To install Arlo Wired Doorbell, you need to follow these steps: 1. Connect the doorbell to your existing wiring.
2. Sync the doorbell with your Arlo base station or SmartHub. If you’re looking to upgrade your home security system with a wired doorbell, the Arlo Wired Doorbell is a great option. With its easy installation process, you can quickly have it up and running in no time.
We will guide you through the step-by-step process of installing the Arlo Wired Doorbell, ensuring a seamless integration into your home security system. Whether you’re a tech-savvy homeowner or a beginner, this guide will provide you with all the information you need to get started. So let’s dive in and get your Arlo Wired Doorbell installed for enhanced security and convenience.
Why Choose Arlo Wired Doorbell For Home Security
When it comes to home security, the Arlo Wired Doorbell is an excellent choice for anyone looking to enhance their security measures. With its advanced features and user-friendly design, this doorbell is guaranteed to provide you with peace of mind.
HD Video and Two-Way Audio for Enhanced Security
One of the standout features of the Arlo Wired Doorbell is its high-definition video capability. With crystal clear images, you can rest assured that you won’t miss a single detail. Keep an eye on your front door and monitor any suspicious activities with ease.
Not only does it offer HD video, but this doorbell also comes equipped with two-way audio. This means that you can communicate with whoever is at your front door, whether it’s a delivery person or a visitor. Its built-in speaker and microphone ensure that you can always be heard loud and clear.
Easy Installation Process for Hassle-Free Setup
Installing the Arlo Wired Doorbell is a breeze, thanks to its easy installation process. You don’t need to be a tech expert or hire a professional to set it up. Simply follow the step-by-step instructions provided, and you’ll have it up and running in no time.
The doorbell comes with all the necessary mounting hardware, ensuring a hassle-free setup. Whether you want to mount it on your wall or use the existing doorbell wiring, the choice is yours. Its compact design allows for seamless integration into your home’s aesthetic.
Integration with Arlo App for Smart Control and Monitoring
With the Arlo Wired Doorbell, you can take advantage of the Arlo app, providing you with smart control and monitoring capabilities. Easily connect your doorbell to the app and have complete control over your home security from your smartphone or tablet.
The Arlo app allows you to receive instant notifications when someone rings the doorbell or when motion is detected. You can view the live video feed, communicate with visitors, and even review previous footage, all from the convenience of your mobile device. The app also lets you customize your settings and manage multiple Arlo devices in one place.
Investing in the Arlo Wired Doorbell ensures that you have a seamless and efficient home security system that perfectly aligns with your needs. With its HD video, two-way audio, easy installation process, and integration with the Arlo app, you can rest assured that your home is always protected.
Getting Started With Arlo Wired Doorbell Installation
Installing the Arlo Wired Doorbell is a straightforward process that can enhance the security of your home and provide you with convenient features like two-way audio communication and motion detection alerts. To get started with installing your Arlo Wired Doorbell, follow these steps:
Understanding the components of the Arlo Wired Doorbell
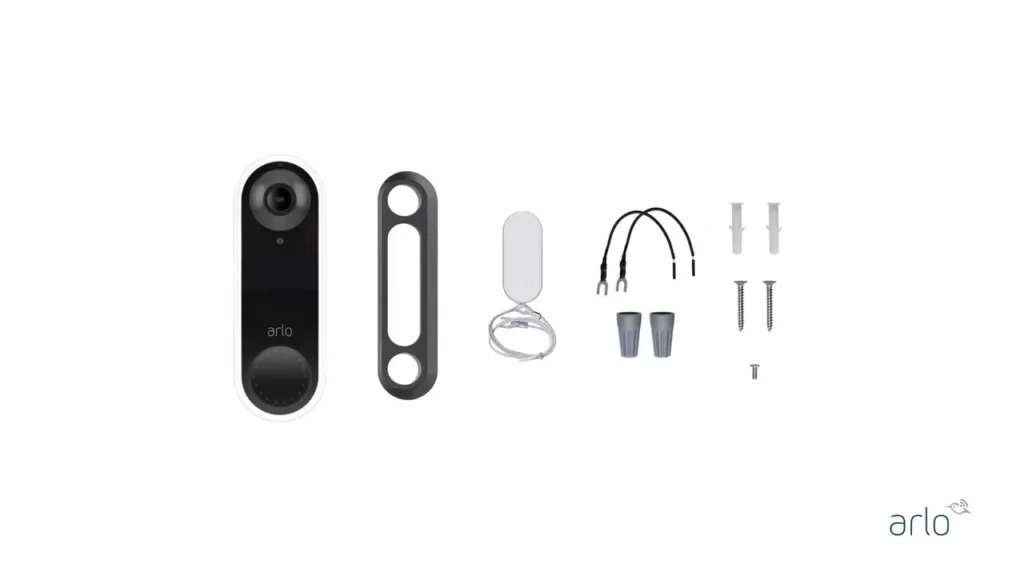
Before you begin the installation process, it’s important to familiarize yourself with the components of the Arlo Wired Doorbell. Here are the main components:
- The Arlo Doorbell
- The Arlo Chime
- Mounting plate and screws
- Wire nuts
- Power kit
Gathering the necessary tools for the installation process
Once you have a clear understanding of the components, gather the following tools to ensure a smooth installation:
- Power drill and drill bits
- Screwdriver
- Wire strippers
- Wire cutters
- Electrical tape
- Level
Setting up your Arlo account and connecting the doorbell to the app
Before you mount the Arlo Wired Doorbell, you need to set up your Arlo account and connect the doorbell to the app. Follow these steps:
- Download and launch the Arlo app on your smartphone.
- Create a new Arlo account or log in to your existing account.
- Select “Add Device” in the app menu and choose the “Arlo Wired Doorbell” option.
- Follow the on-screen instructions to connect the doorbell to your home Wi-Fi network.
Once you have completed these steps, you can proceed with mounting the Arlo Wired Doorbell according to the installation guide provided by Arlo.
Step-By-Step Guide To Installing Arlo Wired Doorbell
Step-by-Step Guide to Installing Arlo Wired Doorbell
Welcome to our step-by-step guide to installing the Arlo Wired Doorbell! In this guide, we will walk you through the process of installing your new doorbell from start to finish. Follow each step carefully to ensure a smooth and successful installation.
Step 1: Choosing the ideal location for the doorbell installation
The first step in installing your Arlo Wired Doorbell is to choose the perfect location for it. Consider a spot near your front door that provides a clear view of your visitors. Make sure the area is well-lit and protected from rain or direct sunlight. Keep in mind that the location should also have a power outlet nearby for connecting the doorbell.
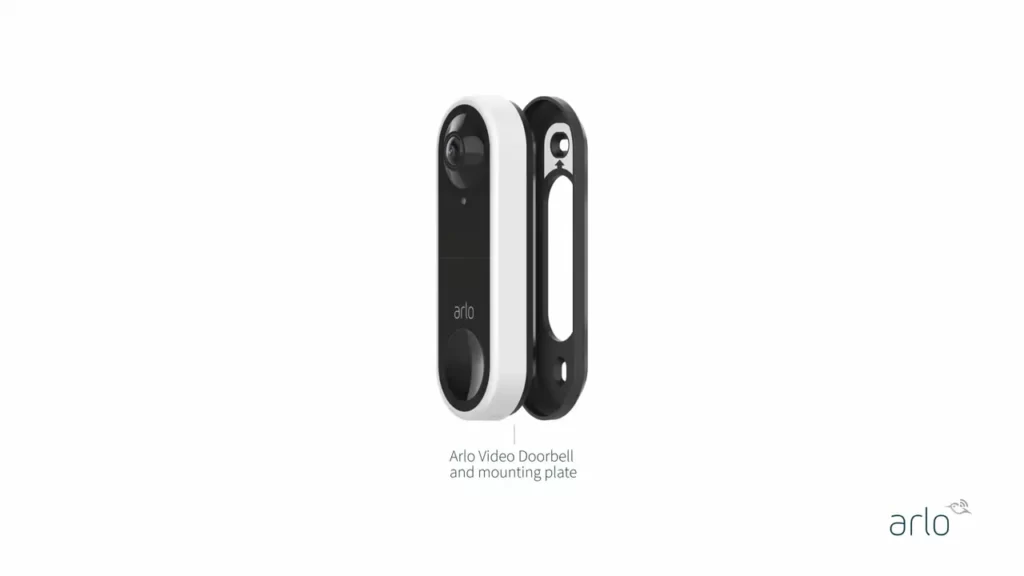
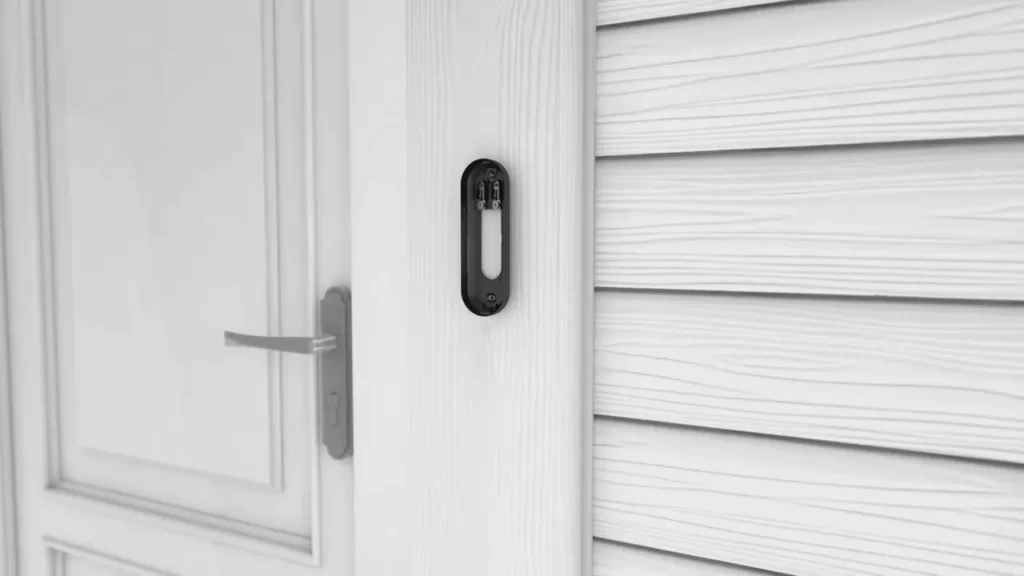
Step 2: Preparing the doorbell and mounting bracket
Once you have selected the ideal location, it’s time to prepare the doorbell and mounting bracket. Start by removing the cover from the doorbell and identifying the mounting holes on the back. Secure the mounting bracket to the wall or door frame using screws and anchors, depending on the type of surface. Ensure that the bracket is level and snugly fit.
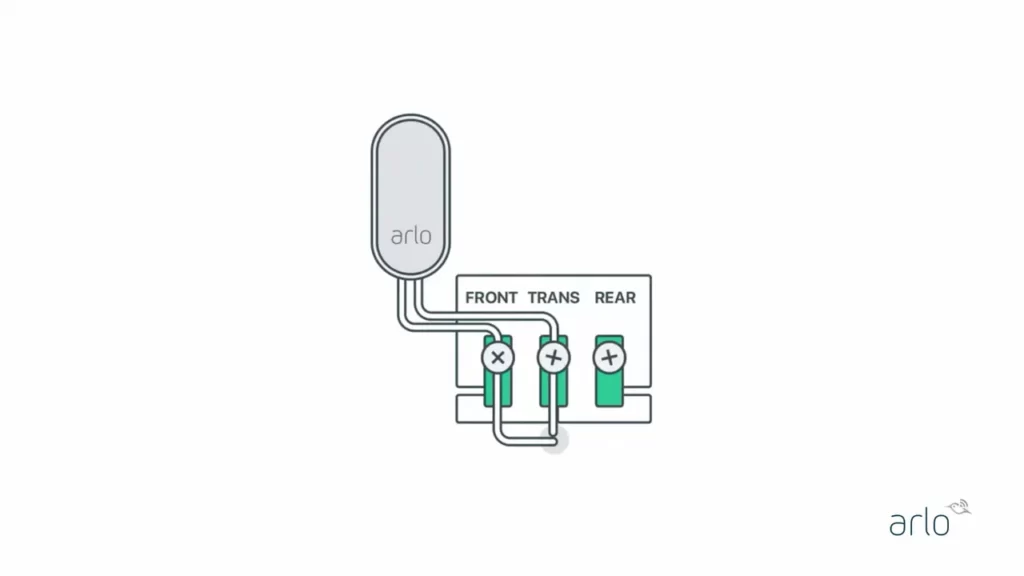
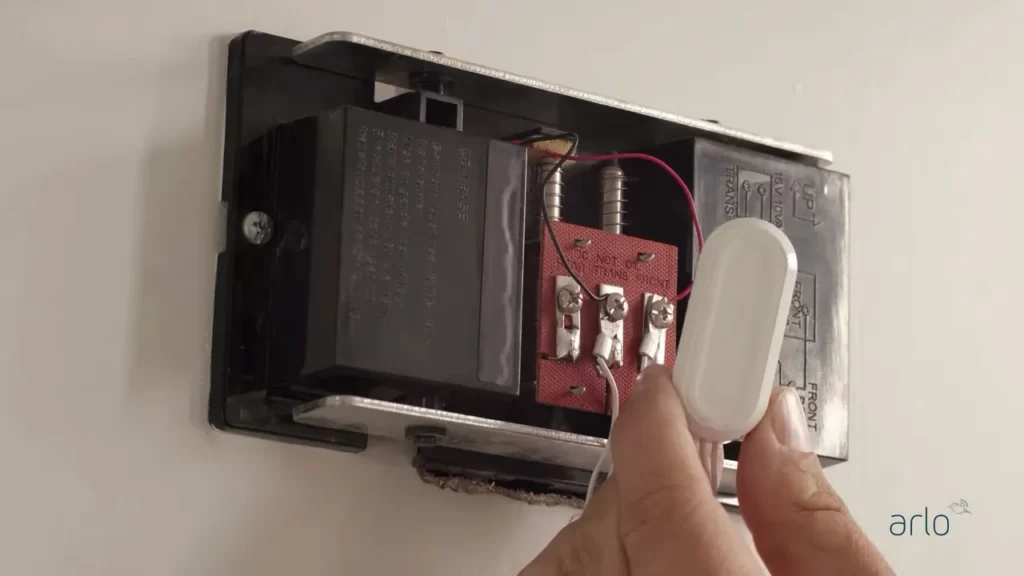
Step 3: Wiring the doorbell to your existing doorbell system or transformer
To ensure your Arlo Wired Doorbell functions properly, you will need to wire it to your existing doorbell system or transformer. Locate your existing doorbell chime or transformer and carefully disconnect the wires. Connect the wires from the Arlo Doorbell to the corresponding wires in your existing system, following the color-coding. If necessary, use wire nuts to secure the connections.
Step 4: Mounting the doorbell to the wall or door frame
securely
Now that the wiring is complete, it’s time to mount the Arlo Wired Doorbell to the wall or door frame securely. Line up the doorbell with the mounting bracket and slide it into place. Use the provided screws to secure the doorbell to the bracket, ensuring it is tightly fastened.
Step 5: Testing the doorbell and adjusting the settings for optimal performance
With the installation complete, it’s time to test your Arlo Wired Doorbell and adjust the settings for optimal performance. Connect the doorbell to power and follow the instructions provided by Arlo to set up the doorbell using the Arlo app. Once setup is complete, test the doorbell by pressing the button and verifying that you receive a notification on your smartphone or device. Adjust the settings, such as motion detection sensitivity and chime volume, to suit your preferences.
Congratulations! You have successfully installed your Arlo Wired Doorbell using our step-by-step guide. Now you can enjoy the convenience and security it provides in monitoring and answering your door. If you have any questions or encounter any issues during the installation process, refer to the user manual or contact Arlo support for assistance.
Troubleshooting Common Installation Issues
Installing the Arlo Wired Doorbell is a straightforward process that can greatly enhance your home security. However, like any electronic device, you may encounter common installation issues along the way. In this section, we will address some of the most frequently reported issues and provide troubleshooting steps to help you resolve them.
Doorbell not powering on or experiencing poor connectivity
If your Arlo Wired Doorbell is not powering on or experiencing poor connectivity, there are a few possible causes and solutions to consider:
- Check the power source: First, ensure that the doorbell is properly connected to a power source. Double-check the wiring connections to make sure they are secure and correctly installed.
- Verify Wi-Fi signal strength: Weak Wi-Fi signal can result in poor connectivity. Consider relocating your Wi-Fi router or adding a Wi-Fi extender to improve the signal strength near the doorbell.
- Reset the doorbell: If the doorbell still isn’t powering on or connecting properly, try performing a reset. Locate the reset button on the doorbell and press it using a small pin or paperclip. This will restore the device to its factory settings, allowing you to set it up again.
Audio or video quality issues during doorbell operation
If you experience audio or video quality issues while using the Arlo Wired Doorbell, follow these troubleshooting steps:
- Check your internet speed: Slow internet speeds can affect the quality of the audio and video. Test your internet connection speed using an online speed test tool to ensure it meets the recommended requirements for the doorbell.
- Adjust the doorbell placement: The positioning of the doorbell can affect the audio and video quality. Ensure that the doorbell is mounted at an optimal height and angle to capture a clear view of your visitors.
- Remove any obstructions: Make sure there are no objects blocking the doorbell’s view, such as tree branches or decorations. Obstructions can interfere with the video quality and audio transmission.
- Update firmware: Check for firmware updates for both the Arlo doorbell and your Arlo base station. Outdated firmware can sometimes cause performance issues.
Integrating the doorbell with other Arlo devices for a
comprehensive home security system
The Arlo Wired Doorbell is designed to seamlessly integrate with other Arlo devices, allowing you to create a comprehensive home security system. To integrate your doorbell with other Arlo devices, follow these steps:
- Ensure compatibility: Confirm that your other Arlo devices are compatible with the Arlo Wired Doorbell. Check the Arlo website or user manual for compatibility information.
- Set up an Arlo base station: If you haven’t already, set up an Arlo base station to serve as the central hub for your Arlo devices. Follow the instructions provided by Arlo to connect the base station to your home network.
- Add the doorbell to your Arlo system: Open the Arlo app on your smartphone and navigate to the device settings. Select “Add New Device” and follow the on-screen instructions to add the doorbell to your Arlo system.
- Configure settings and rules: Once the doorbell is added, you can customize its settings, including motion detection sensitivity, notification preferences, and integration with other Arlo devices. Explore the app to create rules and automation to enhance your home security.
By troubleshooting common installation issues and integrating your Arlo Wired Doorbell with other Arlo devices, you can enjoy a fully functional and comprehensive home security system. Follow these steps and make the most out of your Arlo Wired Doorbell today.
Tips For Enhancing The Performance Of Your Arlo Wired Doorbell
Installing an Arlo Wired Doorbell is a great way to boost the security of your home. However, to ensure optimal performance, there are a few simple tips that you can follow. By adjusting motion sensitivity settings, customizing doorbell notifications and chime preferences, and regularly maintaining and cleaning the doorbell, you can ensure that it functions efficiently in the long run. Let’s take a closer look at each of these tips.
Adjusting Motion Sensitivity Settings to Reduce False Alerts
One common issue with doorbell cameras is receiving false motion alerts. Fortunately, with the Arlo Wired Doorbell, you can adjust the motion sensitivity settings to reduce these occurrences. By making slight adjustments, you can fine-tune the sensitivity of the camera to better match your preferences and avoid unnecessary notifications.
To adjust the motion sensitivity settings, simply follow these steps:
- Open the Arlo app on your smartphone.
- Select the Arlo Wired Doorbell from the device list.
- Tap on the Settings icon.
- Choose Motion Detection.
- Adjust the slider to increase or decrease the sensitivity level.
- Test the changes by having someone approach your door to ensure it captures the desired motion events.
Customizing Doorbell Notifications and Chime Preferences
When it comes to receiving doorbell notifications, personalization is key. With the Arlo Wired Doorbell, you have the option to customize your notifications and chime preferences according to your specific needs and preferences. Whether you want to receive notifications on your smartphone, have a chime sound in your home, or both, you can easily tailor these settings to suit your lifestyle.
Follow these simple steps to customize your doorbell notifications and chime preferences:
- Open the Arlo app on your smartphone.
- Select the Arlo Wired Doorbell from the device list.
- Tap on the Settings icon.
- Choose Notifications.
- Select how you would like to receive notifications (such as push notifications or emails).
- Toggle the chime sound option on or off, depending on your preference.
- Adjust the volume and chime melody to your liking.
Maintaining and Cleaning the Doorbell for Long-lasting Performance
To ensure that your Arlo Wired Doorbell continues to function optimally, regular maintenance and cleaning are essential. Over time, dust, dirt, and debris can accumulate on the camera lens, affecting its performance. By following these simple maintenance tips, you can prolong the lifespan and maintain the quality of your doorbell:
- Regularly clean the camera lens using a soft, lint-free cloth to remove any dirt or smudges.
- Check the wiring connections periodically to ensure they are secure.
- Remove any obstructions that may affect the motion detection or camera angle.
- Keep the doorbell firmware up-to-date by installing any available updates from the Arlo app.
By regularly maintaining and cleaning your Arlo Wired Doorbell, you can enjoy long-lasting performance and reliable security for your home.
Frequently Asked Questions On How To Install Arlo Wired Doorbell
Can I Use Arlo Wired Doorbell Without Chime Box?
Yes, the Arlo wired doorbell can be used without a chime box. It can send notifications directly to your smartphone instead.
What Are The Requirements For Arlo Wired Doorbell?
The requirements for Arlo wired doorbell include a wired power source, compatible Arlo base station, and a mobile device with the Arlo app. The doorbell is designed to work with existing mechanical or digital chimes.
How Do I Connect My Arlo Wired Doorbell To My Base Station?
To connect your Arlo wired doorbell to your base station, simply follow these steps: 1. Ensure your doorbell is powered and within range of your base station. 2. Open the Arlo app on your mobile device. 3. Tap on Settings, then My Devices, and select your base station.
4. Tap on Add Device, choose Doorbell, and follow the on-screen instructions to complete the setup. Enjoy the convenience of a connected doorbell!
Can Arlo Doorbell Be Wired?
Yes, the Arlo doorbell can be wired.
How Do I Install Arlo Wired Doorbell?
To install Arlo Wired Doorbell, first, make sure you have a wired doorbell system. Then, follow the provided instructions to connect the doorbell to your existing wiring.
Conclusion
Installing the Arlo Wired Doorbell is a simple and straightforward process that can enhance the security and convenience of your home. By following the steps outlined in this guide, you can easily set up and configure your doorbell to start receiving notifications and answering your door remotely.
With its easy installation and user-friendly features, the Arlo Wired Doorbell is an excellent addition to any home security system.