To install Arlo Pro 4 Camera, follow these steps: 1. Mount the camera in the desired location.
2. Connect the camera to the base station using the Arlo app. Arlo Pro 4 Camera is a popular security camera that offers advanced features and easy installation. If you’re wondering how to install it, you’re in the right place.
In this guide, we’ll walk you through the simple steps to set up your Arlo Pro 4 Camera. By following these instructions, you’ll have your camera ready to monitor your home or workplace in no time. Whether you’re a tech-savvy individual or a beginner, this installation process is designed to be user-friendly and stress-free. So, let’s dive in and get your Arlo Pro 4 Camera up and running.
Understanding The Arlo Pro 4 Camera Features
The Arlo Pro 4 Camera is a powerful and reliable surveillance system that provides top-notch security for your home or business. With its advanced features and user-friendly design, installing and utilizing the Arlo Pro 4 Camera has never been easier. In this section, we will delve into the key features of the Arlo Pro 4 Camera, the benefits of using this system, and how it stands out from other surveillance systems.
Key features of the Arlo Pro 4 Camera
The Arlo Pro 4 Camera is packed with impressive features that enhance its functionality and provide a comprehensive surveillance experience. Here are some of its standout features:
- Crystal-clear 2K video resolution for sharp and detailed footage.
- Flexible power options, including rechargeable batteries or direct power connection.
- Advanced motion detection technology that can differentiate between people, vehicles, and animals, ensuring you receive relevant alerts.
- Integrated spotlight and color night vision capabilities for enhanced visibility in low-light conditions.
- Two-way audio that allows you to listen and speak to people near the camera.
- Weather-resistant design, making it suitable for both indoor and outdoor use.
- Compatibility with popular smart home platforms like Amazon Alexa, Google Assistant, and Apple HomeKit.
Benefits of using the Arlo Pro 4 Camera system
The Arlo Pro 4 Camera system offers a range of benefits that make it an excellent choice for your surveillance needs:
- Peace of mind: The Arlo Pro 4 Camera provides reliable security, giving you peace of mind knowing that your property is protected.
- Easy installation: Setting up the Arlo Pro 4 Camera is a breeze, thanks to its wireless design and intuitive installation process.
- Flexible placement: With its wireless connectivity and rechargeable batteries, you can easily place the Arlo Pro 4 Camera anywhere without worrying about power outlets or unsightly cables.
- Customizable alerts: The advanced motion detection technology allows you to customize the alerts you receive, ensuring you are notified only when relevant activity occurs.
- Cloud storage options: Arlo offers affordable cloud storage plans, giving you the flexibility to access and store your recorded footage securely.
- Enhanced night vision: The integrated spotlight and color night vision feature of the Arlo Pro 4 Camera provide clear visibility even in the darkest conditions.
How the Arlo Pro 4 Camera stands out from other surveillance systems
The Arlo Pro 4 Camera distinguishes itself from other surveillance systems through its advanced features, reliable performance, and user-friendly experience. Here’s why it stands out:
- Superior video quality: With its 2K video resolution, the Arlo Pro 4 Camera captures incredibly clear and detailed footage, allowing you to see every important detail.
- Precision motion detection: The advanced motion detection technology of the Arlo Pro 4 Camera ensures you receive accurate and timely alerts, eliminating false alarms.
- Integrated spotlight: Unlike many other surveillance systems, the Arlo Pro 4 Camera comes with a built-in spotlight, providing additional deterrent and improved visibility during nighttime.
- Compatibility with smart home platforms: The Arlo Pro 4 Camera seamlessly integrates with popular smart home platforms, allowing you to control and monitor your cameras alongside other connected devices.
- Durability: Designed to withstand various weather conditions, the Arlo Pro 4 Camera delivers reliable performance indoors and outdoors, proving its resilience and longevity.
By understanding the key features, benefits, and unique qualities of the Arlo Pro 4 Camera, you can make an informed decision when it comes to safeguarding your property and loved ones.
Preparing For Installation
Before you begin installing your Arlo Pro 4 Camera, it is important to take some time to prepare. Proper planning and setup will ensure optimal performance and maximize the security surveillance benefits of your Arlo Pro 4 Camera. In this article, we will guide you through the necessary steps to prepare for a successful installation.
What you need to know before installing your Arlo Pro 4 Camera
Before you dive into the installation process, there are a few important things you should be aware of:
- Camera compatibility: Ensure that your Arlo Pro 4 Camera is compatible with your existing Arlo system or base station. This will prevent any compatibility issues and ensure smooth integration.
- Power source: Think about the power source for your Arlo Pro 4 Camera. Will you be using a wired connection or rely on the camera’s built-in rechargeable battery? Consider the advantages and limitations of each option, particularly if you plan to install the camera outdoors.
- Internet connectivity: A stable and reliable internet connection is crucial for the Arlo Pro 4 Camera to function properly. Ensure that you have a strong Wi-Fi signal in the area where you plan to install the camera.
Choosing the right location for optimal surveillance
When it comes to installing your Arlo Pro 4 Camera, choosing the right location is crucial. Here are some factors to consider when selecting the ideal spot:
- Field of view: Determine the area you want to monitor and ensure that the camera’s field of view covers the desired space. Consider the camera’s angle and rotation capabilities to achieve the best surveillance coverage.
- Height and angle: Mounting the camera at the correct height and angle is important for capturing clear footage. Aim for a height that provides a comprehensive view while ensuring the camera is out of reach from potential tampering.
- Obstructions: Take note of any potential obstructions, such as trees, walls, or other objects that may obstruct the camera’s view. Clearing these obstructions will improve the camera’s effectiveness.
Important considerations for outdoor installation
If you plan to install your Arlo Pro 4 Camera outdoors, there are some additional considerations to keep in mind:
- Weatherproofing: Ensure that the camera is suitable for outdoor use and can withstand various weather conditions. Look for an IP65 or higher rating to ensure protection against dust and water.
- Visibility: Consider the camera’s visibility to potential intruders. While it’s important to install the camera discreetly, make sure it is still visible enough to act as a deterrent.
- Power source accessibility: If you choose a wired connection, ensure that you have accessible power outlets near the installation location or plan for the necessary wiring.
By taking these factors into account during the preparation stage, you can set a solid foundation for the successful installation of your Arlo Pro 4 Camera. In the next section, we will dive into the step-by-step installation process to guide you through each stage of the setup.
Installing The Arlo Pro 4 Camera System
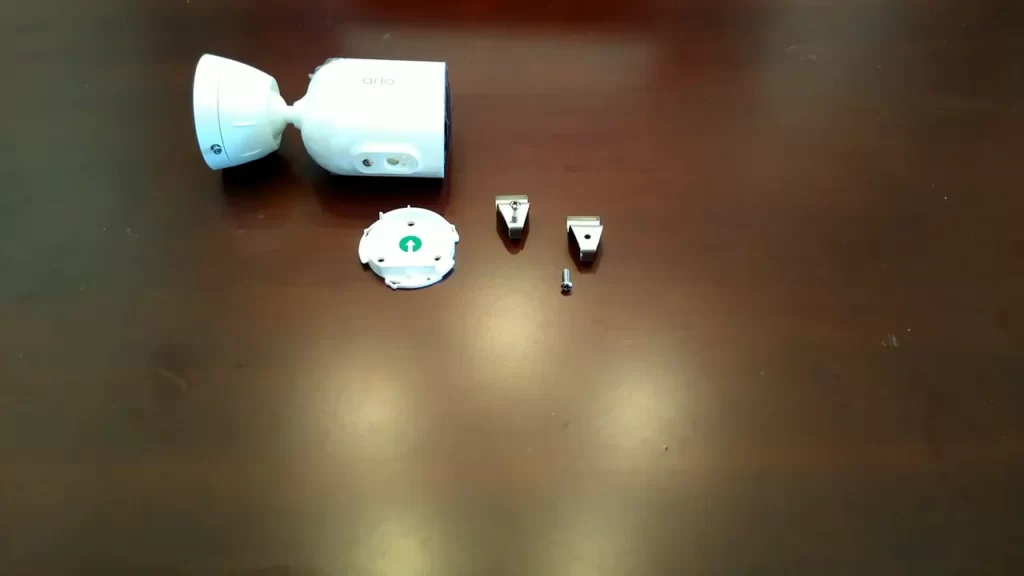
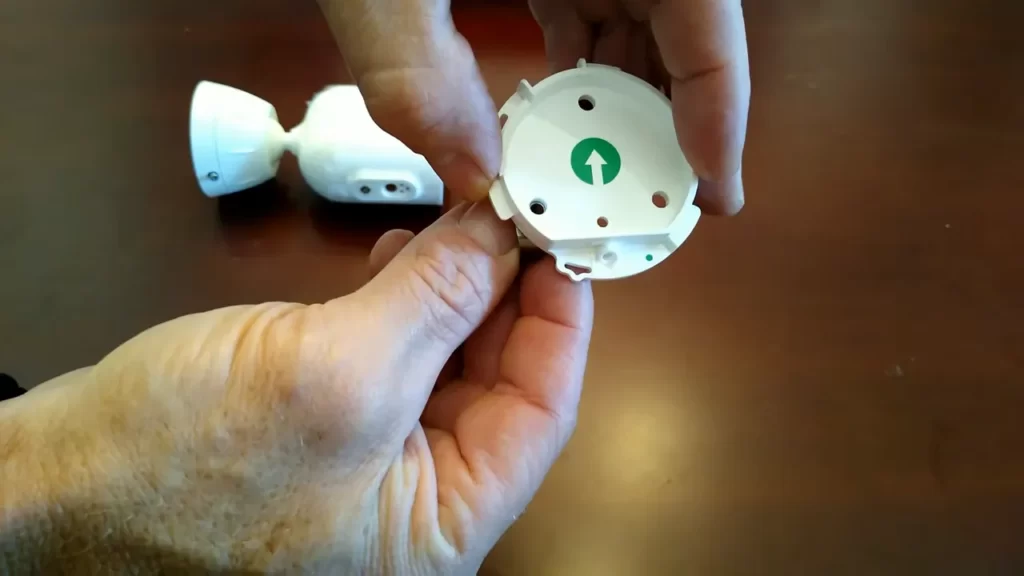
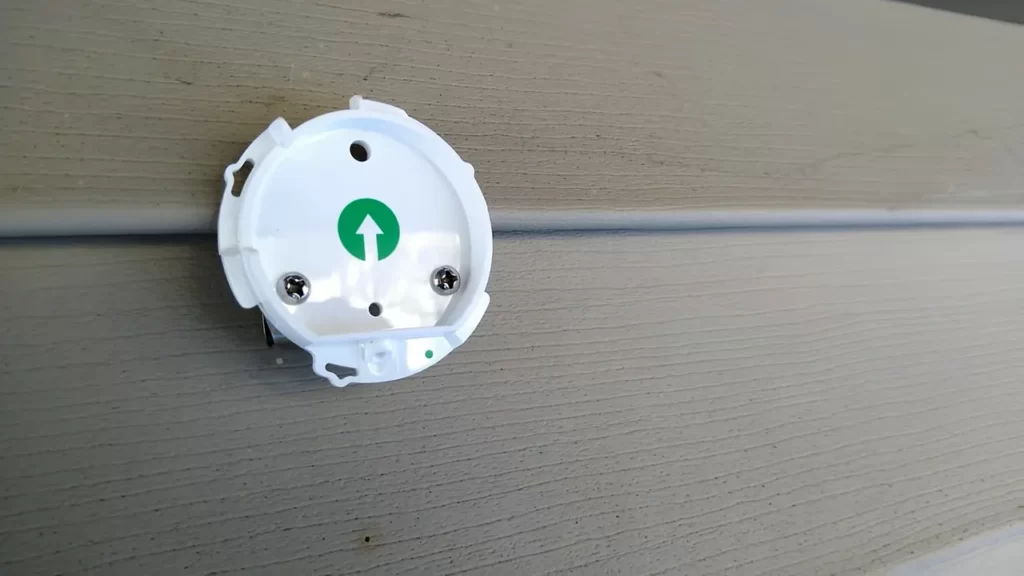
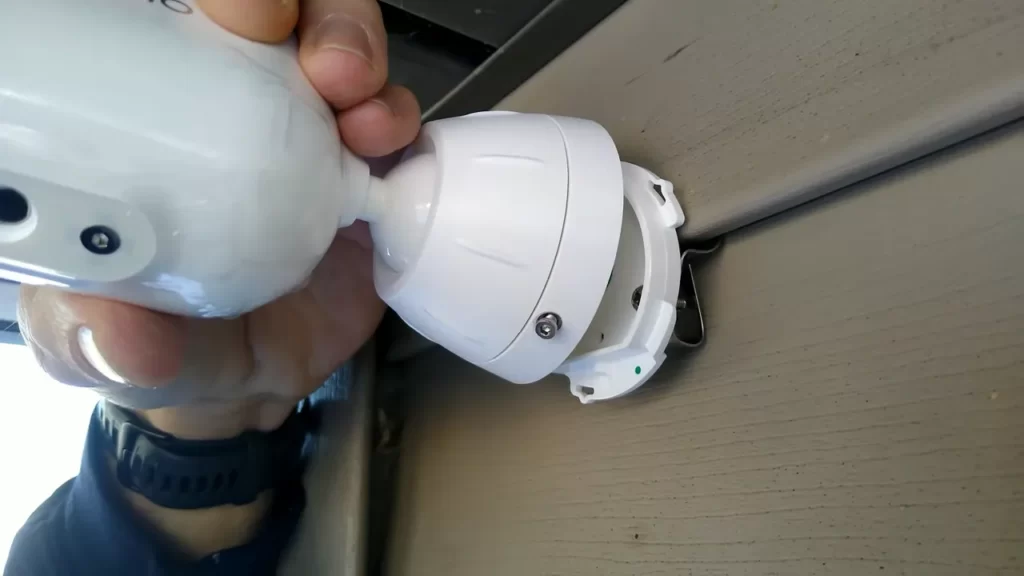
Installing the Arlo Pro 4 Camera System is a straightforward process that can be completed in just a few easy steps. In this guide, we will walk you through each step, ensuring that you can start monitoring your home or business in no time. From mounting the camera onto a wall or other surfaces, to connecting the camera to your Arlo Base Station or SmartHub, and finally setting up the camera on the Arlo mobile app, we have got you covered. **Step-by-step guide to installing the Arlo Pro 4 Camera** 1. Mounting the camera onto a wall or other surfaces: – Begin by selecting an ideal location for your Arlo Pro 4 Camera. Choose a spot that offers a wide field of view and is within the range of your Wi-Fi network. – Using the provided mounting bracket, align it with the desired location and mark the holes where you will need to drill for the screws. – Carefully drill the holes, insert the screws, and secure the mounting bracket in place. – Attach the camera onto the mounting bracket by sliding it onto the bracket until it clicks into place. Make sure it is securely attached. 2. Connecting the camera to Arlo Base Station or SmartHub: – Ensure that your Arlo Base Station or SmartHub is powered on and connected to your network. – Press the sync button located on the base station or SmartHub until the LED light begins to rapidly blink. – Next, press the sync button on the top of the Arlo Pro 4 Camera until the blue LED light on the front of the camera blinks rapidly. – Allow a few moments for the camera and base station or SmartHub to sync. Once synced, the blue LED light on the camera will become solid. 3. Setting up the camera on the Arlo mobile app: – Download the Arlo mobile app from the App Store or Google Play Store and create an Arlo account if you don’t already have one. – Launch the Arlo app and tap on the “+” icon to add a new device. – Select “Arlo Pro 4 Camera” from the list of available devices and follow the on-screen instructions to connect your camera to the app. – Make sure to enter the correct Wi-Fi network credentials when prompted, as this will ensure a seamless connection. – Once the camera is successfully connected, you can customize your settings, such as motion detection sensitivity and notification preferences, to tailor the experience to your needs. With these simple steps, you can easily install your Arlo Pro 4 Camera System and start enjoying the peace of mind that comes with knowing your property is being monitored. Remember to choose strategic locations, ensuring optimum coverage, and regularly check your camera’s functionality to maintain a secure and efficient surveillance system.
Configuring Camera Settings For Your Surveillance Needs
Once you have successfully installed your Arlo Pro 4 Camera, it is time to configure the camera settings to meet your specific surveillance needs. By adjusting various settings, you can ensure that your camera captures and records exactly what you want, giving you complete control over your security system.
Adjusting Camera Settings for Motion Detection and Recording
Arlo Pro 4 Camera offers customizable motion detection and recording settings, allowing you to fine-tune the camera’s behavior according to your preferences. To adjust these settings:
- Open the Arlo app on your mobile device or access the Arlo web portal on your computer.
- Select the camera you want to configure.
- Navigate to the “Settings” section and choose “Motion Detection.”
- From here, you can adjust the motion sensitivity to optimize the camera’s ability to detect movement. If you want to reduce false alerts triggered by minor movements, you can lower the sensitivity. On the other hand, if you want to ensure that no motion goes unnoticed, you can increase the sensitivity.
- You can also specify the motion detection zones by drawing rectangles on the live view screen. This allows you to focus the camera’s attention on specific areas while ignoring others.
- Additionally, you have the option to enable or disable audio recording in conjunction with motion detection.
Customizing Alerts and Notifications
To stay informed about any activities captured by your Arlo Pro 4 Camera, you can customize alerts and notifications based on your preferences. Here’s how:
- In the Arlo app or web portal, select the camera you want to configure.
- Go to the “Settings” section and choose “Alerts.”
- From here, you can enable push notifications, email alerts, or both.
- Arlo Pro 4 Camera also allows you to set up a schedule for when you want to receive notifications. This feature ensures that you’re not bombarded with alerts at inconvenient times.
- If you prefer, you can also choose to enable or disable specific types of alerts, such as motion or audio-related alerts.
Setting Up Geofencing and Other Advanced Features
Arlo Pro 4 Camera offers advanced features, including geofencing, that take your surveillance system to the next level. To set up these features:
- In the Arlo app or web portal, select the camera you want to configure.
- Visit the “Settings” section and choose “Mode.”
- Select “Geofencing” to enable this feature.
- Geofencing allows your camera to automatically arm or disarm based on your device’s location. When you leave your home, the camera will arm itself, and as soon as you return, it will disarm. This ensures that you always have surveillance when you need it and don’t waste battery life when you don’t.
- Aside from geofencing, you can explore other advanced features in the “Mode” settings, such as scheduling specific modes for different times of the day or creating custom modes tailored to your unique requirements.
With the ability to customize camera settings for motion detection and recording, create personalized alerts and notifications, and take advantage of advanced features like geofencing, the Arlo Pro 4 Camera guarantees a surveillance system that meets your specific needs. Configure your camera settings today and enjoy peace of mind knowing that you have complete control over your security.
Integrating The Arlo Pro 4 Camera With Other Arlo Devices
The Arlo Pro 4 Camera offers state-of-the-art surveillance features to keep your home or business secure. But did you know that you can enhance its capabilities by integrating it with other Arlo devices? In this section, we will explore how you can expand your surveillance system, sync and manage multiple cameras, and create custom monitoring zones using the Arlo Pro 4 Camera system.
Expanding your surveillance system with additional Arlo devices
One of the great advantages of the Arlo ecosystem is its ability to seamlessly integrate different devices for a comprehensive surveillance experience. By adding more Arlo cameras to your network, you can monitor multiple areas of your property simultaneously. Whether you need to cover blind spots, secure entry points, or monitor a larger area, you can easily expand your surveillance system with additional Arlo devices.
Arlo offers a variety of cameras to suit different needs, including the Arlo Pro 2, Arlo Ultra, and Arlo Go. Each camera model offers unique features and specifications, allowing you to choose the best fit for your requirements. By combining different Arlo cameras, you can create a tailored surveillance system that provides optimal coverage.
Syncing and managing multiple cameras on the Arlo app
Managing multiple cameras can be overwhelming without a user-friendly interface. Fortunately, Arlo’s intuitive app simplifies the process of syncing and managing multiple cameras. Once you have set up additional Arlo cameras, you can easily connect them to your existing Arlo Pro 4 Camera in just a few simple steps.
To sync your new Arlo cameras with the Arlo Pro 4 Camera, open the Arlo app and navigate to the settings menu. From there, select the option to add a new device and follow the on-screen instructions. The app will guide you through the syncing process, ensuring a hassle-free setup experience.
Once your cameras are synced, you can conveniently monitor and manage all your devices from a single app. Whether you want to view live feeds, adjust camera settings, or access recorded footage, the Arlo app provides a centralized hub for seamless camera management.
Creating custom monitoring zones using the Arlo Pro 4 Camera system
The Arlo Pro 4 Camera system takes surveillance customization to the next level with its advanced monitoring zone functionality. With this feature, you can define specific areas within the camera’s field of view that you want to monitor more closely.
To create custom monitoring zones using the Arlo Pro 4 Camera system, launch the Arlo app and navigate to the camera settings. Look for the option to set up monitoring zones and follow the instructions. You can then use the app’s intuitive interface to draw precise boundaries around the areas you want to focus on.
By creating custom monitoring zones, you can receive specific motion and sound alerts for defined areas, reducing false notifications and ensuring that you are alerted to any activity that matters to you most. This feature is especially useful if you have certain areas, like doors or windows, that you want to monitor with added vigilance.
Integrating the Arlo Pro 4 Camera with other Arlo devices not only enhances your surveillance system but also provides a more comprehensive and tailored security solution for your property. By expanding your system with additional Arlo devices, syncing and managing multiple cameras, and creating custom monitoring zones, you can take full advantage of the advanced features offered by the Arlo Pro 4 Camera system.
Troubleshooting Tips For Common Installation Issues
Setting up your Arlo Pro 4 Camera is an essential part of ensuring the security of your home or business. However, sometimes installation issues can arise, causing frustration and delays. In this section, we will explore some common installation issues and provide troubleshooting tips to help you overcome them. Whether you are experiencing connectivity issues, signal interference, or just need some general maintenance tips, we’ve got you covered.
Resolving connectivity issues between the camera and base station
One of the most common installation issues is connectivity problems between your Arlo Pro 4 Camera and the base station. If you’re facing this issue, here are some troubleshooting tips:
- Make sure that your camera is within range of the base station. The optimal range for the Arlo Pro 4 is up to 300 feet.
- Check that the camera’s batteries are fully charged. Low battery life can affect the camera’s ability to connect to the base station.
- Ensure that the camera and base station have a clear line of sight. Physical obstacles such as walls or objects can interfere with the signal strength.
- Restart both the camera and the base station. Sometimes, a simple reset can resolve connectivity issues.
Dealing with potential signal interference
Signal interference can also be a culprit when it comes to installation problems with your Arlo Pro 4 Camera. Follow these tips to address potential signal interference:
- Keep the camera away from other wireless devices that operate on similar frequencies. This includes Wi-Fi routers, cordless phones, and microwave ovens.
- Adjust the position of the base station. Placing it near a window or in a central location can often improve signal strength.
- If you are using multiple Arlo cameras, separate them as far as possible to prevent interference between devices.
- Consider using a range extender or a Wi-Fi signal booster to enhance the signal strength.
General maintenance and troubleshooting tips for smooth operation
To ensure the smooth operation of your Arlo Pro 4 Camera, it is important to perform regular maintenance and follow these troubleshooting tips:
- Clean the camera lens and motion sensor regularly to prevent dust or debris build-up that could affect performance.
- Update your camera’s firmware to the latest version. Manufacturers often release firmware updates to address bugs and improve functionality.
- Check the camera’s positioning and angle. Adjust it if necessary to optimize the field of view and detection range.
- If you are still experiencing issues, reach out to the Arlo customer support team for further assistance. They have the expertise to help you diagnose and resolve any remaining problems.
Enhancing Your Arlo Pro 4 Camera System
Installing the Arlo Pro 4 Camera is just the first step in bolstering your home security. To truly maximize its potential and take your surveillance to the next level, consider exploring additional accessories and features, integrating your Arlo Pro 4 Camera with smart home devices, and leveraging cloud storage options for long-term video storage.
Exploring additional accessories and features to enhance your surveillance
While the Arlo Pro 4 Camera on its own is a powerful tool for monitoring your property, there are several additional accessories and features that can further enhance your surveillance experience. Here are some options to consider:
- Arlo Solar Panel: Ensure your camera is always powered with the Arlo Solar Panel. By harnessing the sun’s energy, you can eliminate the need for regular battery changes and enjoy continuous surveillance.
- Outdoor Mounts: Optimize the placement of your Arlo Pro 4 Camera with outdoor mounts. These sturdy and adjustable mounts allow you to find the perfect angle for maximum coverage.
- Rechargeable Battery: If you prefer the convenience of a rechargeable battery, Arlo offers a compatible option. With this battery, you can easily swap out the drained battery for a fully charged one, ensuring uninterrupted monitoring.
- Arlo SmartHub: Take advantage of the enhanced wireless capabilities and extended range of the Arlo SmartHub. This hub not only connects your cameras but also acts as a central control unit for other Arlo accessories.
Integrating your Arlo Pro 4 Camera with smart home devices
Make your Arlo Pro 4 Camera even smarter by integrating it with your existing smart home devices. This integration allows you to create an interconnected ecosystem that enhances convenience and security. Here are some ways to integrate your Arlo Pro 4 Camera:
- Smart Locks: Integrate your camera with smart locks to monitor and control access to your property remotely. Receive alerts and see who’s at your door before granting them access.
- Smart Lights: Sync your cameras with smart lights to deter potential intruders. Set your lights to turn on automatically when motion is detected, creating a well-lit environment that discourages unwanted activities.
- Voice Assistants: Connect your Arlo Pro 4 Camera with voice assistants like Amazon Alexa or Google Assistant to enable voice control. Check camera feeds, arm or disarm your system, and receive status updates using simple voice commands.
Leveraging cloud storage options for long-term video storage
Video storage is a crucial aspect of any security system, and the Arlo Pro 4 Camera offers flexible options to ensure your footage is securely stored. By leveraging cloud storage, you can enjoy peace of mind knowing that your videos are always accessible, even if the camera is damaged or stolen. Consider these cloud storage options:
| Plan | Features |
|---|---|
| Arlo Basic | Free plan offering 7 days of cloud storage |
| Arlo Smart | Premium plan with advanced AI features and extended video history |
| Local Storage | Store videos directly on local devices like USB drives or microSD cards |
By choosing the right cloud storage option for your needs, you can ensure that important footage is always available for review and reference.
Enhancing your Arlo Pro 4 Camera system doesn’t have to be complicated. Exploring additional accessories, integrating with smart home devices, and leveraging cloud storage options are simple ways to elevate your surveillance capabilities and protect what matters most to you. Take the time to explore these possibilities and unlock the full potential of your Arlo Pro 4 Camera system.
Best Practices For Maintaining Your Arlo Pro 4 Camera System
Regular cleaning and maintenance, updating firmware and software, and managing recorded footage are key practices to ensure optimal performance and effective monitoring and review of your Arlo Pro 4 Camera system. By following these best practices, you can enhance the functionality, security, and lifespan of your camera system.
Regular cleaning and maintenance tips for optimal camera performance
To maintain the performance of your Arlo Pro 4 Camera system, it is important to regularly clean and maintain the cameras. Here are some tips to keep your cameras in optimal condition:
- Clean the camera lens using a soft, lint-free cloth to remove any dust or dirt that may affect the image quality.
- Check the camera housing for any debris or obstructions and remove them if necessary.
- Ensure that the camera is mounted securely and tighten any loose screws or fittings.
- Regularly inspect the camera’s power and Ethernet cables for any damage or wear. Replace them if necessary.
- Keep the camera away from extreme weather conditions, such as direct sunlight or heavy rainfall, as they can damage the camera’s components.
Updating firmware and software for improved functionality and security
Regularly updating the firmware and software of your Arlo Pro 4 Camera system is crucial to ensure improved functionality and security. Here’s how you can update your camera system:
- Access the Arlo app or the Arlo website and log in to your account.
- Navigate to the “Settings” menu and select “My Devices” to view your cameras.
- Click on the camera you want to update and check for available firmware or software updates.
- If updates are available, follow the on-screen instructions to download and install them.
- After the update is complete, restart your camera for the changes to take effect.
Managing and organizing recorded footage for effective monitoring and review
Efficiently managing and organizing your recorded footage is crucial for effective monitoring and review of your Arlo Pro 4 Camera system. Here are some tips:
- Regularly review and delete unnecessary footage to free up storage space on your Arlo base station or cloud storage.
- Organize your footage into folders or categories based on date, time, or specific events for easy access and retrieval.
- Utilize the search and filtering features in the Arlo app or website to quickly find specific recordings.
- Consider setting up automated schedules or alerts for specific camera activities to streamline your monitoring process.
By following these best practices, you can ensure the longevity and optimal performance of your Arlo Pro 4 Camera system, providing you with peace of mind and reliable security surveillance.
Frequently Asked Questions For How To Install Arlo Pro 4 Camera
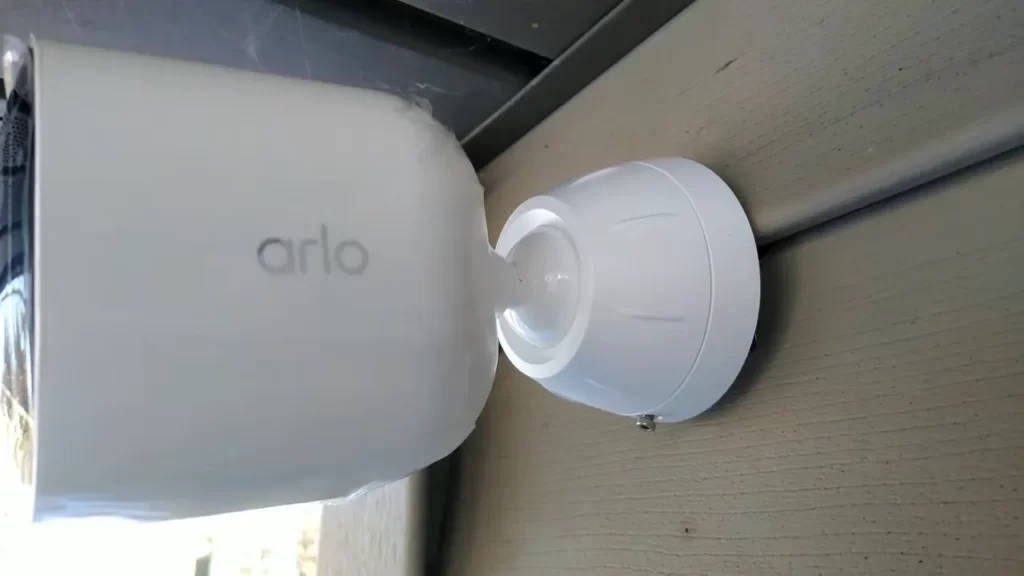
How Do Arlo Pro 4 Cameras Mount?
Arlo Pro 4 cameras are mounted using the included magnetic mount or a screw-in mount option for added security. The magnetic mount allows for easy positioning on any metal surface, while the screw-in mount provides a more secure attachment to walls or ceilings.
Does An Arlo Pro 4 Camera Require A Base Station?
No, the Arlo Pro 4 camera does not require a base station. It operates independently and can connect directly to your Wi-Fi network.
Where To Mount Arlo Pro 4?
Mount your Arlo Pro 4 in a strategic location for optimal security coverage. Choose a spot that provides a clear view and is within range of your Wi-Fi. Ensure it’s mounted securely and at an appropriate height to capture the desired area.
Can You Plug In Arlo Pro 4 Cameras?
Yes, Arlo Pro 4 cameras can be plugged in for power.
How Do I Install Arlo Pro 4 Camera?
Installing Arlo Pro 4 camera is easy. Simply mount it outdoors, connect the base station, and follow the on-screen instructions.
Conclusion
Installing the Arlo Pro 4 Camera is a simple process that anyone can do. By following the step-by-step guide provided in this blog post, you can have your camera up and running in no time. The aim is to make the installation process as easy as possible for you, so you can start monitoring your home or business with ease.
Don’t let the technicalities intimidate you – with a little patience, you’ll have your Arlo Pro 4 Camera ready to go in no time. Happy installing!