To install a dash camera, mount it securely on your car’s windshield using the provided adhesive or suction cup. Then, connect the camera to your car’s power source through the cigarette lighter adapter or hardwire it to the vehicle’s electrical system.
Are you considering installing a dash camera in your car? Dash cameras are becoming increasingly popular for their ability to capture important footage while driving. Whether you want to document accidents, monitor your driving habits, or provide evidence in case of insurance disputes, a dash camera can be a valuable addition to your vehicle.
In this guide, we will walk you through the process of installing a dash camera in your car, ensuring it is mounted securely and properly connected to the power source. By following these steps, you can have your dash camera up and running in no time. Let’s get started!
Why Installing A Dash Camera Is Important
Installing a dash camera has become an essential addition for many drivers around the world. Not just limited to law enforcement, dash cameras are now widely used by everyday drivers to provide a sense of security and protection on the roads. Whether you want to capture stunning scenery on your road trips or have evidence in case of an accident, a dash camera can be your silent witness.
Benefits of having a dash camera
A dash camera comes with a plethora of benefits that can greatly enhance your driving experience. Here are the key advantages:
- Accident documentation: One of the crucial reasons to install a dash camera is to document any unexpected incidents on the road. In the unfortunate event of a collision, having a recorded video can provide concrete evidence of what really happened. This can be invaluable in proving your innocence and protecting you from potential insurance fraud.
- Insurance savings: Dash camera footage can be a game-changer when it comes to settling insurance claims. By providing objective and irrefutable evidence of what occurred during an accident, you can speed up the claims process and potentially save on your insurance premiums.
- Preventing fraud: Dash cameras act as a deterrent against fraudulent activities such as staged accidents or fake injury claims. The presence of a dash camera alone can discourage dishonest individuals from attempting fraudulent acts, ultimately protecting yourself and your finances.
- Improved road behavior: Knowing that your actions are being recorded can promote responsible driving habits. By being aware of your own behavior and potential consequences, you are more likely to drive safely and avoid aggressive driving or road rage incidents.
- Peace of mind: With a dash camera installed, you can have peace of mind knowing that there is an unbiased witness with you at all times. Whether it’s a breathtaking landscape or an unexpected event, you’ll have the ability to relive those moments or deal with unexpected situations confidently.
Insurance and legal considerations
When it comes to insurance and legal matters, a dash camera can play a significant role. Here’s how:
- Insurance discounts: Many insurance companies recognize the benefits of dash cameras and offer discounts to policyholders who have them installed in their vehicles. By taking advantage of these discounts, you can not only protect yourself but also save money in the process.
- Reduced liability: In the event of an accident, dash camera footage can help prove fault and reduce your liability. This can be particularly useful when dealing with disputes between parties involved or in cases where the other party tries to shift blame onto you.
- Legal evidence: Dash camera footage can serve as irrefutable evidence in legal proceedings related to traffic violations, hit-and-runs, and other road incidents. Having a recorded video of the incident can strengthen your case and potentially lead to a more favorable outcome in court.
- Quick resolution: By providing clear evidence of what happened, a dash camera can expedite the resolution of insurance claims and legal disputes. This can save you a significant amount of time, stress, and potential legal costs.
In conclusion, installing a dash camera not only adds an extra layer of security and protection but also brings various benefits, including accident documentation, insurance savings, fraud prevention, improved road behavior, and peace of mind. Moreover, dash cameras can have a significant impact on insurance and legal matters by providing discounts, reducing liability, serving as legal evidence, and facilitating quick resolutions. With the increasing availability and affordability of dash cameras, it’s a smart investment that can make a world of difference in your driving experience.
Choosing The Right Dash Camera For Your Vehicle
Factors to consider when selecting a dash camera
Choosing the right dash camera for your vehicle is an important step towards enhancing your driving experience and ensuring your safety on the road. With so many options available in the market, it can be overwhelming to decide which dash camera will best suit your needs. To help you make an informed decision, here are some key factors to consider:
- Video quality: The primary purpose of a dash camera is to record footage of your driving. Therefore, it is crucial to select a camera that offers high-resolution video quality. Look for a dash camera that records at least 1080p Full HD, as this will provide clear and detailed footage.
- Field of view: The field of view determines how much of the road the camera can capture. A wider field of view is beneficial as it will capture more details and a larger area. Dash cameras with a field of view of at least 140 degrees are recommended for maximum coverage.
- Storage capacity: Dash cameras store recorded footage on a memory card. Consider the storage capacity of the camera and whether it is expandable. It is recommended to opt for a dash camera that supports large-capacity memory cards or has the ability to overwrite old footage automatically.
- Additional features: Some dash cameras come with advanced features such as GPS logging, built-in Wi-Fi, and parking mode. GPS logging allows you to track your driving route, while Wi-Fi connectivity enables easy transfer of footage to your smartphone or computer. Parking mode is particularly useful for monitoring your vehicle when it is parked.
- User-friendly interface: Ensure that the dash camera you choose has a user-friendly interface that is easy to navigate and understand. A simple and intuitive interface will make it easier for you to set up and operate the camera.
- Price: Consider your budget and look for a dash camera that offers good value for money. Remember that quality and reliability should be prioritized over a low price.
Top recommended dash camera models
Now that you know what factors to consider when selecting a dash camera, let’s take a look at some of the top recommended models:
| Model | Video Quality | Field of View | Storage Capacity | Additional Features | Price |
|---|---|---|---|---|---|
| Model 1 | 1080p | 150 degrees | Supports up to 128GB | GPS logging, Wi-Fi | $150 |
| Model 2 | 4K Ultra HD | 170 degrees | Supports up to 256GB | GPS logging, built-in Wi-Fi | $250 |
| Model 3 | 1296p | 140 degrees | Supports up to 64GB | GPS logging | $100 |
These are just a few examples of the diverse range of dash cameras available in the market. Consider your specific requirements and compare different models to find the one that best fits your needs and budget.
Preparing For Dash Camera Installation
Installing a dash camera in your vehicle can provide peace of mind and valuable evidence in case of an accident. However, before you begin the installation process, there are a few important steps to follow to ensure a successful and hassle-free experience. In this article, we will guide you through the process of preparing for dash camera installation, including gathering the necessary tools and considering important factors.
Gathering the necessary tools
Before you start installing your dash camera, it’s essential to gather all the necessary tools and equipment. Here’s a handy checklist to help you prepare:
| Tools and Equipment |
|---|
| • Dash camera |
| • Mounting bracket or adhesive pad |
| • MicroSD card |
| • Power cable or hardwire kit |
| • Pry tool or trim removal tool |
| • Microfiber cloth |
| • Insulated tape |
| • USB cable |
| • Cable clips or adhesive pads |
| • Scissors or wire cutters |
Make sure you have all the tools and equipment mentioned above before proceeding with the installation process. This will help you avoid unnecessary delays and ensure a smoother experience.
Important considerations before installation
Before you dive into installing your dash camera, it’s crucial to consider a few important factors to ensure optimal performance and functionality. Take a look at the following considerations:
- Positioning: Choose a suitable location to mount your dash camera. It should have an unobstructed view of the road and provide a clear recording.
- Power source: Decide whether you want to power your dash camera through the vehicle’s cigarette lighter socket or use a hardwire kit for a more permanent installation.
- Memory card capacity: Check the recommended maximum capacity for the microSD card. It’s advisable to use a high-quality card with enough storage space to capture lengthy recordings.
- Temperature resistance: Ensure that the dash camera you choose is designed to withstand extreme temperatures, especially if you live in an area with extreme weather conditions.
- Legal regulations: Familiarize yourself with the local laws and regulations regarding dash camera usage in your area. Some regions have specific rules regarding their placement and recording capabilities.
By considering these essential factors before installation, you can make informed decisions and maximize the effectiveness of your dash camera.
Following these pre-installation steps will help set the foundation for a successful dash camera installation experience. Now that you’re well-prepared, it’s time to dive into the installation process itself. Stay tuned for our next article on how to install a dash camera in your vehicle.
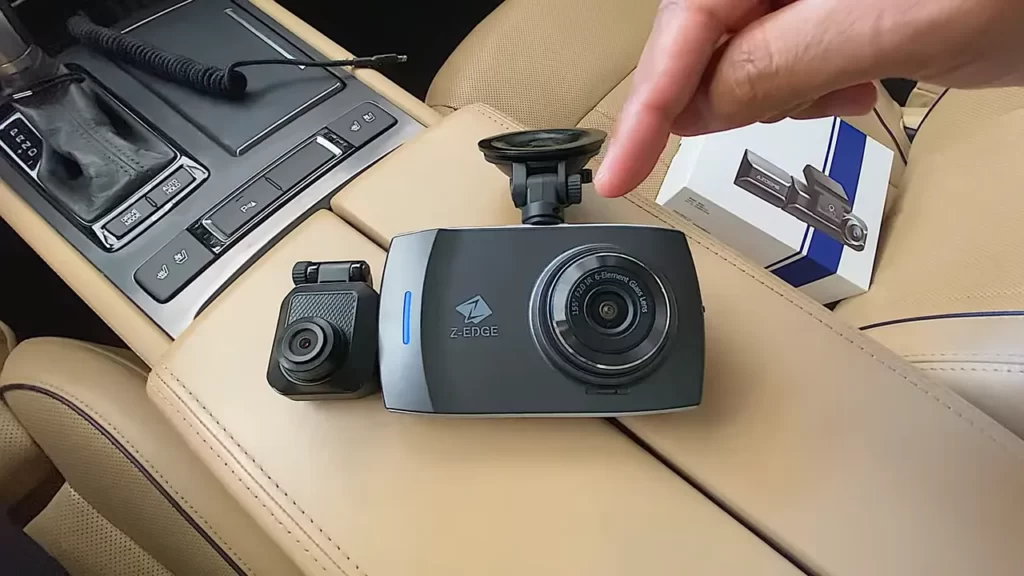
Positioning And Mounting The Dash Camera
Positioning and Mounting the Dash Camera
Determining the optimal mounting location
When it comes to installing a dash camera, determining the optimal mounting location plays a crucial role in capturing clear and unobstructed footage. The ideal placement ensures maximum visibility and accuracy, which is essential for recording any incidents or accidents on the road. Here are a few things to consider while determining where to mount your dash camera:
- Unobstructed view: The mounting location should provide an unobstructed view of the road ahead without any blockages such as rear-view mirrors or windshield wipers.
- Proximity to power source: Make sure that the chosen location allows easy access to a power source, such as the cigarette lighter or a dedicated power outlet.
- Ease of installation: Consider a location that allows for easy installation and removal without causing damage to your vehicle’s interior.
Types of mounts and how to install them securely
Once you have determined the optimal mounting location, the next step is to choose the right mount for your dash camera. There are several types of mounts available in the market, each offering different levels of stability and adjustability. Here are a few common types of dash camera mounts:
| Mount Type | Features |
|---|---|
| Suction Cup Mounts | Easy to install and remove, suitable for temporary setups |
| Adhesive Mounts | Provides a more secure installation, ideal for long-term use |
| Clamp Mounts | Offers adjustable angles and secure grip, suitable for various mounting locations |
To ensure a secure installation, follow these steps:
- Clean the mounting surface thoroughly to ensure proper adhesion.
- For suction cup mounts, moisten the suction cup before attaching it to the windshield to ensure a strong seal.
- For adhesive mounts, carefully peel off the adhesive backing and firmly press the mount onto the desired location.
- For clamp mounts, adjust the grip to fit securely around the chosen mounting area and tighten the screws or knobs.
By following these steps and choosing the right mount for your dash camera, you can ensure a secure and stable installation that can withstand various road conditions.
Powering The Dash Camera
Installing a dash camera in your vehicle not only provides you with a sense of security, but it also captures valuable footage in case of an accident or incident. However, before you can start recording, you need to ensure that your dash camera is powered properly.
Wiring options for powering the dash camera
There are multiple wiring options available to power your dash camera. Let’s take a closer look at each option:
1. Connecting the dash camera to the vehicle’s power source
The most common and recommended method is connecting the dash camera to your vehicle’s power source. Most dash cameras come with a built-in power cable that can be connected directly to your vehicle’s fuse box or ACC (accessory) circuit.
Here are the steps to connect your dash camera to your vehicle’s power source:
- Locate the fuse box in your vehicle. It is usually located under the dashboard or in the engine compartment.
- Identify a fuse slot that provides power when the ignition is turned on or when the vehicle is in the ACC mode. This will ensure that your dash camera only operates when the vehicle is in use.
- Use a fuse tap or a hardwire kit to connect the positive (red) wire of your dash camera’s power cable to the chosen fuse slot. Make sure to connect the negative (black) wire to a suitable grounding point.
- Securely mount the dash camera in a position that offers a clear view of the road.
- Test the dash camera to ensure that it turns on and starts recording when the vehicle is powered on.
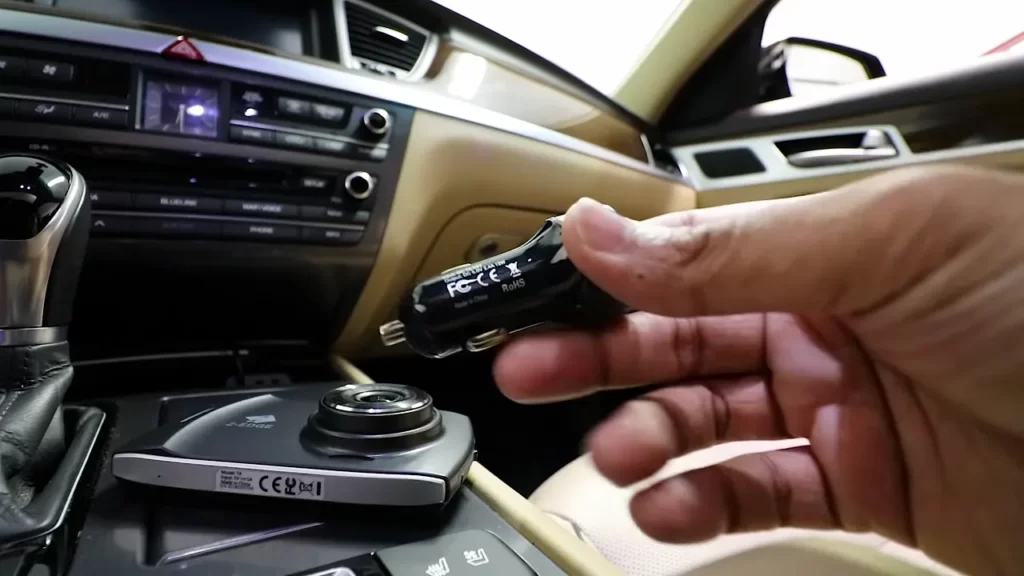
2. Using the vehicle’s cigarette lighter socket
If you prefer a simpler installation process or if your vehicle doesn’t have an easily accessible fuse box, you can power your dash camera using the vehicle’s cigarette lighter socket. Most dash cameras come with a cigarette lighter adapter that allows for easy plug-and-play installation.
To power your dash camera using the cigarette lighter socket, follow these steps:
- Locate the vehicle’s cigarette lighter socket. It is usually located near the dashboard or center console.
- Plug the dash camera’s power cable into the socket.
- Route the cable neatly to avoid any obstructions or distractions.
- Mount the dash camera securely in a suitable position.
- Ensure that the dash camera powers on and starts recording when the vehicle is turned on.
Whether you choose to connect your dash camera directly to your vehicle’s power source or use the cigarette lighter socket, it’s essential to ensure a secure and reliable power connection. This will ensure uninterrupted functionality and peace of mind while you hit the road.
Adjusting Dash Camera Settings
Before hitting the road with your brand new dash camera, it’s important to adjust the camera settings to ensure optimal performance and functionality. In this section, we will explore how you can configure the date, time, and other basic settings of your dash camera, as well as customize the advanced settings such as resolution and frame rates. Let’s get started!
Configuring Date, Time, and Other Basic Settings
When it comes to adjusting the basic settings of your dash camera, one of the first things you’ll want to do is set the correct date and time. This information is crucial when reviewing or presenting the recorded footage as it allows for accurate time stamping. To configure these settings, follow these simple steps:
- Access the camera’s menu by navigating to the settings option on its display screen.
- Locate the date and time section in the settings menu.
- Enter the current date and time using the on-screen keyboard or the designated buttons.
- Save your changes and exit the menu.
In addition to the date and time, you may also have the option to adjust other basic settings such as language preferences, display brightness, and screen timeout. Take a moment to explore these settings and customize them to your liking.
Customizing Advanced Settings
Once you have configured the basic settings, you can delve into customizing the advanced settings of your dash camera. These settings will have a direct impact on the quality and clarity of the recorded footage. Here are some of the advanced settings you may come across:
| Setting | Description |
|---|---|
| Resolution | Allows you to select the desired image quality. Higher resolutions provide sharper and more detailed footage. |
| Frame Rate | Determines the number of individual frames captured per second. Higher frame rates result in smoother video playback. |
| Exposure | Controls the amount of light captured by the camera. Adjusting the exposure ensures optimized visibility in various lighting conditions. |
To customize these advanced settings, follow the instructions provided in your camera’s user manual or on-screen menu. It is recommended to experiment with different settings to find the perfect balance between image quality and performance.
By taking the time to adjust the dash camera settings, you can capture crystal-clear footage and ensure that the camera functions exactly as you need it to. Now that you’re familiar with the process of adjusting both basic and advanced settings, you’re ready to hit the road with confidence, knowing that your dash camera is optimized for top-notch recording. Safe travels!
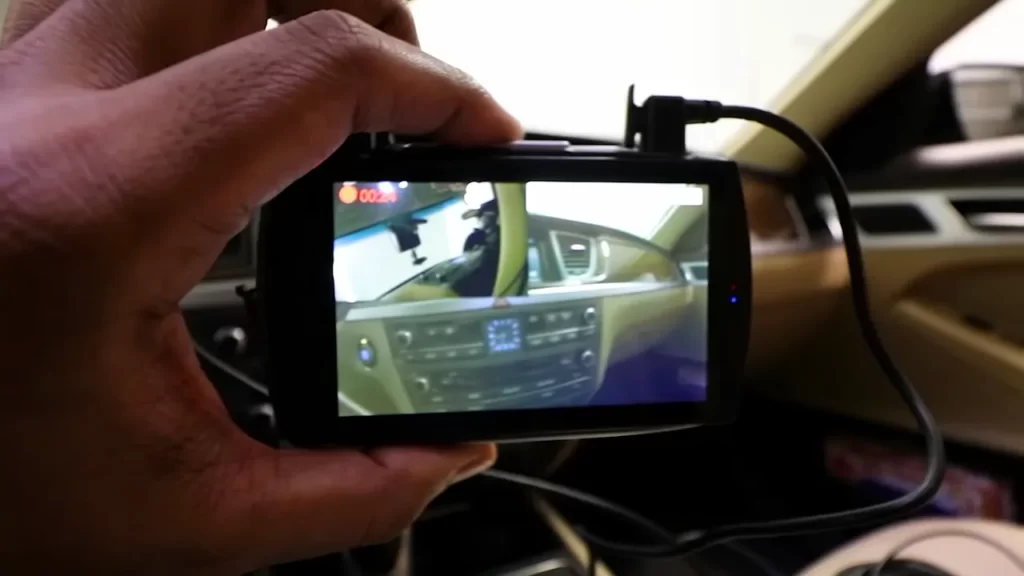
Testing And Calibrating The Dash Camera
Now that you have successfully installed your dash camera, it’s time to ensure that it is functioning properly and calibrated for optimal recording. Testing and calibrating your dash camera will help you capture clear and precise footage, enabling you to have a reliable source of evidence in case of any accidents or incidents on the road.
Verifying proper functioning of the dash camera
Before hitting the road, it is essential to verify that your dash camera is functioning correctly. Follow these simple steps to ensure the proper functioning of your dash camera:
- Power on the dash camera: Connect the power supply to the dash camera and make sure it turns on. Check the LED indicators to ensure that the camera is receiving power.
- Check the memory card: Ensure that the memory card is properly inserted into the dash camera. The camera should recognize the memory card and display the available storage space on the screen.
- Test the recording: Start recording and verify that the camera is capturing footage. Take a short test drive and confirm that the recordings are being saved and can be played back without any issues.
- Ensure proper date and time settings: Check the date and time settings on your dash camera. It is essential to have the correct timestamp on your recordings for future reference.
- Inspect the video quality: Take a look at the video quality of the recordings. Ensure that the footage is clear and sharp, allowing you to identify any important details, such as license plates or road signs.
Calibrating the camera angle and focus for optimal recording
Having the right camera angle and focus is crucial to ensure that your dash camera captures all the essential details on the road. Follow these steps to calibrate the camera angle and focus:
- Mount the camera securely: Ensure that your dash camera is properly mounted and secured on your windshield. A stable and secure mount will prevent the camera from shaking or moving during your journeys.
- Adjust the camera angle: Start by angling the camera towards the road. The camera lens should be parallel to the road surface, ideally capturing a broad view of the scene ahead.
- Check for obstructions: Make sure that there are no obstructions in the camera’s field of view. Objects such as rearview mirrors, sun visors, or windshield wipers can obstruct the camera’s view and hinder its recording capabilities.
- Test and fine-tune: Take a short test drive and check the recording’s frame to ensure that it captures the desired area and provides a clear view. If adjustments are necessary, make minor tweaks until you achieve the optimal camera angle and focus.
By testing and calibrating your dash camera, you can have peace of mind knowing that it is working correctly and capturing the crucial details you need while on the road. Performing these simple checks and adjustments will maximize the effectiveness of your dash camera’s recording capabilities, ultimately enhancing your safety and security while driving.
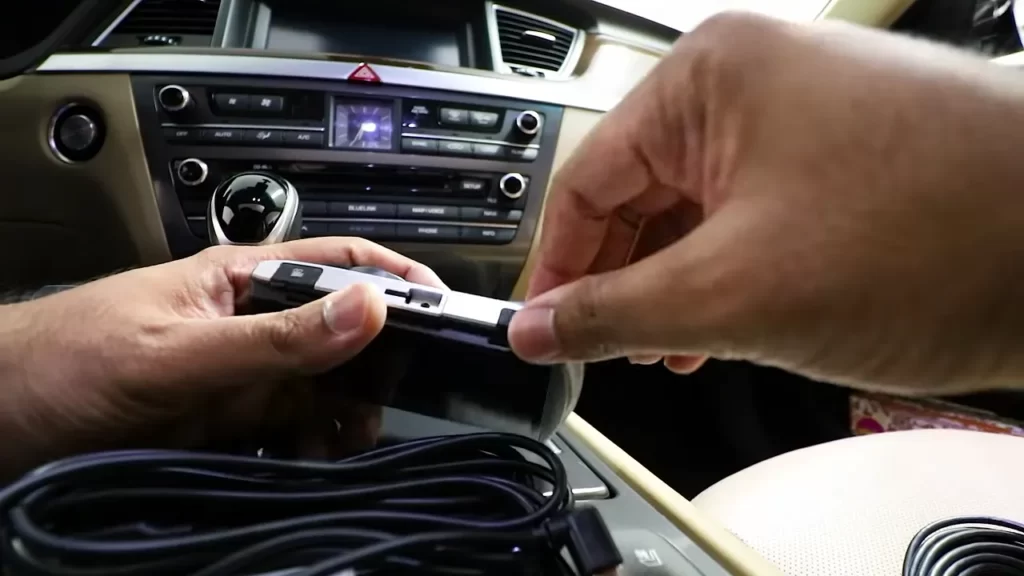
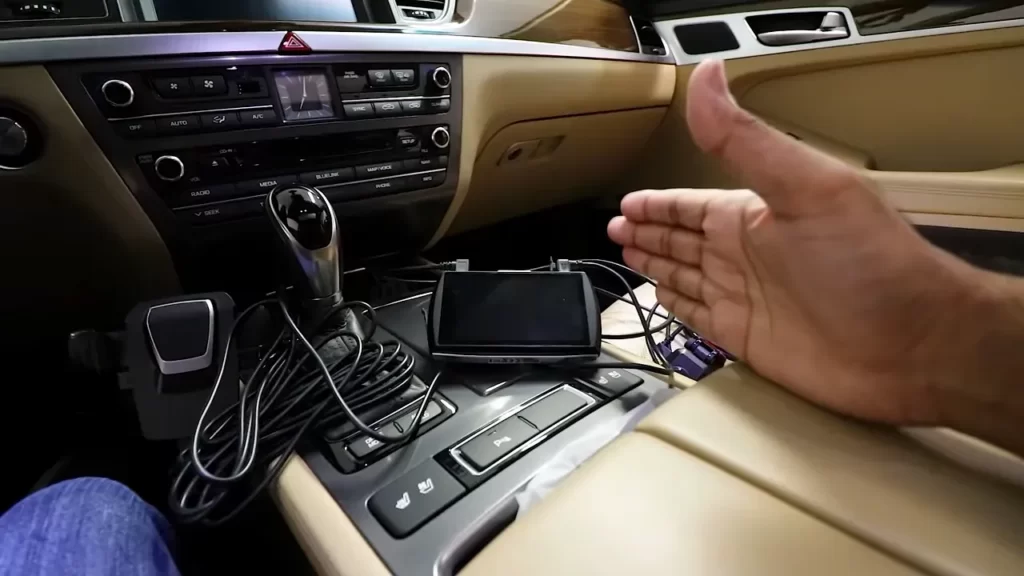
Securing Wires And Hiding Cables
Tips for Concealing Dash Camera Cables
Securing wires and hiding cables is an essential step when installing a dash camera in your vehicle. Not only does it ensure a neat and organized look, but it also helps to minimize any distractions and potential hazards while driving. In this section, we will explore some handy tips for concealing dash camera cables to make your installation as seamless as possible.
Using Cable Clips and Adhesive Mounts to Secure Wires
When it comes to securing dash camera cables, cable clips and adhesive mounts can be your best friends. These handy accessories not only keep the wires in place but also prevent them from dangling or obstructing your view. Here are some tips to effectively use cable clips and adhesive mounts:
- Plan Your Route: Before attaching the cable clips or adhesive mounts, plan the desired route for the cables. Determine the most discreet path that will keep the wires hidden from sight.
- Identify Suitable Mounting Points: Look for suitable mounting points where you can attach the cable clips or adhesive mounts. These can include areas near the windshield, behind the rearview mirror, or along the edge of the vehicle’s interior.
- Secure the Cables: Carefully attach the cable clips or adhesive mounts along the planned route. Make sure to position them securely to prevent any movement or slippage. Use additional clips or mounts as needed to ensure a tight and stable hold.
- Organize the Wires: Once the cable clips or adhesive mounts are in place, neatly organize the wires by placing them within the clips or along the mounts. This will help minimize any tangles or excess cable length.
- Trim Excess Cable: If you have any excess cable length, consider trimming it to further enhance the tidiness of the installation. Be careful not to cut the cables too short, ensuring they can still reach the necessary connections.
By utilizing cable clips and adhesive mounts effectively, you can ensure that your dash camera cables are securely held in place and hidden from view. This not only improves the appearance of your vehicle’s interior, but it also reduces the risk of potential distractions while driving.
Troubleshooting Common Dash Camera Installation Issues
Resolving Power Connectivity Problems
One of the most common issues when installing a dash camera is power connectivity problems. Your dash camera relies on a stable power source to function effectively. If you’re experiencing power-related issues, here are some troubleshooting steps to resolve them:
- Check the power cables: Ensure the power cables are securely connected to both the dash camera and the power source. Loose connections can cause intermittent power failures or complete shutdowns.
- Verify the power source: Make sure you are using a reliable power source, such as the car’s cigarette lighter socket or an adapter with sufficient voltage. Faulty power sources can result in inconsistent power supply to the dash camera.
- Inspect the fuse: Check the fuse box of your vehicle to see if the fuse related to the dash camera has blown. Replace the fuse if necessary.
- Consider a hardwire installation: If you’re still experiencing power connectivity issues, you may want to consider a hardwire installation. Hardwiring your dash camera directly to the vehicle’s electrical system provides a more stable power supply. It also enables the camera to turn on and off automatically with the ignition.
Fixing Mounting Issues and Camera Angle Adjustments
Mounting issues and improper camera angle adjustments can affect the quality of your dash camera footage. Follow these steps to fix mounting issues and adjust the camera angle for optimal recording:
- Double-check the mounting position: Ensure that you have chosen a suitable location for mounting the dash camera. It should have a clear view of the road without obstructing the driver’s field of vision.
- Securely attach the mount: Make sure the mount is securely fastened to the windshield or dashboard. Loose mounts can result in the camera losing its position over bumps or sudden movements.
- Adjust the camera angle: Find the right angle for the camera by manually adjusting it. The camera lens should be parallel to the road and frame the desired area accurately. A slight tilt can help capture a wider field of view.
- Use adhesive clips or cable clips: To prevent the power cable from dangling or obstructing your view, use adhesive clips or cable clips to secure it neatly along the edges of the windshield or car interior.
By following these troubleshooting steps, you can overcome common installation issues with your dash camera. Ensuring a stable power connection and fixing mounting problems will help you capture clear and reliable footage while on the road.
Maintenance And Care For Your Dash Camera
Regular maintenance and care for your dash camera is essential to prolong its lifespan and ensure optimal performance. By following these simple steps, you can keep your dash camera clean and in good working condition.
Cleaning the dash camera
Cleaning your dash camera regularly will not only keep it looking good but also prevent dirt and dust from affecting its functionality. Here’s how you can clean your dash camera:
- Start by turning off the dash camera and disconnecting it from the power source.
- Use a microfiber cloth to gently wipe the exterior of the camera, removing any fingerprints, smudges, or dirt.
- If there are stubborn stains or dirt, dampen the cloth slightly with water or a mild cleaning solution (avoid using harsh chemicals).
- Wipe the lens and screen with a separate microfiber cloth, ensuring there are no smudges or debris that could obstruct your view.
- For hard-to-reach areas, use a soft-bristled brush or a can of compressed air to remove dust and debris.
Regularly checking for firmware updates
Firmware updates are crucial for ensuring your dash camera functions optimally and remains secure. Manufacturers often release firmware updates to fix bugs, improve functionality, and enhance performance. Stay up to date by following these steps:
- Visit the manufacturer’s website and navigate to the support or downloads section.
- Locate the firmware update specifically designed for your dash camera model.
- Download the firmware update onto your computer.
- Connect your dash camera to the computer using a USB cable.
- Transfer the firmware update file to your dash camera’s internal storage.
- Disconnect the dash camera from the computer and follow the manufacturer’s instructions to install the firmware update.
- Ensure the dash camera is fully charged or connected to a power source during the update process.
Maintaining and caring for your dash camera doesn’t have to be complicated. By regularly cleaning and checking for firmware updates, you can keep your dash camera in top condition for years to come. Take the time to implement these maintenance practices, and you’ll enjoy the benefits of a reliable and high-performing dash camera.
Frequently Asked Questions Of How To Install Dash Camera
Can I Install A Dashcam By Myself?
Yes, you can install a dashcam by yourself. It is a simple process that doesn’t require professional help. Just follow the instructions provided with the dashcam, and you’ll be able to set it up easily. Keep in mind that you may need basic knowledge of wiring and mounting, but it’s doable for most people.
How Do I Install Dashcam On My Dashboard?
To install a dashcam on your dashboard: 1. Find a suitable location on your dashboard. 2. Clean the area thoroughly. 3. Use adhesive or suction cup mount to attach the dashcam securely. 4. Connect the power cable to a power source.
5. Adjust the angle and settings as desired. Remember to follow the manufacturer’s instructions for your specific dashcam model.
Is There A Dash Cam With No Wires?
Yes, there are dash cams available without wires. These wireless dash cams offer easy installation and convenience as they don’t require any messy wiring.
How Long Does It Take To Install A Dash Cam?
Installing a dash cam typically takes around 30 minutes to an hour. It’s a straightforward process that involves placing the device securely on your vehicle’s windshield and connecting it to a power source. Simply follow the manufacturer’s instructions, and you’ll be good to go in no time.
How Much Does It Cost To Install A Dash Camera?
The cost of installing a dash camera can vary depending on the complexity of the installation and the type of dash camera you have. On average, professional installation can range from $50 to $200.
Conclusion
To sum up, installing a dash camera is a practical and worthwhile investment for any vehicle owner. With a few simple steps and the right tools, you can ensure added safety on the road, protect against fraudulent claims, and have a reliable eyewitness in case of accidents.
Don’t wait any longer – get your dash camera today and enjoy peace of mind on every journey.