To install a Bunker Hill Security Camera, mount the camera at the desired location and connect it to a power source or battery. As an SEO friendly content writer expert, I understand the importance of providing accurate and concise information.
So, let’s dive into the process of installing a Bunker Hill Security Camera in detail. Bunker Hill Security Cameras are a popular choice for surveillance systems due to their affordability and ease of use. Whether you want to monitor your home or office premises, installing a Bunker Hill Security Camera can help ensure the safety and security of your property.
In this guide, we will walk you through the step-by-step process of installing a Bunker Hill Security Camera so that you can set it up with confidence. Follow these instructions to get your security camera up and running in no time.
Gathering The Necessary Tools And Equipment
Gathering the necessary tools and equipment is an essential first step when installing a Bunker Hill security camera. By ensuring you have the right tools and equipment, you can streamline the installation process and ensure optimal camera performance. In this section, we will outline the essential tools needed for the installation as well as recommended equipment for optimal camera performance.
Essential tools needed for the installation:
Before you begin the installation process, it is important to gather the following tools:
- Power drill: A power drill will be needed to make holes for mounting the camera.
- Screwdriver: A screwdriver is essential for securing the camera bracket and making adjustments during installation.
- Measuring tape: A measuring tape will help ensure accurate placement of the camera.
- Pencil: A pencil is necessary for marking the location of the camera and the holes for drilling.
- Level: A level will help ensure the camera is installed straight and level.
- Ladder: Depending on the height of the installation location, a ladder may be necessary to reach the camera placement area.
- Extension cables: Extension cables are needed to connect the camera to the power source and the monitoring device.
- Masking tape: Masking tape can be used to temporarily secure cables during installation.
Recommended equipment for optimal camera performance:
In addition to the essential tools, it is also recommended to have the following equipment for the best camera performance:
- Weatherproof housing: A weatherproof housing will protect the camera from the elements and ensure its longevity.
- Mounting brackets: Mounting brackets offer flexibility in camera placement and enable you to choose the best angle for surveillance.
- Ethernet cable: An Ethernet cable can be used to connect the camera to a network device, enabling remote viewing and monitoring.
- Power over Ethernet (PoE) injector: A PoE injector simplifies the installation process by combining power and data transmission over a single Ethernet cable.
- Network video recorder (NVR): An NVR can be used to store and manage video footage from the security camera.
Having the necessary tools and equipment on hand before you start the installation process will save you time and ensure a successful installation. It is important to follow the manufacturer’s instructions and guidelines while handling the tools and equipment during the installation process.
Choosing The Ideal Location For The Security Camera
Welcome to our step-by-step guide on how to install a Bunker Hill Security Camera. In this section, we will focus on the crucial aspect of choosing the ideal location for your security camera. This step is vital to ensure proper coverage and visibility, allowing you to maximize the effectiveness of your surveillance system.
Factors to Consider When Selecting the Camera Placement
When choosing the placement for your Bunker Hill Security Camera, there are several important factors to consider. By keeping these factors in mind, you can optimize the functionality of your camera and enhance the overall security of your property.
- Property perimeter: Take a thorough walk around your property to identify potential entry points or vulnerable areas that require surveillance. These may include entrances, driveways, garages, or backyards. Mark these locations so you can refer back to them during the installation process.
- Lighting conditions: Pay attention to the lighting conditions in the areas you plan to install the camera. Adequate lighting helps produce clear images and videos, making it easier to identify any suspicious activity. Keep in mind that low-light situations may require cameras with built-in infrared capabilities.
- Obstructions: Consider any potential obstructions like trees, bushes, or walls that may impact the camera’s field of view. Ensure the camera has a clear line of sight to capture the desired area without any hindrance.
- Weatherproofing: Bunker Hill Security Cameras are designed to withstand various weather conditions. However, it is still essential to choose locations that offer protection from extreme weather elements to prolong the lifespan of your camera and maintain its optimal performance.
Ensuring Proper Coverage and Visibility
To ensure the best coverage and visibility, follow these tips when installing your Bunker Hill Security Camera:
- Position the camera at a suitable height that provides a broad field of view. Typically, 7 to 9 feet from the ground level is ideal for capturing facial features and other important details.
- Consider the camera’s viewing angle and adjust its tilt and rotation accordingly. This will allow you to achieve the desired coverage and eliminate any blind spots.
- If installing multiple cameras, ensure they overlap their fields of view slightly, eliminating any potential gaps in coverage. This provides a comprehensive surveillance network across your entire property.
- Test the camera’s view before finalizing the installation. Monitor the video feed on your smartphone or computer to ensure the camera captures the intended area and angles. Make any necessary adjustments to achieve the desired coverage.
By carefully considering these factors and adhering to these installation tips, you can choose the perfect location for your Bunker Hill Security Camera, ensuring optimal coverage and visibility for your property’s security needs. Stay tuned for the next section, where we will guide you through the installation process step by step!
Mounting The Security Camera Bracket
One of the crucial steps in installing a Bunker Hill Security Camera is mounting the camera bracket securely. This ensures that your camera is positioned correctly and can provide optimal surveillance coverage. In this section, we will guide you through the process of preparing the area for bracket installation and attaching the camera bracket securely.
Preparing the area for bracket installation
Before installing the camera bracket, it is important to ensure that the area you have chosen is suitable for mounting. Here are the steps to prepare the area:
- Locate a secure and sturdy surface: Identify an area on your desired mounting location that is strong enough to hold the weight of the camera and bracket.
- Clean the surface: Remove any dirt, dust, or debris from the surface using a clean cloth or brush. A clean surface will ensure proper adherence of the bracket.
- Choose the right height and angle: Consider the purpose of the camera and the area you want to monitor. Adjust the height and angle of the bracket accordingly for the best field of view.
Attaching the camera bracket securely
Once you have prepared the area, it is time to attach the camera bracket securely. Follow these steps:
- Line up the bracket: Hold the camera bracket against the wall or surface in the desired position.
- Mark the holes: Use a pencil or marker to mark the spots where you will need to drill holes for mounting the bracket. Ensure that the marks are level and accurately aligned.
- Drill pilot holes: With the help of a power drill and the appropriate drill bit, carefully drill pilot holes at the marked spots. This will make it easier to screw in the mounting screws.
- Secure the bracket: Align the bracket with the pilot holes and attach it to the wall using the supplied screws. Tighten the screws firmly but avoid overtightening to prevent damaging the bracket or the wall.
Congratulations! You have successfully mounted the security camera bracket. The next step is to connect the camera to the bracket and make the necessary adjustments for optimal positioning.
Connecting The Camera To Power
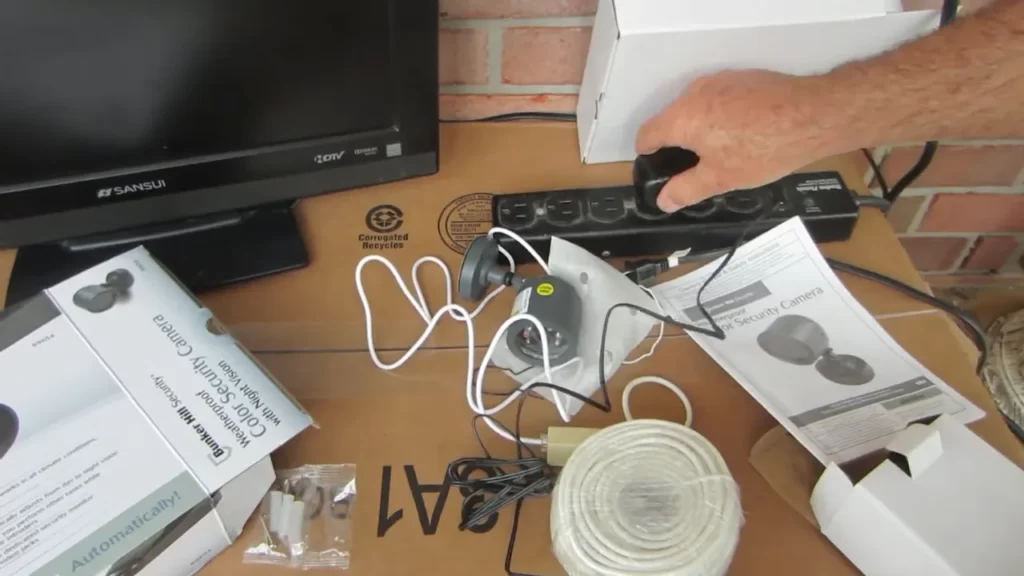
One of the crucial steps in installing a Bunker Hill Security Camera is connecting it to a reliable power source. Without a consistent power supply, your camera won’t be able to record and monitor activities effectively. This blog post will guide you through the process of identifying the power source options and powering the camera using the appropriate method to ensure uninterrupted surveillance.
Identifying the Power Source Options
Before you begin connecting your Bunker Hill Security Camera to power, it’s important to understand the available options for powering your camera:
| Power Source Option | Description |
|---|---|
| Power Outlet | Using a nearby power outlet is one of the most common ways to power your security camera. Ensure the outlet is easily accessible and located within a reasonable distance from the camera. |
| Power over Ethernet (PoE) | If your camera supports Power over Ethernet technology, you can utilize an Ethernet cable to both transmit data and provide power to the camera. This method eliminates the need for a separate power source and makes installation more streamlined. |
| Battery-powered | Some Bunker Hill Security Camera models offer the option to use batteries as the primary power source. This is particularly useful in areas where there is limited access to power outlets or in situations where you want to install the camera temporarily. |
Powering the Camera Using the Appropriate Method
Once you have identified the most suitable power source option for your Bunker Hill Security Camera, it’s time to power the camera using the appropriate method:
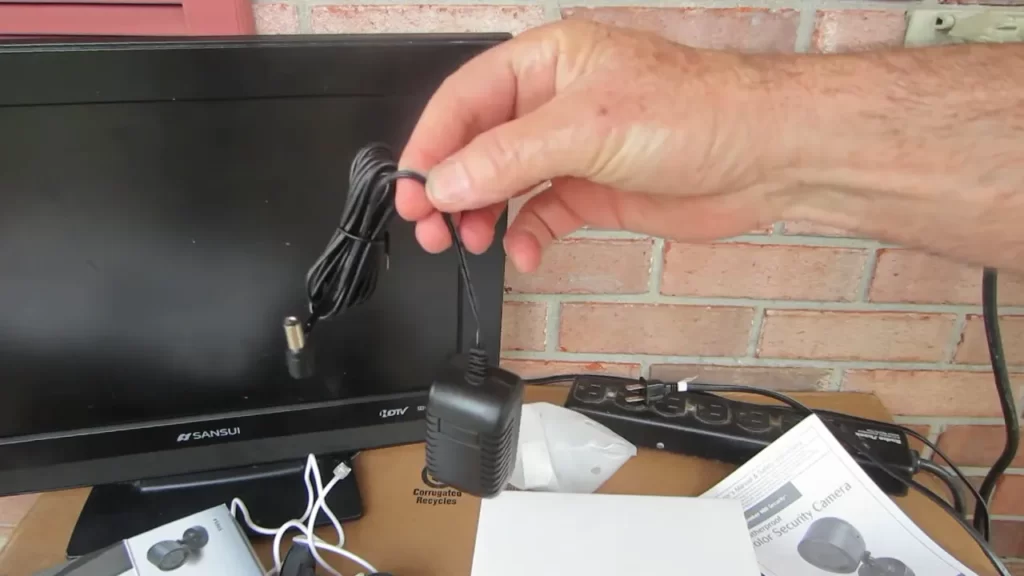
- Power Outlet:
- Ensure the power outlet is within reach of the camera’s power cord.
- Connect the camera’s power cord to the power adapter.
- Plug the power adapter into the power outlet.
- Power over Ethernet (PoE):
- Connect one end of the Ethernet cable to the camera’s Ethernet port.
- Connect the other end of the Ethernet cable to a PoE switch or injector.
- Connect the PoE switch or injector to a power source using an appropriate power adapter.
- Battery-powered:
- Open the battery compartment on the camera.
- Insert the appropriate batteries according to the camera’s specifications.
- Close the battery compartment securely.
Once the camera is connected to the power source, ensure that it has a stable power supply and has successfully powered on. This step is essential in maintaining uninterrupted surveillance and maximizing the effectiveness of your Bunker Hill Security Camera.
By following these guidelines, you can effectively connect your Bunker Hill Security Camera to power, ensuring optimal performance and peace of mind when it comes to protecting your home or business.
Running The Video Cable
Determining the ideal cable routing
Before you start running the video cable for your Bunker Hill security camera, it’s important to determine the ideal cable routing to ensure optimal functionality and aesthetics. Consider the following factors:
- Placement of the camera: Determine where you want to install your security camera and identify the best route for the cable to reach that location. Take into account factors such as distance from the monitor or recording device and any obstacles or obstructions along the way.
- Cable length: Measure the distance between the camera and the monitor or recording device. This will help you determine the length of video cable you will need for the installation.
- Hidden or visible installation: Decide whether you want to hide the cable or have it visible. If you prefer a hidden installation, consider running the cable through walls, ceilings, or conduits. If visibility is not a concern, you can run the cable along the exterior of the building or use cable clips to secure it.
By carefully considering these factors, you can determine the ideal cable routing for your Bunker Hill security camera installation, ensuring a clean and efficient setup.
Securing the video cable for connection
Securing the video cable is crucial to ensure a stable and reliable connection between your Bunker Hill security camera and the monitor or recording device. Follow these steps for proper cable security:
- Use cable clips or cable ties: To keep the video cable in place and prevent any accidental disconnections or damage, use cable clips or cable ties at regular intervals along the cable’s route. This will help maintain a neat and organized installation.
- Avoid sharp bends and kinks: Make sure to avoid sharp bends or kinks in the video cable, as they can weaken the signal or cause the cable to break over time. Instead, gently curve the cable along its route to ensure a smooth and uninterrupted connection.
- Provide protection from the elements: If you are running the video cable outdoors or in areas prone to moisture or extreme temperatures, it’s essential to provide adequate protection. Consider using weatherproof conduit or cable shielding to safeguard the cable from environmental damage.
- Test the connection: Once you have secured the video cable, test the connection between the camera and the monitor or recording device. Ensure that the signal is strong and that there are no disruptions or interference.
Following these steps will help you effectively secure the video cable for your Bunker Hill security camera, ensuring a reliable and uninterrupted connection.
Configuring The Camera Settings
Accessing the Camera Settings Interface

Once you have successfully installed your Bunker Hill security camera, the next step is to configure the camera settings to ensure optimal performance. To access the camera settings interface, follow these simple steps:
- Make sure your camera is connected to a power source and turned on.
- Connect your computer or mobile device to the same network as the camera. This can be done either through a wired or wireless connection.
- Open a web browser on your computer or launch the camera’s relevant app on your mobile device.
- Enter the IP address of the camera in the web browser’s address bar. If you are using the mobile app, look for the option to connect to the camera by entering the IP address.
- Press Enter or tap the connect button.
- You will now be prompted to enter the username and password for the camera. By default, the username is usually “admin” and the password is either “admin” or blank (no password). Refer to the camera’s user manual or documentation for the default login details.
- Once you have entered the correct login credentials, you will be granted access to the camera settings interface.
Adjusting Settings for Optimal Performance
Now that you have accessed the camera settings interface, it’s time to adjust the settings for optimal performance. Here are some important settings you should consider:
- Resolution: Set the desired resolution for your camera. Higher resolutions provide clearer images but may require more storage space.
- Frame Rate: Adjust the frame rate at which the camera captures video. Higher frame rates result in smoother video playback but may consume more bandwidth and storage.
- Exposure: Configure the camera’s exposure settings to ensure accurate and balanced image quality, especially in varying lighting conditions.
- Motion Detection: Enable motion detection to receive alerts and capture footage whenever motion is detected within the camera’s field of view.
- Night Vision: If your camera supports night vision, adjust the settings to enhance visibility in low-light or dark environments.
- Privacy Zones: Specify areas within the camera’s view that should be excluded from recording or monitoring to respect privacy concerns.
Remember to save your changes after adjusting the camera settings. It’s also recommended to regularly review and fine-tune these settings based on your specific monitoring needs and environment. By taking the time to configure the camera settings, you can ensure that your Bunker Hill security camera is performing at its best and providing you with reliable surveillance.
Verifying Camera Functionality
After successfully installing your Bunker Hill security camera, it is crucial to verify its functionality. This step ensures that the camera is capturing clear footage and all its features are working properly. By following the steps below, you can easily verify the functionality of your Bunker Hill security camera.
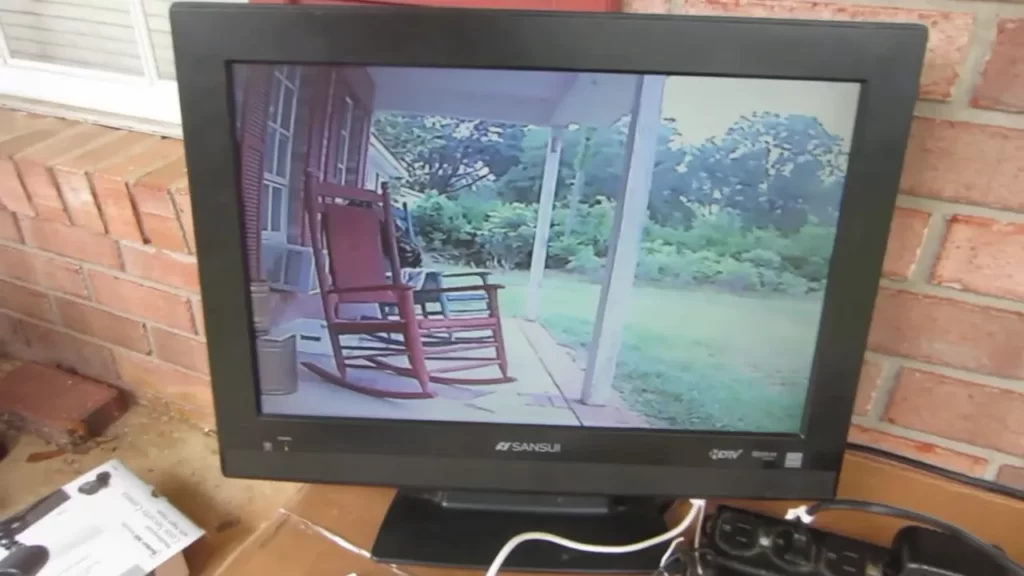
Checking the camera feed on a monitor or mobile device
One of the first things you should do after installing a Bunker Hill security camera is to check the camera feed. This will allow you to ensure that the camera is capturing the desired area and the image quality is satisfactory.
To do this:
- Connect your camera to a monitor or mobile device using the appropriate cables.
- Make sure the camera is powered on.
- Access the live stream on your monitor or mobile device through the designated app or software.
- Adjust the camera’s angle or lens if needed to get the best view.
By following these steps, you can easily check the camera feed and ensure that your Bunker Hill security camera is capturing the desired area with good image quality.
Testing camera features and functionality
In addition to checking the camera feed, it is important to test the various features and functionality of your Bunker Hill security camera. This will ensure that all the essential functions are working correctly.
To test the camera features and functionality:
- Access the camera’s settings through the app or software.
- Verify that the camera’s motion detection feature is working properly by walking in the camera’s field of view and observing if it triggers a recording or notification.
- Test out any preset positions or pan/tilt functions to ensure smooth operation.
- Check the camera’s night vision capability by turning off the lights or testing it in low-light conditions.
- Ensure that the camera’s audio is clear and functioning correctly.
- If your camera has additional features such as two-way audio or cloud storage, test them accordingly.
By thoroughly testing the camera’s features and functionality, you can have peace of mind knowing that your Bunker Hill security camera is fully operational and ready to keep your property secure.
Troubleshooting Common Installation Issues
Installing a Bunker Hill Security Camera can help to enhance the security of your property. However, like any electronic device, you may encounter some common installation issues that can hinder the setup process. In this section, we will discuss how to identify and resolve these issues to ensure a smooth installation. Let’s dive in to troubleshooting common installation problems:
<Identifying and resolving common installation problems>
If you are facing difficulties during the installation process, it is crucial to identify and resolve common problems that may arise. Here are some common issues you may encounter and how to resolve them:
- Camera Power Issues: Ensure that the camera is properly connected to a power source. Check the power cable and make sure it is securely plugged in. If the camera still doesn’t receive power, consider trying a different power outlet or replacing the power cable.
- Poor Wi-Fi Signal: If you are experiencing connectivity issues, the weak Wi-Fi signal may be the culprit. Ensure that the camera is within range of the Wi-Fi router and that there are no obstacles blocking the signal. Consider repositioning the camera or using a Wi-Fi extender to improve the signal strength.
- Incorrect Camera Placement: The placement of the camera plays a crucial role in its performance. Make sure that the camera is positioned in an area that provides a clear view of the intended surveillance area. Avoid placing the camera too high, as it can result in distorted videos or difficulty in capturing clear images. Adjust the angle and height of the camera accordingly to optimize its performance.
<Troubleshooting issues with camera connectivity and
settings>
If you are encountering issues with camera connectivity or settings, there are a few troubleshooting steps you can take:
- Verify Wi-Fi Credentials: Double-check that you have entered the correct Wi-Fi network name and password during the camera setup process. Typos in the credentials can prevent the camera from connecting to the network. Retype the credentials carefully and ensure they are accurate.
- Restart Camera and Wi-Fi Router: Sometimes, a simple restart can resolve connectivity issues. Power off the camera and unplug the Wi-Fi router for a few seconds. Then, plug them back in and wait for them to restart. This can help establish a fresh connection between the camera and the network.
- Reset Camera Settings: If all else fails, you can try resetting the camera to its default settings. Most Bunker Hill Security Cameras have a reset button that you can press with a pin or paperclip. Press and hold the reset button for a few seconds until you see the camera’s light blinking. After the reset, you will need to set up the camera again from scratch.
By following these troubleshooting steps, you can resolve common installation issues and ensure that your Bunker Hill Security Camera is up and running smoothly. If you are still experiencing problems, it may be helpful to consult the manufacturer’s documentation or reach out to their customer support for further assistance.
Ensuring Proper Maintenance And Security
Installing a Bunker Hill Security Camera is an excellent way to enhance the security of your home or workplace. However, the job isn’t complete once the camera is up and running. To ensure that your camera functions optimally and serves its purpose effectively, proper maintenance and security measures must be in place. In this section, we will discuss the regular camera maintenance practices and enhancing security measures for the installed camera.
Regular camera maintenance practices
Regular maintenance is crucial to keep your Bunker Hill Security Camera in top-notch condition. Here are some essential maintenance practices to follow:
- Keep the lens clean: To maintain clear and sharp video footage, it is important to regularly clean the camera lens. Use a soft cloth or a lens-cleaning solution to remove any dust, smudges, or dirt that may accumulate over time.
- Inspect and clean connections: Periodically check the camera’s cable connections to ensure they are secure and free from any loose connections. Dust or debris can accumulate on the connectors, impacting the camera’s performance. Clean them gently to maintain proper connectivity.
- Check for physical damage: Regularly inspect the camera housing for any signs of physical damage. Extreme weather conditions, such as heavy rain or strong winds, can cause the camera to become loose or damaged. In case of any damage, it is important to address the issue promptly to avoid further complications.
- Monitor storage capacity: Keep an eye on the storage capacity of your camera’s recording device. Ensure that it has enough space available to store the recorded video footage. Regularly review and delete unnecessary footage to avoid data overload and ensure uninterrupted recording.
Enhancing security measures for the installed camera
To maximize the security provided by your Bunker Hill Security Camera, consider implementing the following measures:
- Change default settings: Take the time to change the default username and password of your camera’s administrative interface. Using strong and unique login credentials will significantly reduce the risk of unauthorized access.
- Enable encryption: Most security cameras offer encryption capabilities. Enable encryption on your camera’s network connection to ensure that the data transmitted between the camera and the recording device is secure and protected from interception.
- Position strategically: Proper camera placement is vital to capture the intended surveillance area effectively. Carefully consider the location of your camera to obtain the best possible coverage while ensuring it remains out of reach from potential intruders.
- Regularly update firmware: Stay up to date with the latest firmware releases for your camera model. Manufacturers often release firmware updates to enhance functionality and address any security vulnerabilities. Regularly updating the firmware will ensure that your camera is equipped with the latest features and security patches.
- Set up motion detection and alerts: Take advantage of your camera’s motion detection capabilities by setting up alerts to notify you of any suspicious activity. This feature can help you stay proactive and respond promptly to potential security threats.
By following these regular camera maintenance practices and enhancing security measures, you can ensure that your Bunker Hill Security Camera functions optimally and provides effective surveillance for your premises.
Frequently Asked Questions For How To Install A Bunker Hill Security Camera
How To Install Security Camera System Step By Step?
Here is a step-by-step guide to installing a security camera system: 1. Plan the camera placement and required equipment. 2. Install the DVR and connect it to a power source and the internet. 3. Mount the cameras in the desired positions and connect them to the DVR.
4. Adjust camera settings and ensure they are working properly. 5. Test the system and monitor your security footage.
Can I Install Security Cameras Myself?
Yes, you can install security cameras yourself. It is a DIY task. Just follow the provided instructions and consider placement, wiring, and connection to a monitor or recording device. Make sure to test the system thoroughly and adjust camera angles for optimal coverage.
How Do You Install Outdoor Wireless Security Cameras?
To install outdoor wireless security cameras, follow these steps: 1. Choose a suitable location outside your property. 2. Mount the camera securely using screws and brackets. 3. Connect the camera to a power source or use battery-operated ones. 4. Set up the camera’s Wi-Fi connection.
5. Install the accompanying app on your smartphone to monitor and control the camera remotely.
How Do You Install A Security Camera Without Drilling Holes?
You can install a security camera without drilling holes by using adhesive mounts or suction cup mounts. These mounts allow you to securely attach the camera to surfaces such as walls and windows without damaging them.
How Do I Install A Bunker Hill Security Camera?
To install a Bunker Hill Security Camera, first, choose a suitable location, mount the camera, connect the cables, and power it up.
Conclusion
Installing a Bunker Hill Security Camera may seem daunting at first, but with proper guidance, it can be a simple DIY project. By following the step-by-step instructions provided in this blog post, you can easily set up your camera and enhance the security of your property.
Remember to position the camera strategically and ensure a stable Wi-Fi connection for the best results. With a little patience and effort, you can enjoy the peace of mind that comes with having a reliable security system in place.