nstalling shutters on vinyl siding is a simple process involving measuring, positioning, and securing the shutters using screws or anchors. To begin, measure the height and width of the window and mark these dimensions on the siding.
Next, position the shutter on the marks and use a level to ensure it is straight. Finally, use screws or anchors to attach the shutter to the siding, making sure they are securely fastened. By following these steps, you can easily install shutters on vinyl siding to enhance the aesthetic appeal of your home.
Materials Needed
The installation of shutters on vinyl siding can add a touch of elegance and curb appeal to your home. To get started with this project, you will need a few essential materials to ensure a successful and hassle-free installation.
Shutter kit
To begin, you will need a shutter kit specifically designed for vinyl siding.
A shutter kit typically includes all the necessary components you need to install your shutters, such as the shutters themselves, mounting hardware, and detailed instructions. It’s important to choose a kit that matches the style and size of your shutters, as well as the color and texture of your vinyl siding, for a seamless and cohesive look.
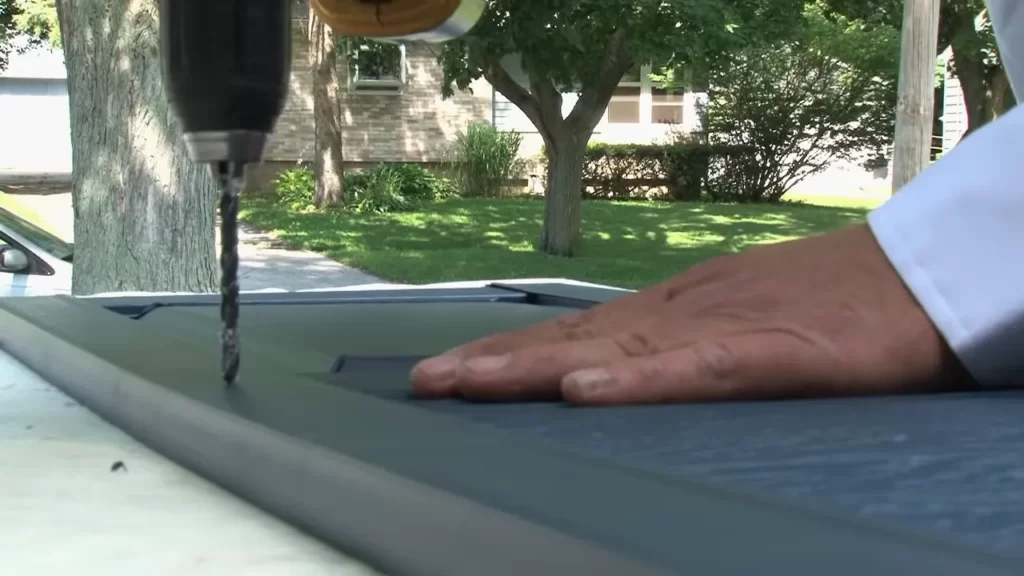
Power drill
A power drill is an indispensable tool for installing shutters on vinyl siding. It will allow you to drill pilot holes and secure the mounting hardware firmly in place.
Make sure your power drill is charged and equipped with the appropriate drill bits suitable for your mounting hardware. This will ensure that the installation process is smooth and efficient.
Measuring tape
Precision is key when installing shutters on vinyl siding, and a measuring tape is an essential tool to achieve accurate measurements.
Before you begin the installation process, use a measuring tape to determine the correct placement and dimensions of your shutters. This will help you achieve a symmetrical and aesthetically pleasing look.
Pencil
A pencil is an often overlooked but necessary tool when installing shutters on vinyl siding. It will allow you to mark the precise locations where you need to drill pilot holes and attach the mounting hardware.
Using a pencil to mark your measurements will ensure that your shutters are aligned correctly and securely attached.
Level
A level is an indispensable tool when installing shutters on vinyl siding, as it will help you ensure that your shutters are straight and properly aligned.
Place the level along the tops and sides of your shutters to ensure they are level, both horizontally and vertically. This will result in a visually pleasing and professional-looking installation.
Mounting hardware
Mounting hardware is the crucial component that will secure your shutters to the vinyl siding securely. It typically includes screws, anchors, and other fasteners.
Make sure to use mounting hardware specifically designed for vinyl siding to ensure a secure and durable installation. Consult the instructions included with your shutter kit for guidance on selecting and using the appropriate mounting hardware.
With these essential materials at hand, you are now ready to embark on your shutter installation project. Follow the remaining steps in our guide to achieve beautiful and long-lasting results that will enhance the overall aesthetic of your home.
Step 1: Measure And Mark
Installing shutters on vinyl siding can transform the look of your home and add a touch of elegance. However, to ensure a seamless installation, it is crucial to start with accurate measurements and precise markings. In this article, we will walk you through the first step of the installation process – measuring and marking.
Measure the height of the window
The first measurement you need to take is the height of the window. Use a measuring tape to determine the distance between the top and bottom of the window frame. Write down this measurement as it will be essential for positioning the shutters correctly.
Mark the center of the window frame
Once you have measured the height, it’s time to mark the center of the window frame. This step is crucial to ensure that the shutters are properly aligned and symmetrical. To find the center point, measure the width of the window frame and divide it by two. Use a pencil to make a small mark at this point.
Determine the desired gap from the edge of the window frame
Next, you need to determine the desired gap between the edge of the window frame and the shutters. This gap is a matter of personal preference and can vary depending on the style you want to achieve. Measure the distance from the edge of the window frame to the desired position of the shutters and make a mark using a pencil.
Mark the placement for the top and bottom shutter hinges
Now that you have measured the height, marked the center, and determined the gap, it’s time to mark the placement for the top and bottom shutter hinges. These hinges will secure the shutters to the window frame and ensure their stability. Measure and mark the positions for the hinges, ensuring that they are evenly spaced and aligned.
By following these measurement and marking steps, you are setting the foundation for a successful installation of shutters on your vinyl siding. The next steps will involve attaching the shutters and making any necessary adjustments to achieve the desired look for your home.
Step 2: Preparing The Shutters
Once you have gathered all the necessary tools and materials for installing shutters on vinyl siding, it’s time to move on to step 2: preparing the shutters. This is an essential step as it ensures that your shutters are properly aligned and securely attached to your siding, giving your home that perfect finishing touch.
Lay the shutters on a flat surface
To begin, find a flat surface where you can lay your shutters. It could be a workbench, a table, or even the ground – just ensure it is stable and level. By doing this, you create a convenient and safe space for you to work on the shutters.
Attach the hinges to the shutters according to the marked locations
Next, take your shutters and locate the marked locations for attaching the hinges. These markings are important as they guide you on the proper placement of the hinges. Take note of the number and position of hinges required for each shutter, as this may vary depending on the size and weight of the shutters.
Ensure that the hinges are aligned with each other
With the hinge markings identified, carefully align the hinges with each other on the shutters. This is crucial to ensure that the shutters open and close smoothly once installed. Take your time to make any necessary adjustments to ensure that the hinges are perfectly aligned and parallel to each other.
Once you have completed these steps, you are now ready to move on to the next stage of installing shutters on vinyl siding. By properly preparing the shutters, you are setting the foundation for a successful installation, ensuring that your shutters not only look great but also function properly.
Step 3: Mounting The Hinges
Now that you have your shutters prepared and the hinge locations marked, it’s time to move on to the next step – mounting the hinges. This step is crucial as it ensures your shutters are securely attached to the window frame, allowing them to function properly while enhancing the aesthetics of your home.
Hold the shutters against the window frame, lining up the hinges with the marked locations.
To begin, hold the shutters against the window frame. Make sure that the hinges align perfectly with the marked locations. This step ensures that the shutters will be properly positioned and in line with the window, providing a seamless and professional finish.
Use a level to ensure that the shutters are straight.
Once the shutters are properly positioned against the window frame, use a level to ensure that they are straight. This step is crucial in achieving a visually appealing and uniform appearance for your shutters. Take your time to adjust the shutters until they are perfectly leveled.
Mark the screw holes for mounting the hinges.
After making all the necessary adjustments, it’s time to mark the screw holes on the window frame. Use a pencil or a marker to clearly mark the spots where the screws will go. This will help you to easily and accurately attach the hinges in the next step.
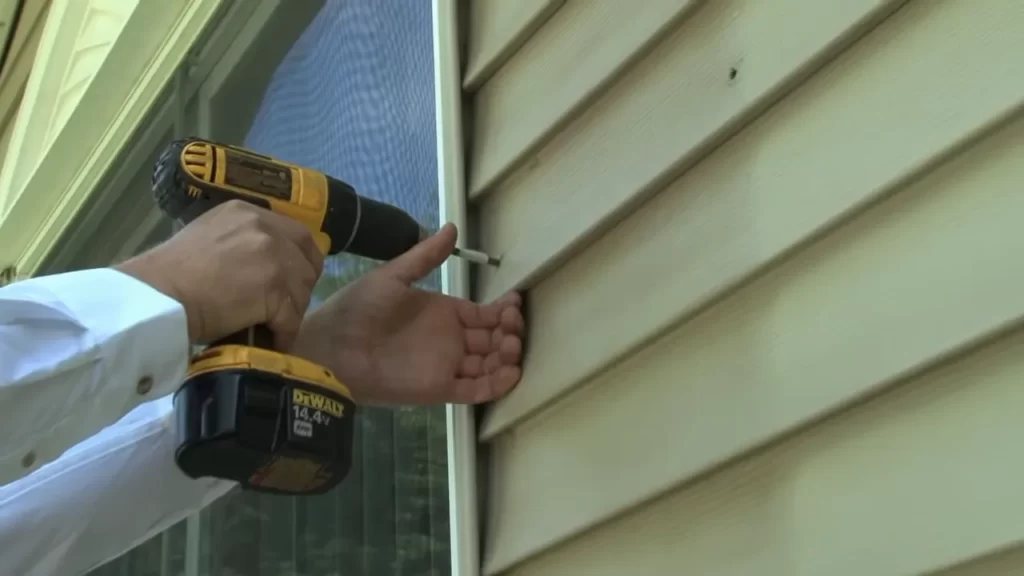
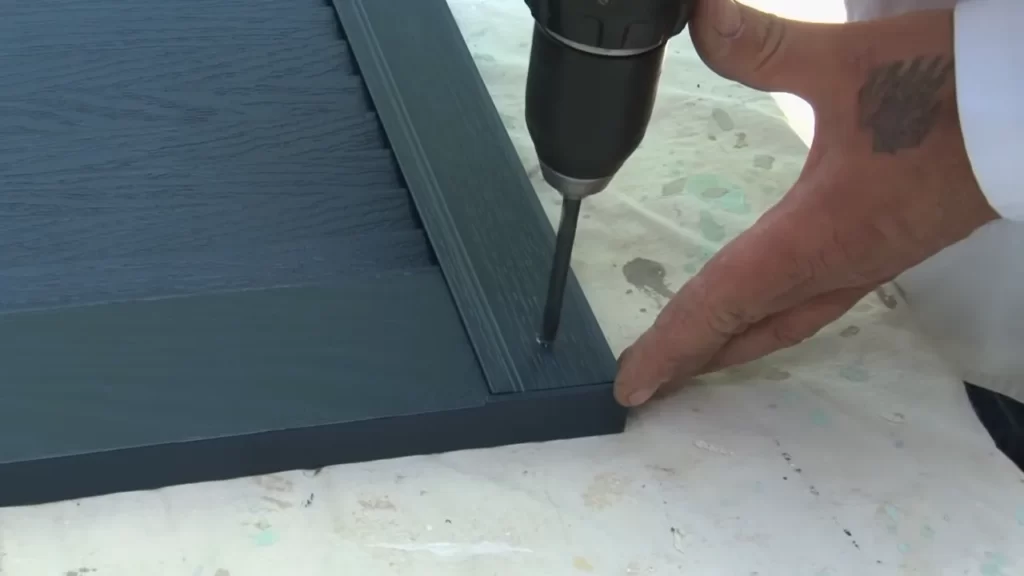
Drill pilot holes for the screws.
Before attaching the hinges, it’s important to drill pilot holes for the screws. This step ensures that the screws go in smoothly and securely, preventing any damages to the shutters or the window frame. Use an appropriate drill bit size that matches the diameter of the screws you’ll be using.
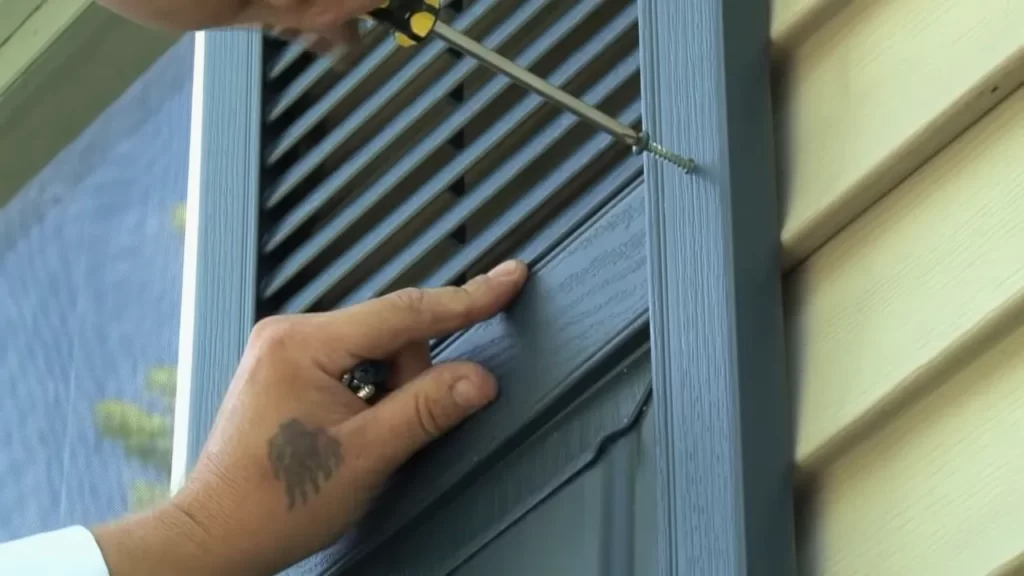
Attach the hinges to the window frame using the provided screws.
Finally, it’s time to attach the hinges to the window frame using the provided screws. Make sure to align each hinge with its corresponding pilot hole, and using a screwdriver, tighten the screws until they are snug. Be careful not to over-tighten, as this can cause damage to the shutters or the window frame. Repeat this step for each hinge until all are securely fastened.
Congratulations! You have successfully completed the third step in installing shutters on vinyl siding. By mounting the hinges properly, you have ensured that your shutters will function effectively and enhance the overall look of your home. In the next step, we will focus on properly securing the shutters to the window frame.
Step 4: Securing The Shutters
Step 4: Securing the Shutters
Now that you have properly aligned the shutters with the window frame and attached the hinges, it’s time to secure the shutters in place. This step is crucial to ensure that the shutters remain stable and functional, even in extreme weather conditions. In this section, we will walk you through the process of securing the shutters to the frame.
Hold the shutters against the window frame once again, aligning the hinges.
First, hold the shutters against the window frame, just as you did when aligning the hinges in the previous step. Make sure the shutters are in the desired position and the hinges are properly aligned with the screws on the window frame.
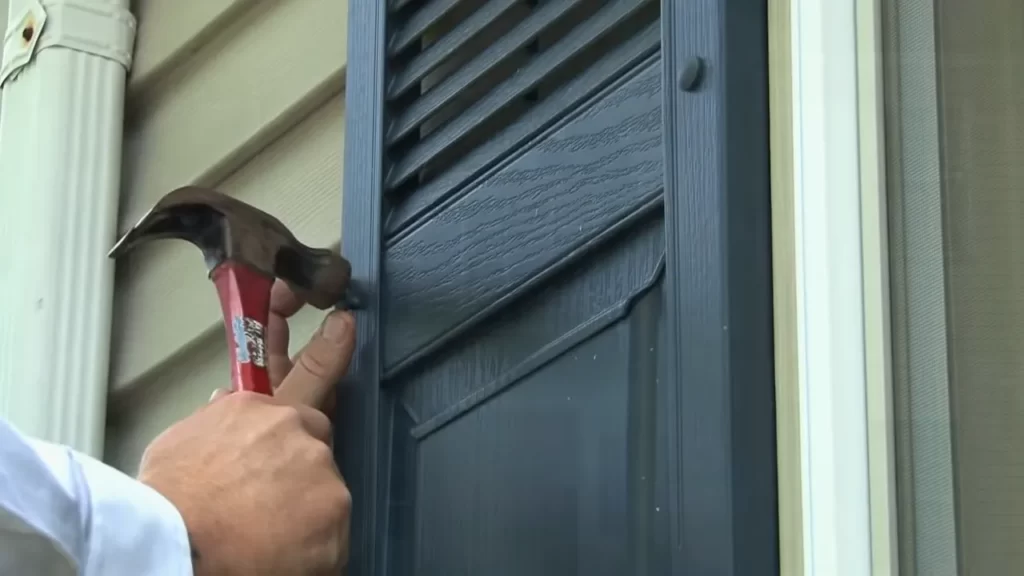
Insert additional screws through the hinges to securely fasten the shutters to the frame.
With the shutters properly positioned, it’s time to secure them to the window frame. Insert additional screws through the hinges, ensuring they go all the way into the frame. This will provide a secure attachment and prevent the shutters from coming loose over time.
Ensure that the shutters are level and aligned.
Finally, take a step back and visually inspect the shutters to ensure they are level and aligned. Use a spirit level if necessary to make adjustments. It’s important to have properly aligned shutters for both aesthetic appeal and functionality.
Congratulations! You have successfully secured your shutters to the vinyl siding. The next step is to check if they open and close smoothly. If you notice any issues, make minor adjustments to the screws or hinges. Once everything is in place, you can enjoy the enhanced curb appeal and added protection that shutters provide to your home.
Step 5: Adjusting The Shutters
Step 5: Adjusting the Shutters
Once the shutters are securely installed on your vinyl siding, it’s time to make any necessary adjustments to ensure they function properly and look aesthetically pleasing. This step is crucial as it will contribute to the longevity and visual appeal of your shutters.
Open and close the shutters to test their functionality
The first thing you need to do is open and close the shutters to test their functionality. This will help determine if there are any issues with their movement or alignment. By doing this, you can identify any sticking points or uneven motion that may need your attention. Make sure to examine each shutter individually to ensure they all operate smoothly.
Make any necessary adjustments to ensure proper operation
If you notice any problems during the functionality test, it’s time to roll up your sleeves and make the necessary adjustments for proper operation. Some common adjustments may include tightening loose hinges, lubricating moving parts, or straightening misaligned shutters. By addressing these issues promptly, you can avoid further damage and improve the overall performance of your shutters.
Check the alignment of the shutters and adjust if needed
Next, you should carefully examine the alignment of the shutters. They should be straight and symmetrical, enhancing the overall aesthetics of your home. If you spot any misalignment, it’s crucial to adjust it accordingly. This can be done by loosening the screws on the hinges and gently shifting the shutters until they align perfectly. Once aligned, don’t forget to tighten the screws securely, ensuring the shutters remain in the desired position.
By taking the time to adjust the shutters, you not only ensure their proper functionality but also improve their overall appearance. This final step completes the installation process, leaving you with beautiful shutters that not only enhance your home’s curb appeal but also provide protection and privacy.
Step 6: Finishing Touches
Once you have successfully installed your shutters on vinyl siding, it’s time to add those finishing touches that will truly make them stand out. Follow these three simple steps to complete the installation process.
Fill in the screw holes with a matching vinyl putty or caulk
To give your shutter installation a polished look, take the time to fill in the screw holes with a matching vinyl putty or caulk. This will not only help to prevent any water or moisture from seeping into the holes but also create a seamless and uniform appearance.
Clean the shutters and window frame to remove any dirt or debris
Before stepping back to admire your handiwork, make sure to clean the shutters and the surrounding window frame. Use a mild detergent and water solution to remove any dirt, dust, or debris that may have accumulated during the installation process. Wipe them down gently with a soft cloth or sponge, ensuring a spotless finish.
Stand back and admire your newly installed shutters
Now that you’ve completed the installation and put those finishing touches in place, it’s time to stand back and admire your handiwork. Take a moment to appreciate how the shutters enhance the overall appearance of your home, adding a touch of elegance and charm to its exterior. Step back, and let the sense of accomplishment wash over you.
In conclusion, taking these three simple steps—filling in the screw holes, cleaning the shutters and window frame, and stepping back to admire your work—will ensure that your newly installed shutters are not only aesthetically pleasing but also durable and long-lasting.
Frequently Asked Questions For How To Install Shutters On Vinyl Siding
Can You Hang Shutters On Vinyl Siding?
Yes, you can hang shutters on vinyl siding. Vinyl siding is a durable and versatile material that can support the weight of shutters without any issues. Make sure to follow the proper installation instructions and use the appropriate hardware to secure the shutters to the siding.
How Do You Install Shutters Without Drilling?
Install shutters without drilling by using tension rods or adhesive hooks. Place tension rods between the window frame and hang the shutters on the rods. Alternatively, attach adhesive hooks to the window frame and hang the shutters on the hooks.
This method requires no drilling and is easy to remove.
Should I Use Shutter Spikes Or Screws?
For installing shutters, you can choose either shutter spikes or screws. Both options are commonly used and have their pros and cons. Spikes offer a traditional and decorative look, while screws provide a more secure and durable installation. Consider the style, durability, and personal preference before making a decision.
How Do You Attach Shutters To A House?
To attach shutters to a house, follow these steps: 1. Choose the desired shutter style and size. 2. Measure the window dimensions accurately. 3. Install the shutter hardware, such as hinges or clips, using appropriate tools. 4. Align and hang the shutters securely onto the hardware.
5. Make sure the shutters are properly secured and functioning before finishing the installation.
How Do You Install Shutters On Vinyl Siding?
Installing shutters on vinyl siding is easy. First, measure the size of your windows. Then, line up the screw holes on the shutters with the mounting holes on the siding. Finally, attach the shutters using screws and a drill.
What Type Of Screws Should I Use?
For installing shutters on vinyl siding, it is recommended to use stainless steel screws. These screws are rust-resistant and will provide a strong and durable hold.
Conclusion
Installing shutters on vinyl siding is a straightforward process that can enhance the aesthetic appeal of your home. By following these step-by-step instructions and tips, you can successfully complete this project. Remember to choose the right materials, measure accurately, and secure the shutters properly.
With a little patience and attention to detail, you can achieve beautiful results. So, why wait? Transform your home’s exterior with some stylish shutters today!