To install hinges on bifold doors: First, align the hinges on the door and mark their placement. Then, use a drill to create pilot holes and screw the hinges into place.
Enhancing Space And Design Flexibility
Bifold doors can create a seamless indoor-outdoor flow.
When it comes to enhancing space and design flexibility, bifold doors are an excellent option. These doors can effortlessly create a seamless transition between indoor and outdoor living areas, allowing you to enjoy the best of both worlds. Whether you have a cozy patio or a sprawling backyard, bifold doors provide a stunning visual connection that expands the perception of space.
With bifold doors, you can seamlessly merge your indoor and outdoor areas, bringing in natural light, fresh air, and stunning views. During the warmer months, you can simply fold back the panels, opening up your living space and transforming it into one expansive area. This creates the perfect setting for entertaining friends, hosting family gatherings, or just enjoying a peaceful morning coffee.
They maximize the use of space by folding back neatly.
Bifold doors are specifically designed to maximize the use of space by folding back neatly. Unlike traditional doors that swing open and can take up valuable floor space, bifold doors neatly stack against the wall, allowing for unobstructed access and an open feel. This is particularly beneficial in smaller living spaces where every square foot counts.
Whether you have a compact apartment or a cozy cottage, installing bifold doors can instantly transform the room and make it feel larger, brighter, and more open. The smooth and efficient folding mechanism ensures that every inch of the doorway is utilized, eliminating wasted space commonly seen with traditional hinged doors.
Bifold doors come in various designs and materials to match any style.
Bifold doors offer incredible design flexibility, as they come in various designs and materials to match any style. Whether you prefer a modern, minimalist look or a traditional, rustic charm, there is a bifold door option that can perfectly complement your home’s aesthetic.
From sleek aluminum frames to warm timber finishes, the range of materials available ensures that you can find a bifold door that perfectly suits your style and preferences. Additionally, you can choose from different configurations, such as full-height glass panels or a combination of glass and solid panels, allowing you to customize the level of privacy, light, and ventilation.
In Conclusion
By installing bifold doors, you can enhance your space and design flexibility in a captivating way. These doors seamlessly merge indoor and outdoor areas, maximize space utilization, and offer a wide range of design options to match any style. Whether you have a small living space or a grand residence, bifold doors provide an elegant and practical solution that adds value and beauty to your home.
Easy And Effortless Installation
When it comes to installing hinges on bifold doors, careful planning and execution are key. To ensure a hassle-free installation process, follow these step-by-step instructions. By following these guidelines, you can achieve an easy and effortless installation of hinges on your bifold doors.
Installing hinges on bifold doors requires careful planning and execution
Before you start the installation process, it is essential to carefully plan out the placement of the hinges on your bifold doors. Take into account the weight of the doors and the type of hinges you will be using.
Here is a step-by-step guide to help you install hinges on your bifold doors:
- Measure and mark: Begin by measuring and marking the desired location for the hinges on the inside of the doors. Make sure the markings are accurate and aligned.
- Pre-drill holes: Use a drill to pre-drill small pilot holes on the marked locations. This will make it easier to screw in the hinges later on.
- Attach the hinges: Take the hinges and align them with the pre-drilled holes. Securely fasten them using screws. Make sure the hinges are flush against the surface of the door.
- Test the movement: Once the hinges are securely attached to the doors, carefully open and close the doors to test the movement. Ensure that the doors open and close smoothly without any obstructions.
- Adjust if necessary: If you notice any issues with the movement of the doors, such as sticking or misalignment, make necessary adjustments to the hinges. This may involve loosening the screws and repositioning the hinges slightly.
- Secure the other end: After successfully installing the hinges on one door, repeat the process on the other door.
Following these step-by-step instructions will help you achieve an easy and effortless installation of hinges on your bifold doors. Remember to take your time and ensure that the hinges are properly aligned and securely fastened for optimal functionality.
Gathering The Necessary Tools And Materials
Before you begin the installation process for your bifold doors, it’s important to gather all the necessary tools and materials. This will ensure that you have everything you need for a smooth and successful installation. Here are the steps to follow:
Ensure you have the right tools before you begin.
Having the right tools is essential for any DIY project, including installing hinges on your bifold doors. Here are the tools you will need:
- Screwdriver: A screwdriver is essential for attaching the hinges to the doors and the door frame. Make sure you have both a flathead and a Phillips head screwdriver to fit different types of screws.
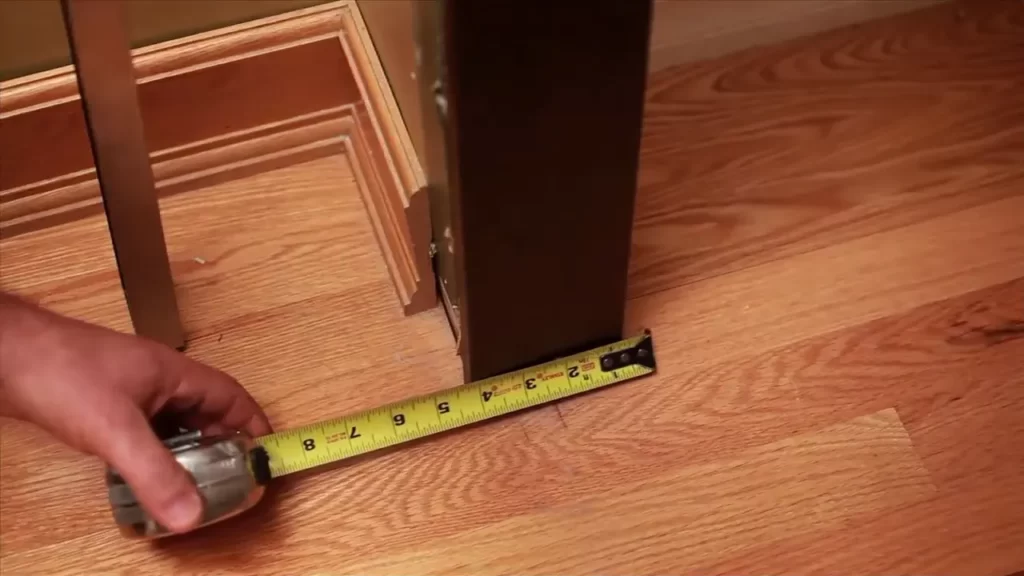
- Tape Measure: You’ll need a tape measure to accurately measure the dimensions of your bifold doors and select the right size hinges. This will ensure that the doors open and close smoothly.
- Pencil: A pencil is a simple yet important tool for marking the locations where you’ll be placing the hinges. This will help you maintain consistency and ensure that the hinges are aligned correctly.
- Chisel: A chisel is used to create mortises in the door frame for the hinges to sit flush. This is an important step for a professional-looking installation.
- Drill: Depending on the type of hinges you’re using, you may need a drill to create pilot holes before attaching the screws. This will prevent the wood from splitting and make the installation easier.
- Hinges: Of course, you’ll need the hinges themselves. There are different types of hinges available for bifold doors, including surface-mounted hinges and concealed hinges. Choose the type that best suits your needs and the style of your doors.
Measure your bifold doors and choose suitable hinges.
Before you can select the appropriate hinges for your bifold doors, you’ll need to measure the dimensions of your doors. Using a tape measure, measure the height and width of each door panel. Write down these measurements so you can refer to them later.
Once you have the measurements, you can choose the suitable hinges for your doors. Keep in mind that the size and weight of your doors will determine the type of hinges you need. Additionally, consider the style and design of your doors to ensure that the hinges complement the overall look.
With the right tools and suitable hinges, you’ll be well-prepared to move on to the next steps of installing the hinges on your bifold doors.
Properly Aligning The Doors

Bifold doors are a popular choice for many homeowners due to their space-saving design and ease of use. However, improper alignment can lead to issues such as difficulty opening and closing the doors, as well as an unsightly appearance. By following a few simple steps, you can ensure that your bifold doors are properly aligned for optimal functionality and aesthetics. In this section, we will discuss how to check if the doors are properly aligned and how to adjust the tracks and panels to create an even and seamless appearance.
Check if the doors are properly aligned
In order to determine if your bifold doors are properly aligned, start by standing back and visually inspecting the doors. Look for any gaps or uneven spaces between the panels, as well as any noticeable tilting or sagging. Additionally, try opening and closing the doors to see if they move smoothly without any obstructions or sticking points.
If you notice any alignment issues, it’s important to address them promptly to avoid further complications. Misaligned doors not only affect the functionality but can also put unnecessary strain on the hinges and other components of the system.
Adjust the tracks and panels to create an even and seamless appearance
Once you have identified any alignment issues, the next step is to adjust the tracks and panels to ensure a smooth and seamless operation. Begin by inspecting the tracks for any dirt, debris, or damage that may be interfering with the doors’ movement. Clean the tracks thoroughly and remove any obstacles that may be causing the misalignment.
Next, check the positioning of the panels within the tracks. Adjust them as needed to create an even gap between each panel and ensure that they are parallel to each other. This can be done by loosening the screws on the pivot brackets and carefully repositioning the panels within the tracks. Once the panels are back in position, tighten the screws to secure them in place.
Finally, test the doors by opening and closing them multiple times to ensure they move smoothly and without any sticking points. If necessary, make further adjustments by loosening or tightening the screws on the pivot brackets until the doors operate seamlessly.
Properly aligning your bifold doors not only enhances their functionality but also improves their overall appearance. By following these steps to check if the doors are properly aligned and adjusting the tracks and panels as needed, you can enjoy smooth operation and a visually appealing set of bifold doors in your home.
Marking The Hinge Positions
Measure and mark the positions for the hinges
When it comes to installing hinges on bifold doors, one of the most important steps is marking the hinge positions accurately. This ensures that the doors will swing open and close smoothly without any alignment issues. To begin this process, you will need a measuring tape, a pencil, and a level for precision.
To start, measure and mark the top and bottom edges of the door where the hinges will be attached. Make sure your measurements are consistent and symmetrical on both sides of the door. These markings will serve as a guide for the hinge placement.
Next, determine the height at which you want the hinges to be positioned. This will depend on the size and style of your bifold doors, but a common recommendation is to place them about 8-10 inches from the top and bottom edges of the door.
Using your measuring tape and pencil, mark the desired hinge positions on both the door and the door frame. It’s crucial to ensure that the marks align with each other when the doors are closed. Verify the accuracy of your marks by placing a level vertically against each mark. Adjust as needed to achieve a balanced and level placement.
Use a template or guide to ensure accurate placement
When it comes to installing hinges on bifold doors, accurate placement is key for proper functionality. To ensure precise alignment, consider using a template or guide specifically designed for marking hinge positions.
One option is to use a pre-made hinge template, which can be purchased at most hardware stores. This template typically consists of holes or notches that match the standard hinge measurements. Simply place the template on the door or door frame, align it with the desired hinge position, and mark the corresponding holes or notches onto the surface.
If you prefer a DIY approach, create your own template using cardboard or thin plywood. Measure and mark the accurate hinge positions on the template, aligning them with the measurements you’ve already marked on the door and door frame. Cut out the marked areas on the template to create a guide. Then, place the template on the surface and mark the necessary hinge positions through the holes or cut-outs.
Using a template or guide not only saves time but also ensures consistent and accurate hinge placement, resulting in smooth and properly functioning bifold doors.
Drilling Pilot Holes
Drilling pilot holes is an essential step when installing hinges on bifold doors. This process involves creating small, guided holes that help to prevent the wood from splitting and ensure that the hinges are securely attached. By following these simple steps, you can drill pilot holes accurately and efficiently.
Drill pilot holes at the marked hinge positions
Before drilling pilot holes, it is crucial to mark the positions where the hinges will be installed on the bifold door. Take precise measurements and use a pencil or a small piece of tape to mark the spots. This will provide guidance while drilling and ensure that the hinges are aligned perfectly with the door frame.
Use an appropriate drill bit size for your hinges
Choosing the right drill bit size for your hinges is important to ensure a proper fit. Refer to the manufacturer’s instructions or measure the diameter of the hinge screws to determine the correct drill bit size. Typically, a size slightly smaller than the screw diameter is recommended for drilling pilot holes.
Once you have marked the hinge positions on the bifold door, select the appropriate drill bit and secure it in your power drill. Take care to hold the drill perpendicular to the door surface to achieve accurate drilling.
Before starting to drill, it is advisable to use clamps or support to secure the bifold door in place to prevent movement and mishaps. This will help in maintaining a steady hand during the drilling process.
Now, position the drill bit at the marked hinge position and begin drilling. Apply gentle pressure and maintain a steady pace as you drill through the door. Ensure that the drill bit goes straight into the wood, without any slant or deviation.
Once the pilot hole is drilled to the desired depth, gently remove the drill bit, making sure not to damage the surrounding wood. Repeat the process for each marked hinge position.
After completing the pilot holes, it is recommended to use a countersink bit to create a shallow recess on the surface of the pilot holes. This will allow the hinge screws to sit flush with the door surface, ensuring a neat and secure fit.
By following these steps, you will be able to drill pilot holes accurately and securely install hinges on your bifold doors. This ensures smooth operation and longevity of your doors, giving you a functional and aesthetically pleasing addition to your space.
Attaching The Hinges To The Door
Attaching the hinges to the door is a crucial step in installing bifold doors. Properly aligned and securely attached hinges ensure smooth opening and closing of the doors. In this section, we will discuss how to align the hinges with the pilot holes and secure them tightly. We will also cover the importance of double-checking the alignment to ensure the doors function properly.
Align the hinges with the pilot holes and secure them tightly
Start by aligning the hinges with the pilot holes on the door. The pilot holes should be drilled beforehand to ensure accurate alignment.
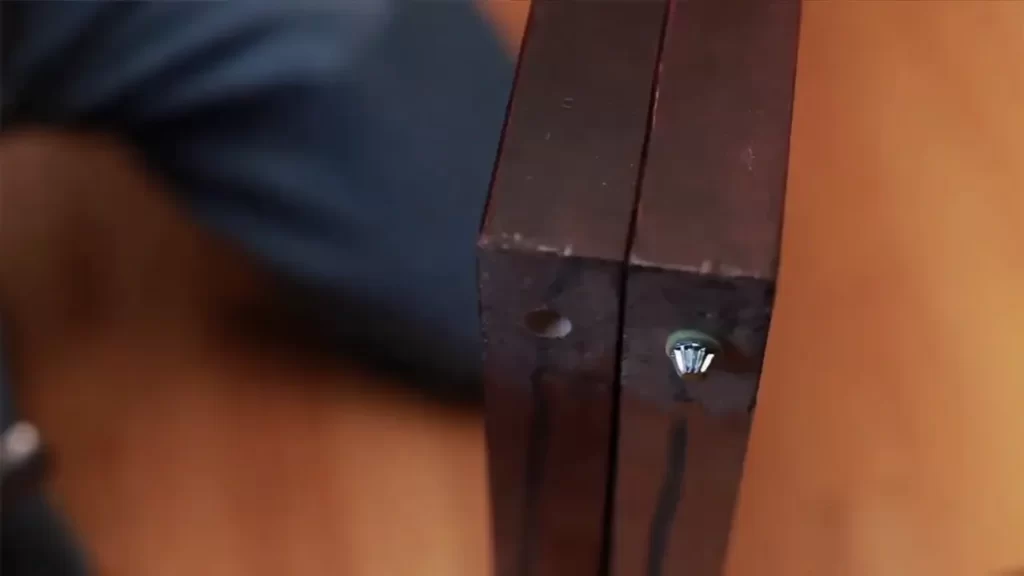
Once the hinges are aligned with the pilot holes, use screws to secure them tightly. Make sure to use screws that are appropriate for the type of material your doors are made of. This will ensure a strong and secure attachment.
To secure the hinges tightly, it is recommended to use a screwdriver or power drill. Apply pressure while screwing in the screws to ensure a tight fit. Be careful not to overtighten the screws, as this may damage the hinges or the door.
Double-check the alignment to ensure the doors open and close smoothly
After attaching the hinges to the door, it is important to double-check the alignment. This step ensures that the doors will open and close smoothly without any obstructions or misalignment.
To double-check the alignment, carefully open and close the doors a few times. Pay close attention to any resistance, sticking, or misalignment. If you notice any issues, it may be necessary to loosen the screws slightly and readjust the hinges.
Once you are satisfied with the alignment and the doors open and close smoothly, you can proceed to install the rest of the hardware and complete the installation of your bifold doors.
Installing The Hinges On The Door Frame
Installing hinges on a bifold door is a crucial step in ensuring its smooth operation and stability. When it comes to installing the hinges on the door frame, there are a few key steps to follow. In this section, we will cover how to mark and drill pilot holes on the door frame for the hinges, as well as how to attach the hinges securely using the provided screws. To begin, make sure you have all the necessary tools handy, including a drill, drill bits, a screwdriver, and the hinges with their accompanying screws. Once you have everything ready, follow these steps: **Mark and Drill Pilot Holes on the Door Frame for the Hinges** 1. Start by positioning the bifold door in its intended location within the door frame. Take note of the desired height for the hinges and mark this height on the door frame using a pencil or marker. This will ensure that the hinges are aligned properly when installed. 2. Once you have marked the desired height for the hinges, it’s time to drill pilot holes. Using an appropriately sized drill bit (typically provided with the hinges), carefully drill into the door frame at the marked locations. These pilot holes will serve as guides for the screws when attaching the hinges. 3. Repeat the process for each hinge, ensuring that the pilot holes are aligned horizontally and vertically. This will ensure that the hinges are level and properly aligned. **Attach the Hinges Securely Using the Provided Screws** 1. After drilling the pilot holes, it’s time to attach the hinges to the door frame. Begin by positioning the first hinge at the desired location on the door frame, aligning it with the previously drilled pilot holes. 2. Once the hinge is properly aligned, take one of the screws provided with the hinge and insert it into one of the pilot holes. Using a screwdriver, tighten the screw until it is securely fastened, but be careful not to overtighten as this can damage the door frame. 3. Repeat the process for the remaining pilot holes and hinges, ensuring that each screw is tightened securely. Check the alignment of the hinges as you go, making any necessary adjustments to ensure they are level and properly aligned. By following these steps, you will be able to install hinges on your bifold door with ease. Remember to take your time and double-check the alignment of the hinges as you go. With properly installed hinges, your bifold door will open and close smoothly, providing years of reliable use.
Testing The Door’S Movement

Once you have successfully installed the hinges on your bifold doors, it’s important to test their movement to ensure they open and close smoothly. This step is crucial to make sure the doors function properly and to avoid any potential issues in the future. In this section, we will cover how to test the door’s movement and make any necessary adjustments for smooth operation.
Open and close the bifold doors to check for any sticking or misalignment.
To begin, carefully open and close the bifold doors to see if there are any sticking points or misalignment. This step will help you identify any potential problems with the door’s movement. Pay close attention to whether the doors open and close smoothly or if there are any areas where they get stuck or don’t align properly. If you notice any sticking or misalignment, it’s essential to address the issue before proceeding. Ignoring these problems could lead to further damage or difficulties with the doors’ operation.
Make necessary adjustments to ensure smooth operation.
To ensure smooth operation, you may need to make some adjustments to the hinges or other components of the bifold doors. Here are a few troubleshooting tips to help you fix common issues:
- If the doors stick at certain points, you can try tightening or loosening the hinge screws. This can help realign the doors and improve their movement.
- Check if the hinges are properly aligned and seated in the door and frame. Adjust them if necessary to ensure a proper fit.
- Inspect the track and rollers for any debris or obstructions. Clean them thoroughly to ensure smooth sliding motion.
- If the doors are not aligned correctly, you may need to adjust the height of the doors by using the hinge adjustment screws. This will help position the doors properly and improve their movement.
- Ensure that the doors are not rubbing against any other surfaces, such as the floor or adjacent walls. If necessary, adjust the position of the doors or the strike plates to prevent any friction.
By following these troubleshooting tips and making the necessary adjustments, you can ensure that your bifold doors operate smoothly and without any sticking or misalignment issues. Regularly testing and maintaining the movement of your doors will help extend their lifespan and ensure their continued functionality.
Adjusting The Hinge Tension
Adjusting the hinge tension is an important step in the installation of bifold doors. It allows you to find the right balance that prevents the doors from swinging open or closing too abruptly. By loosening or tightening the hinge screws, you can easily adjust the tension to ensure smooth and controlled movement of the doors. In this section, we will guide you through the process of adjusting the hinge tension to achieve the desired results.
Loosen or tighten the hinge screws to adjust the tension
To begin adjusting the hinge tension on your bifold doors, you will need to locate the screws on the hinges. These screws are responsible for holding the doors in place and determining the amount of tension applied. By loosening or tightening these screws, you can easily adjust the tension to your preference. First, ensure that the doors are closed and aligned properly. Then, using a screwdriver, locate the hinge screws on each hinge and determine whether you need to loosen or tighten them. If the doors are swinging open too easily or not staying closed, you will need to tighten the hinge screws. Begin by turning the screws clockwise, gradually increasing the tension until the desired resistance is achieved. It is important not to overtighten the screws, as this can lead to unnecessary stress on the hinges. On the other hand, if the doors are closing too abruptly or not opening smoothly, you will need to loosen the hinge screws. Turn the screws counterclockwise, gradually reducing the tension until the doors move freely and easily without swinging open or closing abruptly.
Find the right balance to prevent the doors from swinging open or closing too abruptly
The key to adjusting the hinge tension successfully is finding the right balance. You want the doors to operate smoothly, without excessive force required to open or close them. Start by making small adjustments and testing the doors after each adjustment. It may take a few tries to find the perfect tension. Remember, you want the doors to remain closed when not in use but open and close smoothly without any resistance. Keep in mind that different variables, such as the weight and size of the doors, as well as the condition of the hinges, may affect the required tension. Take your time to find the optimal tension that works best for your bifold doors. In conclusion, adjusting the hinge tension on bifold doors is a crucial step in ensuring their smooth operation. By loosening or tightening the hinge screws, you can find the right balance that prevents the doors from swinging open or closing too abruptly. Take the time to make small adjustments and test the doors until you achieve the desired tension. With properly adjusted hinges, your bifold doors will provide convenience and functionality to your space.
Adding Lubrication For Smooth Operation
One of the key factors in ensuring smooth operation of bifold doors is the correct installation of hinges. However, even with proper installation, friction can occur over time, making it difficult to open and close the doors. This is where adding lubrication to the hinges becomes crucial. By applying a suitable lubricant to the hinges, you can reduce friction and ensure long-lasting performance. Let’s take a closer look at how you can easily add lubrication to your bifold door hinges.
Apply a lubricant to the hinges to reduce friction and ensure long-lasting performance

To start with, you’ll need to gather some essential tools and materials for the task at hand. Make sure you have a suitable lubricant specifically designed for hinges, such as silicone spray or white lithium grease. It’s important to choose a lubricant that is non-staining and specifically formulated for use on hinges. Additionally, keep a clean cloth or paper towel handy to wipe off any excess lubricant during the application process.
Once you have everything you need, follow these steps to apply the lubricant:
- Start by fully opening the bifold doors to gain easy access to the hinges. This will allow you to apply the lubricant more effectively.
- Identify the hinge pins on each door panel. These are the metal rods that go through the hinges and provide the pivotal point for opening and closing.
- Using a gentle twisting motion, remove the hinge pins from each door panel. This can usually be done by hand, but you may need to use a small hammer or a flathead screwdriver to tap the pins out if they’re stuck.
- Once the pins are removed, inspect them for any signs of rust or dirt. If necessary, clean the pins with a metal cleaner or some rubbing alcohol and a clean cloth.
- Next, apply a small amount of lubricant to each hinge pin. Be careful not to over-apply, as too much lubricant can attract dust and dirt and cause additional friction.
- After applying the lubricant, reinsert the hinge pins into the hinge barrels. Make sure the pins are fully inserted and secure in place.
- Finally, repeat the process for each hinge on the bifold doors, ensuring all pins are properly lubricated.
By following these simple steps to apply lubrication to your bifold door hinges, you can significantly reduce friction and achieve a smooth, effortless operation. Remember, regular maintenance is key to keeping your hinges in optimal condition.
Regularly maintain the hinges to prevent rust and keep them in optimal condition
In addition to adding lubrication, regularly maintaining your bifold door hinges is essential for their long-term performance. Here are some maintenance tips to keep in mind:
- Inspect the hinges periodically for any signs of wear, rust, or damage. If you notice any issues, address them promptly to prevent further damage.
- Keep the hinges clean by wiping them down with a damp cloth or using a mild detergent if necessary. Avoid using abrasive cleaners that may damage the hinges.
- Check the tightness of the hinge screws regularly and tighten them if necessary. Loose screws can lead to misalignment and difficulty in operating the doors.
- Consider applying a rust-inhibiting spray to the hinges to protect them from corrosion, especially if you live in a humid or coastal area.
By incorporating regular maintenance into your routine, you can extend the lifespan of your bifold door hinges and ensure they continue to operate smoothly for years to come.
Frequently Asked Questions Of How To Install Hinges On Bifold Doors
What Kind Of Hinges Do You Use For Bifold Doors?
Bifold doors typically use piano hinges which allow them to fold and unfold smoothly. These hinges are commonly used for their durability and ability to support the weight of the doors.
How Do You Install Hardware On A Bifold Door?
To install hardware on a bifold door, follow these steps: 1. Measure and mark where you want the hardware to be placed. 2. Pre-drill holes at the marked spots. 3. Attach the hinges to the door frame using screws. 4. Install the pivot and guide pins on the top and bottom of the door.
5. Finally, align the door with the opening and test its smooth operation.
How Does A Bifold Hinge Work?
A bifold hinge works by connecting two panels together, allowing them to fold in and out. This hinge uses multiple pivot points, enabling the panels to move smoothly and fold in a compact manner. It is commonly used in folding doors and cabinets to save space.
Where Does Hardware Go On Bifold Doors?
The hardware for bifold doors is typically installed at the top and bottom corners of each door panel.
How Do You Install Hinges On Bifold Doors?
To install hinges on bifold doors, start by determining the correct placement on the door and the frame. Next, use a chisel to create mortises for the hinges. Secure the hinges with screws and ensure they are aligned properly. Finally, check the door movement to ensure it opens and closes smoothly.
What Tools Are Needed To Install Hinges On Bifold Doors?
To install hinges on bifold doors, you will need a chisel, a screwdriver, a drill (optional), screws, and a measuring tape. These tools will help you accurately measure, cut mortises, and secure the hinges in place.
Conclusion
To sum up, installing hinges on bifold doors is a straightforward process that can greatly enhance the functionality and aesthetics of your space. By following the steps outlined in this guide, you’ll be able to tackle this DIY project with confidence.
Remember to choose the right hinges for your doors, accurately measure and mark the position, and take your time during the installation. With a little patience and precision, you’ll have smoothly functioning bifold doors in no time. Start enjoying the benefits of these versatile doors today!