To install a barn door track, first, gather all the necessary tools and materials. Then, attach the track to the wall or ceiling using the included screws and anchors, ensuring it is level.
Now you are ready to hang the door on the track, sliding it into place and securing it with the provided hardware.
Step 1: Gather The Necessary Tools And Materials
Before you can begin installing a barn door track, it’s essential to gather all the necessary tools and materials for the job. Having everything you need upfront will save you time and frustration, ensuring a smoother installation process.
Tools Needed for Barn Door Track Installation:
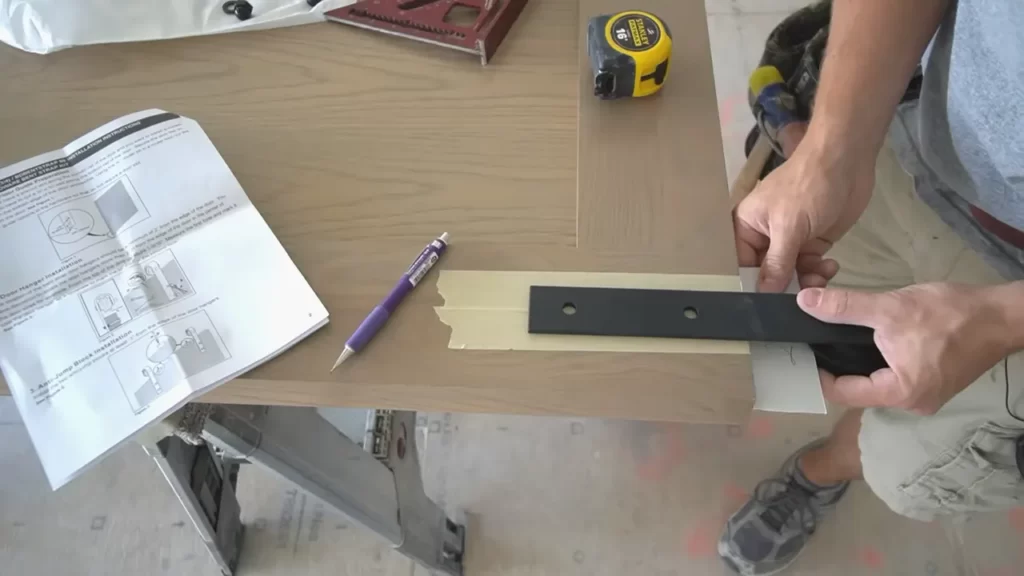
To get started, make sure you have the following tools:
- Power drill
- Measuring tape
- Level
- Pencil
- Screwdriver (either Phillips or flat-head, depending on the screws used)
- Socket wrench
- Wrench set
- Chisel
- Stud finder
- Hammer
Materials Needed for Barn Door Track Installation:
In addition to the tools, you’ll also need the following materials:
- Barn door track kit (including the track, hangers, and hardware)
- Barn door
- Screws
- Wall anchors (if necessary)
- Shims (if needed for leveling)
Make sure you have all these tools and materials on hand before proceeding with the installation. This way, you won’t find yourself scrambling or making multiple trips to the store.
Now that you have everything you need, let’s move on to the next step: measuring and marking the placement of the barn door track.
Step 1.1: Measure And Prepare The Door Opening
Accurately measuring and preparing the door opening is the crucial first step in installing a barn door track. Taking the time to ensure that your measurements are precise and that your door opening is suitable for a barn door track will ensure a smooth installation process.
Accurately measure the door opening for track installation
Before you begin the installation process, it is essential to accurately measure the dimensions of your door opening. This will help you determine the appropriate size of the barn door track you will need.
To measure the door opening, follow these simple steps:
- Start by measuring the width of the door opening from side to side. Use a measuring tape to obtain an accurate measurement in inches or centimeters.
- Next, measure the height of the door opening from top to bottom, again using a measuring tape.
- Once you have these measurements, you can determine the length of the barn door track that you will need. The track should be at least twice the width of the door opening. This will ensure that the barn door can slide open fully, allowing for maximum accessibility.
By accurately measuring the door opening, you can ensure that the barn door track you choose will fit properly and provide seamless functionality.
Ensure the door opening is suitable for a barn door track
While measuring the dimensions of the door opening is important, it’s equally crucial to ensure that the door opening is suitable for a barn door track installation. Here are some factors to consider:
- Check the space above the door opening to ensure there is enough clearance for the barn door track and hardware.
- Ensure that the surrounding wall is strong enough to support the weight of the barn door. If necessary, reinforce the wall with additional studs or supports.
- Inspect the flooring to ensure it is level and stable. Uneven or weak flooring can impact the smooth operation of the barn door.
- If the door opening has trim or molding, consider removing it or adjusting it to accommodate the barn door track. This will ensure a proper fit and a clean aesthetic.
By ensuring the door opening is suitable for a barn door track, you can avoid any potential installation issues and ensure that your barn door operates smoothly and securely.
Step 1.2: Select The Right Barn Door Track System
When it comes to installing a barn door track, one of the most crucial steps is selecting the right track system for your needs. There are different types of barn door track systems available in the market, each with its own unique features and benefits. In this step, we will explore the different options and help you choose a track system that suits your door and aesthetic preferences.
Consider the different types of barn door track systems available
Before diving into the selection process, it’s essential to be aware of the variety of barn door track systems available out there. Here are some popular types:
- Standard Track System: This is the most common and traditional option, featuring a metal track installed above the doorway. It provides stability and durability, making it suitable for heavy doors.
- Box Track System: This system comprises a metal track enclosed within a box-like structure, offering a sleek and minimalist appearance. It is ideal for modern and contemporary design aesthetics.
- Flat Track System: Known for its rustic charm, the flat track system features a vintage-inspired metal track with exposed wheels. It adds character and a touch of nostalgia to any space.
- Double Track System: If you have two barn doors that need to slide independently, the double track system is the right choice. It consists of two parallel tracks, allowing each door to operate separately.
Take your time to research and explore these different options, considering the style of your door and the overall look you want to achieve.
Choose a track system that suits your door and aesthetic preferences
Once you are familiar with the different types of barn door track systems, it’s time to select the one that best suits your specific needs. Consider the following factors:
- Door Weight: Ensure that the track system you choose can support the weight of your door. This information is typically provided by the manufacturer.
- Track Length: Measure the width of your doorway and select a track system with an appropriate length. Make sure to account for any additional space required for the door to slide smoothly.
- Aesthetic Appeal: Your barn door track system should complement the overall aesthetic of your space. Whether you prefer a modern, rustic, or industrial look, there is a track system available to match your style.
- Hardware Quality: Different track systems come with varying levels of quality. Opt for a track system made from durable materials that will stand the test of time.
By considering these factors, you can select a track system that not only functions well but also enhances the visual appeal of your barn door. Remember to take precise measurements and consult with the manufacturer or a professional if needed.
In conclusion, selecting the right barn door track system is an important step in ensuring a successful installation. By understanding the different types of track systems available and considering factors such as door weight, track length, aesthetic appeal, and hardware quality, you can choose a track system that meets your needs and brings your barn door installation project to life.
Step 2: Install The Barn Door Track Mounting Board
After you have prepared the area and marked the placement for your barn door track, it’s time to move on to the next step: installing the barn door track mounting board. The mounting board serves a crucial purpose in providing a sturdy foundation for your barn door track, ensuring that it is properly secured to the wall.
Explain the purpose of mounting board installation
The mounting board is essential for evenly distributing the weight of the barn door and preventing any strain on the wall. It acts as a supportive structure, allowing you to properly mount the barn door track and creating a smooth sliding motion for your door. By attaching the barn door track to the mounting board, you ensure that your barn door operates efficiently and minimizes the risk of any damage or misalignment.
Guide readers on how to properly install the mounting board
Follow these steps to ensure a successful installation of the barn door track mounting board:
- Measure and mark the desired height of the mounting board on the wall, taking into consideration the height of your barn door and the recommended clearance above the floor. This will ensure that your barn door operates smoothly without any obstructions.
- Using a stud finder, locate the wall studs within the marked area. Ideally, you want to secure the mounting board to the studs for maximum stability. Mark the stud locations on the wall.
- Position the mounting board against the wall, aligning it with the marked height and stud locations. Make sure it is level, using a bubble level, to ensure a straight and even installation.
- Secure the mounting board to the wall by driving screws through the pre-drilled holes in the board and into the wall studs. Use a power drill or screwdriver for this step, ensuring that the screws penetrate the studs for a secure attachment.
- Double-check the levelness of the mounting board to correct any adjustments if necessary. This will ensure that your barn door track will be properly aligned for smooth sliding.
Once the mounting board is securely installed, you can proceed to the next step in installing your barn door track. The mounting board will provide a solid foundation for your barn door track, ensuring that you can enjoy effortless sliding and long-lasting functionality.
Step 2.1: Position The Mounting Board
Determine the correct placement for the mounting board
Positioning the mounting board is a crucial step in installing a barn door track. The mounting board serves as the base for attaching the track and ensuring the door’s stability and proper functioning. Follow these steps to determine the correct placement:
- Measure the doorway: Begin by measuring the width of the doorway where the barn door will be installed. This measurement will help you determine the length of the mounting board needed.
- Consider the door size: Take into account the size of the barn door and the recommended overlap on each side when deciding on the placement of the mounting board. The overlap ensures privacy and prevents light leakage when the door is closed.
- Find the centerline: Use a measuring tape to find the centerline of the doorway. This will be the starting point for positioning the mounting board.
- Mark the positions: Mark the desired positions of the mounting board on the wall or trim. These marks will serve as reference points during the installation process.
Provide tips on aligning the board accurately
To ensure the mounting board is aligned accurately, follow these useful tips:
- Use a level: Place a level on top of the mounting board to check for any slopes or uneven surfaces. Adjust the positioning as necessary to ensure a level installation.
- Secure the board firmly: Use appropriate screws or anchors to fasten the mounting board securely to the wall. This will prevent any movement or instability when the barn door is in use.
- Double-check measurements: Before drilling any holes or attaching the board, double-check all measurements to ensure accuracy. Mistakes in measurements can cause misalignment and affect the overall functionality of the barn door.
- Seek assistance if needed: If aligning the mounting board accurately feels challenging or overwhelming, don’t hesitate to ask for help from a friend or a professional. They can provide an extra set of eyes and ensure precise alignment.
Step 2.2: Secure The Mounting Board
Congratulations on reaching Step 2.2 of the barn door installation process! Securing the mounting board is a crucial step towards ensuring the stability and durability of your barn door track. In this step, we will explain the process of securing the board to the wall and show you different methods to achieve the desired stability. Let’s dive in!
Process of Securing the Board to the Wall
To begin with, gather all the necessary tools and materials for this step. You will need a drill, screws suitable for mounting on your wall type, a level, and a measuring tape. Follow these simple steps to securely attach the mounting board to the wall:
- Using a measuring tape, accurately measure and mark the desired height for the mounting board.
- Hold the mounting board against the wall, aligning it with the marked height.
- Ensure the board is level by using a level tool. Make adjustments as necessary.
- Once the board is level, use the drill to create pilot holes through the board and into the wall.
- Securely fasten the mounting board to the wall by driving screws through the pilot holes. Be sure to choose screws that are appropriate for your wall type (e.g., wood studs, drywall anchors).
- Double-check the board’s level and adjust if needed to guarantee a straight and even installation.
Different Methods for Ensuring Stability
There are several methods you can employ to ensure the stability of the mounting board. Consider the following options:
- Using Anchor Bolts: Anchor bolts are commonly used for securing mounting boards to concrete or masonry walls. These bolts provide a strong and reliable connection that can withstand the weight of the barn door.
- Utilizing Wall Studs: If your wall has wooden studs, attaching the mounting board directly to them can offer exceptional stability. Locate the studs using a stud finder and fasten the board securely onto the studs.
- Adding Reinforcement: For extra support, you may consider adding reinforcement to the mounting board. This can be achieved by attaching additional blocks of wood or metal brackets to the board and then securing them to the wall.
By utilizing these different methods, you can ensure a stable and secure installation of your barn door track. Taking the time to securely fasten the mounting board will provide a solid foundation for the rest of the installation process. Remember, a properly installed barn door track will not only enhance the aesthetic appeal of your space but also offer functionality and ease of use.
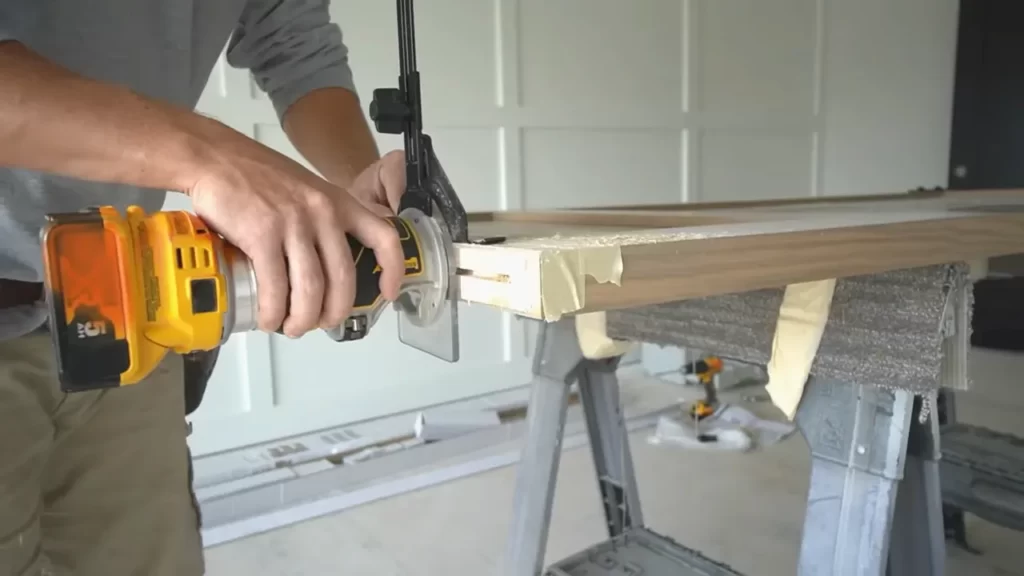
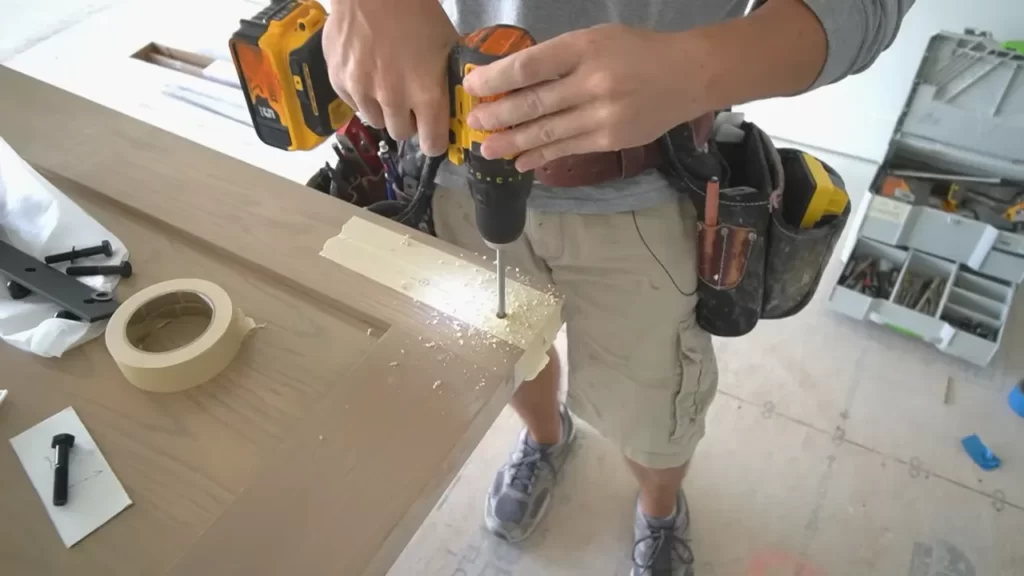
Step 2.3: Attach The Barn Door Track To The Mounting Board
Detail how to attach the track to the installed mounting board
Once you have securely mounted the board on the wall, it’s time to attach the barn door track. This step is crucial as it ensures a stable and smooth sliding motion for your barn door. Here, we provide step-by-step instructions to guide you through the process of attaching the track to the mounting board.
- Evaluate the positioning: Begin by assessing the exact placement of the barn door track on the mounting board. Take into account the door’s height and ensure that the track is positioned at the desired height on the board.
- Mark the hole locations: Using a pencil or marker, mark the location of the screw holes as indicated by the barn door track. These holes will be used to secure the track to the board later on.
- Drill pilot holes: Using an appropriately sized drill bit, create pilot holes at the marked locations. These pilot holes will prevent the wood from splitting when the screws are inserted.
- Prep the track: Before attaching the track, ensure that it is clean and free from any debris or dust. Wipe it down with a damp cloth if necessary, to ensure a secure attachment.
- Align the track: With the pilot holes now in place, align the barn door track with the holes on the mounting board. Ensure that the track is straight and level.
- Secure the track: Insert the screws provided with the barn door track into the pilot holes. Using a screwdriver or a drill, tighten the screws until the track is securely fastened to the mounting board. Be careful not to overtighten and strip the screw holes.
With these simple yet effective steps, you can now confidently secure the barn door track to the mounting board. It’s important to take your time and follow the instructions carefully to ensure a secure and hassle-free installation.
Step 3: Hang And Adjust The Barn Door
Once you have successfully assembled and installed the barn door track, it’s time to move on to the exciting part – hanging and adjusting the barn door itself. This step is crucial for ensuring that your barn door operates smoothly and securely. In this section, we will guide you through the process of hanging the door on the track and provide helpful tips on adjusting it for proper functionality.
Explain the process of hanging the barn door on the track
To hang the barn door on the track, follow these steps:
- Start by attaching the rollers to the top edge of the door. Make sure to align them symmetrically on both sides to ensure the door hangs evenly. Use the provided screws or bolts to secure the rollers firmly in place.
- Once the rollers are attached, lift the door up and position it against the track. The wheels of the rollers should glide smoothly along the track. Take note of any obstructions or tight spots that may hinder the door’s movement.
- Next, carefully slide the door onto the track. Make sure to engage the wheels of the rollers with the track, ensuring a secure connection. This can be done by gently lifting the door and allowing the wheels to fit into the track.
- As the door hangs on the track, check if it is level and plumb. Use a level and a tape measure to ensure that the door is straight vertically and horizontally. Make any necessary adjustments to the position of the track or the door itself to achieve a perfect fit.
- Once the door is properly aligned, secure the track to the wall using the provided screws or anchors. Ensure that the track is firmly attached and can support the weight of the door.
By following these steps, you can successfully hang your barn door on the track, creating a visually appealing and functional addition to your space.
Provide guidance on adjusting the door for proper functionality
To ensure that your barn door operates smoothly and functions properly, it may be necessary to make some adjustments. Here are some helpful tips:
- If the door is rubbing or sticking against the track, you can adjust the roller height by turning the adjustment screws at the bottom of the door. This will raise or lower the door slightly, allowing for smoother movement.
- If the door is not sliding smoothly along the track, check for any debris or obstacles that may be interfering with the wheels. Clean the track and wheels, removing any dirt or dust that could hinder the door’s movement.
- If the door is swinging or sagging, you can adjust the position of the track to correct the alignment. Loosen the screws holding the track in place, slightly shift it up or down, and tighten the screws again. This will help the door hang properly and prevent unnecessary swinging.
- For a quieter sliding door, you can apply a lubricant, such as silicone spray, to the wheels and track. This will reduce friction and noise, ensuring a smoother and more enjoyable experience when opening or closing the barn door.
By making these adjustments, you can optimize the functionality of your barn door, ensuring that it operates seamlessly and adds a touch of charm to your space.
Step 3.1: Hang The Barn Door On The Track
Once you have successfully installed the barn door track, the next step is to hang the door onto the track. This step is crucial as it ensures the smooth operation and proper functioning of the barn door. Following the correct procedure will help you achieve a secure and aesthetically pleasing installation.
Explain how to properly hang the door onto the installed track

To hang the barn door on the track, you will need to follow these steps:
- Begin by positioning the hangers at the top edge of the barn door. It is essential to ensure that they align with the track’s mounting holes perfectly.
- Once aligned, secure the hangers using the provided bolts or screws, depending on the type of hanger system you have chosen. Make sure they are tightened securely to prevent any movement or instability.
- Next, carefully lift the barn door and position it in front of the track. Engage the hangers into the track by inserting them into the designated slots. Move the door back and forth to make sure it glides smoothly along the track.
- Once the door is securely hanging on the track, check its alignment. Ensure that it is level and plumb. Adjust the hangers if necessary to achieve proper alignment.
- Finally, test the door’s movement by sliding it along the track. Make sure it opens and closes smoothly without any obstruction or resistance. If any adjustments are needed, make them accordingly.
Provide tips for smooth installation
For a hassle-free installation and optimal performance, consider the following tips:
- Ensure that the track is securely installed and level before attempting to hang the barn door. A stable base will prevent any wobbling or misalignment.
- Use a level to check the vertical alignment of the door while hanging it on the track. This will help avoid any uneven or crooked appearance.
- Apply a lubricant, such as silicone spray or graphite powder, to the track for smoother sliding action. This will minimize friction and prolong the lifespan of the door and track.
- Regularly inspect the hangers and track for any signs of wear or damage. Tighten any loose bolts or screws and replace any worn-out components to ensure the longevity and proper functioning of the barn door system.
- If you encounter any difficulties during the installation process, refer to the manufacturer’s instructions or seek professional assistance. They can provide guidance and ensure a successful installation.
By following these installation tips, you can hang your barn door on the track with ease and confidence. A properly hung barn door not only adds a touch of rustic charm to your space but also provides functional convenience. So, get ready to enjoy the benefits of a stylish and functional barn door!
Step 3.2: Adjust The Door Height And Alignment
Guide readers on adjusting the door height and ensuring proper alignment
When it comes to installing a barn door track, adjusting the door height and ensuring proper alignment are crucial steps. In this guide, we will walk you through step 3.2, where you will learn how to adjust the door height and align it correctly. Let’s get started!
Techniques for troubleshooting common alignment issues
If you encounter any alignment issues while installing your barn door track, don’t worry! We have got you covered. Here are some techniques to troubleshoot common alignment problems:
- Check the track installation: Ensure that the track is securely installed on the wall and is level. Use a level tool to verify the track’s alignment. If it is not level, adjust the screws or brackets to correct the alignment.
- Inspect the door hangers: Examine the door hangers and make sure they are aligned properly. Adjust the hangers by loosening the screws and sliding them along the track until the door is aligned correctly.
- Measure the door height: Use a tape measure to measure the distance between the top of the door and the track. Adjust the door height by loosening the screws on the hangers and moving the door up or down until it aligns perfectly with the track.
- Inspect the floor guide: If your barn door has a floor guide, ensure it is aligned and positioned correctly. Adjust the floor guide by loosening the screws and moving it until the door glides smoothly along the track without any obstructions.
In addition to these techniques, you may also need to make small adjustments to the door’s height and alignment as you continue with the installation process. Remember, achieving the perfect alignment may require some trial and error. Take your time and make small adjustments until you are satisfied with the door’s height and alignment.
By following these techniques, you will be able to troubleshoot common alignment issues and ensure that your barn door track functions smoothly. Stay tuned for the next step in our installation guide!
Step 3.3: Test The Door Operation
Now that you have successfully installed your barn door track, it’s time to ensure that the door operates smoothly and efficiently. Testing the door’s functionality is crucial to verify that everything is in place and that the door glides effortlessly along the track. By following these steps, you can ensure that your barn door is fully functional and ready for use.
Detail how to test the door’s functionality after installation
Here’s a step-by-step guide on how to test the door’s operation:
- First, fully close the door and check if it aligns properly with the doorway. The door should be flush with the wall and should not rub against the frame or any obstructions.
- Next, slowly slide the door open along the track. Pay attention to any resistance or friction. The door should move smoothly and effortlessly.
- Try opening and closing the door at different speeds to observe if there are any issues. It should glide gracefully without any jerking or sticking points.
- Check the door’s balance by opening it halfway. If the door remains stable in that position without sliding open or closed, it is properly balanced.
- Test the door’s closing mechanism by gently pushing it closed. It should smoothly and securely latch into place without any gaps or misalignments.
- Inspect the door’s bottom guide or floor guide to ensure that it is correctly installed and aligned. The guide should keep the door in a straight line and prevent any swinging motion.
By following these steps, you can easily assess the functionality of your newly installed barn door. Testing the door’s operation is essential to identify and rectify any potential issues or misalignments. By ensuring smooth operation, you can enjoy the convenience and aesthetic appeal of your barn door for years to come.
Step 4: Finishing Touches And Maintenance
Congratulations on successfully installing your barn door track system! Now, it’s time to add those finishing touches that will complete the installation and ensure the longevity of your barn door track. In this step, we’ll provide you with tips on completing the installation with finesse and share important maintenance guidelines to keep your barn door track system functioning smoothly.
Provide Tips for Completing the Installation with Finishing Touches
To give your barn door track system that polished look, it’s essential to pay attention to the finishing touches. Here are some tips to make sure you achieve the desired aesthetic and functionality:
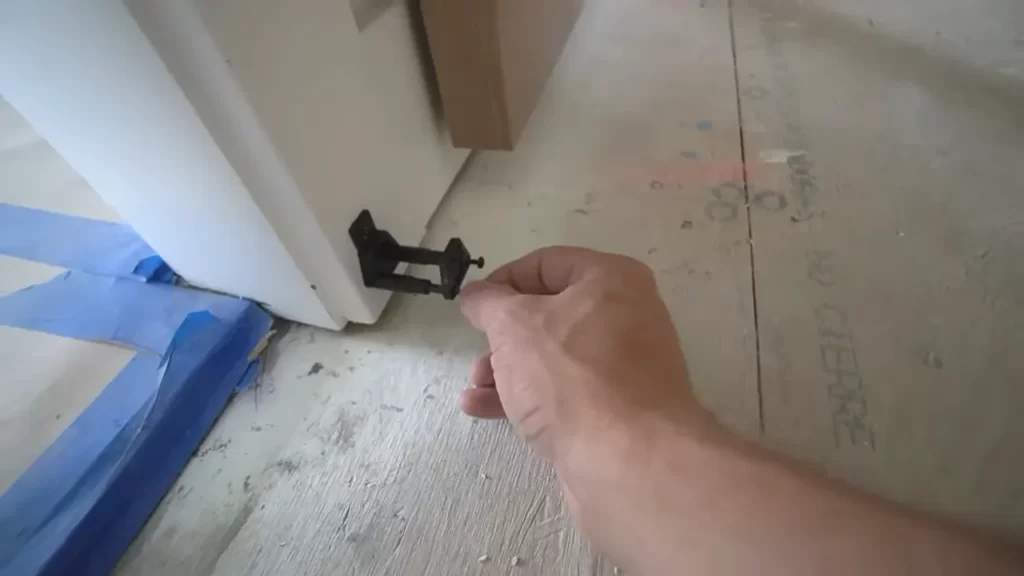
- Secure the door stop: Install a door stopper at the end of the track to prevent the barn door from sliding off the track. This adds an extra layer of safety and stability.
- Attach a handle or pull: Adding a handle or pull to your barn door not only enhances its visual appeal but also makes it easier to open and close. Choose a handle that complements the overall design of your door.
- Apply a protective finish: If your barn door is made of wood, consider applying a protective finish that suits your style preferences. This helps to protect the wood from scratches, moisture, and other potential damage.
Explain How to Properly Maintain the Barn Door Track System
Proper maintenance is key to ensuring the longevity and smooth operation of your barn door track system. Here are some important steps to follow:
- Regular cleaning: Dust and debris can accumulate on the track and hinder the smooth movement of the door. Wipe the track and rollers with a dry or slightly damp cloth to remove any dirt or grime. Avoid using harsh chemicals that may damage the track’s finish.
- Lubrication: Apply a high-quality lubricant specifically designed for barn door tracks to keep the rollers running smoothly. Regular lubrication will prevent squeaking and prolong the lifespan of the system.
- Check for loose screws and bolts: Over time, the constant movement of the barn door can loosen screws and bolts. Regularly inspect the different components of the track system and tighten any loose screws or bolts to maintain stability.
- Monitor door alignment: Keep an eye on the alignment of the barn door. If you notice any misalignment or sticking, check the track for any obstructions or debris that may be causing the issue. Make necessary adjustments to ensure smooth operation.
- Inspect for wear and tear: Regularly inspect the rollers, track, and other components for signs of wear and tear. Look for any cracks, dents, or damage that may affect the performance. Replace any worn-out parts promptly to prevent further damage.
By following these tips for completing the installation with finishing touches and properly maintaining your barn door track system, you can enjoy its beauty and functionality for years to come.
Step 4.1: Install Door Stops And Handles
After successfully installing the barn door track, it’s time to move on to installing the door stops and handles. This step is crucial for ensuring the proper functioning and aesthetic appeal of your barn door. In this section, we will guide you through the process of installing door stops and handles, highlighting the considerations for their proper placement.
Guide readers on installing door stops and handles
Your barn door stops and handles are essential components that not only add functionality but also contribute to the overall design of your barn door. Here, we will provide you with a step-by-step guide to installing these components:
- Start by determining the ideal placement for the door stops. These stops will prevent the door from sliding off the track when fully opened or closed. Measure and mark the locations on the wall where the stops will be installed.
- Next, attach the door stops using screws or nails. Ensure that they are securely fastened to the wall at the marked locations.
- For handles, consider the height and positioning that would be most comfortable and natural for opening and closing the barn door. Measure and mark the desired handle placement on the door.
- Once you have determined the handle placement, attach the handles using the provided screws or bolts. Make sure the handles are firmly secured to the door, allowing for a smooth grip.
Mention considerations for proper placement
When installing door stops and handles, there are a few essential considerations to keep in mind to ensure proper placement:
- Door Stop Placement: Install the door stops at a point where the door’s fully open and closed positions align with your desired stopping point. This will prevent the door from hitting walls or other obstacles.
- Handle Height: Consider the convenience and accessibility of the handle placement. Typically, handles are installed at a height that is comfortable for most users to reach without straining.
- Handle Positioning: Aim for a handle position that allows for a natural and comfortable grip. It’s recommended to position the handle approximately one-third of the way up from the bottom of the door, but you can adjust this based on your specific needs and preferences.
- Door Thickness: Depending on the thickness of your barn door, you may need to choose door stops and handles that are suitable for the door’s thickness. Double-check product specifications to ensure compatibility.
By following these guidelines for installing door stops and handles, you can ensure proper functionality and enhance the overall appearance of your barn door. Take the time to measure and position these components correctly, and you’ll enjoy a smooth, stylish barn door that adds both charm and practicality to your space.
Step 4.2: Apply A Protective Finish
Applying a protective finish to your barn door is an essential step to ensure its longevity and maintain its beauty over time. A protective finish not only enhances the appearance of the door, but it also acts as a barrier against moisture, stains, and scratches. By following these instructions, you can easily apply a protective finish to your barn door and enjoy its benefits for years to come.
Benefits of Applying a Protective Finish to the Door
When you apply a protective finish to your barn door, you are adding an extra layer of protection that helps to extend its lifespan. Here are some key benefits of applying a protective finish:
- Moisture Resistance: A protective finish creates a barrier that prevents moisture from seeping into the wood, preventing swelling, warping, and rotting.
- Stain Resistance: The finish seals the pores of the wood, making it less susceptible to stains from spills or other mishaps.
- Scratch Resistance: The protective layer acts as a shield against scratches and dings, keeping your barn door looking new and pristine.
- Enhanced Durability: Applying a protective finish strengthens the wood, making it more durable and resilient to daily wear and tear.
- Easy Maintenance: A finished barn door is easier to clean and maintain, requiring only regular dusting or wiping with a damp cloth.
Instructions for Applying the Finish
Now that you understand the benefits of applying a protective finish, let’s dive into the step-by-step instructions on how to apply it to your barn door:
- Clean the Surface: Start by cleaning the barn door surface thoroughly to remove any dust, dirt, or debris that could affect the finish.
- Choose the Right Finish: Select a protective finish that suits your preference and the type of wood used for your barn door. Common options include varnish, polyurethane, and lacquer.
- Prepare the Finish: Follow the instructions on the product label to prepare the finish. This may involve stirring or shaking the can to ensure proper consistency.
- Apply the Finish: Using a clean brush, apply the finish in long, even strokes, following the wood grain. Start at one end of the door and work your way towards the other end. Apply a thin coat, allowing it to dry completely before adding additional coats as needed.
- Sand Between Coats: For a smoother finish, lightly sand the surface between coats using fine-grit sandpaper. Wipe away any dust before applying subsequent coats.
- Protect and Cure: Once you have achieved the desired number of coats, allow the finish to cure according to the manufacturer’s instructions. This may involve a few days or weeks depending on the specific product.
By following these instructions and taking the time to apply a protective finish, you can ensure that your barn door remains beautiful and durable for years to come.
Step 4.3: Maintain And Clean The Track System
In order to keep your barn door track system functioning smoothly and looking its best, regular maintenance and cleaning are essential. By giving your track system some extra care and attention, you can ensure its longevity and prevent any potential issues down the line. Follow these tips to keep your barn door track system in optimal condition:
Explain the importance of regular maintenance and cleaning
Regular maintenance and cleaning of the barn door track system are important for a few reasons. Firstly, dust, dirt, and debris can accumulate on the track, hindering the smooth movement of the door. Secondly, without proper maintenance, the track can become dry and rusty, which can lead to operational difficulties. Lastly, a clean and well-maintained track system not only enhances the door’s functionality but also contributes to the overall aesthetic appeal of your barn.
Offer tips for keeping the track system in optimal condition
| 1. Remove dirt and debris regularly |
| Use a soft brush or a vacuum cleaner with a brush attachment to gently remove any dirt or debris that may have accumulated on the track. Be sure to clean both the top and bottom surfaces of the track thoroughly. This will help to prevent the buildup of particles that can interfere with the smooth movement of the door. |
| 2. Wipe the track with a damp cloth |
| After removing the dirt and debris, wipe the track with a damp cloth to remove any remaining residue. Make sure to dry the track thoroughly to prevent any moisture from causing rust or other damage to the metal surface. |
| 3. Lubricate the track |
| Apply a small amount of lubricant, such as silicone spray or a light oil, to the track to ensure smooth and quiet operation. Avoid using heavy grease or oil, as they can attract dust and dirt, causing more harm than good. |
| 4. Check for loose screws or bolts |
| Regularly inspect the track system for any loose screws or bolts. Tighten them as necessary to maintain the stability and proper functioning of the track. |
By following these maintenance and cleaning tips, you can keep your barn door track system in optimal condition, ensuring smooth operation and a longer lifespan for your barn door.
Frequently Asked Questions For How To Install A Barn Door Track
How Do You Put A Barn Door On Track?
To put a barn door on track, follow these steps: 1. Install the track securely onto the wall above the doorway. 2. Attach the hangers to the top of the barn door. 3. Hang the door onto the track by sliding the hangers into it.
4. Adjust the door level and secure it in place. 5. Test the door’s movement to ensure it operates smoothly on the track.
How Do You Install A Barn Door Track With Soft Close?
To install a barn door track with soft close, follow these steps: 1. Begin by measuring and marking the desired location for the track. 2. Attach the track to the wall using screws and a level to ensure it is straight.
3. Install the soft close mechanism according to the manufacturer’s instructions. 4. Hang the barn door onto the track, making sure it glides smoothly. 5. Test the soft close feature to ensure it functions properly.
Do You Need A Bottom Track For Barn Door?
Yes, a bottom track is required for a barn door. It helps in guiding the door’s movement and ensures smooth operation. The bottom track supports the weight of the door and keeps it aligned, preventing it from swinging or wobbling.
Do You Need A Header Board For Barn Doors?
Yes, a header board is needed for barn doors. It provides support and stability for the doors and helps distribute the weight evenly. A header board also allows for proper installation of the door hardware. Without a header board, the barn doors may not function properly or may sag over time.
How Do I Choose The Right Barn Door Track?
To choose the right barn door track, consider the weight of the door, the track material, and the style you prefer.
What Tools Do I Need To Install A Barn Door Track?
For installing a barn door track, you will need a drill, a level, a screwdriver, measuring tape, and mounting hardware.
Conclusion
Installing a barn door track doesn’t have to be a daunting task. By following these simple steps and using the right tools, anyone can successfully add a barn door to their space. From measuring and marking to attaching the track and hanging the door, this process can transform the look and feel of any room.
So, go ahead and get started on your barn door installation project today!