To install kitchen hardware, measure and mark the positions, drill pilot holes, and screw the hardware securely into place. When it comes to giving your kitchen a fresh look, installing new hardware can make a big difference.
Whether you’re replacing outdated handles or adding knobs for a touch of style, the process is relatively straightforward. We will guide you through the steps of installing kitchen hardware. You’ll learn how to measure and mark the positions, drill pilot holes, and securely screw the hardware into place.
With these tips, you’ll have your kitchen looking brand new in no time. So, let’s get started!
Gathering The Necessary Tools And Materials
Before you dive into installing kitchen hardware, it’s essential to gather all the necessary tools and materials you’ll need. By having everything ready and within reach, you can streamline the process and ensure a smooth installation. In this section, we’ll discuss the important aspects of choosing the right hardware, considering the style and finish, as well as measuring and noting down the size requirements.
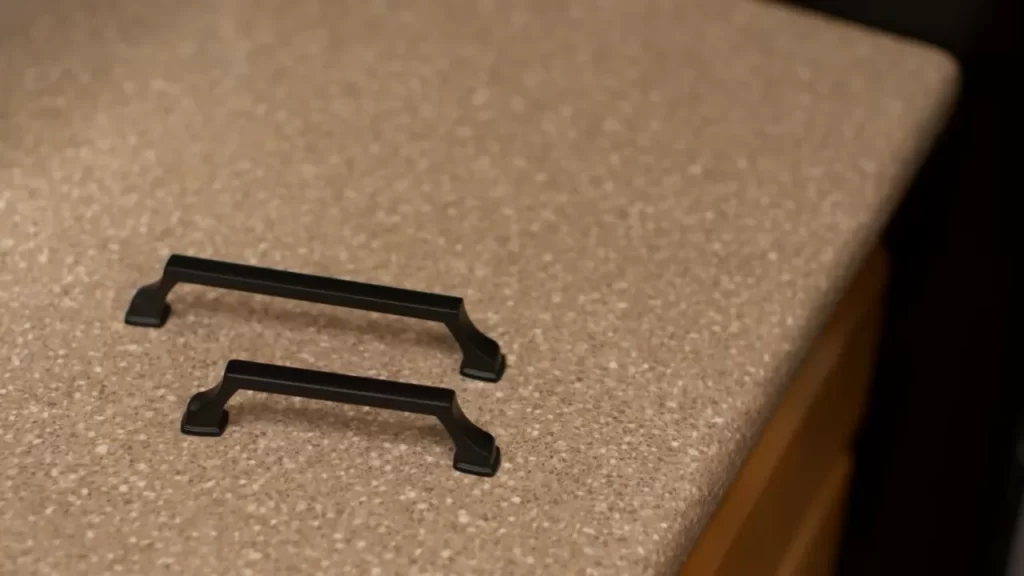
Choosing the Right Hardware
When it comes to kitchen hardware, there are countless options available, making it crucial to choose wisely. The hardware should not only enhance the overall aesthetic of your kitchen but also provide functional benefits. Here are a few factors to consider when selecting the right hardware:
- Style and Finish: Take into account the existing style of your kitchen and whether you want to maintain it or give it a fresh look. Choose a hardware style that complements your cabinetry and overall design. Additionally, consider the finish that will blend seamlessly with other aspects of your kitchen, such as appliances and fixtures.
- Durability and Quality: Select hardware that is built to last. Look for materials that are resistant to tarnish, corrosion, and wear. Choosing high-quality hardware will ensure it withstands daily use and maintains its visual appeal over time.
- Ergonomics: The hardware should feel comfortable to use and provide a good grip. Consider the shape and size of the handles and knobs, ensuring they are easy to grasp and operate.
Measure and Note Down the Size Requirements
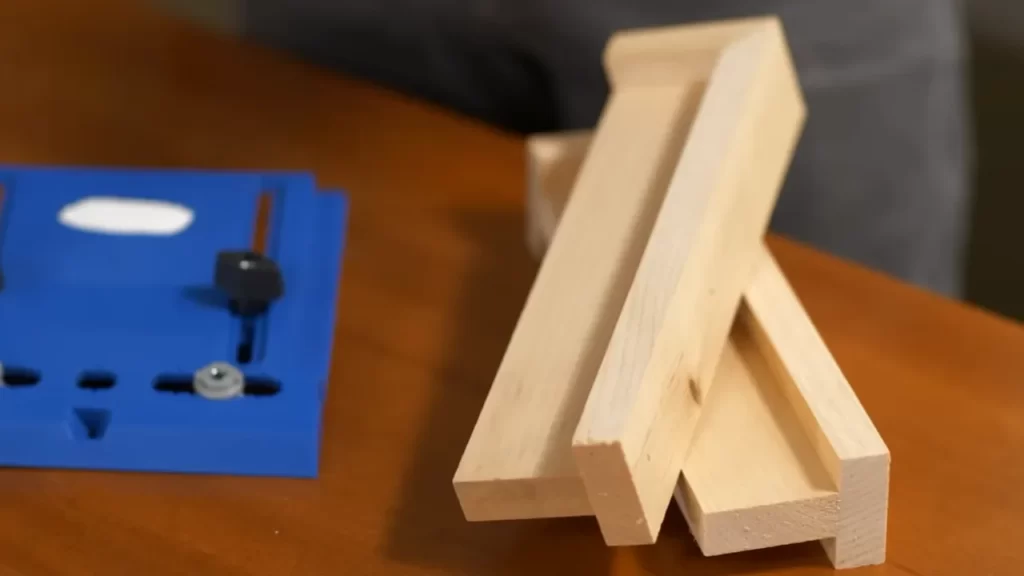
One of the most critical steps in installing kitchen hardware is accurately measuring and noting down the size requirements. It’s essential to avoid any discrepancies that may lead to uneven spacing or incorrect installation. Here’s a simple guide to help you through the process:
| Step | Instructions |
|---|---|
| 1 | Measure the width of each cabinet door and drawer front. |
| 2 | Consider the position where you want to place the hardware. Take into account the height and center alignment for handles or knobs. |
| 3 | Mark the positions where the hardware will be installed, ensuring consistent spacing between each piece. |
| 4 | Take note of the measurements and positions, either on paper or digitally, to refer to during installation. |
By accurately measuring and noting down the size requirements, you can ensure a cohesive and symmetrical placement of your kitchen hardware.
Now that you’ve gathered the necessary tools and materials, as well as considered the style, finish, and size requirements of your kitchen hardware, you’re one step closer to a successful installation. In the next section, we’ll guide you through the step-by-step process of actually installing the hardware.
Preparing The Cabinets For Installation
Before installing new kitchen hardware, it’s important to prepare the cabinets properly. This involves removing any existing hardware, patching up holes or imperfections, and cleaning and sanding the cabinet surface to ensure a smooth finish for the new hardware installation.
Removing Existing Hardware
To start the process, you’ll need to remove any existing knobs and pulls from the cabinets. Follow these steps to safely remove them:
- Locate the screws that hold the hardware in place.
- Using a screwdriver, carefully loosen and remove the screws.
- Once the screws are removed, gently pull the knob or pull away from the cabinet surface.
Patching any Holes or Imperfections
After removing the old hardware, you might notice holes or imperfections on the cabinet surface. Use a wood filler or putty to patch up any holes, scratches, or dents. Follow these instructions to properly patch the surface:
- Apply the wood filler or putty to the holes or imperfections using a putty knife.
- Smooth out the filler or putty, ensuring it’s level with the surrounding cabinet surface.
- Allow the filler or putty to dry completely according to the manufacturer’s instructions.
- Once dry, use sandpaper to gently sand the patched areas until they are smooth and flush with the rest of the cabinet.
Cleaning and Sanding the Cabinet Surface
Before installing the new hardware, it’s essential to clean and sand the cabinet surface. This will remove any grease, grime, or rough spots, creating a clean and smooth surface for the installation. Follow these steps to clean and sand properly:
Cleaning away Grease and Grime
Use a gentle cleanser or dish soap mixed with warm water to clean the cabinet surface. Wipe away any grease, grime, or residue using a soft cloth or sponge. Pay close attention to areas around handles and pulls where buildup may be more prominent. Rinse the surface thoroughly and allow it to dry completely before moving on to sanding.
Sanding to Create a Smooth Surface for Installation
Using fine-grit sandpaper (around 220 grit), lightly sand the entire cabinet surface to create a smooth and even texture. Sand in the direction of the wood grain, applying gentle pressure. This will remove any rough spots and provide a better surface for the new hardware to adhere to. Once you finish sanding, use a soft cloth or tack cloth to remove any dust or debris before proceeding with the installation.
Installing The New Kitchen Hardware
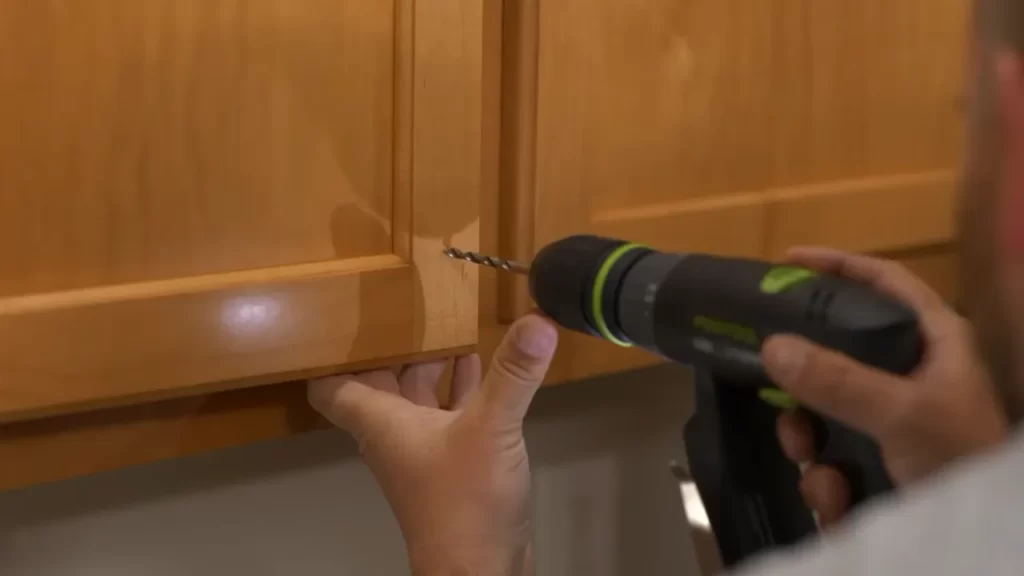
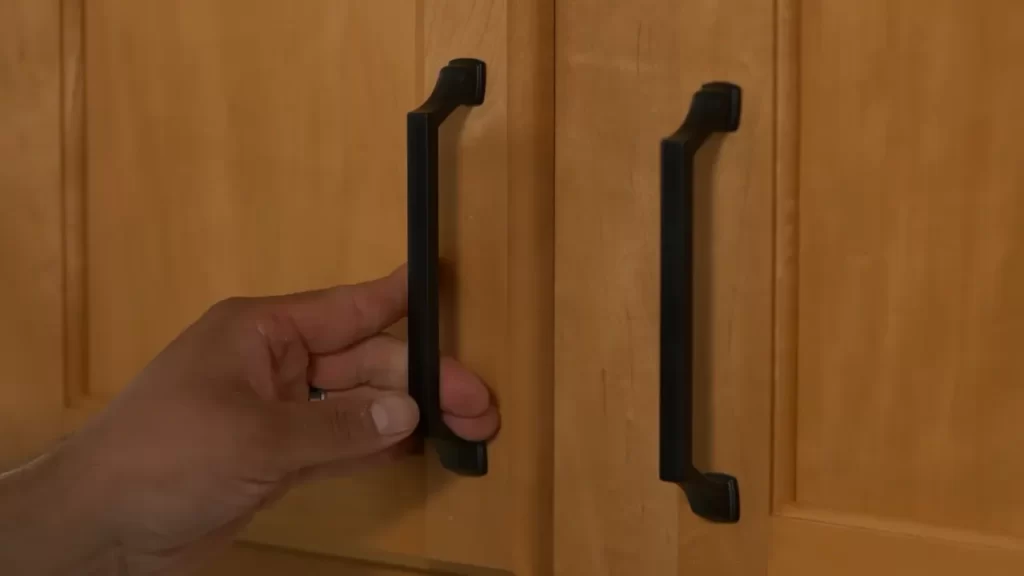
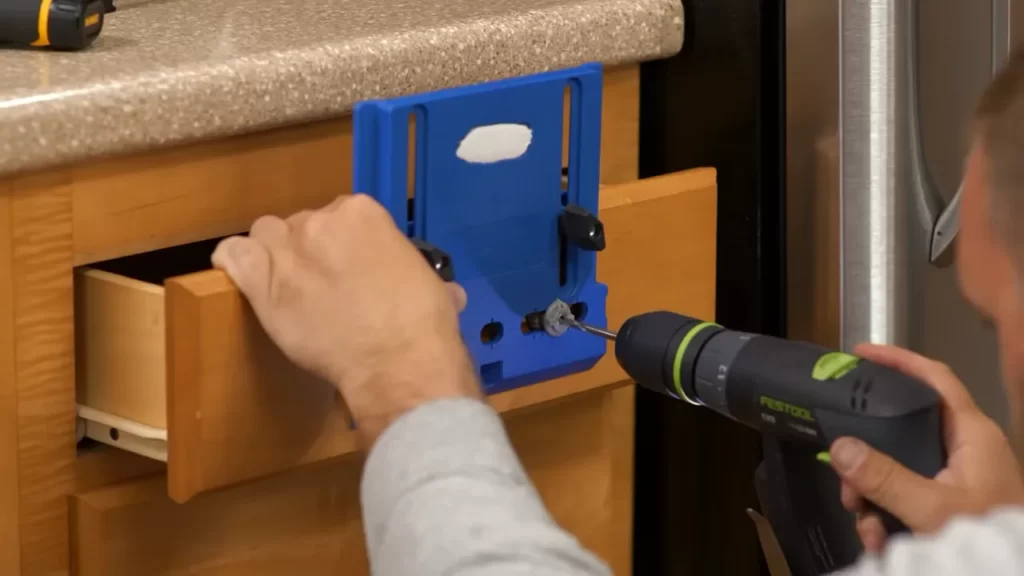
Installing the new kitchen hardware is a crucial step in giving your kitchen a fresh and updated look. Whether you’re replacing worn-out knobs and pulls or adding them to your cabinets for the first time, it’s important to do it right. In this section, we will guide you through the process of choosing the perfect placement, drilling holes for the hardware, and attaching the hardware securely. Let’s get started! Choosing the Perfect Placement When it comes to choosing the perfect placement for your knobs and pulls, there are a few things to keep in mind. First, consider the overall design and style of your kitchen. Are you going for a modern and sleek look or a more traditional and rustic feel? Next, think about the functionality of your cabinet doors and drawers. Make sure the hardware can be easily accessed and doesn’t interfere with the opening and closing of the cabinets. Additionally, consider the size and shape of the knobs and pulls in relation to the size of your cabinets. You want the hardware to complement the overall aesthetic without overpowering the space. Determine the location of knobs and pulls for each cabinet To determine the ideal location of knobs and pulls for each cabinet, start by measuring the width of the cabinet door or drawer. In general, knobs are typically placed on doors while pulls are used for drawers. However, you can mix and match depending on your personal preference. Once you have measured the width, divide it in half to find the center point. This is where you will place your knob or pull. Keep in mind that this is just a general guideline, and you may need to make adjustments based on the specific design of your cabinets. Ensuring consistency throughout the kitchen Consistency is key when it comes to achieving a cohesive look in your kitchen. To ensure consistency, it’s important to measure and mark the drilling points accurately for every cabinet. A simple way to do this is by creating a template using a piece of cardboard or paper. Place the template on each cabinet door or drawer and mark the drilling points. This will help you maintain a consistent placement throughout the kitchen and avoid any mistakes. Drilling Holes for the Hardware Once you have determined the ideal placement and marked the drilling points, it’s time to drill the holes for the hardware. Before you begin, make sure you have the necessary tools on hand, including a drill and the appropriate drill bit size for your hardware. Start by measuring and marking the drilling points accurately using a pencil or a marker. Next, securely hold the drill and gently apply pressure to create clean and precise holes. Be sure to use a steady hand and take your time to avoid any mistakes or damage to the cabinet. Attaching the Hardware Now that the holes have been drilled, it’s time to attach the hardware. For knobs, simply insert the screw through the back of the cabinet door or drawer and tighten it using a screwdriver. For pulls, use screws or bolts to secure them in place. Make sure each knob or pull is firmly attached and doesn’t wobble. Take a step back and admire your handiwork – your new kitchen hardware is now installed and ready to enhance the overall look and functionality of your space. Whether you’re a seasoned DIY enthusiast or a first-time kitchen renovator, installing new kitchen hardware is a relatively simple and rewarding project. By following these steps and taking the time to ensure precise placement and secure attachment, you can transform the look of your kitchen in no time. Now it’s time to enjoy your newly updated space and showcase your stylish new hardware to family and friends.
Enjoying The Result And Making Adjustments
Step Back and Evaluate
Once you have successfully installed your kitchen hardware, it’s time to step back and evaluate the result. Admire your new hardware and take a moment to assess the overall look of your kitchen. This is the moment where all your hard work pays off, and you can start to see how the new hardware enhances the aesthetic of your kitchen.
Check for any adjustments or alignment issues that may need to be addressed. Look closely at each piece of hardware to ensure that it is properly aligned and level. Sometimes, during the installation process, slight adjustments may be necessary to achieve a perfect fit.
Replacing or Repositioning Hardware, If Needed
If you notice any issues with the alignment or overall appearance of your hardware, don’t worry! It’s not uncommon to encounter some challenges during the installation process. Thankfully, most problems can be easily fixed.
Start by troubleshooting common installation problems. Check if the screws or bolts are loose and tighten them if necessary. Make sure that the hardware is securely attached to the cabinets or drawers.
If the problems persist, you may need to consider replacing or repositioning the hardware. Sometimes, a different size or style of hardware can make all the difference. Additionally, you may need to adjust the placement of the hardware to ensure a cohesive and balanced look.
Making necessary adjustments for a perfect fit
Don’t settle for anything less than perfection when it comes to your kitchen hardware. If you notice any gaps, unevenness, or other imperfections, it’s essential to make the necessary adjustments for a perfect fit.
Take the time to measure and remeasure as needed. Use a level to ensure that each piece of hardware is properly aligned. If necessary, you can also add small adjustment devices, such as washers or spacers, to achieve the desired fit.
Remember, the small details can make a big difference when it comes to the overall look and functionality of your kitchen. Taking the time to make these adjustments will ensure that your new hardware not only looks great but also functions flawlessly.
By following these steps and making the necessary adjustments, you’ll be able to enjoy the result of your hard work and create a kitchen that is both visually stunning and highly functional.
Putting The Finishing Touches
Cleaning and Polishing the Hardware
Once you’ve installed your kitchen hardware, it’s time to give it a little TLC to ensure it shines as the finishing touch to your kitchen upgrade. Cleaning and polishing your hardware not only makes it look great but also helps to keep it in top condition for years to come.
Start by removing any dust or dirt from the hardware using a soft cloth or a gentle cleaning solution. Be sure to avoid any abrasive cleaners or scrub brushes that could scratch or damage the surface. After cleaning, dry the hardware thoroughly to prevent water spots.
If you have brass or silver hardware, you can give it an extra shine by using a metal polish specifically designed for these materials. Apply a small amount of polish to a soft cloth and gently buff the hardware in circular motions. Remember to follow the manufacturer’s instructions and test the polish on a small, inconspicuous area before applying it to the entire piece.
Removing any installation residue
After installing your kitchen hardware, you may notice some residue left behind from the installation process. This could be adhesive, fingerprints, or even sticky residue from tape. To remove these pesky marks, use a mild solvent or rubbing alcohol applied to a clean cloth. Gently rub the residue until it lifts, taking care not to scratch or damage the hardware.
Care and maintenance tips for long-lasting hardware
To ensure your kitchen hardware remains in excellent condition for years to come, follow these care and maintenance tips:
- Avoid using harsh or abrasive cleaners that could damage the hardware’s finish.
- Regularly clean the hardware with a soft cloth to remove dust and dirt.
- Wipe off any spills or splatters immediately to prevent staining.
- Check the hardware regularly for loose screws and tighten them if necessary.
- Consider adding felt pads to the back of knobs and pulls to prevent scratching on cabinet surfaces.
Final Thoughts: Showcasing Your Stunning Kitchen Upgrade
Now that you’ve successfully installed and perfected your kitchen hardware, it’s time to step back and admire your stunning kitchen transformation. But why stop there? Consider other kitchen upgrades that can complement your new hardware and take your kitchen to the next level.
Start by updating your cabinet doors and drawers for a cohesive and polished look. Adding a fresh coat of paint or swapping out outdated handles can completely change the vibe of your kitchen. You can also think about installing under-cabinet lighting to highlight your new hardware and create a warm and inviting atmosphere.
Once your kitchen upgrade is complete, don’t forget to capture and share the beauty of your newly revamped space on social media. Sharing before and after photos can inspire others, and you may even discover new ideas and tips from fellow DIY enthusiasts. So snap away, use clever hashtags, and let the virtual applause roll in!
Frequently Asked Questions On How To Install Kitchen Hardware
What Is The Easiest Way To Install Cabinet Hardware?
For an easy installation of cabinet hardware, follow these steps: 1. Measure and mark the desired placement. 2. Drill pilot holes for screws. 3. Attach hardware using a screwdriver or drill. 4. Double-check alignment and tighten screws. 5. Voila! Your cabinet hardware is installed effortlessly.
What Is The Rule Of Thumb For Cabinet Pulls?
The rule of thumb for cabinet pulls is to place them horizontally in the center of the cabinet door. They should be positioned about 2-3 inches from the edge for optimal functionality and aesthetics. Additionally, consider the size and style of the cabinet pulls in relation to the overall cabinet design.
How To Layout Kitchen Cabinet Hardware?
To layout kitchen cabinet hardware, follow these steps: 1. Measure and mark the placement of knobs or handles on the cabinet doors. 2. Ensure consistency by aligning the hardware vertically or horizontally on each door. 3. Use a template or make one to properly position the hardware for accuracy.
4. Use a drill to create holes for the hardware. 5. Install the knobs or handles securely, adjusting as needed for a cohesive look.
Where Do You Mount Kitchen Cabinet Hardware?
To mount kitchen cabinet hardware, start by measuring the desired placement on the cabinet doors or drawers. Use a ruler or template to mark the drilling spots. Then, attach the hardware with screws or bolts, making sure they are tight.
How Do I Choose The Right Kitchen Hardware?
Choosing the right kitchen hardware involves considering the style, finish, and functionality that complements your kitchen decor and personal preference.
What Tools Do I Need To Install Kitchen Hardware?
The tools you will need to install kitchen hardware typically include a measuring tape, screwdriver, drill, level, and optional template for precise placement.
Conclusion
Upgrading the hardware in your kitchen is a simple yet effective way to transform its appearance. By following the steps outlined in this guide, you can easily install kitchen hardware on your own. Remember to choose hardware that complements your kitchen’s style and functionality.
With attention to detail and patience, you can achieve a professional-looking result. Enhance your kitchen’s aesthetic appeal and functionality with new hardware today!