To install pocket door guides, first mark the height of the guides on the jamb and door, then attach the guides and verify their alignment. Now, read on for a more detailed explanation on how to properly install pocket door guides.
Pocket doors offer an efficient way to save space in a room, making them a popular choice for many homeowners. These doors slide into a cavity within the wall, eliminating the need for swing-out clearance. However, to ensure smooth operation, it is crucial to install pocket door guides correctly.
We will provide you with a step-by-step guide on how to install pocket door guides. By following these instructions, you will be able to install the guides securely and ensure your pocket door operates smoothly.
Understanding Pocket Doors And Guides For Installation

When it comes to optimizing the space in your home, pocket doors can be an excellent solution. Unlike traditional hinged doors that swing open and take up valuable floor space, pocket doors slide discreetly into a cavity in the wall. This allows for a seamless transition between rooms and creates a more open and spacious feel in your living areas.
However, installing pocket doors requires careful planning and attention to detail. One crucial component of the installation process is the pocket door guide. In this section, we will explore what pocket doors are, why they are popular, and the importance of using the correct guide when installing them.
<h3>What are pocket doors and why are they a popular choice?</h3>
Pocket doors are sliding doors that disappear into a hidden compartment within the wall when opened. They are an ideal choice for small spaces or rooms with limited floor space, as they do not require any additional floor area for swinging open and closed. Pocket doors are commonly used in areas such as closets, bathrooms, and laundry rooms, where maximizing space is essential.
One of the main reasons why pocket doors are a popular choice is their ability to save space. By eliminating the need for a swinging door, they free up valuable floor space and provide a more open and spacious environment. Additionally, pocket doors can add a touch of elegance to any room, providing a smooth and seamless transition between areas.
<h3>An overview of pocket door guides and their importance in the installation process</h3>
When it comes to installing pocket doors, using the correct guide is crucial. A pocket door guide is a component that helps keep the door aligned and stable as it slides into the wall cavity. It prevents the door from swinging or wobbling, ensuring smooth operation and longevity of the door.
Without a proper guide, pocket doors may become misaligned, causing them to stick or not close properly. This can be frustrating and lead to unnecessary repairs or adjustments down the line. Therefore, it is crucial to choose a high-quality pocket door guide that is suitable for your specific door size and weight.
<h3>Exploring the different types of pocket door guides available</h3>
There are several types of pocket door guides available in the market, each designed to accommodate different door sizes and weights. Some common types include floor-mounted guides, wall-mounted guides, and combination guides.
A floor-mounted guide is installed on the floor along the opening of the pocket door. It helps to keep the door aligned and prevents it from swinging or scraping against the wall. Wall-mounted guides, on the other hand, are attached to the side of the pocket door and serve a similar purpose as floor-mounted guides.
Combination guides are versatile options that can be mounted on both the floor and the wall. They provide additional support and stability for heavier doors or in situations where additional guidance is required.
In conclusion, pocket doors offer a space-saving and elegant solution for rooms with limited floor space. To ensure a successful installation, it is essential to choose the right pocket door guide that matches your door’s requirements. With the proper guide, you can enjoy smooth and hassle-free operation of your pocket doors for years to come.
Tools And Materials Needed For Installing Pocket Door Guides
When it comes to installing pocket door guides, having the right tools and materials is crucial to ensure a smooth and successful installation. In this section, we will discuss the essential tools required, how to choose the right pocket door guide materials, and additional supplies and equipment you may need for the installation process.
Essential tools required for the installation process
To install pocket door guides, you will need the following tools:
- Measuring tape: This will help you accurately measure the dimensions and ensure a proper fit.
- Pencil: You will need a pencil to mark the locations where the guides will be installed.
- Screwdriver: A screwdriver is essential for securing the guides in place.
- Drill: You will need a drill to create holes for the screws.
- Level: Using a level will ensure that the guides are installed straight and level.
- Chisel: A chisel will be necessary to create recesses for the guides.
- Hammer: A hammer can be used to gently tap the guides into place.
Choosing the right pocket door guide materials
When choosing pocket door guide materials, there are a few factors to consider. The materials you choose should be durable, smooth, and able to withstand frequent use. Common materials for pocket door guides include:
| Material | Description |
|---|---|
| Plastic | Lightweight and affordable, plastic guides are suitable for light-duty applications. |
| Metal | Durable and sturdy, metal guides are ideal for heavy-duty pocket doors. |
| Nylon | Nylon guides offer smooth and quiet operation, making them a popular choice. |
Consider the weight and size of your pocket door when choosing the appropriate materials. It’s also important to ensure compatibility between the materials used for the guide and the door itself.
Additional supplies and equipment for a smooth installation
In addition to the essential tools and guide materials, you may also need the following supplies and equipment:
- Pocket door kit: A pocket door kit may include all the necessary components, such as guides, brackets, and hardware.
- Screws: Depending on the guide and door materials, you may need screws of the appropriate size and length.
- Wood shims: Shims can help adjust and stabilize the guides during installation.
- Putty: Putty can be used to fill any gaps or holes created during the installation process.
- Paint or stain: If desired, you may need paint or stain to match the guides with the door or surrounding decor.
Having these additional supplies and equipment on hand will ensure a smooth installation process and help you achieve professional-looking results.
Step 1: Preparing The Door Frame For Pocket Door Guides
Before installing pocket door guides, it is essential to ensure that the door frame is suitable for this type of installation. This preliminary step involves assessing the door frame, removing existing hardware and trim, and addressing any necessary repairs or modifications to the frame.
Assessing the door frame and ensuring it is suitable for pocket doors
The first thing you need to do is assess the door frame to ensure it is suitable for installing pocket door guides. Check the dimensions of the frame and compare them to the requirements of the pocket door system you intend to use. It is crucial to have sufficient space within the frame to accommodate the guides and the door itself.
Removing existing hardware and trim from the door frame
Before proceeding further, remove any existing hardware, such as hinges, doorknobs, and latch plates, from the door frame. Additionally, carefully detach any trim surrounding the frame, including baseboards and casing. This step ensures a clean and unobstructed surface for installing the pocket door guides.
Addressing any necessary repairs or modifications to the frame
Inspect the door frame for any damages, such as cracks, rot, or warped sections. If any issues are identified, it is important to address them before proceeding with the installation. Repair or replace damaged sections and ensure the frame is sturdy and straight.
Moreover, depending on the pocket door system you are using, you may need to make modifications to the frame to accommodate the guides. This can include creating grooves or channels within the frame for the guides to slide smoothly into. Ensure these modifications are made accurately and securely to ensure proper functionality of the pocket door.
In conclusion, preparing the door frame for pocket door guides is a crucial first step in the installation process. By assessing the frame’s suitability, removing existing hardware and trim, and addressing any necessary repairs or modifications, you can set the stage for a successful pocket door installation.
Step 2: Marking And Measuring For Pocket Door Guides
Installing pocket door guides requires accuracy in measuring and marking the door frame. This step is crucial to ensure the proper alignment and smooth operation of the pocket door. In this section, we will walk you through the process of determining the ideal placement of the pocket door guides, measuring and marking the door frame, and ensuring proper alignment.
Determining the ideal placement of the pocket door guides
To start the installation process, you need to determine the ideal placement of the pocket door guides. These guides help the door slide smoothly along the track. Here’s how you can ensure the best placement:
- Inspect the door frame and identify any obstructions such as electrical wires or plumbing pipes.
- Measure the width of the door and mark the center point on the top of the door frame.
- From the center point, measure and mark the location of the pocket door guides on each side of the door frame, keeping in mind the width of the guides themselves.
- Ensure that the marks for the pocket door guides are level and at the same height on both sides of the door frame, as this will ensure smooth operation.
Measuring and marking the door frame for accurate

installation
Next, you need to measure and mark the door frame to ensure accurate installation of the pocket door guides. Follow these steps:
- Measure the height of the door frame and transfer the measurement onto the door, indicating the desired height of the door.
- Use a level to mark a straight line across the door frame, indicating the top edge of the pocket door.
- Measure and mark the locations for the bottom edge and sides of the pocket door, using the width of the door as a guide.
- Double-check the measurements and marks to ensure they are accurate before proceeding with the installation of the pocket door guides.
Ensuring proper alignment for smooth operation of the pocket door
Proper alignment is key to the smooth operation of the pocket door. Following these steps will help you achieve the desired alignment:
- Attach the pocket door guide to the designated marks on the door frame.
- Use a level to ensure that the guide is plumb, vertically aligned, and level, horizontally aligned, before securing it in place.
- Repeat the process for the other pocket door guide, ensuring it is aligned with the first guide.
- Once both guides are securely in place, check the alignment by sliding the pocket door back and forth. Make any necessary adjustments to ensure a smooth and seamless operation.
By following these steps, you will be able to mark and measure the door frame accurately, determine the ideal placement of the pocket door guides, and ensure proper alignment for a pocket door that operates effortlessly. In the next step, we will move on to installing the pocket door itself.
Step 3: Installing The Pocket Door Guides
Now that you have prepared the door frame and cut the necessary slots for your pocket door, it’s time to move on to the next crucial step: installing the pocket door guides. By following these instructions, you’ll be able to ensure a smooth and effortless operation of your pocket door.
Choosing the Appropriate Type of Pocket Door Guides for the Installation
Before diving into the installation process, it’s essential to select the appropriate type of pocket door guides for your specific installation. There are a few different options available, each with its own advantages and considerations. Here are a few popular choices:
| Type of Pocket Door Guides | Advantages | Considerations |
|---|---|---|
| Bottom-Mounted Guides | Easy to install and adjust | Requires a groove on the bottom of the door |
| Side-Mounted Guides | No groove required on the bottom of the door | May require more effort to adjust |
| Floor-Mounted Guides | Provides excellent stability | Requires a groove on the floor |
Consider the specific needs and requirements of your installation, and choose the type of pocket door guides that best fit those considerations.
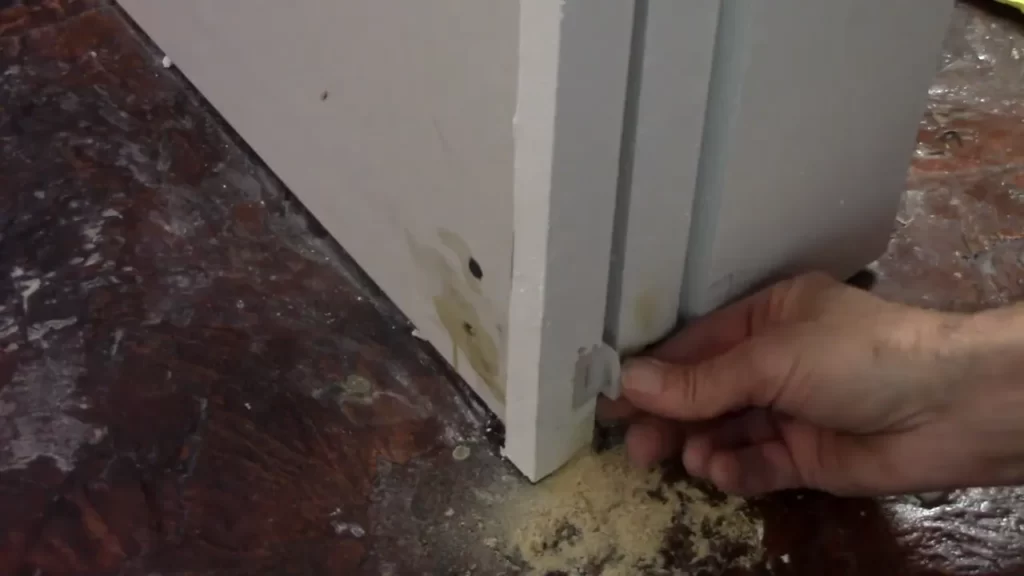
Attaching the Guides Securely to the Door Frame
Once you have selected the appropriate pocket door guides, it’s time to attach them securely to the door frame. To do this, follow these simple steps:
- Measure the distance from the top of the door frame to the bottom of the pocket.
- Cut the pocket door guides to the correct length using a saw.
- Position the guides at the desired height, ensuring they are level and plumb.
- Securely attach the guides to the door frame using screws or nails.
By properly attaching the guides, you will ensure the stability and smooth operation of your pocket door for years to come.
Verifying the Alignment and Stability of the Installed Guides
Lastly, it’s crucial to verify the alignment and stability of the installed pocket door guides. This step will help identify any potential issues before proceeding with the installation of the door itself. Here’s how to do it:
- Check that the guides are aligned with each other and parallel to the door frame.
- Ensure that the guides are securely attached and do not wobble or move when pressure is applied.
- Test the door’s movement within the guides to ensure a smooth operation.
By following these simple steps, you can be confident that the pocket door guides are properly installed and ready for the installation of the pocket door.
With the pocket door guides securely in place, you are now ready to move on to the exciting final step of installing the pocket door itself. Stay tuned for Step 4: Installing the Pocket Door!
Step 4: Testing And Adjusting The Pocket Door

Guides
Once you have successfully installed the pocket door guides and ensured they are aligned properly, it’s time to move on to the crucial step of testing and adjusting their functionality. This step ensures that the pocket door operates smoothly and silently within the guides, maximizing its ease of use and overall performance.
Checking the functionality of the pocket door within the guides
Begin by gently opening and closing the pocket door, taking note of how smoothly it moves along the track within the guides. A well-installed pocket door should glide effortlessly, without any signs of resistance or jarring. Pay attention to any unusual noises or vibrations that may indicate misalignment or obstructions.
Identifying any issues or misalignments and making necessary adjustments
If you notice any issues or misalignments during the functionality test, it’s important to identify their root cause and make the necessary adjustments. Start by inspecting the pocket door guides for any visible misalignment or gaps between the door and the guides. Use a level to check if the guides are perfectly vertical or if they need to be adjusted.
If the pocket door is not sliding smoothly, check if there are any obstructions or debris in the tracks. Remove any dirt, dust, or other particles that may be hindering the door’s movement. Lubricating the tracks can also help improve the door’s functionality, ensuring it slides effortlessly.
Ensuring smooth and silent operation of the pocket door
Once any issues or misalignments have been addressed and the tracks are clean, it’s important to ensure that the pocket door operates smoothly and silently. This not only enhances the overall aesthetics of the door but also prevents any annoying squeaks or rattling noises that may occur during normal usage.
To achieve this, close the pocket door completely and open it slowly while observing its movement. Listen for any unwanted sounds or vibrations that may signify the need for further adjustments. If necessary, tighten or loosen the screws on the guides to optimize the door’s movement and eliminate any noise.
By thoroughly testing and adjusting the pocket door guides, you can ensure that your pocket door operates flawlessly, efficiently, and silently. This final step completes the installation process, allowing you to enjoy the convenience and space-saving benefits of pocket doors in your home or office.
Step 5: Finishing Touches And Maintenance Tips
Once you have successfully installed the pocket door guides, it’s time to add the finishing touches and ensure proper maintenance for long-lasting functionality. This step not only enhances the overall aesthetics of the pocket door but also helps to keep it in optimal condition over time. In this section, we will explore how to apply finishing touches, such as painting or staining the door frame, adding trim and hardware to enhance the aesthetics, and maintenance tips to ensure the longevity of the pocket door guides.
Applying Finishing Touches
One way to give your pocket door a polished and cohesive look is to apply a finishes such as painting or staining to the door frame. This can help blend the door seamlessly into the surrounding decor, giving it a more refined appearance. Here’s how you can go about it:
- Clean the door frame by removing any dust, dirt, or debris
- Mask off any areas of the door frame that you don’t want to get paint or stain on
- If you choose to paint, apply a primer to the door frame and let it dry
- Once the primer is dry, apply the paint color of your choice using smooth and even strokes
- Alternatively, if you prefer a stained finish, apply a wood stain in the desired shade and allow it to penetrate the surface
- Finish off with a clear coat for added protection and durability
Adding Trim and Hardware
Adding trim and hardware to your pocket door can significantly enhance its visual appeal. Here are the steps to follow:
- Select the type of trim and hardware that complements the style and design of your pocket door
- Measure and cut the trim to fit the dimensions of the door frame
- Attach the trim to the frame using appropriate nails or adhesive
- Ensure that the trim is securely attached and aligns with the edges of the door frame
- Install the hardware, such as handles or pulls, according to the manufacturer’s instructions
- Test the functionality of the hardware to ensure smooth operation of the pocket door
Maintenance Tips
To keep your pocket door guides in optimal condition and ensure smooth operation over time, it’s important to perform regular maintenance. Here are a few tips:
- Regularly check for any obstructions or debris in the track and remove them
- Wipe down the guides and tracks with a soft cloth to remove dust or dirt
- Apply a lubricant to the guides and tracks to keep them operating smoothly
- Inspect the door frame for any cracks or damage and repair as needed
- Check the hardware for any loose screws or components and tighten accordingly
By following these maintenance tips, you can extend the lifespan of your pocket door guides and enjoy their functionality for years to come.
Troubleshooting Common Issues With Pocket Door Guides

Installing pocket door guides can be a great way to save space and add a touch of style to your home. However, like any other home improvement project, there can be hiccups along the way. In this section, we will address some of the common issues you may encounter when installing pocket door guides and provide solutions to help you overcome these challenges.
Addressing door alignment problems
One of the most common issues with pocket doors is door misalignment. This can make it difficult to close or open the door smoothly. If you find yourself facing this problem, here are a few steps you can take to address door alignment problems:
- Check for any obstructions: Sometimes, small objects can get in the way of the door, preventing it from sliding properly. Remove any debris or obstructions that may be blocking the door’s path.
- Inspect the track: The track is an essential component of the pocket door guide system. Make sure it is securely attached to the wall and free from any damage or debris.
- Adjust the guides: Pocket door guides usually have height and width adjustment options. Use these adjustments to align the door properly. Refer to the manufacturer’s instructions for specific guidance on adjusting the guides.
- Use a level: A level can help you determine whether the door is properly aligned. Adjust the guides until the door is level both vertically and horizontally.
Dealing with noisy or stuck pocket doors
Noisy or stuck pocket doors can be frustrating. Fortunately, there are a few steps you can take to resolve these issues:
- Apply lubricant: Lubricating the top and bottom tracks can help reduce friction and prevent the door from sticking. Be sure to use a lubricant recommended by the manufacturer.
- Check the rollers: The rollers are an integral part of the pocket door system. Inspect them for any signs of damage or wear. Replace any worn-out or damaged rollers as necessary.
- Inspect the door edges: Sometimes, the edges of the door can become worn or damaged over time, causing it to get stuck. Sand down any rough edges or repair any damage to ensure smooth operation.
- Adjust the track position: If the door is consistently getting stuck in a certain area, you may need to adjust the track position. Loosen the screws holding the track in place and move it slightly to provide more clearance for the door.
Fixing issues with pocket door guide functionality
Occasionally, you may encounter issues with the functionality of the pocket door guide itself. Here are a few tips to help you address these problems:
- Check the guide alignment: Ensure that the guide is properly aligned with the track. Adjust it if necessary to ensure smooth door operation.
- Inspect the guide material: Some pocket door guides are made of plastic or metal. Check for any signs of damage or wear. Replace the guide if it is worn out or damaged.
- Tighten loose screws: Over time, screws holding the guide in place may become loose. Use a screwdriver to tighten these screws and secure the guide firmly.
- Consider professional help: If you have tried troubleshooting the issues on your own and are still experiencing problems, it may be time to seek the assistance of a professional handyman or installer.
By following these troubleshooting tips, you can overcome common issues with pocket door guides and ensure smooth and trouble-free operation of your pocket doors.
Frequently Asked Questions Of How To Install Pocket Door Guides
Do Pocket Doors Need A Bottom Guide?
Yes, pocket doors typically require a bottom guide. It helps keep the door aligned and prevents it from swinging or shifting when opening and closing. The guide ensures smooth and consistent movement.
How Do You Adjust Pocket Door Guides?
To adjust pocket door guides, follow these steps: 1. Loosen the screws securing the guide on the bottom or top of the door. 2. Adjust the guide’s position by sliding it left or right. 3. Retighten the screws once the guide is in the desired position.
4. Test the door’s movement to ensure proper alignment. 5. Make further adjustments if necessary until the door operates smoothly.
How Do You Install Pocket Door Pulls?
To install pocket door pulls, follow these steps: 1. Measure and mark the ideal location for the pull on the door’s edge. 2. Drill a hole at the marked spot using an appropriate drill bit size. 3. Insert the pull into the hole, aligning it properly.
4. Secure the pull by screwing it in place using the provided screws. 5. Test the pull to ensure smooth operation.
How Do You Install A Pocket Door Jamb Kit?
To install a pocket door jamb kit, follow these steps: 1. Measure and cut the header and track to fit the door opening. 2. Attach the header and track to the wall using screws or nails. 3. Install the vertical jambs on each side of the door opening, ensuring they are plumb.
4. Secure the bottom track to the floor using screws or adhesive. 5. Mount the door into the track and adjust for smooth operation.
How Do I Install Pocket Door Guides?
To install pocket door guides, measure and mark the position, attach the guide to the floor, and secure it in place with screws or adhesive.
What Tools Do I Need For Installing Pocket Door Guides?
For installing pocket door guides, you will need a measuring tape, screwdriver, drill, screws, adhesive, and a level.
Conclusion
Installing pocket door guides may seem like a daunting task at first, but with the right tools and guidance, it can be a straightforward project. By following the steps outlined in this blog post, you can ensure a smooth installation process and enjoy the benefits that pocket doors have to offer.
Remember to measure accurately, choose the right door guide, and take your time during the installation. With these tips, you’ll have your pocket doors functioning seamlessly in no time. Happy installing!