o install a garage door seal, measure the bottom of the garage door and cut the seal to size. Then, attach the seal to the bottom of the door using adhesive or screws.
Why Install A Garage Door Seal
If you’re a homeowner, you know that maintaining the integrity of your house is crucial. From roof repairs to prevent leaks to maintaining the HVAC system for optimal energy efficiency, you’ve seen it all. But have you considered the importance of sealing your garage door? While it may not be the first thing that comes to mind when it comes to home maintenance, installing a garage door seal offers numerous benefits that you shouldn’t overlook.
Benefits of installing a garage door seal
When it comes to protecting your home, your garage door plays a vital role in keeping out the elements. Installing a garage door seal can provide the following benefits:
Protection against weather elements
Your garage door is constantly exposed to the elements, ranging from rain and snow to wind and sunlight. Without a proper seal, these weather elements can easily find their way inside your garage, causing damage not only to your belongings but also to the structure of your garage. By installing a garage door seal, you create a barrier that keeps out rain, snow, dust, and drafts, ultimately prolonging the lifespan of your garage and providing a clean and safe environment for your vehicles, tools, and other stored items.
Energy efficiency and cost savings
One of the most significant benefits of installing a garage door seal is the improvement in energy efficiency, which can lead to substantial cost savings. A well-sealed garage door prevents air leaks, reducing the amount of hot or cold air that enters or escapes from your garage. This means your HVAC system won’t have to work as hard to maintain a consistent temperature inside your home. As a result, you’ll see a decrease in your energy consumption and a lower utility bill each month. Additionally, by preserving the temperature within your garage, a sealing system can help protect delicate belongings or materials from extreme temperatures, preventing potential damage and costly replacements.
By installing a garage door seal, you not only enhance the overall protection and functionality of your garage but also save money in the long run. So, don’t underestimate the importance of this simple yet effective home improvement project.
Pre-Installation Preparation
Before you begin installing a garage door seal, it’s important to properly prepare for the job. Taking the time to gather the necessary tools and materials, measure the garage door accurately, and choose the right type of seal will ensure a successful installation that effectively keeps out drafts, insects, and debris. In this section, we will guide you through the essential pre-installation steps to set you up for success.
Tools and Materials Needed
Before you start installing a garage door seal, make sure you have the following tools and materials on hand:
| Tools | Materials |
| ScrewdriverTape measureUtility knifePencilDrillHammerLevel | Garage door sealScrewsAdhesiveWeatherstrippingNailsSealant |
Having these tools and materials readily available will streamline the installation process and save you time and effort.
Measuring the Garage Door
Accurate measurements are crucial for installing a garage door seal that fits properly. Follow these steps to measure your garage door:
- Close the garage door completely and ensure it is aligned properly.
- Starting from one side of the door, measure the width of the door opening. Take measurements at both the top and bottom of the door, as well as at the middle. Note down the widest measurement.
- Next, measure the height of the door opening on both sides and in the middle. Record the highest measurement.
By measuring the width and height of the garage door at multiple points, you can account for any irregularities and ensure a precise fit for your seal.
Choosing the Right Type of Seal
Selecting the appropriate type of seal is essential to achieve maximum effectiveness and durability. Keep the following factors in mind when choosing your garage door seal:
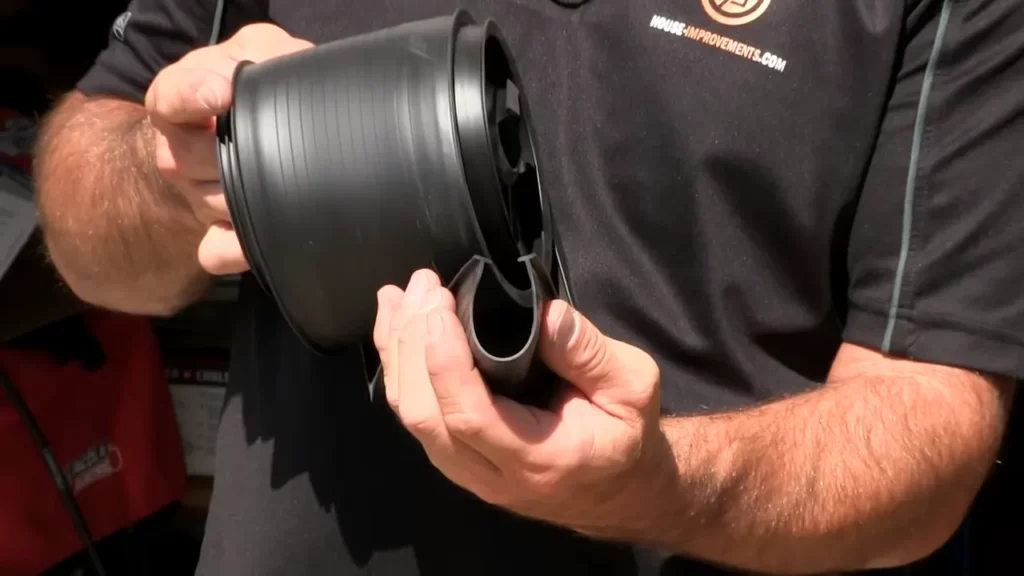
- Type of seal: There are various types of seals available, such as bottom seals, threshold seals, and weatherstripping. Consider the specific needs of your garage, such as insulation requirements and exposure to the elements, in order to determine the most suitable type.
- Material: Garage door seals can be made of materials like rubber, vinyl, or brush. Each material offers different benefits, such as flexibility, durability, and resistance to weather conditions. Choose the material that best suits your needs.
- Budget: Determine your budget for the garage door seal and consider the long-term cost-effectiveness of the chosen option. While cheaper seals may be tempting, investing in a higher-quality seal can ensure better performance and longevity.
By carefully considering these factors, you can select the right type of seal that will provide optimal functionality and longevity for your garage door.
Now that you have completed the pre-installation preparations, you are ready to move on to the installation process itself. In the next section, we will guide you through the step-by-step instructions on how to install a garage door seal.
Step 1: Remove The Old Seal
Before installing a new garage door seal, you need to start by removing the old one. This will ensure a clean and smooth surface for the installation of the new seal. Follow these steps to safely remove the old seal:
Inspect the existing seal
Begin by inspecting the condition of the existing seal. Look out for any cracks, breaks, or signs of wear and tear. This will help you determine if the seal really needs to be replaced or if it can be fixed.
Removing the old seal safely
Once you’ve confirmed that the old seal needs to be replaced, it’s time to remove it safely. Here’s how:
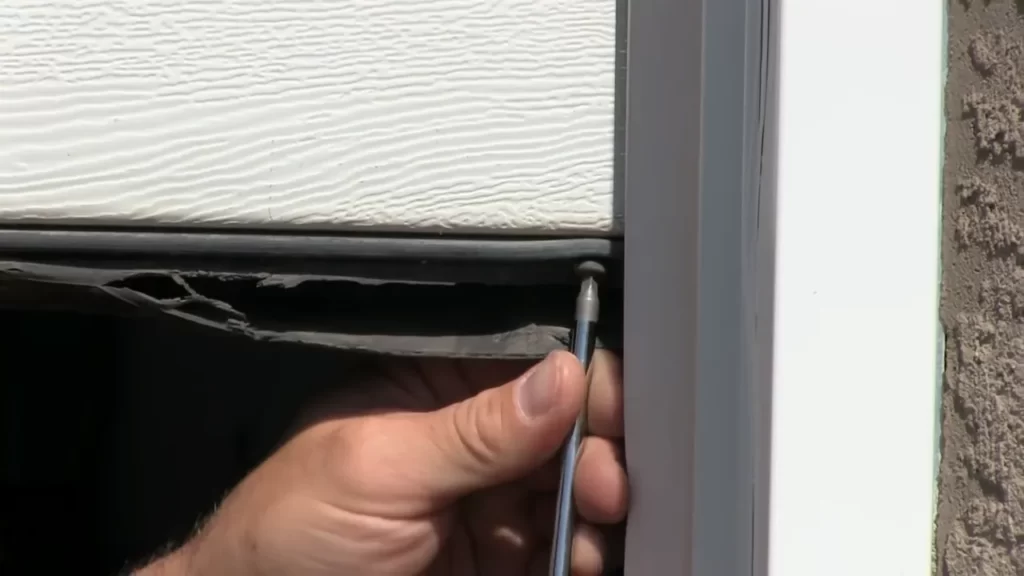
- Start at one end of the garage door and locate the seal’s ends. These are usually fixed with either nails or screws.
- Using a screwdriver or a pry bar, carefully remove the nails or screws securing the old seal in place. Be cautious not to damage the door or the surrounding area.
- Slowly pull off the old seal from one end to the other, making sure to detach it completely. It may require some force, but be gentle to avoid any injuries or causing damage to the door.
- Dispose of the old seal properly, following your local waste disposal guidelines.
Cleaning the area
After removing the old seal, it’s essential to clean the area before installing the new one. This will remove any dirt, debris, or adhesive residue and ensure a strong bond with the fresh seal. Here’s how to clean the area:
- Use a mild detergent or soapy water solution to clean the surface where the old seal was attached. This will help remove any dirt or grime.
- Scrub the area gently with a soft-bristle brush or sponge to ensure a thorough clean.
- Rinse the area with clean water to remove any leftover soap or cleaning solution.
- Allow the area to dry completely before installing the new seal.
By carefully following these steps, you can remove the old seal from your garage door safely and get the area ready for the installation of the new seal. Stay tuned for the next steps on how to install a garage door seal!
Step 2: Measure And Cut The New Seal
Measuring the length of the seal needed
Before you can install a new garage door seal, you’ll need to measure the length of the seal needed for your specific garage door. This step is crucial to ensure a proper fit and prevent any unwanted gaps or drafts.
To measure the length of the seal, follow these simple steps:
- Close your garage door completely.
- Use a tape measure to measure the width of the garage door opening.
- Starting from one side of the opening, measure the distance to the opposite side of the opening.
Make sure to measure both sides to ensure accuracy, as some garage doors have uneven openings.
Once you have the measurement, write it down and keep it handy for the next step.
Cutting the seal to the correct size
Now that you have the measurement for the length of the seal needed, it’s time to cut the new seal to the correct size. This step requires precision and attention to detail to ensure a seamless installation.
Follow these steps to cut the seal:
- Place the new seal on a flat surface.
- Using a sharp utility knife, carefully cut the seal according to the measured length.
- Be sure to make straight, clean cuts to ensure a proper fit.
Remember, it’s always better to cut slightly longer than needed rather than cutting too short. You can always trim the excess later if necessary.
Ensuring proper fit and seal coverage
After cutting the seal to the correct size, it’s important to ensure a proper fit and seal coverage to maximize the effectiveness of the seal and prevent any air or moisture leaks.
To ensure a proper fit and seal coverage, follow these tips:
- Align the newly cut seal along the bottom edge of the garage door.
- Make sure the seal is centered and runs the full length of the door.
- Stretch the seal slightly, if necessary, to ensure a snug fit.
- Use adhesive or screws, depending on the type of seal, to secure it in place.
- Inspect the seal and make any adjustments as needed to ensure complete coverage.
By taking the time to measure, cut, and ensure proper fit and seal coverage, you can effectively install a new garage door seal and enjoy the benefits of improved energy efficiency and protection against the elements.
Step 3: Prepare The Garage Door For Installation
Before you can install a garage door seal, it’s important to properly prepare the garage door surface. This step ensures a clean and smooth surface, allowing for a secure and effective seal installation. Here are the key steps you need to follow:
Cleaning the Garage Door Surface
The first step in preparing the garage door is to thoroughly clean the surface. Over time, dirt, dust, and other debris can accumulate on the door, which can affect the adhesive quality of the seal. To clean the surface, follow these simple steps:
- Gather the necessary cleaning supplies such as mild detergent, warm water, and a soft sponge or cloth.
- Dilute the detergent in a bucket of warm water according to the instructions on the packaging.
- Dip the sponge or cloth into the soapy water and gently scrub the entire surface of the garage door. Pay special attention to areas with visible dirt or stains.
- Rinse the door with clean water using a hose or bucket.
- Wipe the surface dry with a clean, lint-free cloth to ensure no water spots or residue remains.
Removing any Debris or Dirt
In addition to cleaning the surface, it’s crucial to remove any debris or dirt that may be stuck on the garage door. This step ensures a smooth installation and prevents any interference with the seal. Follow these steps to effectively remove debris:
- Inspect the garage door for any visible debris such as pebbles, leaves, or twigs.
- Use a broom or brush to gently sweep away any loose debris.
- If there are stubborn dirt or sticky residue, use a mild detergent solution and scrub the affected area with a soft brush.
- Rinse the area with clean water and wipe it dry with a cloth.
Ensuring a Smooth and Clean Surface
After removing the debris and cleaning the surface, it’s important to ensure a smooth and clean garage door surface for optimal seal installation. Follow these additional steps to achieve a perfectly prepared surface:
- Inspect the entire surface of the garage door for any remaining dirt, stains, or residue.
- If necessary, repeat the cleaning process until the surface is completely clean and free from any contaminants.
- Check for any rough or uneven areas on the garage door surface. If found, use sandpaper to smooth out these imperfections.
- Wipe the entire surface of the garage door with a clean, dry cloth to remove any dust or particles.
By properly cleaning, removing debris, and ensuring a smooth and clean surface, you are now ready to install the garage door seal. Following these simple steps not only ensures a successful installation but also prolongs the lifespan and effectiveness of the seal in keeping your garage protected from external elements.
Step 4: Attach The New Seal
Attaching the new seal to your garage door is an essential step to ensure proper insulation and protection from outside elements. Follow these instructions to correctly attach the seal:
1. Applying adhesive to the seal

Start by applying adhesive to the bottom side of the new seal. Use a high-quality adhesive that is specifically designed for outdoor use and can withstand different weather conditions. Make sure to read and follow the manufacturer’s instructions for the adhesive.
2. Aligning the seal with the bottom of the door
Once the adhesive is applied, align the seal with the bottom of the garage door. Ensure that the seal runs parallel to the bottom edge of the door. A well-aligned seal will provide maximum effectiveness in preventing drafts and keeping out dust, debris, and pests.
3. Pressing firmly to ensure proper adhesion
After aligning the seal, press firmly along its entire length to ensure proper adhesion. Apply even pressure to make sure that the seal is securely attached. This will help prevent any gaps or loose spots where air or water might enter.
It’s important to note that the adhesive may require specific curing times. Check the manufacturer’s instructions for the recommended curing time before testing the seal’s effectiveness.
By following these steps, you can easily attach the new seal to your garage door and enjoy improved insulation and protection.
Step 5: Test And Adjust The Seal
Now that you have successfully installed the garage door seal, it is important to test its effectiveness and make any necessary adjustments. This step will ensure that your garage remains well-insulated, free from drafts, and protected against pests. By following the simple procedures outlined below, you can be confident that your seal is working optimally.
Closing and opening the garage door to check the seal
Begin by closing the garage door to examine the seal’s initial contact with the ground. Observe whether the seal compresses evenly along the entire length of the door. Make sure it creates a secure seal and shows no signs of buckling, gaps, or raised areas. Pay special attention to the corners and edges, as these are areas prone to potential leakage.
Once you have checked the seal with the door closed, open it and observe how the seal retracts. Ensure that it does not catch on any part of the garage door mechanism or obstruct its movement. A smooth and unimpeded operation is essential for the seal’s long-term functionality.
Making any necessary adjustments for tightness or gaps
If you notice any areas where the seal is not tightly compressed or gaps are present, adjustments can be made to enhance the seal’s effectiveness. Start by identifying the source of the issue; it could be due to improper installation or an uneven garage floor.
If the seal is not tightly compressed, you can adjust it by tightening the screws or clips holding it in place. Ensure that the seal is snug against the bottom of the garage door, creating a proper seal without impeding the door’s movement.
For gaps that may be present, consider using additional weather-stripping materials or opting for a thicker seal. These modifications can help fill any empty spaces and prevent drafts or pests from entering your garage.
Testing the seal’s effectiveness against drafts and pests
Once you have made the necessary adjustments, it’s time to test the seal’s ability to keep drafts and pests at bay. To do this, stand inside the garage and close the door. Observe any noticeable changes in the temperature or any draft that may be present around the seal. Additionally, check for signs of light filtering through the seal, as this could indicate potential gaps that need addressing.
To test the seal’s effectiveness against pests, inspect the interior of the garage for any signs of insect or rodent entry. Look for droppings, gnaw marks, or any other evidence of a potential breach that could be exploited by pests. By ensuring a solid seal, you will be able to effectively keep unwanted visitors out of your garage.
By following these simple steps, you can guarantee that your garage door seal is properly installed, tested, and adjusted for maximum efficiency. Enjoy the benefits of an insulated garage, free from drafts and protected against pests.
Maintenance And Longevity Of The Seal
Ensuring the maintenance and longevity of your garage door seal is essential for preventing any unwanted drafts, water infiltration, or debris from entering your garage. By regularly cleaning and inspecting the seal, you can detect any wear and tear and take necessary actions to keep it in optimal condition. In this article, we will discuss how to clean and maintain the seal, how to check for wear and tear, and when it’s time to replace the seal.
Cleaning and maintaining the seal
A clean and well-maintained garage door seal is more effective in keeping out unwanted elements. Follow these simple steps to clean and maintain your seal:
- Start by wiping off any dirt, debris, or dust from the seal using a damp cloth or sponge. Removing the accumulated dirt will allow the seal to function properly and provide a tight seal.
- Mix a mild detergent or soap with warm water. Using a soft-bristled brush or sponge, gently scrub the seal to remove any stubborn stains or grime.
- Rinse the seal thoroughly with clean water, ensuring all soap residue is removed.
- Dry the seal with a clean cloth or allow it to air-dry completely. Moisture can lead to mold or mildew growth, compromising the effectiveness of the seal.
- Apply a silicone-based lubricant to the seal to keep it flexible and prevent cracking or splitting. Avoid using petroleum-based lubricants as they can damage the seal.
Checking for wear and tear
Regularly inspecting the garage door seal will help you identify any signs of wear and tear. Pay close attention to the following areas:
- Cracks or splits in the seal
- Loose or detached sections of the seal
- Deterioration or disintegration of the rubber
- Uneven or inconsistent seal contact with the garage door
If you notice any of these issues, it may be time to replace the seal.
Replacing the seal when necessary
When replacing the garage door seal, follow these steps:
- Measure the length of the existing seal to ensure you purchase the correct size.
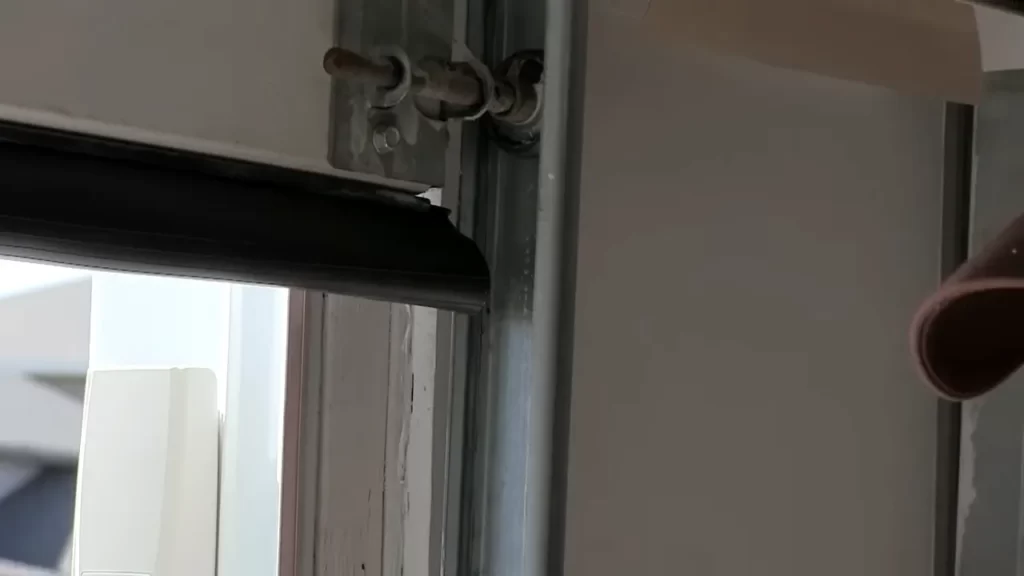
- Using a flathead screwdriver or pliers, carefully remove the old seal by pulling it out of the retaining groove.
- Clean the retaining groove thoroughly to remove any dirt or debris.
- Insert the new seal into the retaining groove, starting from one end and working your way to the other end.
- Ensure the seal is securely in place and provides a tight seal against the garage door.
By following these maintenance steps and replacing the seal when necessary, you can extend the longevity of your garage door seal and enjoy a well-insulated and protected garage space.
Frequently Asked Questions For How To Install A Garage Door Seal
How Do You Install A Bottom Seal On A Garage Door?
To install a bottom seal on a garage door, follow these steps: 1. Measure the width of the garage door and cut the seal accordingly. 2. Position the seal along the bottom edge of the door, ensuring it is centered.
3. Attach the seal using a sealant or screws, depending on the type of seal. 4. Check for any gaps or loose spots and make adjustments as needed. 5. Test the door to ensure it closes properly and creates a tight seal.
How Do You Install A Garage Side Seal?
To install a garage side seal, follow these steps: 1. Measure the width of your garage door opening. 2. Purchase a garage side seal that matches your door size. 3. Attach the seal to the side of your garage door using adhesive or screws.
4. Make sure the seal is snugly fitted against the door to prevent drafts and pests. 5. Test the seal by opening and closing the garage door to ensure it functions properly.
How Do You Install A Bottom Threshold Seal Strip On A Garage Door?
To install a bottom threshold seal strip on a garage door, follow these steps: 1. Clean the bottom of the garage door thoroughly. 2. Measure the width of the door and cut the seal strip to fit. 3. Apply adhesive to the threshold area.
4. Press the seal strip firmly onto the threshold, ensuring it is aligned. 5. Allow the adhesive to dry completely before using the garage door.
Can You Glue A Garage Door Seal?
Yes, you can glue a garage door seal.
Can I Install A Garage Door Seal Myself?
Yes, installing a garage door seal is a simple DIY project that can be done by homeowners.
How Long Does It Take To Install A Garage Door Seal?
On average, it takes about 1-2 hours to install a garage door seal, depending on the complexity of the door.
Conclusion
Installing a garage door seal is a simple yet effective way to enhance energy efficiency, improve functionality, and minimize dust and debris in your garage. By following the step-by-step instructions outlined in this blog post, you can easily install a garage door seal on your own.
Remember to choose the right seal for your specific garage door and take your time to ensure a proper installation. Enjoy the benefits of a well-sealed garage and protect your belongings from the elements with this straightforward DIY project.