To install shed doors, measure and cut the door to fit the opening, attach hinges to the door and doorway, hang the door, and secure it with a latch. Installing shed doors involves accurately measuring and cutting the door to fit the opening, attaching hinges to both the door and the doorway, hanging the door properly, and securing it with a latch.
By following these steps, you can successfully install shed doors and ensure they function properly.
Preparing The Door Frame And Hinges
One of the crucial steps in installing shed doors is preparing the door frame and hinges. This ensures that the doors will open smoothly and securely, providing easy access to the shed. In this section, we will guide you through the process, from measuring and marking the placement of hinges to drilling pilot holes and attaching the hinges to the door frame.

Measuring and Marking the Placement of Hinges
Before you begin installing the shed doors, it’s essential to measure and mark the correct placement of hinges on the door frame. This will ensure that the doors are properly aligned and function effectively. Follow these steps:
- Using a tape measure or ruler, measure the distance from the top of the door frame to the desired hinge placement. Mark this measurement on both sides of the door frame using a pencil.
- Next, measure the distance from the bottom of the door frame to the intended location of the bottom hinge. Mark this measurement on both sides of the frame as well.
- For additional stability, it is recommended to add a center hinge. Measure and mark the center point on the door frame between the top and bottom hinge marks.
By accurately measuring and marking the hinge placement, you ensure that the shed doors will open and close smoothly without any misalignment issues.
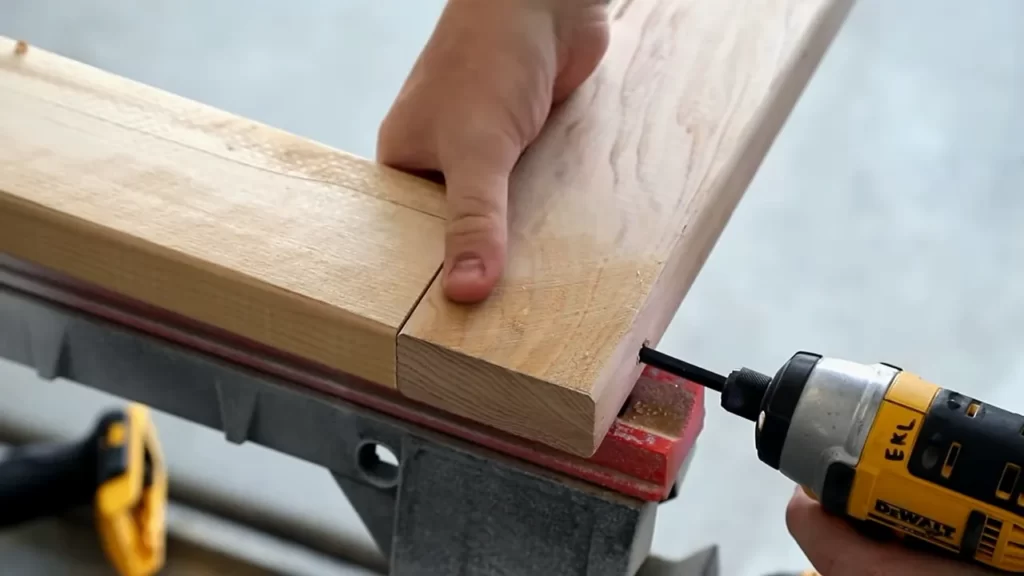
Drilling Pilot Holes for the Hinge Screws
Once you have marked the placement of the hinges, the next step is to drill pilot holes for the hinge screws. This is an essential step to prevent splitting or damaging the door frame. Follow these simple instructions:
- Select an appropriate drill bit size based on the diameter of your hinge screws. It is usually recommended to use a drill bit that is slightly smaller than the screw diameter.
- Position the drill bit on the marked hinge placement and drill a hole into the door frame. The depth of the hole should be equal to the length of the screw.
- Repeat this process for all the hinge marks on the door frame, ensuring that you maintain the same depth for each pilot hole.
By drilling pilot holes, you ensure that the hinge screws will be securely fastened without causing any damage to the door frame, resulting in a sturdy and durable installation.
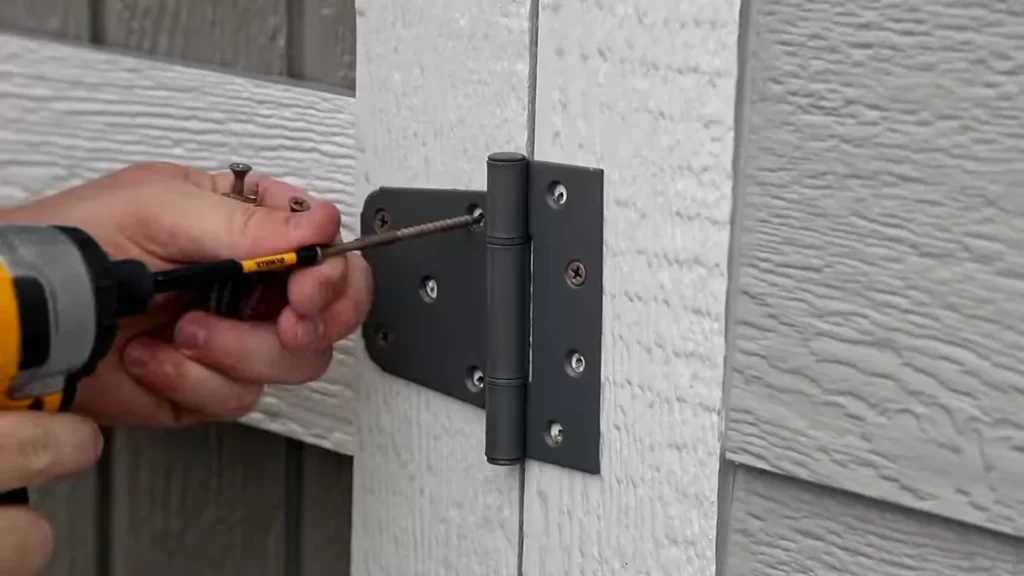
Affixing the Hinges to the Door Frame
Now that you have prepared the door frame with the necessary hinge placements and drilled pilot holes, it’s time to affix the hinges to the frame. Follow these steps to complete the installation:
- Align the hinge plate with the pilot holes on the door frame, ensuring that the knuckle of the hinge is facing the direction you want the door to swing.
- Insert the hinge screws into the pilot holes and tighten them securely using a screwdriver or drill, but be careful not to overtighten and strip the screws or damage the door frame.
- Repeat this process for all the hinges on the door frame, working your way from top to bottom or vice versa.
By affixing the hinges correctly to the door frame, you ensure smooth operation and longevity of the shed doors.
Now that you have successfully prepared the door frame and hinges, you are ready to move on to the next step in installing your shed doors. Stay tuned for our next blog post on the final steps to complete your shed door installation.
Installing The Shed Door
Installing the shed door is a crucial step in completing your shed project. A well-installed door ensures both functionality and security for your shed. In this section, we will guide you through the process of aligning, attaching, and securing the shed door in place to achieve a professional finish. Follow these steps to ensure a smooth installation process.
Aligning and Attaching the Door to the Hinges
Before attaching the door to the hinges, it is important to ensure proper alignment. By following these steps, you can achieve optimal alignment:
- Begin by placing the shed door onto the frame, ensuring a proper fit within the door opening.
- Using a level, carefully adjust the door until it is plumb, ensuring that the door is perfectly vertical.
- Once the door is aligned, mark the positions of the hinges on both the door and the frame using a pencil or marker.
- Using a drill, create pilot holes at the marked positions on the door and the frame to facilitate the attachment of the hinges.
- Position the hinges over the pilot holes and secure them in place using screws, ensuring the hinges are flush against the door and the frame.
Checking for Proper Alignment and Adjustments
After attaching the door to the hinges, it is essential to check for proper alignment and make any necessary adjustments. Follow these steps to ensure everything is in place:
- Close the door and check if it aligns evenly with the frame. Ensure that there are no gaps or uneven spaces between the door and the frame.
- If you notice any misalignment, use a hammer or a mallet to make minor adjustments, gently tapping the door or the hinges until the desired alignment is achieved.
- Once the door is properly aligned, open and close it several times to test its smooth operation. Ensure that it swings freely without sticking or dragging against the frame.
- If adjustments are required, repeat the alignment process until the door operates smoothly without any issues.
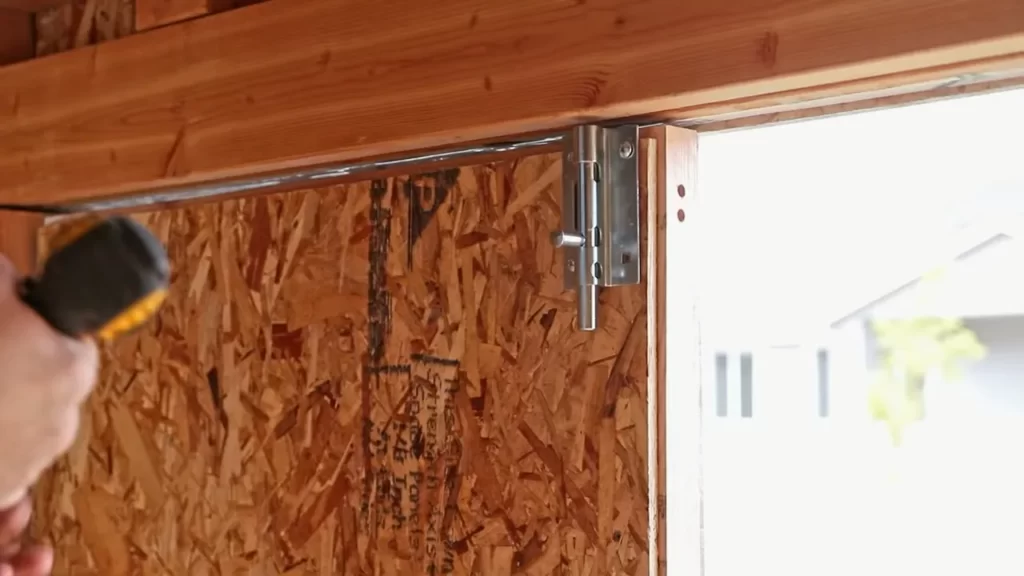
Securing the Door in Place with Screws or Nails
After aligning the door and ensuring its smooth operation, the final step is to secure it in place. This will provide stability and prevent the door from shifting over time. Follow these steps to securely attach the door:
- Using screws or nails, attach the hinges firmly to both the door and the frame, ensuring that they are tightly secured.
- Check the entire door for any gaps or misalignments, using shims or adjusting the hinges if necessary.
- Secure the remaining areas of the door to the frame using additional screws or nails, ensuring that the door is securely in place.
- Finally, test the door’s functionality by opening and closing it to ensure a smooth operation and a secure fit.
By carefully following these steps, you can successfully install shed doors and achieve a professional and secure finish for your shed. Take your time during the installation process to ensure proper alignment, adjustments, and secure attachment of the door, resulting in a functional and aesthetically pleasing shed.
Adding Weatherstripping And Insulation
Adding weatherstripping and insulation to your shed doors is a crucial step in creating a durable and energy-efficient space. Not only does it help prevent drafts and moisture from seeping inside, but it also improves insulation, keeping the shed comfortable throughout the year. In this section, we will cover the steps involved in measuring and cutting weatherstripping to fit around the door frame, as well as the process of applying weatherstripping to ensure a tight seal.
Measuring and Cutting Weatherstripping to Fit Around the Door Frame
Before you can apply weatherstripping to your shed doors, it’s important to accurately measure and cut the material to fit around the door frame. This ensures a precise and snug fit, maximizing its effectiveness in sealing off any gaps or cracks.
To measure the weatherstripping, follow these simple steps:
- Start by measuring the height and width of the door frame using a tape measure.
- Add a few extra inches to these measurements to allow for any overlapping or trimming.
- Using a utility knife or scissors, carefully cut the weatherstripping to match the measured dimensions.
Once you have the weatherstripping cut to size, you are ready to move on to the next step!
Applying Weatherstripping to Prevent Drafts and Improve Insulation
Now that you have the weatherstripping ready, it’s time to apply it to your shed doors. This process is essential for preventing drafts and enhancing insulation, keeping your shed protected from the elements.
Follow these steps to apply weatherstripping:
- Clean the door frame thoroughly to ensure a smooth surface for the weatherstripping to adhere to.
- Starting from one corner, peel off the backing from the weatherstripping adhesive.
- Align the weatherstripping with the edge of the door frame and press it firmly in place, smoothing out any wrinkles or air bubbles.
- Continue this process, adhering the weatherstripping along the entire perimeter of the door frame.
- Trim any excess weatherstripping using a utility knife or scissors, ensuring a neat and tidy finish.
By following these steps, you will create a tight seal that not only prevents drafts but also improves insulation. Your shed doors will be well-protected, keeping the interior comfortable and safeguarding your belongings from the elements.
Installing Door Hardware And Accessories
How to Install Shed Doors
Once you have successfully built your shed doors, the next step is to install the necessary hardware and accessories to ensure proper functionality and convenience. In this section, we will cover the steps for installing a doorknob, latch, and locking mechanism, as well as adding a handle or pull for easy opening and closing. Additionally, we will explore how to install additional features such as a peephole or doorbell to enhance the security and functionality of your shed doors.
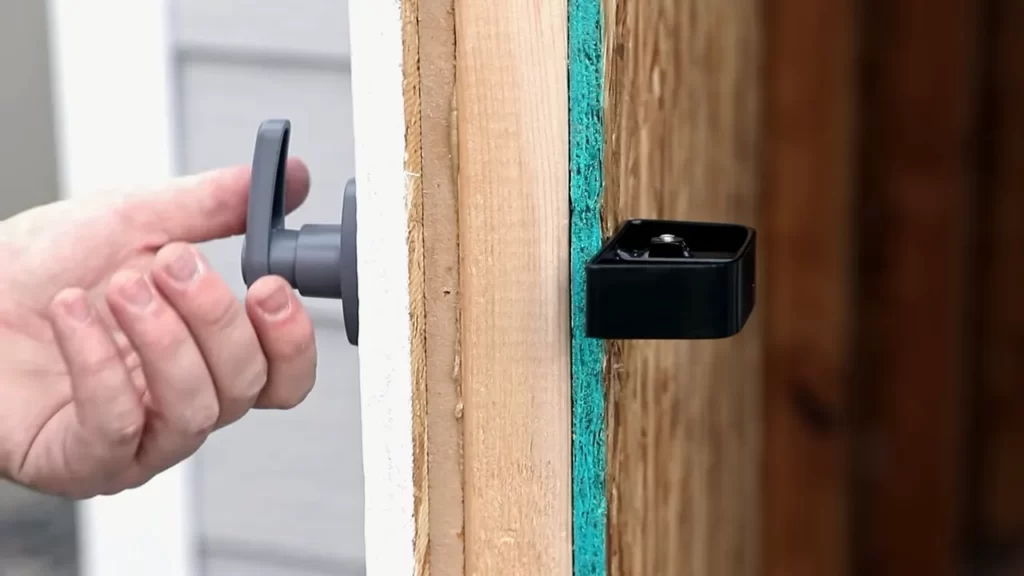
Installing a Doorknob, Latch, and Locking Mechanism
Installing a doorknob, latch, and locking mechanism is essential for securing your shed and protecting its contents. Follow these steps to install these components effectively:
- Position the doorknob: Decide on the ideal height for your doorknob, typically around 36 inches from the bottom of the door. Use a measuring tape to mark the desired location.
- Drill the hole: Use a hole saw bit or drilling template to create a hole for the doorknob.
- Insert the latch and lock: Place the latch into the pre-drilled hole and secure it with screws. Next, attach the lock on the opposite side of the door using the provided screws.
- Test the functionality: Ensure that the doorknob, latch, and locking mechanism are working correctly by turning the knob and testing the lock.
Adding a Handle or Pull for Easy Opening and Closing
An additional handle or pull makes it more effortless to open and close your shed doors. Follow these steps to add a handle or pull:
- Choose the handle location: Decide on the best spot for the handle, considering the height and ergonomics.
- Mark the handle position: Use a pencil or marker to mark the holes for mounting the handle or pull.
- Drill the holes: Use an appropriately sized drill bit to create the holes for the screws that will secure the handle.
- Attach the handle: Align the holes on the handle with the drilled holes on the door and secure it in place with screws.
Installing Additional Features like a Peephole or Doorbell
Installing additional features like a peephole or doorbell can enhance the functionality and security of your shed doors. Follow these steps to install these extra accessories:
- Choose the location: Determine the ideal spot for the peephole or doorbell, considering visibility and reachability.
- Mark the mounting holes: Use a pencil or marker to mark the holes for mounting these accessories.
- Drill the holes: Use an appropriate drill bit size for the accessories you are installing.
- Attach the accessories: Secure the peephole or doorbell in place using the provided hardware, such as screws or bolts.
- Test the functionality: Ensure that the installed accessories are working correctly by testing the peephole or doorbell.
By following these steps, you can effectively install door hardware and accessories for your shed doors. It is essential to attend to these details to ensure proper functionality, security, and ease of use. Take your time to complete each installation step carefully and enjoy the convenience and enhanced functionality that these accessories provide.
Frequently Asked Questions Of How To Install Shed Doors
How Do I Hang A Shed Door?
To hang a shed door, follow these steps: 1. Measure and mark the desired door placement on the shed frame. 2. Install the door hinges on the frame using screws. 3. Attach the door to the hinges, ensuring it is level and aligned.
4. Install a latch or lock mechanism on the door and frame. 5. Test the door to ensure it opens and closes smoothly.
Do Shed Door Hinges Go On The Inside Or Outside?
Shed door hinges are typically installed on the inside, ensuring a clean and professional look.
How Do You Secure An Outside Shed Door?
To secure an outside shed door, follow these steps: 1. Install a robust locking system. 2. Reinforce the door with a metal security plate. 3. Use heavy-duty hinges and screws. 4. Install a security camera or motion sensor light. 5. Consider using a security alarm system for added protection.
Can You Add A Door To A Shed?
Yes, you can easily add a door to a shed. It’s a simple and practical solution to provide access and improve functionality. Adding a door will enhance the shed’s convenience and make it more versatile for various purposes.
How Do You Install Shed Doors Properly?
To install shed doors properly, start by measuring the door opening, then choose the right size and style of doors. Next, remove the old doors, install the door frame, and hang the new doors. Finish by adjusting the doors and adding any necessary hardware for proper functionality.
What Tools Do I Need To Install Shed Doors?
To install shed doors, you will need a tape measure, level, screwdriver, drill, hammer, chisel, circular saw, and a wrench. Additionally, you may need shims, screws, nails, and weatherstripping for a secure and well-sealed installation.
Conclusion
Installing shed doors can be a straightforward process if you follow the right steps. Remember to measure your door opening accurately, choose the right type of door for your needs, and ensure a secure installation. By taking these precautions, you can enjoy a functioning and safe shed door that will last for years.
Don’t hesitate to seek professional help if needed, and make sure to regularly maintain and inspect your shed doors to extend their lifespan. Happy installing!