To install a keyless entry door lock, follow these steps: prepare the door, install the lock keypad, connect the wires, mount the lock on the door, and secure it in place. Introducing keyless entry door locks can be a convenient and secure way to enhance access control in your home or office.
These locks eliminate the hassle of carrying keys and provide a modern touch to your property’s security. We will guide you on how to install a keyless entry door lock in a few simple steps. By following these instructions, you can have your keyless entry door lock installed in no time and enjoy the convenience and peace of mind that it brings.
The Benefits And Growing Popularity Of Keyless Entry Door Locks
Keyless entry door locks have gained significant popularity in recent years due to the numerous benefits they offer to homeowners. These modern locks provide convenience, enhanced security features, and cost-effectiveness, making them a desirable option for both residential and commercial properties.
Convenience and Ease of Use
One of the primary reasons for the growing popularity of keyless entry door locks is the convenience and ease of use they offer. Gone are the days of fumbling for keys or worrying about losing them. With keyless entry locks, you can simply enter a personalized code, use your fingerprint, or even connect to a mobile app to unlock or lock your door.
Besides eliminating the need for traditional keys, keyless entry door locks also provide convenience for homeowners who often have their hands full. Whether you’re carrying groceries, juggling your kids, or trying to find your keys in a bag, the simplicity of using a keyless entry lock saves you time and effort.
Enhanced Security Features
When it comes to the safety of your home or business, keyless entry door locks offer advanced security features that traditional locks may lack. These locks often come with built-in alarm systems and tamper-proof mechanisms, providing an additional layer of protection against break-ins.
Unlike traditional locks that can be easily picked or forced open, keyless entry door locks offer a higher level of security. With features such as auto-locking and time-restricted access codes, you can have peace of mind knowing that only authorized individuals can enter your premises.
Cost-Effectiveness
In addition to their convenience and security, keyless entry door locks are also cost-effective in the long run. While the initial investment may be higher compared to traditional locks, the durability and longevity of keyless entry locks make them a wise financial choice over time.
Keyless entry locks are built to withstand wear and tear, and their electronic components are designed to last. This means you won’t have to constantly replace keys or hire locksmiths for lock repairs. Additionally, the decreased risk of break-ins and theft can help you save money on insurance premiums.
Moreover, keyless entry door locks provide flexibility in terms of access control. With the ability to easily add or delete access codes, you can grant temporary access to visitors or contractors without the need for physical keys. This eliminates the hassle and costs associated with rekeying locks or replacing lost keys.
In conclusion, the benefits and growing popularity of keyless entry door locks are undeniable. From the convenience and ease of use to the enhanced security features and cost-effectiveness, these modern locks offer a superior alternative to traditional locks. Upgrade to a keyless entry door lock today and experience the convenience and peace of mind it brings.
Understanding The Keyless Entry Door Lock Components
Installing a keyless entry door lock can provide convenience and enhanced security for your home or office. With a keyless entry system, you no longer have to worry about misplacing your keys or locking yourself out. However, before you embark on this installation project, it’s important to understand the key components of a keyless entry door lock system.
Types of Keyless Entry Door Locks
There are several different types of keyless entry door locks on the market. Understanding the differences between these types will help you choose the right one for your specific needs.
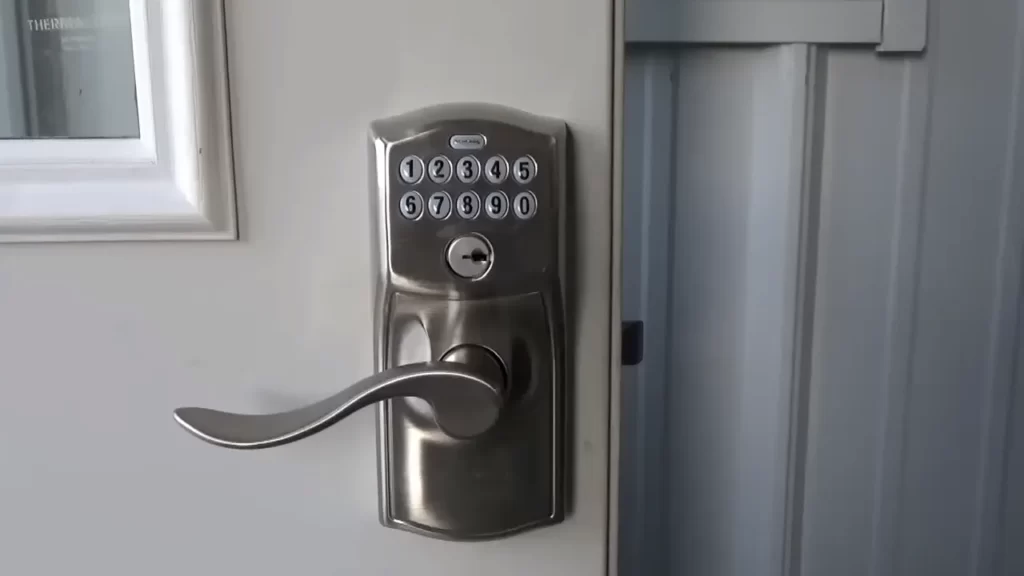
- Numeric Keypad Locks: These locks require you to enter a numeric code on a keypad to gain access. They are commonly used in residential settings and can be reprogrammed easily if you need to change the access code.
- Biometric Locks: These locks use unique physical characteristics, such as fingerprints or retinal scans, to grant access. They offer a high level of security and are often used in commercial or high-security environments.
- Key Fob Locks: These locks operate by using a key fob or remote control to unlock the door. They are convenient, especially for individuals with mobility issues, as they allow for hands-free entry.
- Bluetooth-Enabled Locks: These locks connect to your smartphone via Bluetooth technology. You can unlock the door by simply using an app on your phone, making them extremely convenient.
Necessary Tools and Supplies
Before you begin the installation process, gather the necessary tools and supplies to ensure a smooth and efficient installation. The specific tools required may vary based on your lock model, but here are some commonly needed items:
| Tools | Supplies |
|---|---|
| Screwdriver (Phillips and flathead) | Keyless entry door lock |
| Tape measure | Batteries |
| Drill | Screws |
| Screws | Mounting plate |
| Wire stripper | Strike plate |
Pre-Installation Checklist
Before you dive into the installation process, go through this checklist to ensure you are fully prepared:
- Choose the appropriate type of keyless entry door lock based on your needs and preferences.
- Read the manufacturer’s instructions carefully to familiarize yourself with the installation process.
- Ensure that you have all the required tools and supplies at hand.
- Measure the dimensions of your door to ensure the lock will fit properly.
- Prepare the door by removing the existing lock, if applicable.
By taking the time to understand the key components of a keyless entry door lock system, gathering the necessary tools and supplies, and completing a pre-installation checklist, you will be well-prepared to install your new keyless entry door lock successfully. In the next section, we will walk you through the step-by-step installation process, ensuring that your home or office is secure and conveniently accessible.
Removing The Existing Door Lock
Introductory paragraph
When it comes to upgrading the security of your home, installing a keyless entry door lock is a great option. Not only does it provide convenience by eliminating the need for keys, but it also enhances the overall security of your property. If you’re considering undertaking this project yourself, the first step is to remove the existing door lock. In this article, we’ll guide you through the process of removing a traditional lock mechanism to make way for your new keyless entry system.
Assessing the Current Door Lock
Before you dive into removing your current door lock, it’s essential to assess the condition and type of lock you have. This will help you determine the complexity of the removal process and any additional tools or materials you may need. Here’s what you need to do:
- Examine the lock: Inspect the existing lock for any signs of damage or wear. Make a note of the brand and model of the lock mechanism, if visible. This information can be helpful if you encounter any specific challenges during the removal process.
- Measure the dimensions: Measure the dimensions of your current lock, including the backset and the borehole diameter. This information will be crucial when selecting a replacement keyless entry lock that fits your door perfectly.
- Check the door material: Assess the material of your door (wood, metal, etc.) to ensure the keyless entry lock you choose is compatible and can be securely installed.
Removing the Traditional Lock Mechanism
Once you have completed the initial assessment, you are ready to remove the traditional lock mechanism. Here are the step-by-step instructions:
- Gather the necessary tools: Before starting, gather the tools you’ll need, such as a screwdriver, a drill (if required), pliers, and a latch plate template (if included with your new keyless entry lock).
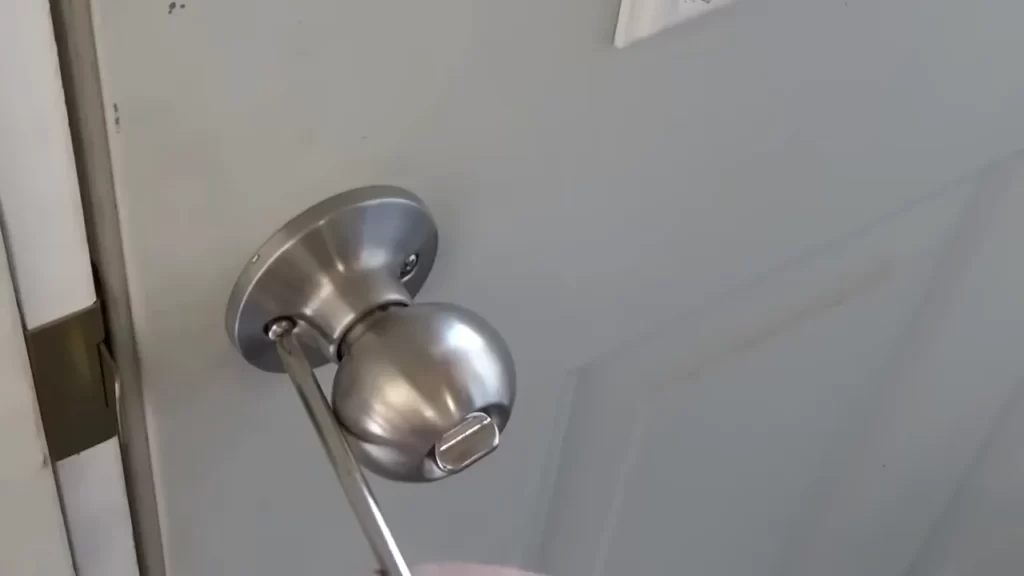
- Prepare the door: Ensure the door is open and stable. Remove any decorative plates or covers that may be concealing the screws holding the lock in place. Set them aside for reinstallation later.
- Unscrew the lock plates: Use a screwdriver to remove the screws holding the lock plates on both the interior and exterior sides of the door. Keep these screws in a safe place as you will need them when installing the new keyless entry lock.
- Detach the latch assembly: Locate the latch assembly, which protrudes into the door frame, and unscrew it from the edge of the door. Slide out the latch bolt and set it aside.
- Remove the deadbolt assembly: If your door has a deadbolt, follow the manufacturer’s instructions to remove the deadbolt assembly. Typically, this involves removing screws or disengaging the lock cylinder from the door edge.
- Clean up and prepare for installation: Once you’ve successfully removed the traditional lock mechanism, take a moment to clean any debris or dust from the door edges and the area where the new keyless entry lock will be installed. This ensures a smooth installation process.
By following these steps, you can easily remove the existing door lock in preparation for installing your new keyless entry system. Stay tuned for our next article, where we’ll guide you through the installation process, bringing you one step closer to enhancing the security and convenience of your home.
Preparing The Door For The Keyless Entry Lock
Preparing the Door for the Keyless Entry Lock Installing a keyless entry door lock can enhance the security and convenience of your home. Before you can install the lock, you’ll need to prepare the door to ensure a smooth and successful installation. This involves measuring and marking the door for the lock components and drilling the necessary holes. In this section, we will guide you through each step, so you can confidently proceed with the installation.
Measuring and Marking the Door
The first step in preparing the door for a keyless entry lock is to measure and mark the door. This will help you determine the precise location where the lock components should be installed. Follow these simple steps:
- Start by measuring the height of the door edge where the keyless entry lock will be installed. Use a tape measure to get an accurate measurement.
- Next, measure the distance from the door edge to the center of the hole where the latch will go. This measurement should typically be around 2-3/8 inches or 2-3/4 inches. Refer to the lock manufacturer’s instructions to confirm the correct measurement for your specific lock.
- Once you have these measurements, mark the door accordingly using a pencil or a marker. Make sure the marks are clearly visible and aligned correctly.
Drilling Holes for the Lock Components
After measuring and marking the door, the next step is to drill the necessary holes for the lock components. Here’s how to proceed:
- Refer to the lock manufacturer’s instructions to determine the specific hole sizes and measurements required for your keyless entry lock.
- Use a drill bit of the appropriate size to drill the hole for the latch. Make sure to drill at the marked center point, ensuring the hole is deep enough to accommodate the latch.
- Next, drill the hole for the deadbolt. Again, refer to the instructions for the correct size and depth of the hole.
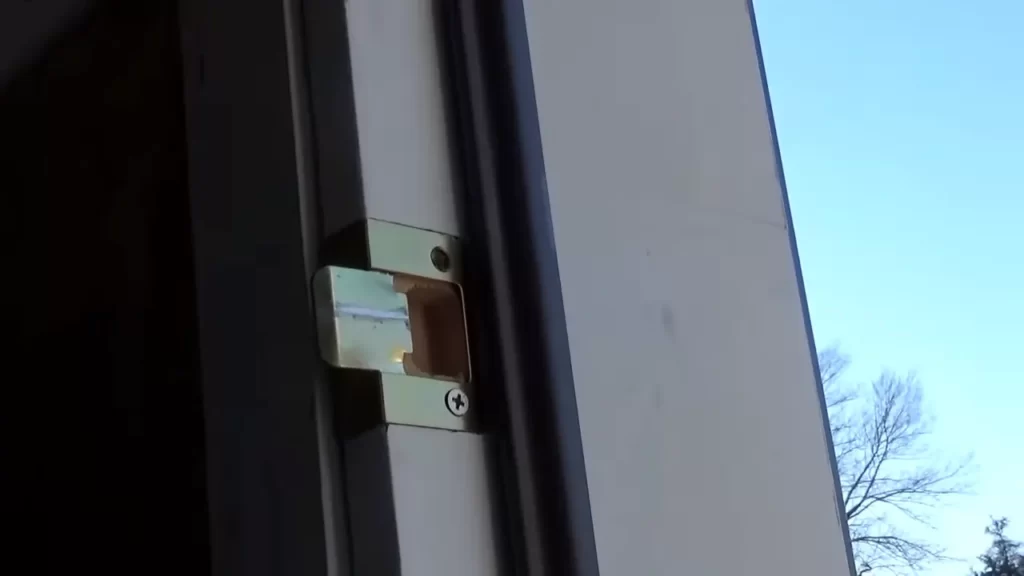
- If your keyless entry lock requires additional holes for other components, such as a strike plate or screws, follow the manufacturer’s instructions to drill these as well.
- Remember to take all necessary safety precautions when using power tools and ensure that the drill is securely held and stable during the drilling process.
By carefully measuring, marking, and drilling the appropriate holes, you are one step closer to installing your new keyless entry door lock. Once the door is prepared, you can proceed with the installation as per the manufacturer’s instructions. Installing a keyless entry door lock is a great way to enhance home security and convenience. With proper preparation, you’ll be able to install the lock seamlessly and start enjoying the benefits it brings. So, measure, mark, and drill your way to a safer and more convenient home today!
Mounting And Connecting The Keyless Entry Door Lock
Installing a keyless entry door lock provides convenience, security, and peace of mind. With a keyless entry door lock, you can eliminate the need for traditional keys and easily grant access to your home. In this guide, we will walk you through the process of mounting and connecting a keyless entry door lock – a straightforward task that can be accomplished with a few simple steps.
Positioning the Lock Housing
Before you start installing the keyless entry door lock, begin by determining the optimal position for the lock housing. Ideally, aim to position the lock housing at a comfortable height, around 3-4 feet from the ground. This height allows for ease of access while maintaining a reasonable level of security.
Attaching the Lock Mechanism and Keypad
Once you have determined the correct position for the lock housing, the next step is to attach the lock mechanism and keypad to the door. Start by aligning the lock mechanism with the pre-drilled holes on the door. Ensure that the mechanism is level and centered.
Take the necessary screws provided with the keyless entry door lock and secure the lock mechanism firmly to the door. Use a screwdriver to tighten the screws, ensuring a tight and secure fit.
After attaching the lock mechanism, it’s time to connect the keypad. Locate the wiring harness on the lock mechanism and the corresponding connection port on the keypad. Carefully insert the wiring harness into the port, ensuring a snug and secure connection.
Once the keypad is connected, test the functionality of the keyless entry door lock. Enter the default access code or the code specified in the manufacturer’s instructions. The lock should engage or disengage accordingly.
Finally, affix the keypad to the door, ensuring it is level and securely fastened. Use the provided screws to attach the keypad to the door, making sure they are tight but not over-tightened to avoid damaging the keypad or the door.
With the lock mechanism and keypad securely attached to the door, you have successfully mounted and connected your keyless entry door lock. In the next section, we will explore setting up access codes and additional features to enhance security and convenience.
Adjusting And Configuring The Keyless Entry Door Lock
Aligning and Testing the Lock Mechanism
Before you start programming user codes for your keyless entry door lock, it is important to first ensure that the lock mechanism is properly aligned and functioning correctly. Misalignment can result in difficulties in opening and closing the door, making it crucial to take the time to adjust the lock mechanism correctly. Here’s a step-by-step guide on how to align and test your keyless entry door lock:
- Begin by making sure the door is fully closed and securely in its frame. This will ensure accurate alignment of your lock mechanism.
- Locate the lock mechanism on your door. It is usually positioned on the edge of the door, adjacent to the door jamb.
- Using a screwdriver, adjust and tighten the screws on the lock mechanism until it is securely fastened to the door. This will help to prevent any unnecessary movement or misalignment.
- Once the lock mechanism is properly aligned, test the lock by turning the handle or knob to see if it smoothly opens and closes the door. A properly aligned lock should operate effortlessly, without any resistance or sticking.
- If you encounter any issues during the testing phase, double-check the alignment of the lock mechanism and make necessary adjustments. In some cases, lubricating the lock mechanism with a silicone-based lubricant can help improve its functionality.
By taking the time to ensure that your keyless entry door lock is properly aligned, you can prevent future issues and ensure smooth operation of the lock mechanism.
Programming User Codes
Now that you have successfully aligned and tested your keyless entry door lock, it’s time to program user codes. Programming user codes allows you and your family members or authorized individuals to enter and exit your home without the need for traditional keys. Follow these steps to program user codes:
- Refer to the manufacturer’s instructions to determine the programming procedure specific to your keyless entry door lock model.
- Start by entering the default master code provided by the manufacturer. This code will allow you to access the programming menu.
- Once you have entered the programming menu, follow the instructions to add or delete user codes. These codes may consist of digits, letters, or a combination of both.
- Choose unique user codes for each person or authorized individual who will be granted access to your home.
- Confirm each user code by pressing the appropriate programming button or following the outlined steps.
- Test each user code by attempting to open the door using the assigned code. Ensure that the door unlocks and locks smoothly.
- If any issues arise during the programming process, refer back to the manufacturer’s instructions or contact their customer support for assistance.
By successfully programming user codes, you can enjoy the convenience and security of a keyless entry door lock. Remember to change your master code periodically and keep your user codes confidential to maintain the security of your home.
Dealing With Misaligned Components
Installing a keyless entry door lock can provide convenience and enhanced security for your home. However, one common issue that homeowners may encounter is misaligned components. Misalignment can occur in both the lock housing and mechanism, as well as the keypad. Fortunately, with a few adjustments, you can easily overcome this problem and ensure smooth operation of your keyless entry door lock.
Adjusting the Lock Housing and Mechanism
When the lock housing and mechanism are misaligned, it can prevent the keyless entry door lock from functioning properly. To resolve this issue, follow these steps:
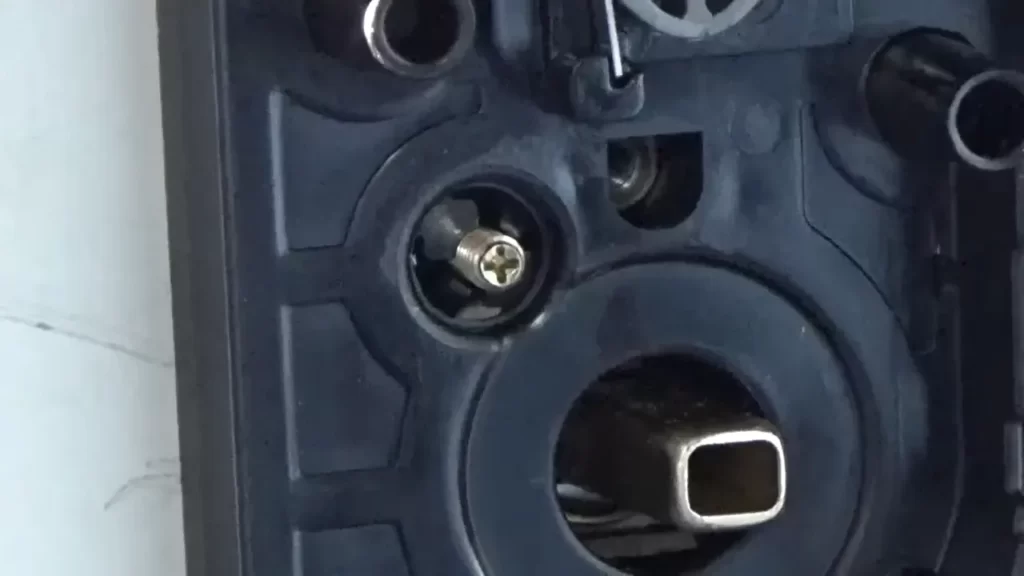
- Start by removing the mounting screws that secure the lock housing to the door.
- Once the lock housing is detached, check for any obstructions or debris that may be causing misalignment.
- Gently adjust the position of the lock housing to align it correctly with the door frame.
- Tighten the mounting screws to secure the lock housing in its new position.
By carefully adjusting the lock housing and mechanism, you can ensure that the keyless entry door lock is properly aligned and functions smoothly.
Realigning the Keypad

If the keypad on your keyless entry door lock is misaligned, it can make it difficult to enter the correct code and gain access to your home. To realign the keypad:
- Remove the keypad cover by loosening any screws or clips that hold it in place.
- Inspect the back of the keypad for any loose connections or visible misalignment.
- If necessary, gently adjust the position of the keypad to align it correctly with the buttons.
- Reattach the keypad cover, ensuring that all screws or clips are securely fastened.
By taking these steps to realign the keypad, you can ensure that entering the access code is a breeze and enjoy the convenience of your keyless entry door lock.
Addressing Power And Battery Concerns
Addressing Power and Battery Concerns
When it comes to installing a keyless entry door lock, one of the most important considerations is ensuring that it has a reliable power source. Power and battery concerns can affect the functionality of your keyless entry door lock, so it’s crucial to address these issues to ensure a smooth and hassle-free experience. In this section, we will discuss two key aspects that you need to focus on: replacing batteries and troubleshooting power supply issues. Let’s dive right in!
Replacing Batteries
If your keyless entry door lock is powered by batteries, regular maintenance is necessary to keep it working optimally. Over time, batteries can drain and lose their effectiveness, leading to reduced performance or even complete lock failure. To avoid any inconvenience, follow these simple steps to replace the batteries:
- Locate the battery compartment on your keyless entry door lock. This is usually located either on the interior side of the door or within the lock mechanism itself.
- Using a screwdriver or the provided tool, carefully open the battery compartment.
- Remove the old batteries, ensuring to dispose of them properly according to local regulations.
- Insert the new batteries, making sure to align them correctly based on the polarity markings.
- Close the battery compartment securely, ensuring it is properly fastened to avoid any potential issues.
By following these steps, you can easily replace the batteries in your keyless entry door lock and continue enjoying its convenience without any interruptions.
Troubleshooting Power Supply Issues
If your keyless entry door lock is not functioning correctly despite regular battery replacements, the problem could lie with the power supply. Here are a few troubleshooting steps you can take to address power supply issues:
- Check the power source. Ensure that your keyless entry door lock is properly connected to a reliable power source, such as an electrical outlet or a backup battery if applicable.
- Inspect the power cables. Ensure that all cables connected to your keyless entry door lock are securely plugged in, without any visible signs of damage.
- Test the power supply. Using a multimeter or voltage tester, check the power output from the source to ensure it meets the required specifications for your keyless entry door lock.
If you have performed these troubleshooting steps and are still experiencing power supply issues, it might be necessary to contact a professional locksmith or the manufacturer for further assistance.
By addressing power and battery concerns when installing a keyless entry door lock, you can ensure a reliable and convenient access control system for your home or office. Regularly replacing batteries and troubleshooting power supply issues will help maintain the functionality of your keyless entry door lock and provide peace of mind knowing that your property is secure.
Fixing Programming And User Code Problems
Resetting the Lock to Factory Settings
One of the common problems users face with keyless entry door locks is programming and user code issues. If you’re experiencing difficulties with your lock and suspect that the programming or user code has been compromised, resetting the lock to factory settings can often solve the problem.
Resetting the lock erases all the previous programming and restores it to its original settings. This process varies depending on the type and brand of the lock you are using, so it’s vital to follow the manufacturer’s instructions specific to your model. However, below we have listed some general steps that can guide you through the resetting process:
- Locate the reset button:
- Keep the button pressed:
- Release the button:
- Reprogram the lock:
Programming User Codes Correctly
After resetting the lock to factory settings, it’s crucial to program the lock correctly to avoid any further programming or user code problems. Programming user codes allows you to assign unique passcodes to individuals who need access to your property. Here are some steps to correctly program user codes:
- Choose user codes:
- Enter programming mode:
- Enter user codes:
- Test the codes:
By following these instructions for fixing programming and user code problems, you can resolve common issues with keyless entry door locks. Remember, it’s always advisable to refer to your lock’s specific manual for accurate and detailed instructions tailored to your lock’s make and model.
Regular Cleaning And Lubrication
The regular cleaning and lubrication of your keyless entry door lock is essential to ensure smooth and efficient operation. Over time, dirt, dust, debris, and even moisture can accumulate on the keypad and lock mechanism, causing them to become sticky or difficult to use. By following a few simple steps to clean and lubricate your keyless entry door lock, you can maintain its functionality and prolong its lifespan.
Cleaning the Keypad and Exterior Components
To start the cleaning process, gather a few basic supplies:
- A soft cloth or microfiber towel
- A mild, non-abrasive cleaner or soap solution
- A small brush with soft bristles
- A can of compressed air (optional)
Follow these steps:
- Begin by wiping down the keypad and exterior components with a soft cloth or microfiber towel to remove any surface dirt or dust. Make sure to clean between and around the buttons.
- If there are any stubborn stains or grime, dampen the cloth with a mild, non-abrasive cleaner or soap solution and gently wipe the affected areas. Avoid using harsh chemicals or abrasive substances, as they may cause damage.
- For hard-to-reach areas or small crevices, use a small brush with soft bristles to dislodge any dirt or debris. Be careful not to apply excessive pressure that could damage the keypad.
- If there are any narrow gaps where dirt or debris might accumulate, use a can of compressed air to blow away the particles.
- Finally, use a dry cloth or towel to wipe down the keypad and exterior components to remove any remaining moisture or cleaning solution.
Lubricating the Lock Mechanism
The next step in maintaining your keyless entry door lock is lubricating the lock mechanism. This helps to ensure smooth operation and prevents any potential sticking or grinding noises. Here’s how you can do it:
- Before applying any lubricant, make sure to refer to the manufacturer’s instructions to determine the appropriate type of lubricant to use for your specific keyless entry door lock.
- Once you have the correct lubricant, apply a small amount to the lock mechanism. Use a precision applicator or a cloth to reach the inaccessible areas.
- Be careful not to over-lubricate, as excess lubricant can attract dust and debris, leading to potential clogging or malfunctioning.
- After applying the lubricant, manually lock and unlock the door several times to distribute the lubricant evenly throughout the lock mechanism.
- Check for any excess lubricant and wipe it away with a cloth or towel.
By following these regular cleaning and lubrication steps, you can maintain the functionality and efficiency of your keyless entry door lock, ensuring hassle-free access to your home or office. It is recommended to perform these maintenance tasks periodically, depending on the usage and environmental factors, to keep your keyless entry door lock in optimal condition.
Monitoring And Replacing Batteries
Monitoring and replacing the batteries in your keyless entry door lock is essential to ensure its proper functioning and maintain the security of your home or office. In this section, we will discuss the battery life expectancy, signs of low battery, and the steps involved in replacing the batteries. By following these guidelines, you can ensure that your keyless entry door lock is always powered up and ready to provide you with convenient access control. Battery Life Expectancy The battery life expectancy of keyless entry door locks may vary depending on the type of lock and frequency of usage. On average, most keyless entry door locks have a battery life expectancy of 1 to 2 years. However, this can be influenced by factors such as the brand, quality of batteries used, and environmental conditions. It is important to keep track of the battery life of your lock and replace the batteries before they run out of power. Signs of Low Battery To avoid any inconvenience or lockouts, it is crucial to be aware of the signs of low battery. Some common indicators include: 1. The lock becomes sluggish or slow in operation. 2. The keypad displays a low battery warning. 3. The lock emits a low or weak sound when engaged. If you notice any of these signs, it is advisable to replace the batteries as soon as possible. Ignoring low battery signs can lead to lock malfunctions, leaving you locked out of your own property. Replacing the Batteries To replace the batteries in your keyless entry door lock, follow these simple steps:
- Locate the battery compartment on your lock. It is usually situated on the interior side of the door.
- Remove the cover of the battery compartment. This can be done by sliding it or using a small screwdriver, depending on the lock model.
- Take out the old batteries and dispose of them properly. Ensure that you use the appropriate type of batteries recommended by the lock manufacturer.
- Insert the new batteries into the compartment, making sure to align them correctly with the positive and negative terminals.
- Close the battery compartment cover, ensuring that it is securely in place.
- Test the lock to confirm that the new batteries are functioning correctly. Enter your access code and check if the lock operates smoothly.
By regularly monitoring and maintaining the batteries in your keyless entry door lock, you can avoid any unexpected lockouts and enjoy the convenience and security it provides. Ensure that you schedule battery replacements according to the manufacturer’s guidelines and promptly address any signs of low battery. With these proactive measures, you can ensure that your keyless entry door lock continues to be a reliable and convenient security solution for your property.
Updating Security Settings And User Codes
When it comes to updating the security settings and user codes of your keyless entry door lock, it’s important to stay on top of these changes to ensure the highest level of security for your home or office. By regularly changing user codes and enabling or disabling certain features, you can enhance the overall safety of your premises. This handy guide will walk you through the process of updating your security settings and user codes for your keyless entry door lock. Let’s dive in!
Changing User Codes Periodically
One of the simplest yet most effective ways to maintain a secure keyless entry door lock is by changing user codes periodically. This practice helps prevent unauthorized access to your property and adds an extra layer of protection. Here’s a step-by-step breakdown of how to change your user codes:
- Identify the manufacturer’s instructions for changing user codes for your specific keyless entry door lock model.
- Locate the programming button or keypad sequence required to enter the programming mode.
- Enter the programming mode and follow the instructions provided by the manufacturer to change the user codes.
- Make sure to select unique and secure user codes that are not easy to guess.
- Save the new user codes in a secure place and avoid sharing them with unauthorized individuals.
Enabling or Disabling Features
Keyless entry door locks often come with additional features that you can enable or disable according to your security needs. These features can enhance the functionality and convenience of your lock while providing added security measures. Here’s how you can enable or disable features:
- Refer to the user manual or manufacturer’s instructions to identify the available features for your keyless entry door lock model.
- Access the programming mode using the designated button or keypad sequence.
- Within the programming mode, navigate the menu options to locate the feature settings.
- Follow the instructions provided by the manufacturer to enable or disable the desired features.
- Always consider your specific security requirements when deciding which features to enable or disable.
- Test the functionality of the enabled or disabled features to ensure they are working correctly.
- If you encounter any issues or have questions, refer back to the user manual or consult the manufacturer’s customer support.
By regularly updating your security settings and user codes, you can ensure your keyless entry door lock remains a reliable and effective security solution. Remember to periodically change user codes and customize the features to suit your specific needs. With a few simple steps, you can enhance the security of your premises and enjoy the convenience of a keyless entry system. Stay safe and secure!
Frequently Asked Questions On How To Install Keyless Entry Door Lock
Are Keyless Door Locks Hard To Install?
Installing keyless door locks is not difficult. With the right tools and instructions, it can be done easily. The process typically involves removing the old lock and replacing it with the new keyless lock. Following the manufacturer’s guidelines will ensure a smooth installation.
How Much Does It Cost To Install A Keyless Entry Door Lock?
The cost of installing a keyless entry door lock varies depending on factors like brand, features, and complexity. On average, you can expect to pay around $150 to $400 for the installation. It’s best to consult a professional locksmith for an accurate quote.
How Do You Install A Keypad Entry Lock?
To install a keypad entry lock, follow these steps: 1. Choose a suitable location for the lock on your door. 2. Remove the existing lock and prepare the door for installation. 3. Attach the keypad assembly and secure it in place.
4. Connect the lock mechanism and test its function. 5. Adjust the lock settings, such as the access code, as needed.
Can Keyless Entry Be Installed?
Yes, keyless entry can be installed in vehicles. It provides convenience and enhances security by allowing you to unlock and start your vehicle without using a key. Professional installation is recommended to ensure compatibility and proper functioning.
How Do I Install A Keyless Entry Door Lock?
Installing a keyless entry door lock is a simple process that requires a few basic tools and following the manufacturer’s instructions. Typically, you’ll need to remove the existing lock, install the new lock, and program it with your desired access codes.
Can I Install A Keyless Entry Door Lock Myself?
Yes, you can definitely install a keyless entry door lock yourself. Most keyless entry door locks come with easy-to-understand instructions and require only basic tools for installation. However, if you’re unsure or uncomfortable with the process, it’s always best to hire a professional locksmith.
Conclusion
Installing a keyless entry door lock is a simple yet effective way to enhance your home security. By following the step-by-step guide outlined in this blog post, you can effortlessly upgrade your door lock system. With its convenient features and ease of use, a keyless entry door lock provides peace of mind and accessibility.
Make your home smarter and safer today with this modern security solution.