To install weather stripping on a garage door, start by measuring the length needed and cutting the weather stripping accordingly, then attach it to the bottom edge of the garage door. Installing weather stripping can help to prevent drafts, save energy, and improve the overall insulation of your garage.
Proper insulation is crucial for maintaining a comfortable and energy-efficient environment in your home. When it comes to your garage door, a simple yet effective method to enhance insulation is by installing weather stripping. By sealing any gaps and cracks, weather stripping prevents drafts, reduces noise, and helps conserve energy.
This comprehensive guide will walk you through the step-by-step process of installing weather stripping on your garage door. With just a few tools and minimal effort, you can significantly improve the insulation capability of your garage and enjoy a more comfortable space while saving on energy costs. Let’s dive into the easy-to-follow instructions for installing weather stripping on your garage door.
Factors To Consider When Selecting Weather Stripping
Installing weather stripping on your garage door is an effective way to prevent drafts, moisture, and even unwanted pests from entering your garage. However, with various types of weather stripping available, it’s important to consider a few factors before making a decision. By understanding the different materials, durability, and effectiveness of each option, you can ensure that you choose weather stripping that meets your specific needs. Let’s delve into these factors in more detail:
Material: Different types of weather stripping materials available
When it comes to weather stripping, you have several materials to choose from. Each material has its own unique characteristics and benefits. Consider the following options:
| Material | Benefits |
|---|---|
| Vinyl | Resistant to extreme temperatures, cost-effective |
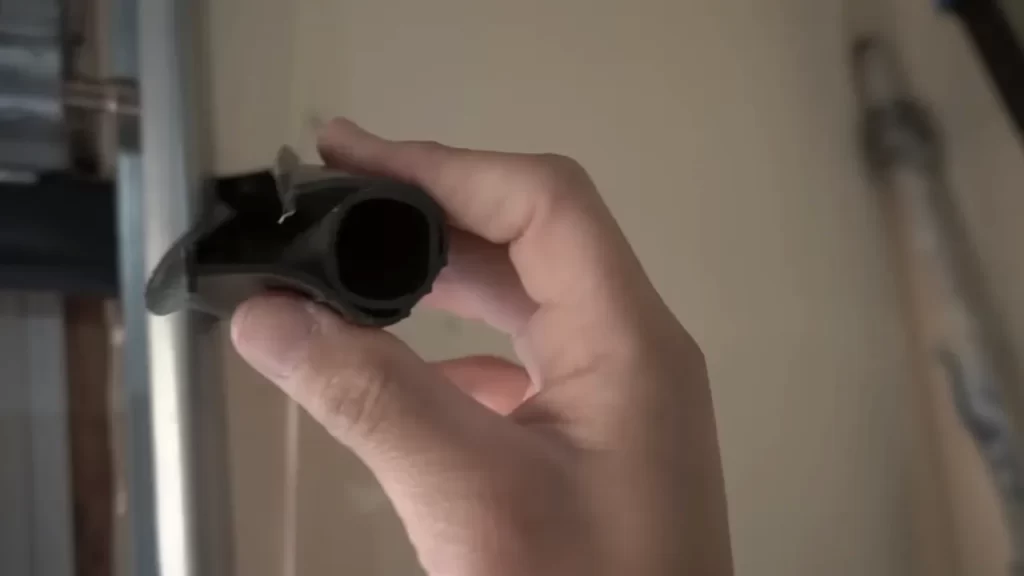
| Rubber | Flexible, durable, can provide a tight seal |
| Foam Tape | Easy to install, seals small gaps efficiently |
| Metal | Durable, effective for larger gaps, suitable for heavy-duty applications |
Durability: Assessing the longevity of weather stripping options
When selecting weather stripping for your garage door, it’s important to assess the durability of each option. After all, you want to choose weather stripping that will last for years to come, offering the best value for your investment. Consider the material’s resistance to wear and tear, extreme temperatures, and exposure to sunlight. Look for weather stripping that is designed to withstand frequent use and remains effective in various weather conditions.
Effectiveness: Evaluating how well each type of weather stripping prevents drafts and moisture
One of the primary purposes of weather stripping is to prevent drafts and moisture from entering your garage. Assessing the effectiveness of each type of weather stripping is crucial in ensuring a secure and efficient seal. Look for weather stripping that creates a tight seal and effectively prevents air and water infiltration. Keep in mind that professional-grade weather stripping may offer superior effectiveness compared to standard options, especially if you live in an area prone to extreme weather conditions.
By considering these factors – the different materials available, the durability of each option, and the effectiveness in preventing drafts and moisture – you can make an informed decision when selecting weather stripping for your garage door. Remember, choosing the right weather stripping can help improve energy efficiency, reduce noise, and provide a more comfortable environment in your garage.
Measuring And Preparing Your Garage Door For Installation
Before you can install weather stripping on your garage door, it’s essential to properly measure your door and prepare the surface. This ensures a precise fit and allows for optimal weather protection. In this section, we will guide you through the necessary steps to measure the length of your garage door and determine the amount of weather stripping needed. We will also cover the important task of cleaning and preparing the surface of the door for installation.
Measuring the Length of the Door and Determining the Amount of Weather Stripping Needed
Correctly measuring the length of your garage door is crucial for obtaining the right amount of weather stripping. To get accurate measurements, follow these simple steps:
- Using a tape measure, start from one side of your garage door and measure its width. Make sure to measure both the top and bottom sections separately as they can sometimes have slight variations.
- Proceed to measure the height of your garage door. Again, measure both the left and right sides of the door, as well as the center, to account for any irregularities.
- Once you have these measurements, calculate the total length of weather stripping needed by adding the measurements from all sides. Remember to consider both the width and height measurements to accurately determine the required amount.
By following these steps, you can ensure that you have the right length of weather stripping to provide optimal protection against drafts and moisture.
Cleaning and Preparing the Surface of the Garage Door for Weather Stripping Installation
Before installing weather stripping on your garage door, it’s crucial to prepare the surface to ensure optimal adherence and longevity. Here are the steps to clean and prepare the door’s surface:
- Begin by thoroughly cleaning the area where the weather stripping will be applied. Remove any dirt, debris, or old weather stripping using a brush, vacuum, or damp cloth.
- After cleaning, inspect the surface for any damage or imperfections. If you notice any dents, rust, or peeling paint, take the necessary steps to repair or restore the surface before proceeding with the weather stripping installation.
- Next, ensure that the surface is dry and free from any moisture. This will allow for proper adhesion of the weather stripping. If necessary, use a towel or allow the surface to air dry before moving forward.
Following these cleaning and preparation steps will set the stage for successful weather stripping installation, providing you with a durable and effective barrier against the elements.
Step-By-Step Guide To Installing Weather Stripping

Before you begin the process of installing weather stripping on your garage door, it’s important to gather all the necessary tools and materials. Having everything prepared will make the installation process smoother and more efficient. Here is a list of items you will need:
| Tools | Materials |
| Measuring tape | Weather stripping |
| Pencil | Adhesive |
| Straight edge | |
| Scissors or utility knife | |
| Screwdriver |
Once you have gathered these tools and materials, you are ready to move on to the next step.
If your garage door already has weather stripping installed, you will need to remove it before installing the new one. Follow these steps to remove the old weather stripping:
- Start by examining the weather stripping to determine how it is attached to the garage door. It may be held in place by screws, adhesive or both.
- Use a screwdriver to remove any screws holding the weather stripping in place.
- If the weather stripping is adhesive-based, carefully peel it off the garage door. You may need to use a utility knife or scissors to help loosen it.
- Once you have removed all the old weather stripping, make sure to clean the surface of the garage door to ensure proper adhesion for the new weather stripping.
Now that you have removed the old weather stripping (if applicable) and prepared the surface of the garage door, you can begin installing the new weather stripping. Follow these step-by-step instructions for each part of the garage door:
Bottom
- Measure the width of the garage door bottom and cut the weather stripping to fit using scissors or a utility knife.
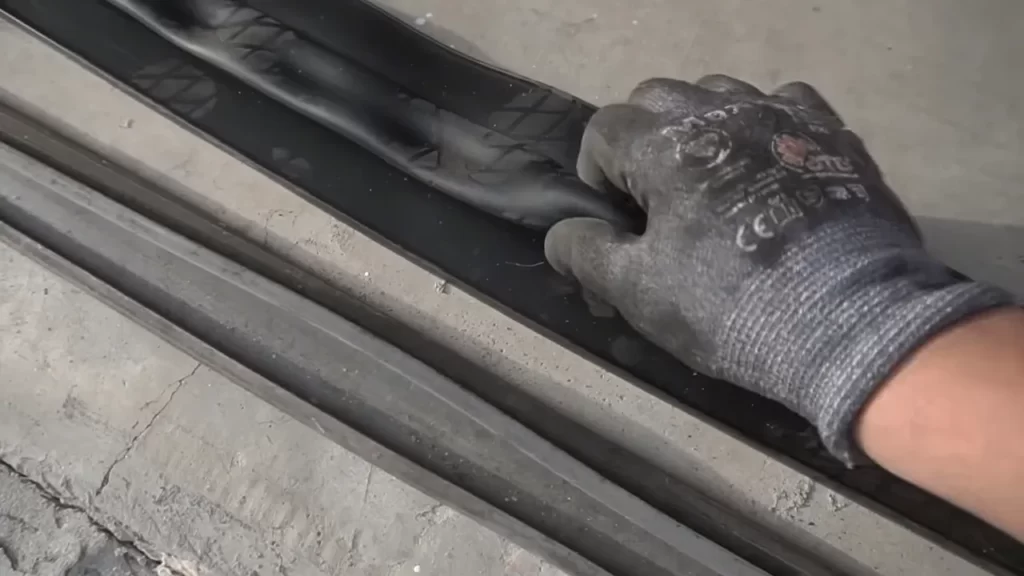
- Apply adhesive to the back of the weather stripping.
- Attach the weather stripping to the bottom of the garage door, making sure it is aligned with the edge.
Sides
- Measure the height of each side of the garage door and cut the weather stripping accordingly.
- Apply adhesive to the back of the weather stripping.
- Attach the weather stripping to each side of the garage door, ensuring that it is aligned with the edge.
Top
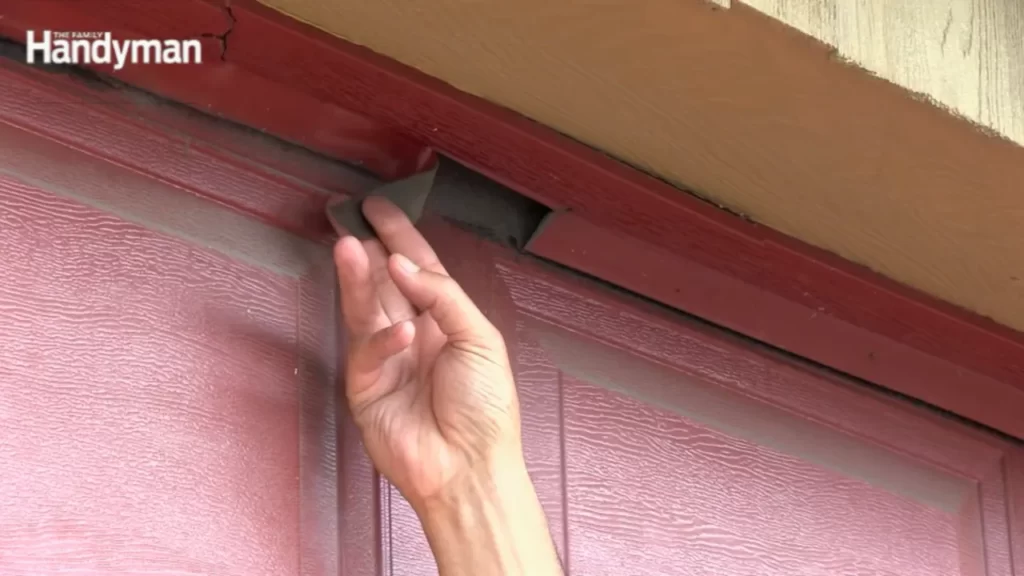
- Measure the width of the garage door top and cut the weather stripping to fit.
- Apply adhesive to the back of the weather stripping.
- Attach the weather stripping to the top of the garage door, ensuring it is aligned with the edge.
To ensure that your garage door is properly sealed and protected from exterior elements, it’s important to pay attention to the corners and joints during the weather stripping installation. Here are a few tips to help you seal them effectively:
- Trim the corners of the weather stripping at a 45-degree angle to create a tight seal at the corners.
- If necessary, apply additional adhesive to the corners and joints to reinforce the seal.
- Smooth out any air pockets or wrinkles in the weather stripping to ensure a secure and even seal.
- Allow the adhesive to dry completely before using the garage door to prevent any damage to the weather stripping.
By following these step-by-step instructions, you can successfully install weather stripping on your garage door and improve its insulation and energy efficiency. Don’t forget to inspect and maintain your weather stripping regularly to ensure its longevity and effectiveness.
Common Mistakes To Avoid During Weather Stripping Installation
When installing weather stripping on your garage door, it’s important to ensure a proper installation to maximize its effectiveness. Unfortunately, many people make avoidable mistakes that can compromise the sealing and insulation of their garage door. By being aware of these common errors and taking the necessary precautions, you can achieve a successful weather stripping installation.
Common errors made during garage door weather stripping installation
- Failing to clean the surface before installation: One of the most common mistakes is neglecting to thoroughly clean the garage door before applying the weather stripping. Dust, debris, and residue can prevent the adhesive from properly adhering to the surface, leading to a weak seal.
- Choosing the wrong type of weather stripping: Another mistake is using the wrong type of weather stripping for your garage door. There are various options available, such as vinyl, rubber, and brush seals. Each type has its own benefits and is suited for different conditions. Using the wrong type can result in ineffective insulation and durability.
- Improper measurement and cutting: Accurate measurement is vital for a proper weather stripping installation. Cutting the weather stripping too short or too long can affect its fit and effectiveness. It’s important to carefully measure the dimensions of your garage door and follow the manufacturer’s instructions for cutting.
- Incorrect positioning and alignment: Placing the weather stripping in the wrong position or misaligning it can compromise its sealing capabilities. Take your time to carefully align the weather stripping along the edges of the garage door, ensuring a tight seal when the door is closed.
- Not adequately securing the weather stripping: Insufficiently securing the weather stripping can cause it to come loose or detach over time. Ensure that the adhesive side is properly pressed against the garage door surface, applying even pressure along its length to guarantee a firm attachment.
Tips for avoiding these mistakes and achieving a proper
installation
To ensure a successful weather stripping installation and avoid the common mistakes mentioned above, consider the following tips:
- Thoroughly clean the garage door surface using a mild cleaning solution and a brush to remove any dirt or debris.
- Choose the appropriate type of weather stripping based on your garage door’s needs, climate conditions, and the level of insulation required.
- Take precise measurements of your garage door before cutting the weather stripping, and follow the manufacturer’s guidelines for cutting and installation.
- Double-check the positioning and alignment of the weather stripping along the edges of the garage door to ensure a proper seal when closed.
- Apply firm pressure along the entire length of the weather stripping to guarantee a secure attachment to the garage door surface.
By avoiding these common mistakes and following these helpful tips, you can achieve an effective and long-lasting weather stripping installation on your garage door. This will not only provide insulation and energy savings but also contribute to a more comfortable and weather-resistant garage environment.
Regular Inspection And Cleaning Of Weather Stripping
Regular Inspection and Cleaning of Weather Stripping When it comes to maintaining the functionality and efficiency of your garage door, regular inspection and cleaning of weather stripping are essential. Weather stripping plays a crucial role in sealing off your garage from the outside weather conditions, preventing energy loss and reducing noise infiltration. Over time, weather stripping can deteriorate due to wear and tear, exposure to the elements, and the accumulation of dirt and debris. To ensure optimal performance and extend the lifespan of your weather stripping, it is important to inspect it regularly for signs of wear and tear and clean it appropriately. In this article, we will guide you through the process of inspecting your weather stripping and share effective cleaning techniques to keep it in top condition.
How to inspect weather stripping for signs of wear and tear
Inspecting your weather stripping for signs of wear and tear is a simple yet vital task that should be done periodically. By identifying any potential issues early on, you can prevent further damage and costly repairs. Here are the steps to inspect your weather stripping effectively:
- Start by carefully examining the weather stripping around your garage door. Look for any visible signs of cracks, splits, or gaps. These can occur due to prolonged exposure to extreme temperatures, sunlight, and harsh weather conditions.
- Next, check the overall condition of the weather stripping. Make sure it is firmly attached to the door and the surrounding frame. Loose or detached weather stripping can compromise its effectiveness.
- Run your hand along the weather stripping to feel for any irregularities or inconsistencies. Pay special attention to areas that are prone to high levels of friction, such as the bottom of the door.
- If you notice any signs of wear and tear, it is important to replace the weather stripping promptly. This will help maintain the energy efficiency of your garage and prevent unwanted outdoor elements from entering.
Cleaning techniques to remove dirt and debris
Cleaning your weather stripping regularly is crucial for keeping it free from dirt and debris that can hinder its performance. Here are some effective cleaning techniques you can use:
- Start by wiping the weather stripping with a clean and damp cloth to remove loose dirt and debris on the surface.
- If the weather stripping has stubborn dirt or grime buildup, mix a mild detergent with warm water. Use a soft-bristled brush or sponge to gently scrub the affected areas.
- Rinse the weather stripping thoroughly with clean water to remove any soap residue.
- Dry the weather stripping completely using a clean towel or cloth. Ensure that it is completely dry before closing the garage door.
- Once the weather stripping is dry, apply a silicone-based lubricant or weather stripping conditioner to keep it flexible and prevent it from drying out and cracking. Be sure to follow the manufacturer’s instructions when applying the lubricant.
Regular inspection and cleaning of your garage door’s weather stripping will help maintain its efficiency and extend its lifespan. By being proactive in the care and maintenance of your weather stripping, you can ensure that your garage remains well-insulated and protected from the outside elements. Remember to inspect for wear and tear regularly and clean your weather stripping using the appropriate techniques.
Replacing Worn-Out Or Damaged Weather Stripping
Signs that weather stripping needs to be replaced
Over time, the weather stripping on your garage door can become worn out or damaged, causing a variety of issues. It is important to know the signs that indicate the need for replacement, so you can maintain the energy efficiency and weather protection of your garage. Here are some common signs that weather stripping needs to be replaced:
- Visible wear and tear: Check for any visible signs of damage, such as cracks, tears, or frayed edges on the weather stripping.
- Drafts or air leaks: If you notice cold drafts or air leaks coming from around your garage door, it is likely that the weather stripping is no longer sealing properly.
- Increased energy bills: Damaged weather stripping can lead to increased energy consumption and higher utility bills, as it allows outside air to enter your garage.
- Moisture accumulation: If you notice moisture or water pooling inside your garage, it may be a sign that the weather stripping is no longer providing an effective barrier against rain or snow.
Step-by-step guide to replacing weather stripping on a garage door
If you have identified that your garage door weather stripping needs to be replaced, don’t worry! You can easily replace it yourself by following these simple steps:
Step 1: Measure and purchase the right weather stripping
The first step is to measure the dimensions of your garage door to determine the length and width of weather stripping required. You can then purchase the appropriate weather stripping from your local hardware store or online.
Step 2: Prepare the garage door
Before installing the new weather stripping, ensure that the garage door is clean and free from any dirt, debris, or old adhesive. Use a mild detergent and water solution to clean the area thoroughly, and allow it to dry completely.
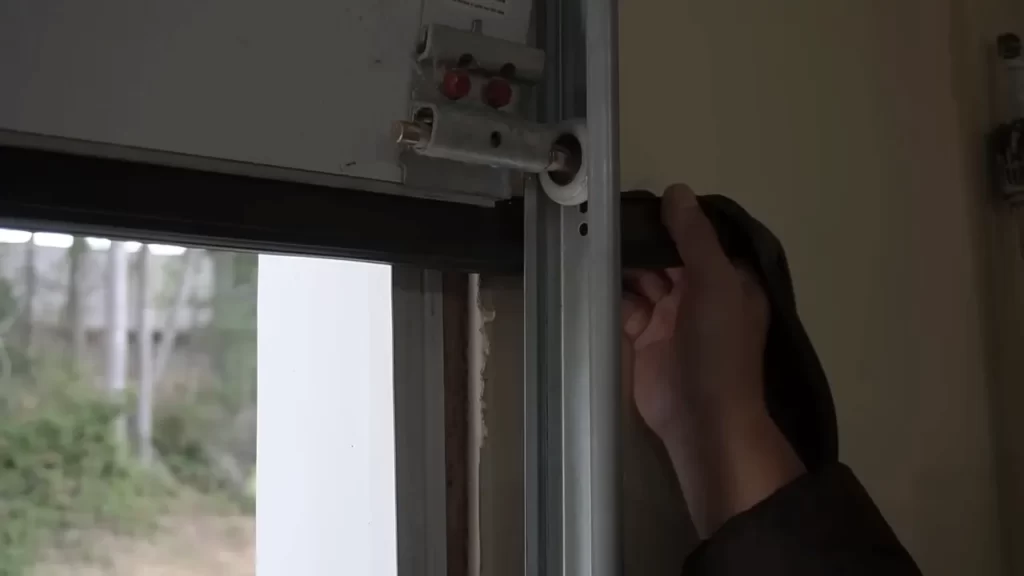
Step 3: Remove the old weather stripping
Starting at one end of the garage door, carefully peel off the old weather stripping using a putty knife or scraper. Take care not to damage the surface of the door during this process. Remove any adhesive residue using an adhesive remover or rubbing alcohol.
Step 4: Install the new weather stripping
Begin by aligning one end of the new weather stripping with the edge of the garage door. Press firmly to adhere it in place. Slowly work your way along the door, pressing and securing the weather stripping as you go. Trim any excess length using a utility knife and make sure the ends meet tightly at the corners for a proper seal.
Step 5: Test the seal
After installing the new weather stripping, close the garage door and check for any gaps or areas where the seal may not be tight. Adjust or reposition the weather stripping if necessary to ensure a proper seal all around the door.
By following these steps, you can easily replace the weather stripping on your garage door, improving its energy efficiency and weather protection. Enjoy a more comfortable and well-insulated garage while reducing your energy consumption and utility bills.
Extending The Lifespan Of Weather Stripping
Weather stripping plays a crucial role in maintaining the efficiency of your garage door, protecting it from the elements and preventing energy loss. However, exposure to weather conditions can cause wear and tear, reducing the effectiveness of the weather stripping over time. To ensure the longevity of your weather stripping, it is essential to take preventive measures and protect it from damage. In this section, we will explore some useful tips and techniques for extending the lifespan of weather stripping on your garage door.
Tips and preventive measures to ensure the durability of weather stripping on a garage door
- Regular inspection: Conducting routine inspections of weather stripping on your garage door is crucial. Check for any signs of damage, such as cracks, tears, or gaps. This will allow you to identify problems early on and take necessary action.
- Proper installation: Ensure that the weather stripping is correctly installed on your garage door. If it is not properly aligned or secured, it may not provide adequate protection and might wear out faster.
- Regular cleaning: Weather stripping can accumulate dirt, debris, and moisture over time. Regularly clean your weather stripping by gently wiping it with a mild detergent or warm water. This will help prevent buildup and maintain its effectiveness.
- Avoid excessive force: Be cautious when opening or closing your garage door to prevent slamming or forcefully hitting the weather stripping. Excessive force can cause cracks or damage the material.
- Keep chemical substances away: Avoid using harsh chemical cleaners or solvents near your garage door weather stripping. These chemicals can degrade the material and shorten its lifespan.
- Apply lubrication: Applying a silicone-based lubricant to the weather stripping can help keep it flexible and prevent it from drying out or cracking. Make sure to use a lubricant that is safe for the type of weather stripping you have.
How to protect weather stripping from damage caused by exposure to weather conditions
Protecting your weather stripping from extreme weather conditions is crucial to ensure its longevity. Here are some techniques to shield it from potential damage:
- Weatherproofing: Consider adding a layer of weatherproofing sealant to your weather stripping. This can provide an extra barrier against moisture, UV rays, and other environmental factors that can degrade the material.
- Garage door threshold seal: Installing a garage door threshold seal can help prevent water and debris from seeping under the garage door, reducing the chances of weather stripping damage. This additional layer of protection can significantly extend the lifespan of both the threshold seal and the weather stripping.
- Weather stripping covers: Investing in weather stripping covers or guards can provide an added defense against physical damage from accidental impacts or abrasions. These covers are designed to shield the weather stripping without compromising its functionality.
- Regular maintenance: Develop a routine maintenance schedule for your garage door, including inspections, cleaning, and necessary repairs. Keeping the door in good condition can minimize wear and tear on the weather stripping and extend its lifespan.
By following these tips and taking preventive measures, you can ensure the durability and longevity of the weather stripping on your garage door. Regular inspections, proper installation, cleaning, and protection from extreme weather conditions will help maintain its effectiveness, providing optimal energy efficiency and protection for your garage.
Frequently Asked Questions Of How To Install Weather Stripping On A Garage Door
How Do You Attach Weather Stripping To A Garage Door?
Attach weather stripping to a garage door by following these steps: 1. Measure the length of the door and cut the weather stripping accordingly. 2. Clean the door surface and ensure it is dry. 3. Peel off the backing from the weather stripping and press it firmly onto the door edge.
4. Attach the weather stripping to the sides and bottom of the door. 5. Trim any excess material if necessary.
How Do You Install Rubber Strips On A Garage Door?
To install rubber strips on a garage door, follow these steps: 1. Measure the width of the garage door and cut the rubber strip to fit. 2. Apply adhesive to the bottom of the garage door. 3. Press the rubber strip onto the adhesive, starting from one side and working your way across.
4. Use a roller to smooth out any wrinkles or air bubbles. 5. Allow the adhesive to dry completely before using the garage door.
How Do You Install A Bottom Seal Retainer On A Garage Door?
To install a bottom seal retainer on a garage door, follow these steps: 1. Measure the length of the door bottom and cut the retainer to fit. 2. Attach the retainer to the bottom of the door using screws or nails.
3. Slide the bottom seal into the retainer’s track. 4. Trim any excess seal. 5. Test the door to ensure a proper seal.
How Do You Replace The Weather Strip On The Bottom Of A Garage?
To replace the weather strip on your garage’s bottom, follow these steps: 1. Measure the length needed for the new strip. 2. Remove the old strip by pulling it out from the groove. 3. Clean the area to ensure a smooth surface.
4. Insert the new strip into the groove. 5. Trim any excess length if necessary.
Q: How Do You Install Weather Stripping On A Garage Door?
A: Start by cleaning the garage door and measuring the length of the weather stripping needed. Cut the weather stripping to size and attach it to the bottom of the garage door using adhesive or nails.
Q: Why Is Weather Stripping Important For A Garage Door?
A: Weather stripping helps to seal the gaps and cracks around the garage door, preventing drafts, insects, and moisture from entering the garage. It also helps to improve energy efficiency.
Conclusion
Installing weather stripping on a garage door is a simple yet effective way to prevent drafts, energy loss, and dust from entering your home. By following these steps and using the right tools, you can easily enhance the insulation of your garage and maintain a comfortable temperature inside.
Remember to regularly check and replace worn-out weather stripping to ensure its functionality. Don’t wait any longer to start saving energy and improving the comfort of your home with this easy DIY project!