To install an exterior door where there is no existing door, measure the opening, purchase a door of the appropriate size, install the door frame, and hang the door.
Preparing For The Installation Process
Before you begin installing an exterior door where there is currently no door, it’s important to properly prepare for the installation process. This involves evaluating the space for door installation, gathering the necessary tools and materials, and taking accurate measurements for the door opening. By following these steps, you can ensure a smooth and successful installation.
Evaluating the Space for Door Installation
Start by evaluating the space where you plan to install the exterior door. Take a close look at the area and make note of any potential obstacles or challenges that may arise during the installation process. Look for things like electrical outlets, plumbing pipes, or structural supports that could be in the way. It’s important to address these issues before proceeding with the installation to avoid any complications later on.
Gathering the Necessary Tools and Materials
Next, gather all the tools and materials you’ll need for the installation process. This ensures that you have everything on hand and ready to go, saving you time and frustration along the way. Some of the common tools and materials you may need include:
| Tools | Materials |
|---|---|
| DrillScrewdriverHammerLevelTape Measure | Exterior doorScrewsShimsWeatherstrippingDoor frame kit |
Taking Accurate Measurements for the Door Opening
Finally, taking accurate measurements is crucial to ensure a proper fit for your new exterior door. Start by measuring the width and height of the door opening. Measure the width at the top, middle, and bottom of the opening, as well as the height on both sides. Take note of the smallest measurement for both width and height. This ensures that your new door will fit securely in the opening without any gaps or unevenness.
Once you have the measurements, you can select an exterior door that matches the dimensions. Remember to take into account any additional space needed for the door frame kit and weatherstripping.
With proper evaluation, gathering the necessary tools and materials, and taking accurate measurements, you are now ready to proceed with the installation process. In the next section, we will guide you through the step-by-step process of installing the exterior door where there is no door, ensuring a seamless and efficient installation.
Framing The Door Opening
When it comes to installing an exterior door where there is no existing opening, the first step is framing the door opening. This crucial step ensures that the door fits securely and functions properly. In this section, we will guide you through the process of framing the door opening, highlighting key steps such as removing any obstacles or existing structure, creating the rough opening, and ensuring proper alignment and leveling.
<h3>Removing any Obstacles or Existing Structure</h3>
Before you begin framing the door opening, it’s important to remove any obstacles or existing structure that may be in the way. This could include walls, old doors, or anything that obstructs the installation of the new door. Take caution and ensure you have the necessary tools and safety equipment before proceeding.
<h3>Creating the Rough Opening for the Door Installation</h3>
Once any obstacles or existing structure have been removed, it’s time to create the rough opening for the door installation. The rough opening refers to the space in the wall where the door will be placed. Measure the dimensions of your new door and mark the outline on the wall, ensuring it is level and square. Use a saw to carefully cut along the marked outline, making sure to follow any manufacturer recommendations for the door size.
If you are unsure about the correct dimensions or the process of creating a rough opening, it is advisable to consult a professional or refer to the manufacturer’s installation instructions. Accuracy is key in this step to ensure a proper fit for your exterior door.
<h3>Ensuring Proper Alignment and Leveling of the Opening</h3>
Once the rough opening has been created, it’s important to ensure proper alignment and leveling of the opening. This will prevent any potential issues with the door’s functionality in the future. Check the opening for levelness using a carpenter’s level, adjusting as necessary. Additionally, make sure the opening is plumb by using a plumb bob or level. This will ensure that the door hangs correctly and operates smoothly.
If you notice any inconsistencies or misalignments during this process, it is important to address them before proceeding with the installation. This could involve adjustments to the framing, shimming, or other corrective measures. Taking the time to properly align and level the opening will greatly contribute to the overall success of your exterior door installation.In conclusion, framing the door opening is a crucial step when installing an exterior door where there is no existing opening. By removing any obstacles or existing structure, creating the rough opening for the door installation, and ensuring proper alignment and leveling of the opening, you set the foundation for a secure and functional exterior door. Take your time, follow the necessary steps, and consult professionals if needed to ensure a successful installation process.
Installing The Exterior Door
How to Install an Exterior Door Where There is No Door
Installing an exterior door where there is currently no door can greatly enhance the aesthetic appeal and security of your home. Whether you’re replacing an old door or adding a door to a new opening, the installation process can seem daunting. However, with the right tools and a little knowledge, you can successfully install an exterior door yourself. In this guide, we’ll walk you through the process of installing the exterior door, from choosing the right type of door to checking for proper functionality.
Before you start the installation process, it’s important to choose the right type of door for your needs and style preferences. There are various types of exterior doors available on the market, including wood, fiberglass, and steel doors. Each type has its own advantages and considerations. Here are some factors to consider when choosing the right type of door:
- Security: Consider the level of security you require. Steel doors are known for their strength and durability, making them a popular choice for homeowners prioritizing security.
- Insulation: If energy efficiency is a concern, consider a door with good insulation properties. Fiberglass doors are known for their excellent insulation capabilities.
- Aesthetics: Choose a door that complements the architectural style of your home. Wood doors offer a classic and elegant look, while fiberglass and steel doors come in a variety of styles and finishes.
Once you have chosen the right type of door, it’s time to prepare it for installation. Follow these steps to ensure a smooth installation process:
- Measure the doorway: Take accurate measurements of the doorway to ensure the door will fit properly. Measure the width, height, and depth of the doorway.
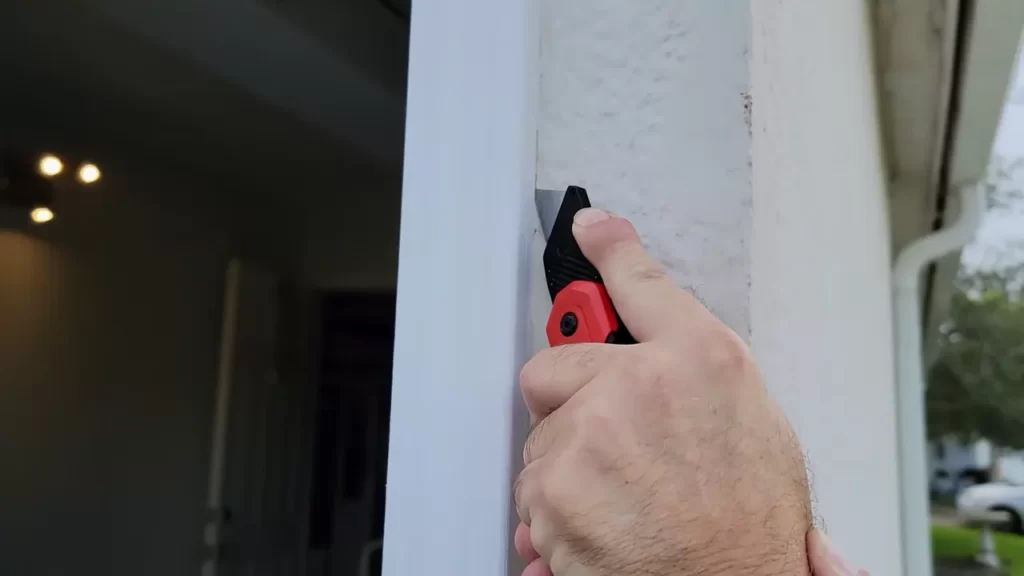
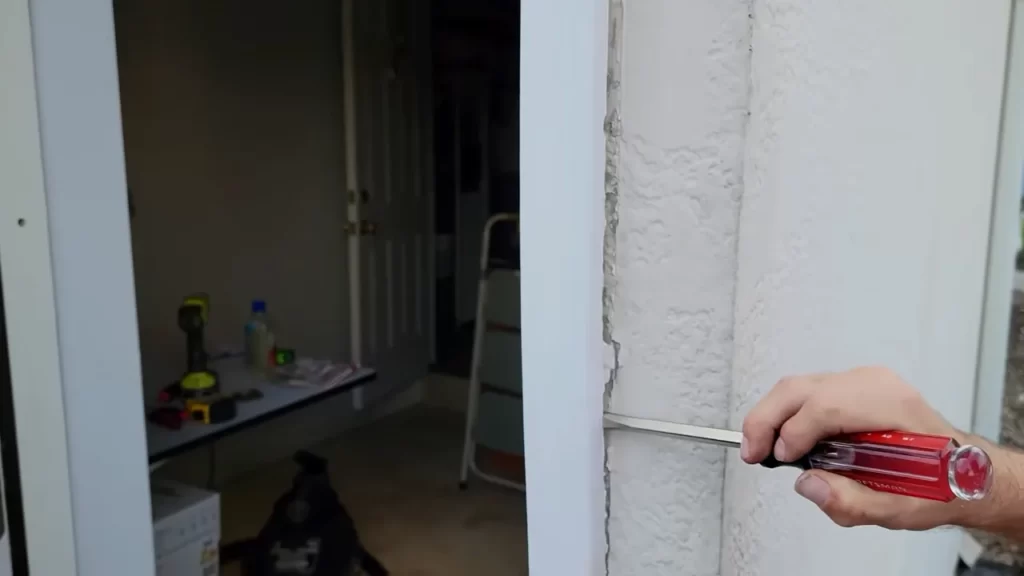
- Remove any existing trim: If there is trim around the doorway, carefully remove it using a pry bar or a utility knife.
- Clean the doorway: Remove any debris or dirt from the doorway to ensure a clean surface for installation.
Now it’s time to install the hinges and align the door within the doorway:
- Position the door: Place the door into the opening, ensuring it is level and centered.
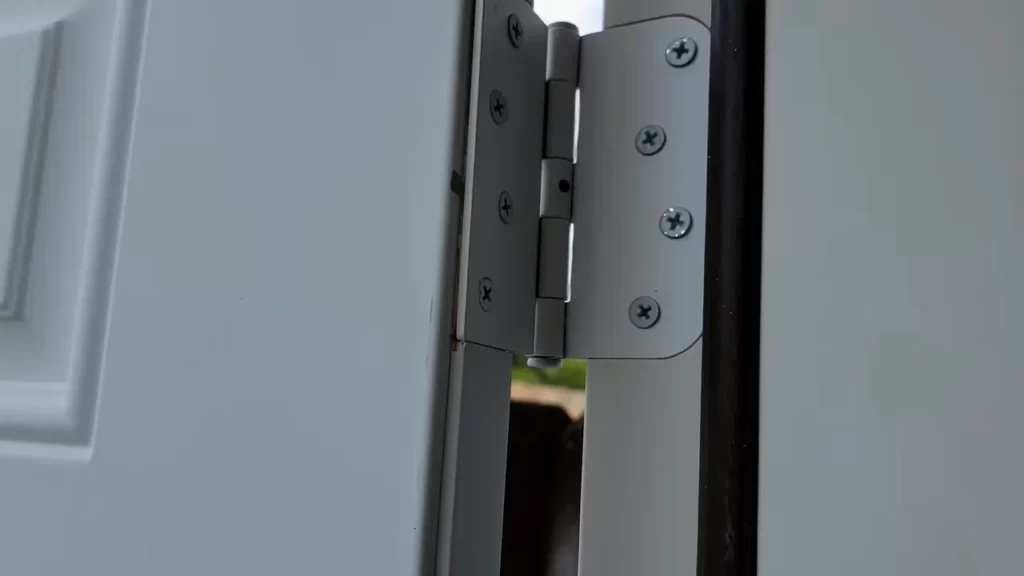
- Install the hinges: Secure the hinges to the door and the door frame using screws. Make sure the hinges are properly aligned to ensure smooth operation of the door.
- Check the door swing: Open and close the door to ensure it swings freely and doesn’t scrape against the frame. If needed, adjust the hinges to achieve the proper swing.
After aligning the door, it’s important to secure it in place using screws or bolts:
- Secure the door frame: Use long screws or bolts to secure the door frame to the surrounding structure. This will help reinforce the door and provide added security.
- Check for stability: Make sure the door is stable and doesn’t wobble. If necessary, use shims to level the door and eliminate any gaps.
- Tighten all screws: Ensure that all screws and bolts are tightly secured to prevent the door from becoming loose over time.
Finally, it’s important to check the door for proper functionality before considering the installation complete:
- Test the lock: Ensure that the lock functions smoothly and securely. Test both the locking mechanism and the doorknob or handle to make sure they operate properly.
- Check the weatherstripping: Inspect the weatherstripping around the door to ensure a tight seal. Replace any damaged weatherstripping to prevent drafts and energy loss.
- Verify proper insulation: If your door is supposed to provide insulation, check for any gaps or drafts around the edges. Use weatherstripping or insulation materials to fill any gaps and improve energy efficiency.
By following these steps, you can install an exterior door where there is currently no door, enhancing the security, beauty, and functionality of your home.
Adding Finishing Touches
Once you have successfully installed an exterior door where there was previously none, it’s time to add those final touches that will not only enhance the appearance but also improve energy efficiency and provide convenience and security. In this section, we will cover important aspects such as applying weatherstripping and insulation, installing door trim and casing, painting or staining the door, and adding hardware and accessories.
Applying Weatherstripping and Insulation for Energy Efficiency
Applying weatherstripping and insulation is an essential step to ensure your new exterior door is energy efficient. Weatherstripping helps seal any gaps between the door and the frame, preventing drafts and increasing energy efficiency. Insulation provides additional thermal resistance, keeping your home warm in the winter and cool in the summer.
To apply weatherstripping, you will need to measure and cut strips of weatherstripping material according to the size of your door frame. Then, using adhesive or nails, attach the weatherstripping along the sides and top of the door frame, making sure it creates a tight seal when the door is closed. For the bottom of the door, you can use a door sweep to further prevent air leakage.
When it comes to insulation, you have several options. Foam insulation is a popular choice as it can be easily sprayed into small spaces and expands to fill them. Another option is fiberglass insulation, which comes in rolls or batts that can be cut and fitted around the door frame. Whichever type of insulation you choose, make sure it is properly installed to maximize energy efficiency.
Installing Door Trim and Casing for a Polished Look
Installing door trim and casing adds a polished and finished look to your exterior door. Trim and casing can be made from various materials such as wood, PVC, or composite materials. Before installation, measure and cut the trim pieces according to the dimensions of your door frame.
To install the trim, start with the top piece and secure it in place using nails or construction adhesive. Next, install the side pieces, positioning them flush with the top piece and securing them firmly. Finally, install the bottom piece, making sure it aligns with the side pieces.
Painting or Staining the Door to Enhance its Appearance
Painting or staining your exterior door is a great way to enhance its appearance and protect it from the elements. Before painting or staining, ensure that the door surface is clean and free from any dust or debris. If necessary, sand the door lightly to create a smooth surface for better paint or stain adhesion.
When painting the door, choose a high-quality exterior paint that can withstand the outdoor conditions. Apply a primer coat first for better adhesion and then follow with the desired color. For staining, select a stain that complements the natural grain of the door. Apply the stain evenly and let it dry completely before applying a protective clear coat.
Adding Hardware and Accessories for Convenience and Security
Adding hardware and accessories to your exterior door not only adds convenience but also enhances security. Choose high-quality hardware that is durable and resistant to weather conditions. Install a deadbolt lock for added security, along with a sturdy handle or doorknob.
Additionally, consider adding accessories such as a door viewer to increase visibility and a doorbell or knocker for convenience. These small details can make a big difference in the overall functionality and aesthetics of your exterior door.
Troubleshooting And Common Tips
Addressing Common Issues during Door Installation
Installing an exterior door can sometimes be a tricky task, especially when there was no previous door in place. However, by following the correct steps and troubleshooting common issues that may arise, you can successfully install an exterior door where there was none before. Here are some common issues you may encounter and how to address them:
1. Uneven or Sloping Floors:
If you notice that the floor where you are installing the door is uneven or sloping, it’s important to address this issue before proceeding. Uneven floors can cause the door frame to twist or warp, resulting in a poor fit and potential issues with the door’s functionality. To address this problem, you can use shims to level the door frame or consider using self-leveling compound to create a smooth and even surface for installation.
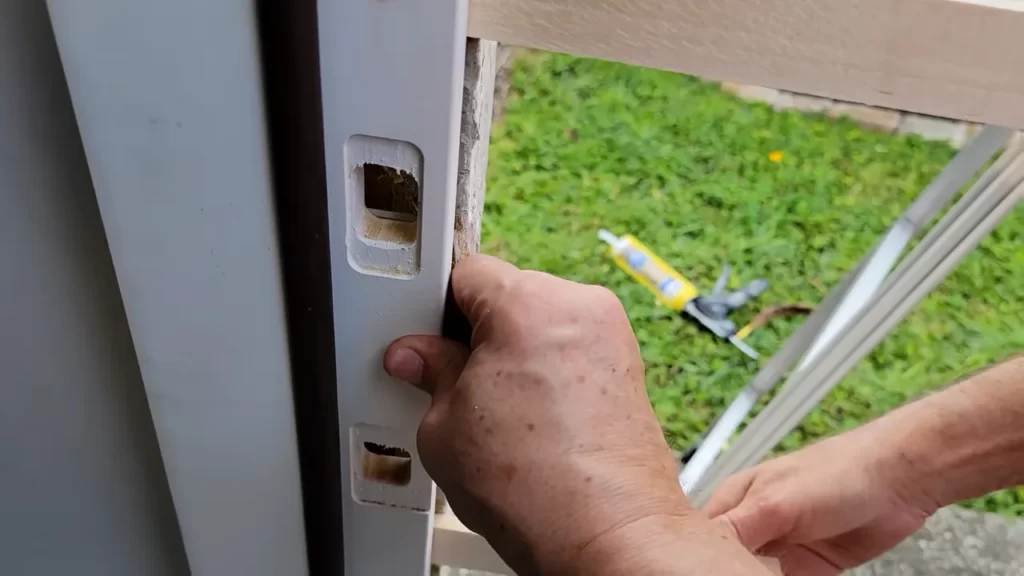
2. Rot or Damage to the Door Frame:
Before installing the new exterior door, it’s crucial to inspect the door frame for any signs of rot or damage. Rotting wood or structural damage can compromise the integrity of the door and affect its performance. If you notice any issues with the door frame, it’s recommended to replace or repair the damaged areas before proceeding with the installation. This will ensure a solid foundation for your new door and prevent any future problems.
3. Inadequate Insulation:
Proper insulation is vital for maintaining a comfortable temperature inside your home and reducing energy costs. During the installation process, pay close attention to the insulation around the door frame. Inadequate insulation can lead to drafts or air leaks, compromising the energy efficiency of your home. Make sure to use weatherstripping and insulating foam to seal any gaps or cracks around the door frame. This will help to keep your home well-insulated and reduce energy loss.
Tips for Achieving a Professional and Seamless Finish
To ensure a professional and seamless finish when installing an exterior door where there was no door previously, here are some helpful tips to consider:
1. Accurate Measurements:
Before purchasing your new exterior door, it’s important to take accurate measurements of the door opening. Measure the height, width, and depth, and consider any additional space required for proper installation. Having precise measurements will ensure that the door fits perfectly and minimizes the need for adjustments during installation.
2. Proper Door Alignment:
To achieve a professional look, it’s crucial to properly align the door within the frame. Use a level to ensure that the door is plumb, both vertically and horizontally. This will prevent the door from sticking or swinging open or closed on its own. Proper alignment is essential for the door’s functionality and aesthetic appeal.
3. Secure Installation:
To guarantee a secure installation, use high-quality screws and fasteners to attach the door frame to the wall studs or existing framing. This will provide added durability and stability to your exterior door. Additionally, consider using longer screws in the door hinges for added strength and security.
Maintaining and Caring for Your Exterior Door
To keep your newly installed exterior door in optimal condition, it’s important to provide regular maintenance and care. Here are some tips to help you maintain your door’s functionality and preserve its appearance:
1. Regular Cleaning:
Cleaning your exterior door regularly is essential to remove dirt, dust, and other debris that can build up over time. Use a mild detergent solution and a soft cloth or sponge to gently clean the door’s surface. Avoid using abrasive cleaners or harsh chemicals that could damage the door’s finish.
2. Lubrication of Moving Parts:
To keep the door’s moving parts functioning smoothly, it’s recommended to lubricate hinges, locks, and other hardware on a regular basis. Use a silicone-based lubricant or a specialized door lubricant to ensure proper operation and prevent rust or corrosion.
3. Periodic Inspections:
Performing periodic inspections of your exterior door is crucial to identify any signs of wear or damage. Check for cracks, chips, or any signs of rot, and promptly address these issues to prevent further damage. Regular inspections will help you catch any potential problems early on and take appropriate action. By troubleshooting common issues, following these tips for achieving a professional finish, and maintaining your exterior door properly, you can enjoy a beautiful and functional addition to your home. So go ahead and tackle that exterior door installation project – you’ve got this!
Frequently Asked Questions Of How To Install An Exterior Door Where There Is No Door
How Much Does It Cost To Add A Door To An Exterior Wall?
Adding a door to an exterior wall can cost between $1,000 and $3,000, depending on factors like the material, size, and complexity of the installation. It’s always best to consult with a contractor to get an accurate estimate for your specific project.
Can You Buy Just The Exterior Door?
Yes, you can purchase just the exterior door separately, without any additional components.
How Do You Add A Door To A Finished Opening?
To add a door to a finished opening, you’ll need to measure the opening size. Then, purchase a pre-hung door that fits the measurements. Remove trim and molding around the opening, and install the pre-hung door following the manufacturer’s instructions.
Finally, replace the trim and molding to complete the installation.
Can You Put A New Door In An Old Frame?
Yes, it is possible to put a new door in an old frame. Just make sure the dimensions and hinges align properly for a secure fit. Try to choose a door that matches the style and size of the frame for a cohesive look.
How Do You Install An Exterior Door Without An Existing Door?
To install an exterior door without an existing one, measure the opening, remove any obstructions, and secure the new door frame before installing the new door.
What Tools Do You Need To Install An Exterior Door?
To install an exterior door, you’ll need tools such as a tape measure, level, drill, hammer, chisel, screwdriver, and a saw – both a circular saw and a hacksaw.
Conclusion
To sum up, installing an exterior door where there is no door may seem like a daunting task, but with the right tools and techniques, it can be accomplished by anyone. By following the step-by-step instructions provided in this blog post, you can transform your entrance and enhance your home’s security and curb appeal.
So, go ahead and take on this DIY project with confidence!