To install a door sill, begin by measuring the width and height of the doorway. Then, purchase a door sill that matches the dimensions.
Getting Started: Tools And Materials Needed
Before you dive into the process of installing a door sill, there are a few essential tools and required materials that you need to gather. These items will ensure that you have everything you need to successfully complete the installation and achieve a professional-looking result. Whether you are a seasoned DIY enthusiast or a beginner, having the right tools and materials at hand will make your job much easier and more efficient.
Essential tools for door sill installation
Below is a list of the essential tools you will need for installing a door sill:

| Tool | Description |
|---|---|
| Measuring Tape | Used to measure the dimensions of the door sill accurately. |
| Pencil or Marker | Used to mark the areas on the door sill where cuts or adjustments are needed. |
| Hacksaw or Miter Saw | Used to cut the door sill to the required length. |
| Screwdriver | Used to secure the door sill in place with screws. |
| Drill | Used to create pilot holes for the screws. |
| Level | Used to ensure that the door sill is installed level and even. |
| Clamps | Used to hold the door sill in place during installation. |
| Safety Glasses | Used to protect your eyes from debris while cutting or drilling. |
| Gloves | Used to protect your hands from sharp edges or splinters. |
Required materials for the project
Now that you have your tools ready, it’s time to gather the necessary materials for the door sill installation. Here is a list of the materials you will need:
- Door Sill: Choose a door sill that fits the dimensions of your door and is made from a durable material.
- Screws: Look for screws that are long enough to penetrate the door sill and secure it firmly to the floor.
- Adhesive: Depending on the type of door sill you have, you may need adhesive to ensure a strong bond between the door sill and the floor.
- Flooring Material: If you plan to install flooring around the door sill, make sure you have the necessary flooring material on hand.
- Putty or Caulk: Used to fill any gaps or seams between the door sill and the floor, providing a seamless and finished appearance.
With these tools and materials at your disposal, you are well-prepared to begin the installation of your door sill. In the next section, we will guide you through the step-by-step process of installing a door sill, ensuring a secure and attractive transition between the exterior and interior of your door.
Preparing For Installation: Measuring And Planning
Before installing a door sill, it’s important to take accurate measurements and plan the installation process. This will ensure a smooth workflow and a perfectly installed door sill that fits your doorway like a glove. In this guide, we will walk you through the essential steps of measuring and planning, so you can proceed with confidence.
Measuring the doorway for accurate installation
Accurate measurements are crucial when installing a door sill. To begin, gather the following tools:
- Tape measure
- Pencil or marker
- Level
Start by measuring the width of your doorway. Place the tape measure at the inside edge of the door frame on one side, and extend it across the width to the other side. Make sure to measure from the inside edges, as this will give you the correct dimensions for your door sill.
Next, measure the height of the doorway. Place the tape measure at the threshold of the door frame and extend it upwards to the top of the frame. This measurement will determine the height of the door sill you need to purchase.
Repeat the process on both sides of the doorway to ensure accuracy. Take note of the measurements and write them down for future reference.
Planning the installation process for a smooth workflow
Once you have measured your doorway, it’s time to plan out the installation process. Planning ahead will help you streamline the installation and avoid any unnecessary hiccups along the way. Here are some important steps to consider:
- Choose the right door sill: Based on your measurements, select a door sill that matches the width and height of your doorway. Consider the material, design, and functionality of the door sill to ensure it meets your specific requirements.
- Prepare the doorway: Before installing the door sill, make sure the doorway is clean and free of any debris. Remove any existing door sill or trim that may interfere with the installation process.
- Check the subfloor: Inspect the subfloor beneath the doorway to ensure it’s level and in good condition. If there are any uneven areas or damage, make the necessary repairs before proceeding with the installation.
- Install weatherstripping (optional): If you want to enhance the energy efficiency of your doorway, consider installing weatherstripping along the edges. This will help seal any gaps and prevent drafts from entering your home.
- Follow the manufacturer’s instructions: Every door sill installation may have specific requirements and guidelines. Read the manufacturer’s instructions carefully and follow them step by step to ensure a successful installation.
By taking accurate measurements and planning the installation process, you are setting yourself up for a hassle-free and precise installation of your door sill. Now that you have the knowledge, it’s time to put it into action and enjoy the benefits of a properly installed door sill that enhances the functionality and aesthetics of your doorway.
Step 1: Removing The Old Door Sill
Before you can install a new door sill, you need to remove the old one. This is a crucial step in ensuring a proper and secure installation. In this section, we will guide you through the process of safely removing the old door sill. Follow these steps to ensure a smooth transition:
Assessing the condition of the existing door sill
The first step in removing the old door sill is to assess its condition. Carefully inspect the sill for any signs of damage, such as cracks, warping, or rot. If the door sill is severely damaged, it may need to be replaced entirely. However, if the damage is minor, you may be able to repair the existing sill.
In some cases, the door sill may be firmly secured in place, making it challenging to remove. Use a flashlight to inspect the area beneath the old sill to identify any screws or nails that may be holding it down.
TIP: If you are unsure about the condition of the door sill or how to proceed, it is recommended to consult a professional for guidance.
Safely removing the old door sill
Once you have assessed the condition of the existing door sill, you can proceed with its removal. Follow these steps to safely remove the old door sill:
- Using a screwdriver or drill, carefully remove any screws or nails that may be securing the door sill in place.
- After removing the screws or nails, use a pry bar or flathead screwdriver to gently pry the old door sill away from the door frame.
- Apply moderate pressure and work your way along the entire length of the door sill to loosen it from the frame.
- Once the old door sill is loosened, remove it from the door frame. You may need to wiggle it back and forth to completely detach it.
WARNING: Be cautious while removing the old door sill to avoid damaging the surrounding door frame or flooring. Take your time and use gentle pressure to prevent any unnecessary harm.
Congratulations! You have successfully removed the old door sill. Now, you can move on to the next step of the installation process, preparing for the installation of the new door sill.
Step 1.1: Detaching Door Frame Trim
Before you can install a new door sill, you’ll need to detach the door frame trim. This step is crucial to ensure a proper and seamless installation. Follow these instructions carefully to remove the door frame trim without causing any damage to your door or delicate components.
Removing the Door Frame Trim Carefully
To remove the door frame trim, you’ll need a few simple tools:
- A flathead screwdriver
- A pry bar or trim removal tool
Follow these steps:
- Start by locating the small plastic caps or plugs at the corners of the door frame. These typically cover the screws that secure the frame trim in place.
- Use the flathead screwdriver to carefully pry off these plastic caps or plugs.
- Once the caps are removed, you should see the screws underneath. Use the necessary screwdriver to unscrew them, being cautious not to strip the screw heads.
- After removing all the screws, gently insert the pry bar or trim removal tool between the door frame trim and the wall. Apply even pressure and slowly work your way along the trim, releasing it from the adhesive or nails holding it in place.
- Continue this process until the entire door frame trim is detached from the wall.
Handling Any Delicate Components
When removing the door frame trim, you may come across delicate components such as wiring or insulation materials. It’s crucial to handle these components with care to avoid any damage. Follow these guidelines:
- If you encounter any wiring, be cautious not to pull or tug on it. Instead, carefully disconnect any connectors or loosen any securing clips to detach the wiring from the trim.
- For insulation materials, gently detach them from the trim and set them aside. Take care not to tear or damage the insulation.
By following these removal steps and handling delicate components carefully, you’ll be ready to move on to the next stage of installing your new door sill seamlessly.
Step 1.2: Unscrewing And Removing The Door Sill
Unscrewing and removing the door sill is an important step in the installation process to ensure a smooth and secure fit for your new door sill. By following these steps, you can easily remove the old door sill and prepare the doorway for the new one.
Locating and unscrewing the fasteners
To begin, you’ll need to locate and unscrew the fasteners that are holding the door sill in place. These fasteners could be screws, nails, or any other type of securing hardware. Here’s how you can do it:
- Start by visually inspecting the door sill to locate the fasteners.
- Use a screwdriver or a suitable tool to remove the screws or nails that are securing the door sill.
- Make sure to keep these fasteners in a safe place so that you can easily reinstall the door sill if needed.
Removing the door sill from the doorway
Once you have successfully unscrewed the fasteners, it’s time to remove the door sill from the doorway. This process should be done carefully to avoid any damage to the surrounding area. Here’s what you need to do:
- Begin by applying gentle pressure to one end of the door sill using your hands or a pry bar.
- Gradually work your way along the length of the sill, lifting it up and away from the doorway.
- If the door sill is stuck or does not easily come off, you may need to gently tap it with a hammer to loosen it.
- Once the door sill is completely free, carefully lift it out of the doorway and set it aside.
Now that you have successfully unscrewed and removed the old door sill, you are ready to move on to the next step of the installation process. Stay tuned for Step 1.3, where we will guide you through preparing the doorway for the new door sill.
Step 2: Preparing The Doorway For Installation
Before you begin installing your new door sill, it’s crucial to prepare the doorway to ensure a secure fit and a smooth surface. This step is essential for the longevity and effectiveness of your installation. In this section, we will discuss two important aspects of preparing the doorway: cleaning the doorway area and ensuring a smooth surface for the new door sill.
Cleaning the doorway area for a secure fit
The first step in preparing the doorway for your new door sill is to thoroughly clean the area. Any debris, dust, or old adhesive can hinder the proper installation. By cleaning the doorway area, you create a clean and stable foundation for the door sill to adhere to.
To clean the doorway area:
- Begin by removing any existing door sill or trim using a pry bar or a suitable tool.
- Next, use a broom or a vacuum cleaner to remove any loose dirt, dust, or debris from the floor and surrounding areas.
- Wipe down the floor and walls adjacent to the doorway using a damp cloth or sponge dipped in a mild household cleaner. Ensure the area is completely clean and dry before proceeding to the next step.
Ensuring a smooth surface for the new door sill
Once the doorway area is clean, it’s important to ensure a smooth surface for the new door sill. This step guarantees a tight and seamless fit, preventing any gaps or unevenness.
To ensure a smooth surface:
- Inspect the floor for any unevenness or protruding nails. If needed, use a sanding block or a file to smooth out any rough patches or high spots.
- Check the walls adjacent to the doorway for any imperfections. If necessary, use spackling paste or joint compound to fill in any cracks or holes. Once applied, allow it to dry completely and sand it down until smooth.
- Inspect the door frame for any irregularities. If there are any gaps between the frame and the wall, use a suitable filler to close them up. Ensure the filler is dry and sanded before proceeding.
By following these steps to clean and ensure a smooth surface, you are ready for the next phase of the installation process: actually installing the new door sill.
Step 2.1: Leveling The Doorway
Once you have prepared the doorway and removed the old door sill, it’s time to level the doorway before installing the new one. Proper leveling ensures a smooth and even surface for the new door sill to sit on, preventing any potential gaps or unevenness. This step is crucial to maintain the structural integrity and functionality of the doorway.
Checking the level of the doorway
Before proceeding further, check the level of the doorway using a spirit level. A spirit level is a tool that indicates if a surface is horizontal or vertical. Place the level on different areas of the doorway, both horizontally and vertically, and observe the bubble within the ruler of the level. If the bubble stays within the center markings, it means that the surface is leveled. However, if the bubble veers away from the center, it indicates that the surface is not level and adjustment is necessary.
Adjusting the alignment if necessary
If the level indicates that the doorway is not level, you will need to make adjustments in order to achieve a level surface. Below is a step-by-step guide on how to adjust the alignment:
- Start by identifying whether the doorway needs to be raised or lowered to become level. This can be determined by observing which side of the bubble is moving away from the center markings on the spirit level.
- If the doorway needs to be raised, you will need to remove the existing shims between the door frame and the wall. Shims are small, tapered wedges typically made of wood or plastic. Carefully tap a chisel or a pry bar under the shims to loosen them and remove them.
- If the doorway needs to be lowered, you will need to add shims to the low side of the doorway. Cut the shims to the appropriate length and slide them in between the door frame and the wall, gradually increasing the height until the surface is level.
- Once the adjustments have been made, place the spirit level back on different areas of the doorway to check if it is now leveled. Repeat the process until the bubble stays within the center markings on the level.
Remember, achieving a leveled doorway is essential for proper door sill installation. Take your time and ensure that the surface is completely level before moving on to the next step.
Step 2.2: Sealing The Doorway Gaps
After successfully installing the door sill, it’s important to address any gaps or cracks around the door frame to ensure optimal insulation. In this step, we will discuss how to fill in these gaps effectively using appropriate sealant.
Filling in any gaps or cracks around the door frame
Inspect the door frame closely to identify any gaps or cracks that may be present. These gaps can occur due to natural wear and tear or improper installation. It is crucial to address them as they can lead to energy loss, drafts, and even water damage.
Start by cleaning the area around the gaps or cracks to remove any dirt, dust, or loose debris. This will help improve the adhesion of the sealant. You can use a brush or a vacuum cleaner to ensure a thorough cleaning.
Next, apply the appropriate sealant to fill in the gaps or cracks. There are various types of sealants available in the market, such as silicone caulk or polyurethane sealants. Choose a sealant that is suitable for the material and conditions of your door frame.
Using a caulking gun, carefully apply the sealant into the gaps or cracks. Ensure that the sealant fills the entire space and creates a tight seal. Smooth out the sealant using a putty knife or your finger. This will help create an even and professional-looking finish.
Using appropriate sealant for optimal insulation
When selecting a sealant for filling in the gaps or cracks around the door frame, it’s crucial to choose one that offers optimal insulation and durability. A high-quality sealant will not only prevent drafts but also help reduce energy loss, resulting in cost savings in the long run.
Consider factors such as weather conditions, the material of the door frame, and the type of gap or crack you are sealing when choosing a sealant. Some sealants are specifically designed for outdoor use, while others may be more suitable for indoor applications.
Additionally, look for sealants that offer good adhesion to various surfaces, such as wood, metal, or PVC. This ensures that the sealant remains secure and effective over time.
Remember, proper sealing is essential to maintain a comfortable and energy-efficient home. By filling in the gaps and cracks around the door frame with appropriate sealant, you can keep the elements and unwanted drafts at bay.
With Step 2.2: Sealing the Doorway Gaps complete, your door sill installation will be one step closer to perfection! The next step will guide you on how to protect and maintain your newly installed door sill.
Step 3: Installing The New Door Sill
Now that you have prepared the area and removed the old door sill, it’s time to install the new one. Follow these simple steps to ensure a secure and long-lasting installation of your new door sill.
Placing the new door sill into position
Start by placing the new door sill into position. Carefully align it with the opening, ensuring that it fits snugly against the bottom of the door frame. Take a moment to double-check the positioning before proceeding.
If necessary, make any adjustments to ensure that the new door sill is level and properly aligned. This will not only enhance the appearance of your doorway but also provide a seamless transition between indoor and outdoor spaces.
Securing the door sill for long-lasting stability
With the door sill properly positioned, it’s time to secure it for long-lasting stability. Use hammer and nails or screws to attach the door sill to the floor. Make sure to insert the fasteners in a way that they penetrate both the door sill and the floor beneath for maximum support.
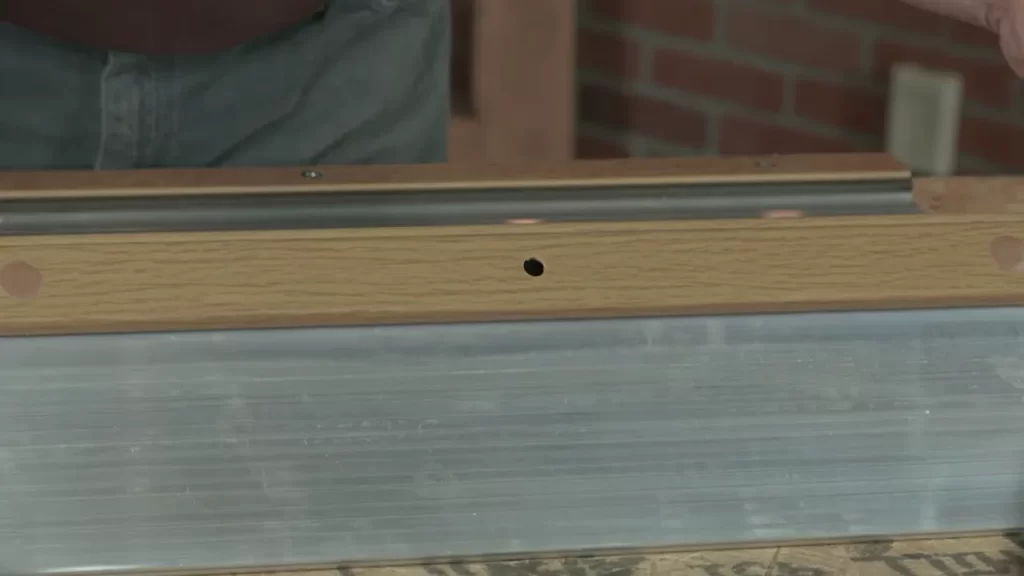
If your door sill came with pre-drilled holes, use them as a guide for the placement of the fasteners. Alternatively, you can also mark the locations for the fasteners using a pencil or marker.
Make sure to space the nails or screws evenly along the length of the door sill for balanced support. Avoid spacing them too far apart, as this could compromise the stability of the installation. Also, ensure that each fastener is driven in tightly to prevent any movement or shifting of the door sill over time.
Finishing touches for a professional look
Once the door sill is securely fastened, take a moment to inspect the installation. Ensure that it is level, aligned, and free from any visible gaps between the door sill and the floor. Additionally, check that the door can open and close smoothly without any obstruction from the newly installed sill.
If desired, you can apply a silicone or adhesive sealant along the edges of the door sill to create a watertight seal. This will help prevent water damage and ensure the longevity of your new door sill.
Finally, clean up any debris or excess sealant from the installation area. This will give your doorway a polished and professional finish, leaving you with a door sill that not only looks great but functions effectively too.
With these easy steps, you can confidently install a new door sill and enjoy the benefits of a secure and well-designed entrance to your home.
Step 3.1: Aligning The New Door Sill
Aligning the new door sill is a crucial step in the installation process. This ensures that the door sill fits perfectly in the doorway and is aligned properly with the door frame. Here’s how you can position the door sill correctly and ensure proper alignment:
- Measure the door frame: Before positioning the new door sill, measure the dimensions of the door frame. This will help you determine the precise placement of the door sill in the doorway.
- Position the door sill: Place the new door sill in the doorway, making sure that it is centered and aligned with the door frame. Use a level to ensure that the door sill is perfectly horizontal.
- Adjust the position: If the door sill is not aligned properly, you may need to make some adjustments. Gently tap the door sill with a hammer to shift its position slightly. Check the alignment again using the level.
- Secure the door sill: Once the door sill is properly aligned, you can secure it in place. Use screws or nails to fasten the door sill to the floor. Make sure to follow the manufacturer’s instructions for the specific type of door sill you are installing.
- Finishing touches: After securing the door sill, inspect it to ensure that it is aligned correctly and flush with the floor and door frame. Make any necessary adjustments before proceeding with the installation of the rest of the door components.
Properly aligning the new door sill is essential for a professional and secure installation. Take your time during this step to ensure that the door sill fits perfectly in the doorway and complements the overall appearance of your entrance.
Step 3.2: Fastening The Door Sill
Once you have appropriately positioned the new door sill, it is time to fasten it securely in place. This step is crucial to ensure that the door sill remains stable and can withstand regular usage and foot traffic. By using the recommended fasteners and following the proper installation technique, you can be confident in a long-lasting and well-secured door sill.
Attaching the new door sill securely
To attach the new door sill securely, follow these steps:
- Begin by selecting the appropriate fasteners for the job. It is essential to use the recommended fasteners, as they are designed to provide optimum stability and durability. Consult the manufacturer’s instructions or seek professional advice if you are unsure about the appropriate fasteners for your specific door sill.
- Next, position the door sill in its designated place, ensuring that it aligns correctly with the door frame and that there is an even gap between the door and the sill. Using a level, check for any unevenness and make adjustments as necessary.
- Once you are satisfied with the positioning, start inserting the fasteners into the pre-drilled holes in the door sill. It is crucial to align the fasteners accurately with the holes to maintain stability. Use a screwdriver or a power drill (if applicable) to fasten the screws or bolts securely.
- Repeat the previous step for each pre-drilled hole, ensuring that each fastener is tightly secured. Take your time to go through each hole meticulously, as even one loose fastener can compromise the stability of the entire door sill.
- After attaching all the fasteners, double-check the door sill’s stability by gently applying pressure to different areas. Make sure there are no wobbles or movements. If you notice any instability, tighten the fasteners further or seek professional assistance to rectify the issue.
- Finally, wipe away any excess debris or residues around the door sill to present a clean and finished appearance.
Following these steps and ensuring each fastener is securely fastened will provide you with a door sill that remains stable even with regular use. By taking the time and effort to properly fasten the door sill, you can enjoy a well-secured and long-lasting entrance to your home or building.
Step 4: Finishing Touches
Once the door sill is securely installed, it’s time to add those finishing touches that will not only enhance the aesthetic appeal of your doorway but also ensure the functionality of the newly installed door sill. In this step, we will look at how to add aesthetic elements to enhance the door sill and how to test its functionality.
Adding aesthetic elements to enhance the door sill
To truly make your doorway stand out, consider adding some aesthetic elements to your door sill. These small additions can transform the overall look and feel of your entrance, giving it a personalized touch. Here are a few options you can explore: 1. Choosing the right material: Selecting the right material for your door sill is crucial in enhancing its appearance. Opt for a material that complements the style of your home, such as wood, stainless steel, or even decorative tiles. Ensure that the material is durable and weather-resistant, as it needs to withstand constant foot traffic and outdoor conditions. 2. Decorative design: Consider adding decorative design elements to your door sill. This could include intricate patterns, engraved motifs, or even personalized monograms. These details can elevate the visual appeal of your entrance and make a memorable first impression on your guests. 3. Color coordination: Coordinate the color of your door sill with the overall color scheme of your doorway. This will create a cohesive and visually pleasing effect. You can either match the door sill color to the door or choose a complementary color to create contrast. 4. Accessorize: Add some accessories to your door sill to enhance its overall look. This could include installing door kickplates, weatherstripping, or door sweeps. These small additions not only add aesthetic value but also provide practical benefits such as protection against scuffs, drafts, and insects.
Testing the functionality of the newly installed door sill
Once you’ve added the aesthetic elements, it’s important to ensure that the door sill is fully functional. Here’s a simple checklist to test its functionality: 1. Smooth operation: Open and close the door multiple times to check if the door sill allows smooth and effortless movement. If you encounter any resistance or inconsistencies, make the necessary adjustments to ensure a consistent and reliable operation. 2. Sealing performance: Assess the sealing performance of the door sill by running your hand along the edges to check for any gaps or drafts. A well-installed door sill should provide a tight seal, effectively insulating your home from external weather conditions. 3. Water drainage: During rainy weather, observe the door sill to ensure that there is no water pooling or leakage. Proper water drainage is essential to prevent any water damage to your doorway and maintain its longevity. 4. Secure fit: Double-check that the door sill is securely attached and does not wobble or move when pressure is applied. This will ensure that your door frame remains stable and provides optimal security. By following these steps, you’ll not only enhance the visual appeal of your doorway with aesthetic elements but also ensure the functionality and longevity of your newly installed door sill. Take the time to experiment with different options, and choose elements that truly reflect your personal style and preferences.
Step 4.1: Installing Door Frame Trim
Once you have successfully fitted and secured the door sill, the next step in installing a door sill is to install the door frame trim. This step is crucial to creating a clean and polished appearance for your door installation. The door frame trim not only covers any gaps between the door frame and the surrounding wall but also adds an aesthetic touch to your entryway. In this section, we will guide you through the process of fitting and securing the door frame trim, ensuring a flawless and professional finish.
Fitting and Securing the Door Frame Trim
To ensure a seamless installation of the door frame trim, it is important to follow these steps:
- Start by measuring the length and width of the door frame opening. Use these measurements to cut the door frame trim to the appropriate size. Make sure to take into account any corners or angles that may require miter cuts.
- Once you have the trim pieces cut to size, dry-fit each piece to ensure they match the dimensions of the door frame opening. This step will help you identify any adjustments that need to be made before securing the trim in place.
- Apply a thin bead of construction adhesive along the backside of the trim pieces. This will help secure the trim to the door frame and prevent any movement or gaps over time.
- Press the trim pieces firmly against the door frame, ensuring they are aligned and level. Use a level to double-check the vertical and horizontal positioning of the trim.
- Secure the trim in place using finishing nails or brad nails. Make sure to place the nails evenly spaced along the trim, keeping them flush with the surface.
- Once all the trim pieces are securely fastened, fill any nail holes or gaps with wood filler. Smooth out the filler with a putty knife and sand it down once dry to create a seamless finish.
By following these steps, you can achieve a clean and polished appearance when installing the door frame trim. Ensure that each trim piece is fitted correctly, secured tightly, and finished to perfection. This attention to detail will result in a professional-looking installation that enhances the overall aesthetic of your entryway.
Step 4.2: Sealing And Weatherproofing
Properly sealing and weatherproofing your door sill is crucial to ensure its longevity and protect against moisture. By taking the time to apply sealant and weatherproofing measures, you can prevent water damage and increase the overall durability and lifespan of your door sill.
Applying sealant to protect against moisture
One of the most important steps in sealing your door sill is to apply a high-quality sealant. Sealants are designed to create a barrier between the door sill and moisture, preventing water from seeping into the wood or causing damage.
To apply sealant to your door sill, follow these steps:
- Clean the door sill thoroughly using a mild detergent and water. Ensure that all dirt, dust, and debris are removed.
- Dry the door sill completely to avoid trapping moisture beneath the sealant.
- Choose a suitable sealant for your specific door sill material, such as silicone or polyurethane-based sealant.
- Using a caulking gun, run a bead of sealant along the edges and gaps of the door sill. Be sure to cover any exposed areas where moisture can penetrate.
- Smooth out the sealant with a putty knife or your finger to ensure a tight and even seal.
- Allow the sealant to dry completely according to the manufacturer’s instructions before moving on to the next step.
By applying a sealant to your door sill, you create an additional layer of protection against moisture, helping to prevent rot and decay and extending the lifespan of your door sill.
Weatherproofing the door sill for durability
In addition to sealing the door sill, weatherproofing measures can further enhance its durability and resistance to harsh weather conditions.
Here are some weatherproofing techniques to consider:
- Apply a weatherproofing membrane: A weatherproofing membrane can be applied to the door sill surface to create a protective barrier against moisture, UV rays, and other harsh outdoor elements.
- Install a door sweep: A door sweep is a weatherstripping device that is attached to the bottom of the door to seal the gap between the door and the sill. This helps to minimize drafts and prevent water from entering.
- Use weatherstripping tape: Apply weatherstripping tape to any gaps or cracks around the door sill. This adhesive-backed tape creates a tight seal, preventing air and moisture infiltration.
- Consider a threshold seal: A threshold seal is a durable strip that is installed on the exterior of the door sill. It acts as an additional barrier against water and drafts, providing extra protection.
By implementing these weatherproofing measures, you can ensure that your door sill remains durable and resistant to the elements, ultimately extending its lifespan and reducing the risk of damage.
Wrapping Up: Maintenance And Troubleshooting Tips
Tips for Maintaining the Door Sill’s Condition
Maintaining the condition of your door sill is crucial in ensuring its longevity and performance. Here are some valuable tips to help you keep your door sill in top shape:
- Regular Cleaning: Start by removing any dirt, debris, or other substances that may have accumulated on the surface of the door sill. Use a soft cloth or brush to gently scrub away any stains or marks. Avoid using harsh chemicals or abrasive materials that could damage the door sill’s finish.
- Apply a Protective Sealant: To provide an extra layer of protection against scratches, scuffs, and moisture, consider applying a protective sealant to your door sill. This will help maintain its appearance and prevent any potential damage caused by daily wear and tear.
- Inspect for Signs of Wear and Tear: Regularly inspect your door sill for any signs of damage, such as cracks or chips. If you notice any issues, address them promptly to prevent further deterioration. Small repairs can usually be done using a suitable filler or adhesive, while more significant damage may require professional assistance.
- Prevent Water Accumulation: To avoid water from pooling on your door sill, ensure that the drainage system is functioning correctly. Clean out any debris or blockages in the drainage channels to allow efficient water flow. Additionally, consider installing a weatherproof door sweep to prevent water from seeping under the door.
- Maintain Proper Lubrication: If your door sill contains moving parts, such as hinges or sliding mechanisms, it’s essential to keep them properly lubricated. Applying a suitable lubricant on a regular basis will help prevent rusting and ensure smooth operation.
Troubleshooting Common Issues Related to Door Sill Installation
While installing a door sill can be a relatively straightforward process, there may be some common issues that you could encounter. Here are a few troubleshooting tips to help you address these problems:
| Issue | Troubleshooting Solution |
|---|---|
| Uneven or Misaligned Door Sill | Check if the door sill is properly leveled and aligned. If not, adjust the positioning and secure it with the appropriate fasteners. If necessary, seek professional assistance to ensure proper installation. |
| Drafts or Air Leaks | Inspect the door sill for any gaps or cracks that may be causing drafts or air leaks. Apply weatherstripping or caulk to seal any openings, ensuring a tight seal. |
| Water Leakage | If water is seeping through the door sill, check if the installation is watertight. Ensure the proper positioning of the threshold and use waterproof sealants to prevent water penetration. Consider adding a door sweep to redirect water away from the threshold. |
| Noise or Squeaks | If your door sill is producing noise or squeaking sounds, lubricate the moving parts, such as hinges and tracks, with a suitable lubricant. This should help reduce friction and eliminate the noise. |
By following these maintenance tips and troubleshooting solutions, you can ensure that your door sill remains in optimal condition, providing a secure and functional entrance to your home or business.
Frequently Asked Questions On How To Install Door Sill
How Do You Install An Exterior Door Sill?
To install an exterior door sill, follow these steps: 1. Measure the width and length of the door opening. 2. Purchase a door sill that matches the measurements and style. 3. Remove the old door sill and clean the area. 4.
Install the new door sill, ensuring it is level and secure. 5. Test the door for smooth operation and make any necessary adjustments.
What Is The Difference Between A Door Sill And Threshold?
A door sill sits at the bottom of a doorframe to provide a smooth transition. It helps keep out drafts, dirt, and moisture. On the other hand, a threshold is the floor strip that separates different rooms or areas, helping to maintain temperature and minimize gaps.
How Are Door Thresholds Installed?
To install door thresholds, follow these steps: 1. Measure the width and height of the doorway. 2. Choose a threshold that matches the measurements and material of the doorframe. 3. Place the threshold on the floor, aligning it with the doorframe.
4. Drill pilot holes through the threshold into the subfloor. 5. Secure the threshold with screws or adhesive, ensuring it’s level and flush with the floor.
Does The Door Sill Go On The Inside Or Outside?
The door sill is typically installed on the inside of the door to provide protection and create a smooth transition between rooms.
How Do You Install A Door Sill?
To install a door sill, start by measuring and cutting it to the correct size. Then, position it in place and secure it with screws or adhesive.
What Tools Do I Need To Install A Door Sill?
To install a door sill, you will need a measuring tape, a saw or a hacksaw, a drill, screws or adhesive, and a screwdriver.
Conclusion
Installing a door sill is a simple yet important step in ensuring proper insulation and protection for your home. By following the step-by-step guide provided in this blog post, you can easily complete the installation process and enjoy the benefits it brings.
Remember to measure accurately, prepare the area, and secure the sill firmly for long-lasting results. Enhance the appearance and functionality of your doors with the right door sill installation today.