To install a Wyze Camera, first, download the free Wyze app on your smartphone or tablet. Then, open the app and select “Add Device” to begin the setup process.
Follow the on-screen instructions to connect your camera to your Wi-Fi network and complete the installation. Introducing the Wyze Camera installation process is quick and easy. By downloading the Wyze app and following the step-by-step instructions, you can have your camera up and running in no time.
Whether you’re a beginner or experienced with home security cameras, the Wyze Camera installation process is user-friendly and hassle-free. With just a few simple steps, you can start enjoying the benefits of a reliable and affordable security camera system. Keep reading to learn more about the Wyze Camera installation and setup process.
Setting Up The Base Station
| Blog post title: | How to Install a Wyze Camera |
| Heading: | Setting up the Base Station |
| Subheading under heading: | Ensure camera and router are powered on and close to each other |
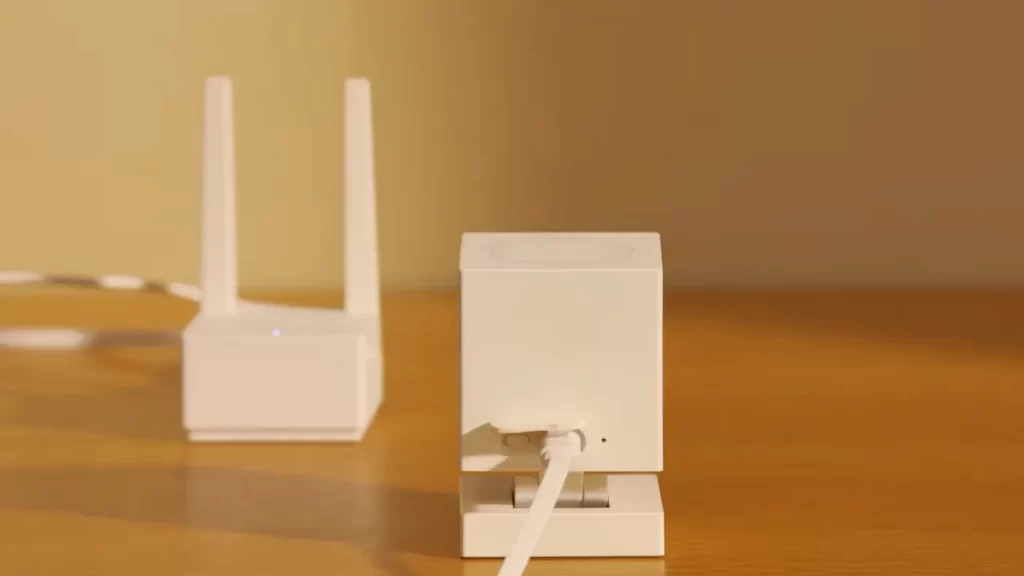
To successfully set up the base station for your Wyze Camera, follow these steps:
- First, ensure that both the camera and the router are powered on and positioned close to each other.
- Open the Wyze app on your mobile device.
- Select the “Add Camera” option.
By following these simple steps, you will be able to set up the base station of your Wyze Camera easily and quickly. Remember to keep the camera and router close to each other to ensure a strong and stable connection. Once the base station is set up, you can proceed with the next steps of installing and configuring your Wyze Camera for optimal performance.
Downloading The Wyze App
Downloading the Wyze App is the first step in installing a Wyze Camera. To get started, go to your app store, whether it’s Google Play or the App Store, on your mobile device. Once there, search for “Wyze app” and download and install the app. This app is necessary to set up and manage your Wyze Camera.
After the app is installed, you can proceed with the setup process for your Wyze Camera. The Wyze app will guide you through the steps, including connecting the camera to your Wi-Fi network and configuring any desired settings. Once the camera is set up, you can start using it for monitoring, recording, and accessing its features through the app.
Make sure to follow the instructions provided by Wyze and refer to any additional resources, including videos and guides, for a smooth installation process. With the Wyze app and your Wyze Camera, you can enhance your home security and surveillance.
Setting Up The Camera
To install a Wyze camera, start by opening the Wyze app on your mobile device. Tap the “+” sign on the top left corner of the screen. Then, tap “Add Device” and select “Wyze Cam” from the options. Follow the on-screen instructions to connect the camera to the app. This will involve connecting the camera to your Wi-Fi network and creating a Wyze account.
Once the camera is connected, you can proceed with setting it up. The app will guide you through the process, including naming the camera and adjusting settings such as resolution and motion tagging. You can also explore additional features such as alarms and notifications.
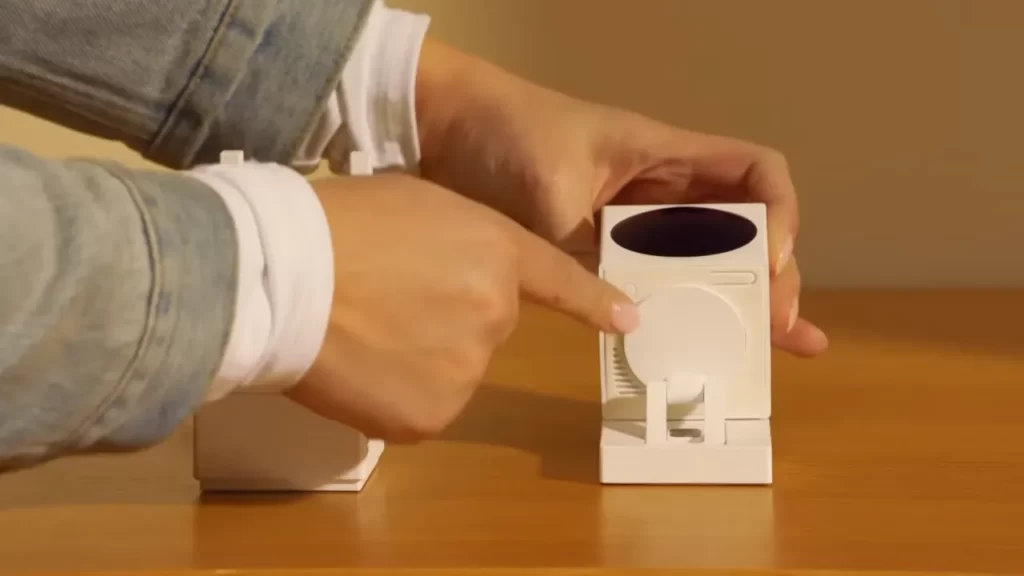
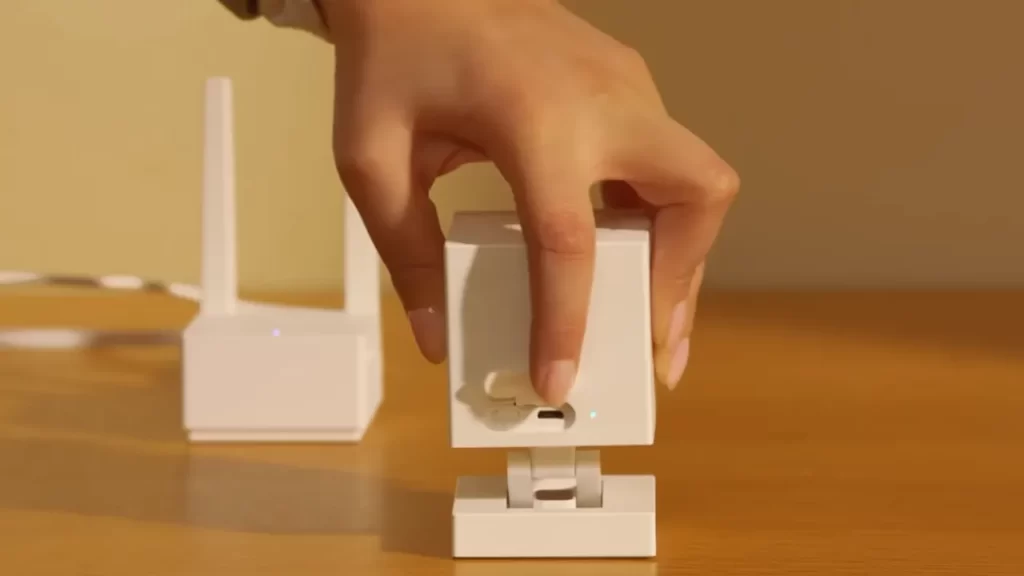
To mount the camera, find a suitable location such as a wall or ceiling. Separate the camera from the mounting base and fasten the base to the desired surface. Then, attach the camera back onto the base. Make sure to position it in a way that offers the best view and coverage.
That’s it! Your Wyze camera is now installed and ready to use. Enjoy monitoring your space and accessing the camera’s features through the Wyze app.
Finding A Location For Installation
Finding a Location for Installation
When installing a Wyze Camera, it is important to choose a suitable location for the camera. Consider factors such as visibility, coverage, and power source. Ensure that the camera is within range of the router for a stable connection.
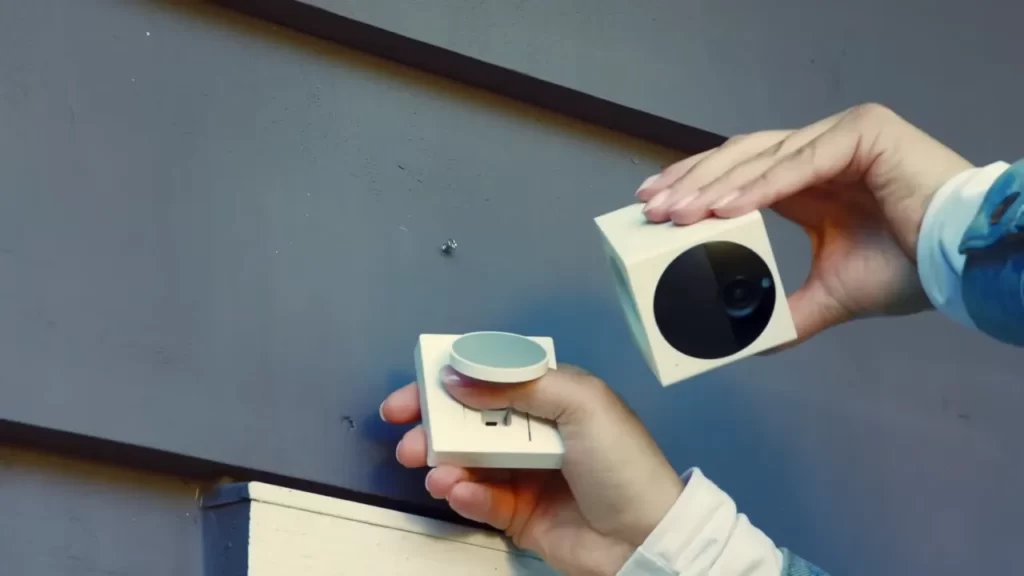
Mounting On A Wall
Mounting the Wyze camera on a wall is a simple process. Begin by using the provided mounting bracket and screws.
First, mark the desired location for the camera on the wall. Then, drill holes and mount the bracket securely. Finally, attach the camera to the bracket.
Mounting On A Ceiling
Mounting on a Ceiling:
Use the provided mounting bracket and screws to secure the camera to the ceiling.
First, mark the desired location for the camera on the ceiling. Then, using a drill, create holes and mount the bracket securely. Finally, attach the camera to the bracket.
Separating The Camera From The Mounting Base
| Separating the Camera from the Mounting Base |
| Gently twist and separate the camera from the mounting base. Be careful not to damage any cables or connections. |
Fastening The Mounting Base To The Ceiling
| Heading: | Fastening the Mounting Base to the Ceiling |
| Subheading: | Align the mounting base with the previously drilled holes |
| To fasten the mounting base to the ceiling, start by aligning it with the previously drilled holes. Make sure the base is positioned correctly before moving forward. Once aligned, securely fasten the mounting base to the ceiling using screws. Ensure that the screws are tightened properly to ensure stability. This step is crucial in properly installing the Wyze camera as it provides a secure foundation for the camera to be attached to. The mounting base should be firmly fixed to the ceiling to prevent any movement or instability. Following these steps will ensure a successful installation of your Wyze camera and provide optimal security for your space. | |
Frequently Asked Questions For How To Install A Wyze Camera
What Do I Need To Install A Wyze Camera?
To install a Wyze camera, follow these steps: 1. Download the free Wyze app on your smartphone or tablet. 2. Open the app and select “Add Device” -> “Cameras” -> “Wyze Cam”. 3. Make sure the camera and router are powered on and close to each other.
4. Follow the on-screen instructions to connect the camera to your Wi-Fi network. 5. Once connected, you can set up the camera location, mount it on a wall or ceiling, and customize its settings through the app. That’s it! You’re ready to enjoy the benefits of your Wyze camera.
Are Wyze Cameras Easy To Install?
Wyze cameras are easy to install. Download the Wyze app, set up the base station, and follow the prompts to connect and mount the camera.
How Do I Set Up My Wyze Camera?
To set up your Wyze camera, follow these steps: 1. Download the free Wyze app on your smartphone or tablet. 2. Open the app and tap on the “+” sign in the top left corner to add a device. 3. Select “Wyze Cam” or “Wyze Cam Pan” from the camera options.
4. Make sure your camera and router are powered on and close to each other. 5. Follow the on-screen instructions to complete the setup process.
How Do You Install A Wyze Outdoor Camera?
To install a Wyze outdoor camera, follow these steps: 1. Download the free Wyze app on your smartphone or tablet. 2. Set up the base station and connect it to your Wi-Fi. 3. Find a suitable location for the camera. 4.
Mount the camera on a wall or ceiling using the provided mounting base. 5. Separate the camera from the base and fasten the base to the ceiling. That’s it! Your Wyze outdoor camera is ready to monitor your surroundings.
How Do I Install A Wyze Camera?
To install a Wyze Camera, download the Wyze app and follow the step-by-step instructions provided.
Conclusion
To conclude, installing a Wyze Camera is a simple process that can be done by anyone. From setting up the base station to finding the perfect location for installation, every step is explained in detail. With the help of the free Wyze app, you can easily connect and control your camera.
Whether you want to mount it on a wall or ceiling, the instructions are straightforward. By following these steps, you can have your Wyze Camera up and running in no time for enhanced security and peace of mind.