o install a slab exterior door, remove the old door, measure and prepare the doorway, position the door, attach and secure it to the frame, and finish the installation by adjusting the hardware. When installing a slab exterior door, start by removing the old door and measuring the doorway.
Then, position the door in place and secure it to the frame using screws or nails. Finally, adjust the hardware to ensure proper functionality. By following these steps, you can successfully install a slab exterior door.
Factors To Consider When Selecting A Slab Exterior Door
Selecting the right slab exterior door for your home is an important decision that requires careful consideration. To ensure that the door you choose not only complements the style of your house but also provides durability and the right fit, there are several key factors to keep in mind. In this section, we will explore these factors in detail, including style and design, material and durability, and size and measurements.
Style and Design
When selecting a slab exterior door, the style and design play a crucial role in enhancing the overall aesthetic appeal of your home. The door you choose should harmonize with the architectural style of your house, whether it’s modern, traditional, farmhouse, or any other design. Consider the following points when evaluating the style and design:
- Look for a design that complements the existing exterior elements such as windows and siding.
- Choose a door style that aligns with the overall theme of your home.
- Consider the color and finish options available to match or contrast the exterior color palette.
By carefully considering the style and design of the slab exterior door, you can create a cohesive and aesthetically pleasing look for your home.
Material and Durability
The material of the slab exterior door is another critical factor to consider. Different materials offer varying levels of durability and maintenance requirements. Here are some commonly used materials for exterior doors:
| Material | Description |
|---|---|
| Wood | A classic and timeless choice that offers natural beauty, insulation, and customization options. |
| Fiberglass | Durable, low maintenance, and resistant to harsh weather conditions, making it a popular choice. |
| Steel | Provides excellent security, durability, and energy efficiency, but may require regular maintenance to prevent rust. |
Consider the pros and cons of each material in relation to your desired level of durability, insulation, and maintenance needs. Choosing a material that suits your climate and lifestyle will ensure that your slab exterior door stands the test of time.
Size and Measurements
The proper size and measurements of the slab exterior door are crucial for a proper fit and ease of installation. Before making a purchase, it’s important to measure the existing door frame accurately. Follow these steps to ensure accurate measurements:
- Measure the height and width of the existing door frame from various points to account for any irregularities.
- Consider the door’s swing direction when positioning the hinges.
- Take note of the door’s thickness to ensure compatibility with the frame and any hardware.
By taking precise measurements and considering the swing direction and thickness, you can select a slab exterior door that fits perfectly and simplifies the installation process.
In conclusion, when selecting a slab exterior door, consider the factors of style and design, material and durability, and size and measurements. By paying close attention to these factors, you can choose a door that not only enhances the visual appeal of your home but also meets your functional needs and stands up to the elements with durability and longevity.
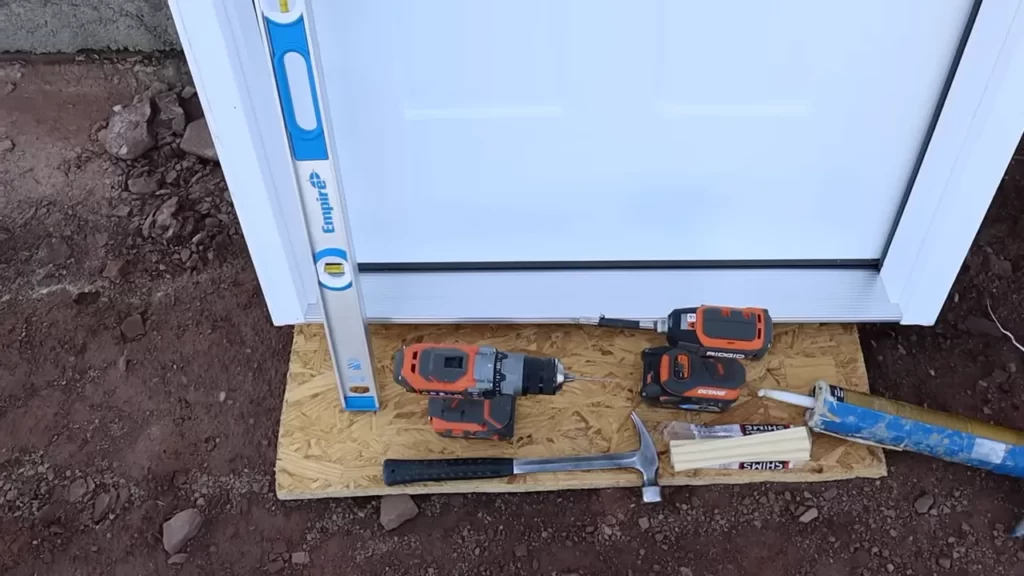
Gathering The Necessary Tools And Materials
Before you can start installing a slab exterior door, it is important to gather all the necessary tools and materials. This will ensure that you have everything you need to complete the installation smoothly and efficiently. Here is a list of the key tools and materials you will need:
Screwdriver
A screwdriver is an essential tool for installing a slab exterior door. It is used to secure screws in various parts of the door frame and hardware. Make sure to have a screwdriver with different types of heads to accommodate the screws you will be using.
Drill
A drill comes in handy when you need to create pilot holes for the screws. It makes the installation process easier and prevents the wood from splitting. Ensure that you have the appropriate drill bits for the size of the screws you’ll be using.
Tape Measure
A tape measure is essential for accurately measuring the dimensions of the door frame and ensuring that the door fits properly. Measure the width, height, and depth of the frame to determine the correct size of the slab door.
Level
A level is crucial for ensuring that the door is installed straight and level. It will help you achieve a proper fit and prevent any issues with the door’s functionality. Make sure the level is long enough to span the height of the door.
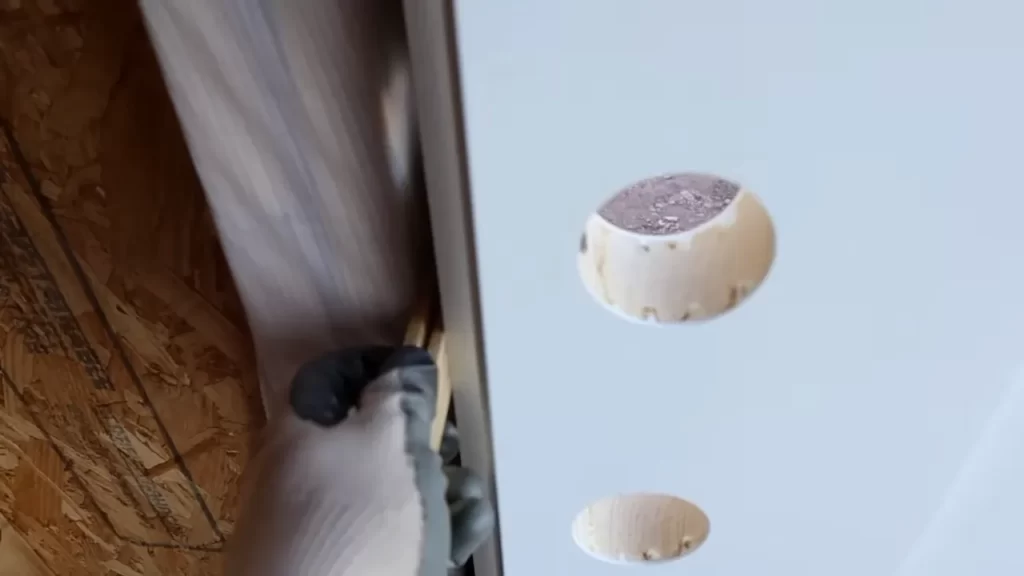
Shims
Shims are used to adjust the positioning of the door within the frame and ensure that it is level. They are typically made of wood or plastic and can be inserted between the door frame and the rough opening.
Screws
You’ll need screws to secure the door frame and hardware in place. Choose the appropriate length and type of screws based on the materials you are working with and the weight of the door. Pilot holes may be necessary to prevent the wood from splitting.
Caulk
Caulk is used to seal any gaps or cracks around the door frame, preventing drafts and water infiltration. It is essential for maintaining energy efficiency and keeping the elements out. Choose a caulk that is suitable for exterior use and adheres well to the materials in your door frame.
Weatherstripping
Weatherstripping helps to create a tight seal around the door, improving insulation and preventing air and water leaks. It is typically made of rubber or foam and is installed along the edges of the door frame. Choose weatherstripping that is appropriate for your climate and door type.
Door knob and lockset
Lastly, you’ll need a door knob and lockset to complete the installation. Make sure to choose a set that matches your door’s design and meets your security needs. Follow the manufacturer’s instructions for installation and proper positioning.
Measuring And Preparing The Door Frame
Checking the Rough Opening Dimensions
Before installing a slab exterior door, it is crucial to ensure that the rough opening dimensions are accurate. Taking accurate measurements will ensure a proper fit and make the installation process smoother. To check the rough opening dimensions, follow these steps:
- Measure the width of the door frame from one side to the other. Take three measurements – at the top, middle, and bottom – and use the smallest measurement to ensure a snug fit.
- Next, measure the height of the door frame from top to bottom. Again, take three measurements – at the left, center, and right – and use the smallest measurement for accuracy.
- Confirm that the rough opening dimensions meet the manufacturer’s recommendations for the specific door size you are installing. Refer to the door’s installation instructions or contact the manufacturer if necessary.
Removing the Existing Door and Hardware
To begin the installation process, the existing door and hardware must be removed. Properly removing these components will allow for a clean slate and ensure a seamless installation of the new slab exterior door. Follow these steps to remove the existing door and hardware:
- Start by removing the door hinge pins using a flathead screwdriver and hammer. Tap the bottom of the pins upwards until they are loose enough to be pulled out by hand.
- Once the hinge pins are removed, carefully lift the door out of the frame and set it aside. be sure to have a helper assist you if the door is heavy or bulky.
- Next, remove any remaining hardware such as the door handle, lockset, and hinges. Use a screwdriver or drill to remove screws and detach these components from both the door and frame.
Inspecting and Repairing the Door Frame
After removing the existing door and hardware, it is essential to inspect and repair the door frame as needed. Addressing any structural issues or damage before installing the new door will ensure a secure and durable installation. Follow these steps to inspect and repair the door frame:
- Thoroughly examine the door frame for any signs of rot, water damage, or other structural problems. Pay close attention to the frame’s corners, bottom, and any areas that may have been exposed to moisture.
- If you encounter any significant damage or rot, it may be necessary to replace sections of the door frame. Use a reciprocating saw to carefully remove the damaged portions, ensuring a clean, even cut.
- Once any necessary repairs or replacements are complete, fill any gaps or holes in the door frame with a suitable wood filler. Smooth out the filler using a putty knife and allow it to dry completely before proceeding.
Clearing the Door Opening
Now that the rough opening dimensions have been checked, the existing door and hardware removed, and the door frame inspected and repaired, it is time to clear the door opening in preparation for the new slab exterior door installation. Follow these steps to clear the door opening:
- Ensure that the door opening is clean, free of debris, and level. Use a broom or vacuum to remove any dirt, dust, or construction materials that may impede the installation process.
- Inspect the door opening for any obstructions or obstacles that may interfere with the installation. Check for nails, screws, or any other protrusions that may need to be removed or adjusted.
- Double-check the rough opening dimensions one final time before proceeding with the installation. Measure the width and height of the cleared opening to confirm that it aligns with the manufacturer’s recommendations.
Preparing The Door And Hinges
Before installing a slab exterior door, there are a few important steps to take to ensure a smooth and secure installation. Preparing the door and hinges is an essential part of this process. In this section, we will cover the necessary tasks of priming and painting the door, marking the hinge locations, and mortising the hinge recesses.
Priming and Painting the Door
First impressions matter, and your exterior door is no exception. To protect it from the elements and enhance its appearance, priming and painting the door is crucial. Follow these steps to get a professional-looking finish:
- Start by thoroughly cleaning the door to remove any dirt or dust.
- Next, inspect the door for any imperfections such as scratches or dents. Use wood putty to fill these in, and sand the surface smooth once dry.
- Apply a coat of primer to the entire door surface. This will help the paint adhere better and ensure an even finish. Allow the primer to dry completely.
- Choose a high-quality exterior paint in your desired color. Apply two coats of paint, allowing each coat to dry fully before applying the next.
Marking the Hinge Locations
Accurate marking of the hinge locations is crucial to ensure the door hangs properly and operates smoothly. Follow these steps to mark the hinge locations:
- Place the door on a sturdy work surface, such as sawhorses, with the bottom edge facing up.
- Measure and mark the desired height of the hinges on the edge of the door. For most doors, hinges are typically placed 6 inches from the top and bottom of the door, with additional hinges evenly spaced in between.
- Using a square, extend the hinge location marks onto the face of the door. This will serve as a reference when mortising the hinge recesses.
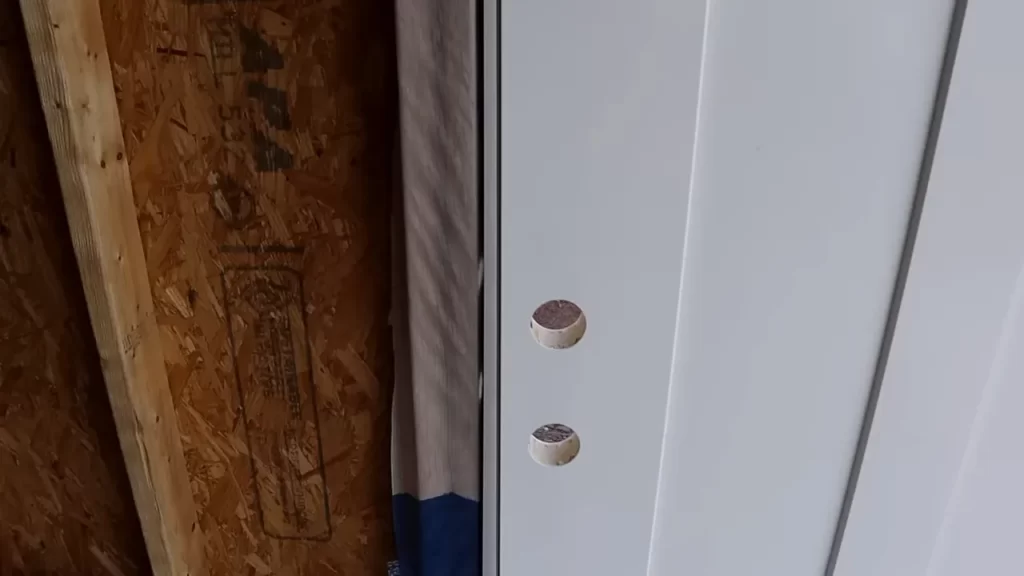
Mortising the Hinge Recesses
To ensure that the hinges are properly seated and the door hangs flush with the frame, mortising the hinge recesses is necessary. Follow these steps to mortise the hinge recesses:
- Position the hinge on the edge of the door, aligning it with the reference marks made earlier.
- Trace around the hinge with a pencil, outlining its shape on the edge of the door.
- Using a chisel and mallet, carefully remove the wood within the outlined area to the depth of the hinge.
- Test the fit of the hinge by placing it back into the recess. It should fit snugly and be flush with the door’s surface.
By properly preparing the door and hinges, you lay the foundation for a successful installation. Priming and painting the door not only adds aesthetic appeal but also protects it from weather damage. Accurately marking the hinge locations and mortising the recesses ensure the door hangs securely and operates smoothly. With these steps completed, you are now ready to install your slab exterior door.
Installing The Door Into The Frame
Installing the door into the frame is a crucial step in the process of installing a slab exterior door. This is where you align the door and attach it securely to the frame, ensuring proper functionality and security. In this section, we will walk you through the steps of aligning and leveling the door, attaching the hinges to the frame, and testing the door swing to ensure a smooth operation. Let’s get started!
Aligning and Leveling the Door
Before attaching the door to the frame, it’s essential to align and level it properly. Follow these steps:
- Place shims at the bottom of the frame to create a level base for the door.
- Position the door in the frame, ensuring it is centered and fits snugly.
- Use a level to check the vertical alignment of the door. Adjust the shims as necessary to achieve a straight and plumb installation.
- Check the horizontal alignment of the door using a level. Make any adjustments to ensure the door is level.
- Double-check the alignment by opening and closing the door to ensure smooth operation.
Attaching the Hinges to the Frame
Now that the door is aligned and leveled, it’s time to attach the hinges to the frame. Follow these steps:
- Position the hinge plates on the frame where the hinges will be installed.
- Use a pencil to mark the screw hole locations on the frame.
- Drill pilot holes at the marked locations.
- Secure the hinge plates to the frame using screws, making sure they are aligned properly.
- Hold the door up to the frame and align the hinges with the hinge plates. Insert the hinge pins to connect the door to the frame.
Testing the Door Swing
Once the hinges are attached, it’s important to test the door swing to ensure proper operation. Follow these steps:
- Open the door slowly and observe if it swings freely without any resistance.
- Close the door and check for any gaps or misalignment with the frame.
- If necessary, make small adjustments to the hinges or shims to achieve a proper fit.
- Test the door swing multiple times to ensure smooth and unrestricted movement.
By following these steps to align, level, attach hinges, and test the door swing, you will successfully install a slab exterior door into the frame. Take your time and ensure each step is done correctly for a secure and functional door installation.
Weatherproofing And Insulating The Door
Adding Weatherstripping to the Door Frame
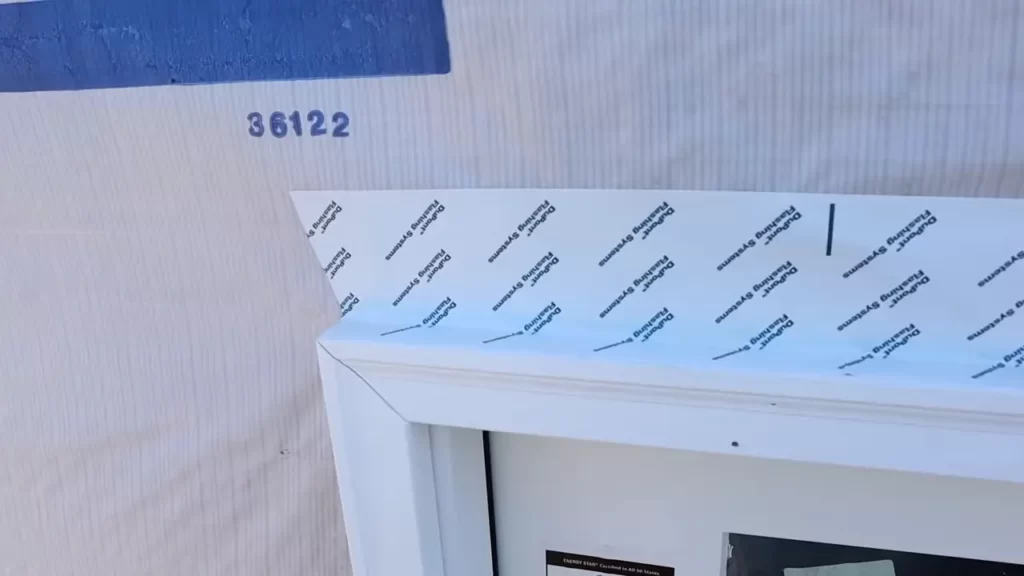
One crucial step in weatherproofing and insulating a slab exterior door is to add weatherstripping to the door frame. Weatherstripping seals the gaps between the door and the frame, preventing drafts, air leaks, and moisture from entering the house. To add weatherstripping, follow these simple steps:
- Start by measuring the length of the top and sides of the door frame.
- Cut the weatherstripping material to match the measurements.
- Remove the backing from the adhesive side of the weatherstripping.
- Press the weatherstripping firmly against the door frame, ensuring that it adheres properly.
- Repeat the process for all sides of the door frame.
By adding weatherstripping to the door frame, you create a tight seal that helps prevent heat loss during winter and keeps your home cool in the summer. This simple yet effective step can significantly improve energy efficiency and reduce your utility bills.
Installing a Door Sweep
Another important aspect of weatherproofing and insulating a slab exterior door is installing a door sweep. A door sweep is a flexible strip that attaches to the bottom of the door, creating a barrier against drafts, insects, and moisture. To install a door sweep, follow these steps:
- Measure the width of the door.
- Cut the door sweep to fit the door width.
- Secure the door sweep to the bottom of the door using screws or adhesive.
- Ensure the sweep extends slightly beyond the edge of the door to provide a proper seal.
A door sweep effectively seals the gap between the door and the floor, enhancing insulation and preventing outdoor elements from entering your home. It also helps keep dust and debris outside, contributing to a cleaner and more comfortable living environment. In conclusion, weatherproofing and insulating a slab exterior door is essential for energy efficiency and home comfort. By adding weatherstripping to the door frame and installing a door sweep, you can significantly reduce drafts, improve insulation, and save on heating and cooling costs. Take the time to implement these weatherproofing techniques, and you’ll enjoy a more comfortable and energy-efficient home.
Installing The Door Knob And Lockset
Drilling Holes for the Knob and Lockset
Before you can attach the door knob and lockset, you’ll need to drill the necessary holes in the door. This step is crucial as it ensures the proper functioning and alignment of the hardware.
To start, use a measuring tape to locate the center of the door’s edge. Mark this spot with a pencil to indicate where the latch will go. Next, measure the height and distance from the edge where you want the doorknob to be located. Mark these measurements on the door as well.
Using a hole saw drill bit that matches the size of your doorknob’s backset, carefully drill a hole through the marked spot for the latch. Make sure to drill perpendicular to the door’s surface to ensure a proper fit.
After drilling the latch hole, use a spade bit or a hole saw of the appropriate size to create holes for the doorknob and lockset. Remember to follow the manufacturer’s instructions regarding placement and sizing. These holes are typically located about 36 inches from the floor for standard doors.
Attaching the Knob and Lockset
Once you have drilled the holes, it’s time to attach the doorknob and lockset. This process may vary depending on the specific hardware you are installing, so be sure to refer to the manufacturer’s instructions for guidance.
- Begin by inserting the latch into the hole you drilled earlier, ensuring the bevel faces toward the door jamb.
- Next, slide the exterior knob onto the spindle, aligning it with the latch.
- From the interior side of the door, insert the interior knob onto the spindle and align it with the exterior knob.
- Tighten the screws provided with the doorknob to secure the hardware in place. Be careful not to over tighten as it may affect the functionality.
Once the doorknob is securely attached, it’s time to install the lockset. Following the manufacturer’s instructions, insert the lock cylinder into the designated hole and align it with the doorknob. Secure it in place with the screws provided.
Finally, test the doorknob and lockset to ensure smooth operation. Keep in mind that adjustments to the strike plate or latch may be required for optimal performance.
Congratulations! You have successfully installed the door knob and lockset on your slab exterior door. This finishing touch not only enhances the security of your home but also adds a stylish element to your entryway.
Checking And Adjusting The Door
Checking for Proper Alignment and Fit
Before installing a slab exterior door, it’s important to check for proper alignment and fit to ensure a smooth installation process. This involves carefully examining the door frame, hinges, and overall positioning of the door.
To check the alignment of the door, start by inspecting the door frame. Look for any signs of damage, warping, or gaps that could affect how the door sits. Make sure the frame is level and plumb, using a level tool to ensure accuracy.
Next, examine the hinges. Ensure they are securely attached to both the door and the frame, with no loose screws or signs of wear. Check that the hinge pins are properly aligned and inserted, allowing the door to swing freely.
Position the door in the frame and test its fit. Ideally, it should fit snugly within the frame, with an even gap around all sides. To check for gaps, use a feeler gauge or a piece of paper. Insert it between the door and the frame at various points to identify any areas where the fit is not tight enough.
If the door doesn’t align properly or if there are significant gaps, some adjustments may be necessary. This leads us to the next step: adjusting the door for smooth operation.
Adjusting the Door for Smooth Operation
If the door doesn’t fit properly within the frame or if it doesn’t open and close smoothly, adjustments can be made to improve its operation. These adjustments may involve tweaking the hinges, repositioning the strike plate, or shimming the door to correct any alignment issues.
First, take a close look at the hinges. Ensure the screws holding them in place are tight and secure. If necessary, loosen these screws slightly to allow for adjustments. With the help of a partner, carefully lift or lower the door to align it within the frame. Once the door is in proper position, tighten the hinge screws back up.
If the door is binding or dragging along the floor, it may be necessary to trim the door or the frame slightly. Measure the excess material and use a circular saw (or a hand saw) to carefully remove it. Remember to wear appropriate safety gear and take your time to avoid any damage to the door or frame.
Another adjustment that can be made is repositioning the strike plate. If the door latch doesn’t fully engage or if it’s difficult to close the door, try readjusting the strike plate. Loosen the screws holding it in place and carefully reposition it so that it aligns with the door latch. Once aligned, tighten the screws back up.
After making adjustments to the door, test its operation. Open and close the door multiple times to ensure it swings freely and latches securely. If additional adjustments are needed, repeat the steps outlined above until the door operates smoothly and fits properly within the frame.
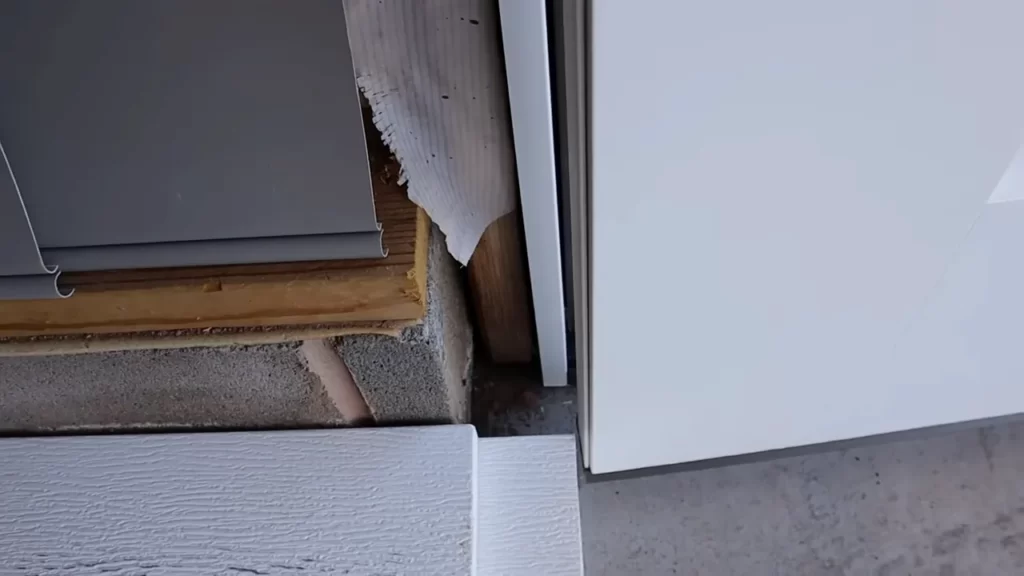
Sealing Gaps and Cracks with Caulk
Once the door is properly aligned and adjusted, one final step is to seal any gaps and cracks around the door frame using caulk. This helps to prevent drafts, improve energy efficiency, and keep out moisture.
Start by thoroughly cleaning the area around the door frame, removing any dirt or debris. Use a caulk gun to apply a bead of caulk along the gap between the door jamb and the frame. Smooth the caulk with a caulk smoothing tool or your finger to create a neat, finished appearance.
Pay close attention to any gaps or cracks that may be present. These can occur between the frame and the wall or between the frame and the floor. Fill these gaps with caulk, ensuring a tight seal and eliminating potential sources of air or water leakage.
Allow the caulk to dry completely before closing and locking the door. This ensures proper adhesion and a long-lasting seal. Once dry, the door is ready to be enjoyed for years to come, providing security, insulation, and a beautiful entrance to your home.
Inspecting And Testing The Door
Inspecting and testing the door is a crucial step in the installation process, as it ensures that the door will provide the necessary security and weather protection for your home. By thoroughly checking for proper closure and sealing, as well as testing the lock and latch mechanism, you can ensure that your slab exterior door functions optimally. Follow the steps below to inspect and test your new door.
Checking for Proper Closure and Sealing
To begin, check for proper closure and sealing to ensure that your door fits well within the door frame and provides an airtight seal. This will help prevent drafts and keep your home energy-efficient. Follow these steps to check for proper closure and sealing:
- Close the door and observe if there are any noticeable gaps between the door and the frame. Look along the top, sides, and bottom of the door.
- If you notice any gaps, determine their size. Small gaps can often be easily fixed with weatherstripping, while larger gaps may require adjustments to the door or frame.
- Check the door for any warping or bowing that could cause misalignment. This can be done by visually inspecting the door or by placing a level along the top edge to check for any deviations.
- If you find any warping or bowing, consult the manufacturer’s instructions or seek professional assistance to correct the issue.
- In addition to visual inspection, perform the “dollar bill test” to check for proper sealing. Close the door on a dollar bill and try to slide it out. If the bill slides out easily, there may be a gap that needs to be addressed.
- Repeat these steps for the latch side of the door as well.
Testing the Lock and Latch Mechanism
Another important aspect of inspecting and testing the door is to ensure that the lock and latch mechanism functions properly. This will provide the necessary security for your home. Follow these steps to test the lock and latch mechanism:
- Close the door and engage the lock. Try turning the key or operating the keypad, depending on the type of lock you have.
- Ensure that the lock securely engages and disengages without any difficulty or resistance.
- Test the latch mechanism by closing the door and trying to pull it open without turning the handle or operating the lock. The latch should prevent the door from opening.
- If the latch is not catching properly or if there is any other issue with the lock and latch mechanism, consult the manufacturer’s instructions or seek professional assistance to resolve the problem.
By carefully inspecting and testing the door for proper closure, sealing, and functionality of the lock and latch mechanism, you can ensure that your slab exterior door is installed correctly and provides the security and weather protection your home needs. Take the time to thoroughly complete these steps to enjoy the benefits of a well-installed door for years to come.
Cleaning Up And Maintenance
Cleaning up and maintaining your slab exterior door is essential to ensure its longevity and keep it looking its best. By removing excess caulk and regularly cleaning the door, you can prevent dirt and grime buildup and prolong the life of your door. In this section, we will discuss how to remove excess caulk and clean the door effectively. We will also provide you with some regular maintenance tips to help you keep your slab exterior door in top-notch condition.
Removing Excess Caulk and Cleaning the Door
When it comes to removing excess caulk and cleaning your slab exterior door, following the right steps is crucial for optimal results. Here’s a step-by-step guide to help you through the process:
- Start by carefully inspecting the door for any areas where caulk may have been applied incorrectly or has started to deteriorate. Use a putty knife or caulk removal tool to gently scrape away the excess caulk.
- Next, prepare a solution of warm water and mild detergent. Dip a soft sponge or cloth into the solution and gently scrub the door, focusing on areas that require more attention. Take care not to use abrasive materials that could scratch or damage the door’s surface.
- Rinse the door thoroughly with clean water to remove any soapy residue. Wipe the door dry with a clean, lint-free cloth.
- If your slab exterior door has glass panels, use a glass cleaner specifically formulated for exterior use. Spray the cleaner onto the glass and wipe it clean using a microfiber cloth or newspaper for a streak-free finish.
- Inspect the door for any remaining dirt or stains. If necessary, repeat the cleaning process until the door is free from any visible dirt or marks.
Regular Maintenance Tips for Longevity
To ensure the longevity of your slab exterior door, it’s important to implement regular maintenance practices. Here are some tips to help you keep your door in optimal condition:
- Inspect the door regularly for any signs of damage, such as cracks, peeling paint, or warping. Address any issues promptly to prevent further damage.
- Regularly clean the door using the steps mentioned above. This will help prevent dirt and grime buildup, keeping your door looking clean and well-maintained.
- Inspect and lubricate the door’s hinges and handles to ensure smooth operation. Apply a silicone-based lubricant to prevent rust and ensure the long-term functionality of these components.
- Reapply a protective finish, such as varnish or paint, as needed. This will help protect the door from the elements and maintain its appearance.
- Keep the door’s surrounding area clean and free from debris. This will prevent dirt and leaves from accumulating near the door, reducing the risk of damage.
- During extreme weather conditions, consider using weatherstripping or a door sweep to minimize drafts and improve energy efficiency.
By following these cleaning and maintenance tips, you can keep your slab exterior door looking its best and ensure its long-lasting performance. Regular inspections and maintenance will help identify any potential issues early on, allowing you to address them promptly and keep your door in optimal condition for years to come.
Frequently Asked Questions On How To Install A Slab Exterior Door
Can You Use A Slab Door For An Exterior Door?
Yes, you can use a slab door for an exterior door. However, it’s important to ensure that the slab door is made of a durable and weather-resistant material to withstand outdoor conditions. Additionally, consider adding weatherstripping and proper sealing to improve energy efficiency and security.
How Hard Is It To Install A Slab Door?
Installing a slab door is relatively easy. With some basic tools and a little bit of patience, you can complete the installation in a few hours. Just make sure to measure accurately, align the hinges properly, and secure the door well.
Is It Easier To Hang A Prehung Door Or A Slab Door?
Hanging a prehung door is easier than hanging a slab door.
Do Slab Doors Come With Hinge Cutouts?
Slab doors typically do not come with hinge cutouts. Hinge cutouts are usually made on-site during installation to fit the specific door hinges.
How Much Does It Cost To Install A Slab Exterior Door?
The cost to install a slab exterior door can range from $500 to $1500, depending on various factors such as the material, size, and complexity of the installation.
What Tools Do I Need To Install A Slab Exterior Door?
To install a slab exterior door, you will need basic tools such as a tape measure, screwdriver, chisel, hammer, level, drill, screws, and a pry bar.
Conclusion
Installing a slab exterior door can improve the security and aesthetic appeal of your home. By following these step-by-step directions, you can successfully complete this project on your own. Remember to measure accurately, prep the door and frame properly, and use the right tools for the job.
With patience and attention to detail, you’ll have a beautiful, functional door in no time. Enjoy the satisfaction of a job well done and the added value to your home.