Installing Security Camera Wiring can be done easily by following a few simple steps. Find the right spot for your camera, drill a hole for the wiring, connect the wires to your camera and power source, and finally, secure the wiring to prevent any damage.
It’s a straightforward process that doesn’t require any special skills or tools. With a little time and effort, you can have your security camera wiring installed and ready to go. So don’t hesitate to take matters into your own hands and ensure the safety and security of your property.
Planning Camera Placement
One of the most crucial steps in installing security camera wiring is planning camera placement. Careful consideration must be given to determine the number of cameras needed for optimal coverage, important camera locations for maximum security, and the overall camera coverage for effective monitoring. By following these steps, you can ensure that your security cameras are strategically placed to provide you with the best possible coverage.
Determine the number of cameras needed for optimal coverage
To determine the number of cameras needed for optimal coverage, you should assess the size and layout of the area you want to monitor. Consider the potential blind spots and areas that require high-security coverage. A good rule of thumb is to have cameras installed in every entry point and strategically placed in common areas where any suspicious activity can occur.
To make this process easier, create a diagram or blueprint of your property and mark the potential camera locations. This will give you a visual representation of where your cameras should be placed for the best coverage.
Consider important camera locations for maximum security
When considering important camera locations for maximum security, focus on areas that are vulnerable to break-ins, such as front and back doors, windows, and garage entrances. Additionally, high-traffic areas like hallways, staircases, and parking lots should also be prioritized.
Another important consideration is the visibility of the cameras. Placing them in visible areas can act as a deterrent to potential intruders. However, if you want to maintain the element of surprise, you can opt for hidden or discreet camera placements.
Plan out camera coverage for effective monitoring
Once you have determined the number of cameras needed and identified the important camera locations, it’s time to plan out the camera coverage. This involves considering the field of view and range of each camera to ensure there are no blind spots.
Start by determining the ideal angle and range for each camera. Consider the camera’s focal length and adjust it accordingly to cover the desired area. Keep in mind any obstacles, such as walls or trees, that may obstruct the camera’s view. By strategically positioning the cameras, you can achieve comprehensive coverage and minimize blind spots.
Take into account the wiring requirements for each camera and plan out the cable routes accordingly. Ensure that the cables are hidden and protected to avoid any tampering or damage.
By carefully planning camera placement, you can maximize the effectiveness of your security camera system and ensure that your property is well-protected. Remember to consider the number of cameras needed, important camera locations, and camera coverage for effective monitoring.
Preparing The Installation
How to Install Security Camera Wiring
Gather the necessary equipment for the installation
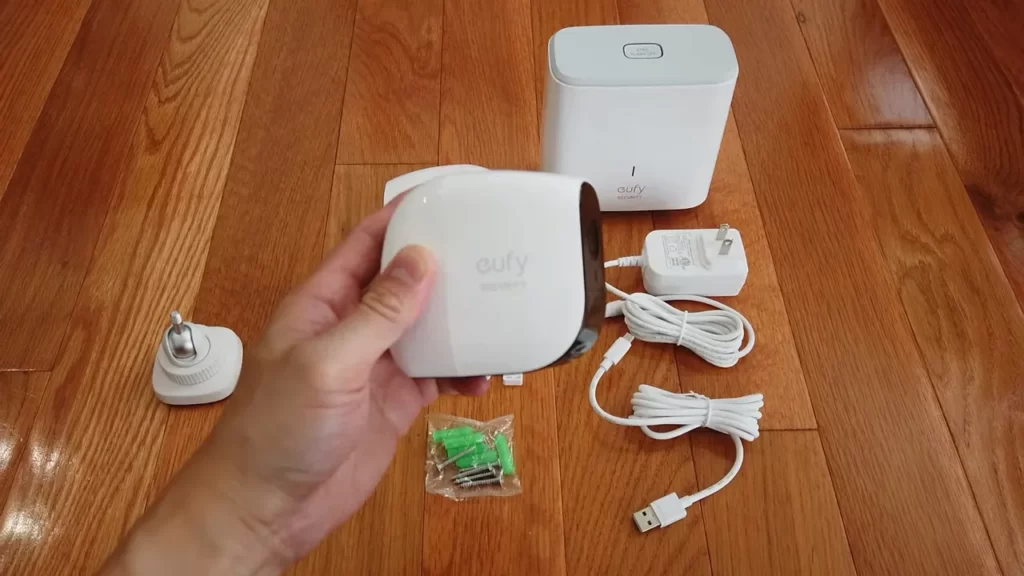
Before you begin installing security camera wiring, it’s crucial to gather all the necessary equipment. This will ensure a smooth and efficient installation process. Here are the key items you’ll need:
- Security cameras
- Ethernet cables
- Power supply
- Drill
- Fish tape
- Connectors
- Mounting brackets
- Screws
- Waterproofing kit
Ensure you have the required tools, including drill, fish tape, and ethernet cables

To install security camera wiring, you’ll need specific tools to ensure a proper installation. Here are the tools you’ll need:
- Drill: A drill will be necessary for creating holes in walls, ceilings, or other surfaces to pass the wiring through.
- Fish tape: A fish tape is used to thread and guide the ethernet cables through walls, ceilings, or conduits.
- Ethernet cables: Ethernet cables are essential for transmitting the video and power signals between the security cameras and the recording device.
Cut out drywall for ethernet cable installation
When installing security camera wiring, it’s often necessary to cut out drywall to run the ethernet cables. Before cutting, ensure you have measured and planned the cable routes to minimize the number of cuts required. Here’s a step-by-step guide to cutting out drywall:
- Identify the precise location where the ethernet cables need to be installed.
- Use a stud finder to locate any studs or electrical wires behind the drywall.
- Carefully mark the area of the drywall that needs to be cut using a pencil or marker.
- Wear safety goggles and a mask to protect your eyes and lungs from dust.
- Use a utility knife or drywall saw to cut along the marked lines.
- Remove the cut-out section of drywall and set it aside.
- Ensure the opening is large enough to fit the ethernet cables through.
- Proceed with running the ethernet cables through the opening and connecting them to the security cameras and the recording device.
Running Wiring In The Attic
How to Install Security Camera Wiring
The attic is a commonly overlooked area when it comes to running security camera wiring. However, it can be an ideal location for running ethernet cables, as it provides a hidden and convenient space that allows you to easily connect your security cameras to a central location. In this section, we will discuss how to find the best route for running ethernet cables in the attic, as well as the techniques to run the cables safely and neatly, ensuring they are secured and out of the way of potential damage.
Find the best route for running ethernet cables in the attic
Before you start running the ethernet cables in the attic, it is essential to plan and find the most suitable route. Here are some steps to help you:
- Inspect the attic: Begin by inspecting the layout and structure of your attic. Look for accessible areas and identify potential obstacles such as beams, electrical wires, or HVAC ducts.
- Create a wiring plan: Consider the locations of your security cameras and where they need to connect to the central hub. Map out a route that avoids obstructions and minimizes cable length.
- Measure cable length: Measure the length of ethernet cables required for each camera and add extra length for flexibility and future needs.
- Identify access points: Determine the entry and exit points for the cables in the attic, such as wall cavities or utility closets.
Use appropriate techniques to run the cables safely and neatly
Once you have planned the route, it’s time to run the ethernet cables in the attic. Here are some techniques to ensure safe and neat installation:
- Wear protective gear: Before entering the attic, make sure to wear appropriate protective gear such as gloves, goggles, and a dust mask.
- Secure cables to ceiling joists: Use cable clips or staples to secure the cables along the ceiling joists to prevent them from sagging or getting tangled.
- Avoid sharp bends: Avoid sharp bends or kinks in the cables, as they can cause signal loss or damage. Use gentle curves and loops to maintain the integrity of the cable.
- Separate power and data cables: Keep the ethernet cables separated from any power cables or electrical wiring to minimize interference and ensure optimal performance.
- Label and organize cables: Label each cable according to its destination and use cable management solutions such as cable ties or cable trays to keep them organized and easily identifiable.
- Ensure proper insulation: Insulate the ethernet cables if your attic experiences extreme temperatures or humidity to protect them from environmental damage.
Ensure cables are secured and out of the way of potential damage
Securing the cables properly in the attic is crucial to protect them from potential damage. Here are some tips:
- Avoid sharp objects: Ensure that the cables are routed away from any sharp objects or surfaces that could potentially damage them.
- Protect from pests: Use conduit or cable sleeves to protect the cables from rodents or other pests that may be present in the attic.
- Inspect regularly: Regularly inspect the cables and connections to identify any signs of wear, damage, or loose connections. Address any issues promptly to prevent further problems.
- Maintain proper ventilation: Ensure that the cables are placed in areas with proper ventilation to prevent overheating and potential cable degradation.
By following these techniques and ensuring that your security camera wiring in the attic is done correctly, you can have a safe and reliable system that provides peace of mind for your home or business.
Running Wiring In The Crawl Space
Explore the process of running ethernet cables in the crawl space
When it comes to installing security camera wiring, running cables in the crawl space is a common and effective solution. The crawl space provides a convenient pathway for the cables, keeping them out of sight and protected from external elements.
Before getting started, it’s crucial to explore the step-by-step process of running ethernet cables in the crawl space:
- Begin by planning the cable route. Take into consideration the location of the cameras and the most direct path to the network video recorder (NVR) or other central hub.
- Next, ensure the crawl space is accessible and safe to work in. Take necessary precautions to avoid accidents, such as wearing appropriate protective gear, using proper lighting, and being mindful of any obstacles.
- Once you have a clear plan and a safe working environment, begin running the ethernet cables in the crawl space. Use cable staples or clips to secure the cables to the floor joists or other structural elements along the route.
- Ensure that the cables are properly supported and not hanging loosely, as this can lead to potential damage or interference.
- Keep the cables away from any potential sources of interference, such as electrical wires or plumbing pipes.
- If needed, use conduits or cable management solutions to organize and protect the cables. This will help maintain a clean and organized setup, reducing the chances of tangling or accidental damage.
- After running the cables, make sure to test the connectivity and ensure that each camera is properly linked to the NVR or central hub.
By following these steps, you can successfully run ethernet cables in the crawl space for your security camera installation.
Take necessary precautions when working in tight spaces
Working in a crawl space can be challenging due to its confined and often cramped nature. However, with the right precautions, you can ensure a safe and efficient installation process:
- Always wear protective gear, such as gloves and knee pads, to protect yourself from any sharp objects or potential hazards.
- Use proper lighting to enhance visibility in the crawl space. This will help you identify any obstacles or potential dangers.
- Avoid rushing or making sudden movements to prevent accidents or injuries.
- Communicate with a buddy or someone on the surface to ensure assistance is available if needed.
- Be cautious of any potential electrical hazards or live wires in the crawl space. Use a non-contact voltage tester to ensure safety.
- Avoid excessive bending or twisting of the cables, as this can cause damage to the wires or connectors.
- Take breaks and stay hydrated to prevent exhaustion, as working in tight spaces can be physically demanding.
By following these necessary precautions, you can carry out the installation process in a safe and efficient manner.
Ensure proper cable management for a clean and organized setup
To ensure a clean and organized setup for your security camera wiring, proper cable management is essential. Here are some tips to achieve this:
- Use cable clips or staples to secure the cables along the crawl space walls or floor joists. This will prevent them from hanging loosely and reduce the risk of accidental damage.
- Consider using cable conduits or raceways to protect and conceal the wires. This will not only improve the aesthetics but also provide added protection against physical damage and interference.
- Label each cable to make it easier to identify and troubleshoot any potential issues in the future.
- Use cable ties or Velcro straps to bundle and organize multiple cables. This will keep them neat and prevent tangling, making future maintenance or upgrades easier.
- Ensure that the cables are not tightly bent or kinked, as this can affect their performance. Use gentle curves and avoid sharp angles when securing the cables.
- When connecting the cables to the cameras and NVR, leave some slack to allow flexibility and ease of movement during installation and any future adjustments.
By implementing these cable management techniques, you can achieve a professional-looking and well-organized security camera wiring setup.
Installing Wired Cameras
Follow step-by-step instructions for installing wired cameras
Installing wired cameras is an essential step in ensuring the security and surveillance of your property. By following the step-by-step instructions below, you can easily set up your wired cameras and have peace of mind knowing that your property is protected.
- Choose the right location: Start by identifying the areas where you want to install your cameras. Consider high-risk areas such as entrances, windows, and other vulnerable spots. Ensure the location provides a clear view of the area you want to monitor.
- Prepare the wiring: Before starting the installation process, ensure that you have the appropriate tools and wiring. Measure the required length of the wire and cut it accordingly.
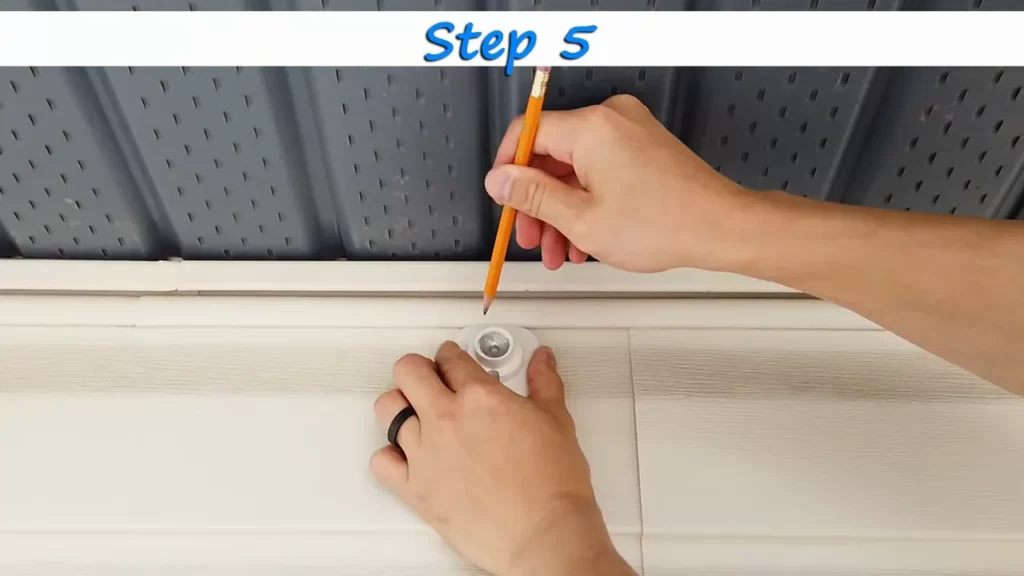
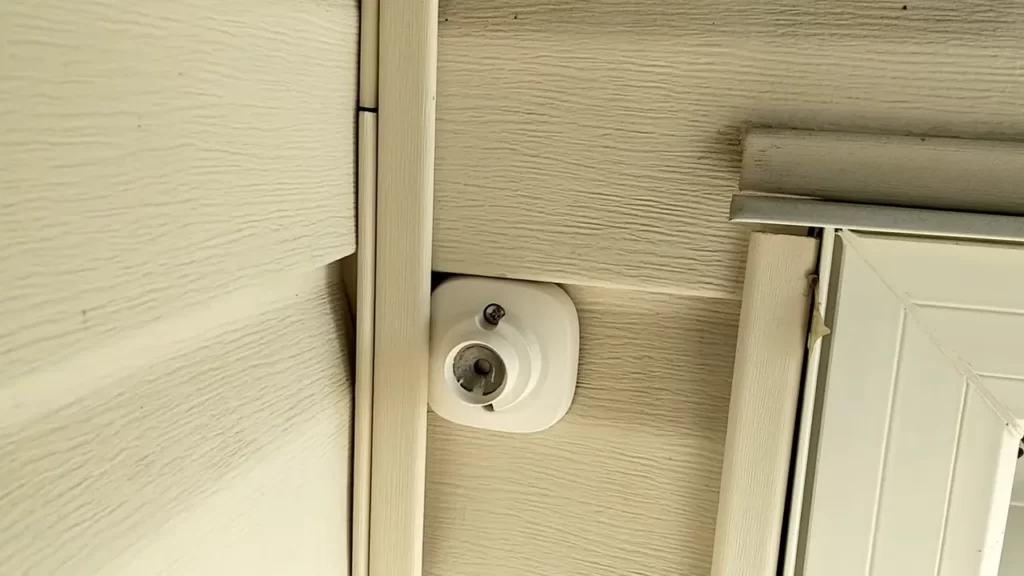
- Mount the camera: Use a stud finder to locate a secure spot for mounting the camera. Mark the screw holes and drill pilot holes. Securely mount the camera using screws and ensure it is level.
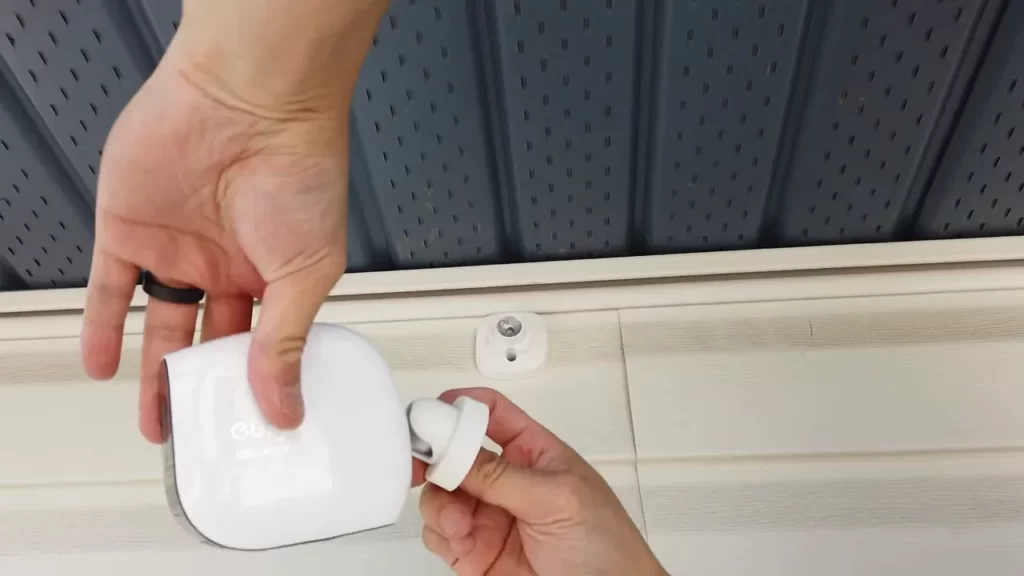
- Connect the wires: Carefully thread the wires through the mounting bracket and connect them to the camera. Follow the manufacturer’s instructions for properly connecting the wires. Use waterproof connectors to protect the connections from moisture.
- Test the camera: After connecting the wires, test the camera to ensure it is functioning properly. Check the live feed on your monitor or smartphone to confirm that the camera captures clear footage of the desired area.
- Secure the wires: To prevent tampering or damage, secure the wires to the wall or ceiling by using cable clips or conduit. This will help keep the wires organized and protected.
By following these step-by-step instructions, you can easily install your wired cameras and have an effective surveillance system in place.
Mount cameras securely in desired locations
Mounting your cameras securely in the desired locations is crucial for effective surveillance. When choosing the installation spots, consider these important factors:
- Visibility: Ensure that the cameras have a clear line of sight to the areas you want to monitor. Avoid obstructions such as trees or walls that can block the camera’s view.
- Elevation: Mount the cameras at an appropriate height to capture the desired field of view. This can deter potential intruders and enable the camera to capture clear footage.
- Stability: Select a stable mounting surface to ensure the camera remains steady and secure. Use mounting brackets or enclosures that are designed for your specific camera model.
- Concealment: If possible, consider mounting the cameras in inconspicuous locations to reduce the chances of tampering or vandalism. However, make sure they are still able to capture a clear view.
By mounting your cameras securely in the desired locations, you can maximize the effectiveness of your surveillance system and enhance the security of your property.
Weather-seal camera connections for durability and protection
Weather-sealing camera connections is crucial to ensure their durability and protect them from external elements. By following these steps, you can weather-seal your camera connections effectively:
- Use waterproof connectors: Invest in high-quality waterproof connectors that are designed for outdoor use. These connectors are specifically designed to protect the camera connections from moisture, dust, and other environmental factors.
- Apply silicone sealant: Before connecting the wires, apply silicone sealant around the connections to create a watertight seal. This will prevent water or moisture from seeping into the connections and causing damage.
- Secure connection points: Make sure all connection points are tightly secured to prevent any water or debris from entering. Use zip ties or electrical tape to hold the connections together and provide additional protection.
- Check for gaps: After weather-sealing the camera connections, inspect the connections carefully for any gaps or areas that might still be exposed to the elements. Apply additional sealant or tape as needed to ensure complete protection.
By weather-sealing your camera connections, you can ensure their longevity and protect them from the effects of harsh weather conditions, ultimately ensuring the reliability and effectiveness of your security system.
Connecting The Wiring To The Nvr
Now that you have successfully run and concealed the security camera wiring, it’s time to connect them to the NVR for video transmission. This step is crucial in ensuring that your security system functions properly and provides you with the surveillance coverage you need. Follow the steps below to connect the ethernet cables to the NVR:
Connect the ethernet cables to the NVR for video transmission
- Locate the ethernet ports on the back of the NVR.
- Take one end of an ethernet cable and insert it firmly into one of the available ports.
- Repeat the process for each camera, ensuring that each cable is securely connected to the NVR.
- Make sure to label each cable and correspond it to the respective camera for easy identification.
Follow proper wiring guidelines to ensure a stable connection
It is important to follow the proper wiring guidelines to ensure a stable and reliable connection between the cameras and the NVR. Some guidelines to keep in mind include:
- Use high-quality ethernet cables that are suitable for outdoor or indoor use, depending on your installation location.
- Avoid exceeding the recommended cable distances to maintain optimal video quality.
- Ensure that the cables are not stretched or strained, as this can lead to connection issues.
- Keep the cables away from power sources to minimize potential interference.
- Consider using cable clips or conduits to organize and protect the wiring.
Test the connectivity and make necessary adjustments
Once all the cables are connected to the NVR, it’s time to test the connectivity and make any necessary adjustments. Follow these steps:
- Ensure that the NVR is powered on and connected to a monitor or a TV.
- Navigate through the NVR menu to access the live view of the connected cameras.
- Check the video feed from each camera to ensure that they are properly transmitting.
- If you encounter any issues, such as a black screen or poor video quality, double-check the cable connections and reseat them if necessary.
- Consider adjusting the camera angles or repositioning them for better coverage.
By carefully following these steps, you can confidently connect the wiring to the NVR and ensure a stable and reliable video transmission for your security camera system. Taking the time to properly connect and test the wiring will help you maximize the performance of your surveillance system, providing you with peace of mind and a safer environment.
Finalizing The Installation
Once you have successfully installed the security camera wiring, it’s time to finalize the installation by verifying the camera feed on the NVR or monitoring device, adjusting camera angles and settings as needed, and exploring additional features and software for enhanced security.
Verify the camera feed on the NVR or monitoring device
After completing the installation, it is crucial to verify the camera feed on the NVR or monitoring device to ensure that everything is functioning properly. Follow these steps:
- Connect the NVR or monitoring device to the power source.
- Access the NVR or monitoring device interface through a computer or mobile device by entering the designated IP address.
- Locate the camera feed in the interface and make sure the video is clear and stable.
- Check if the camera feed is being recorded and stored properly.
- Test the playback function to ensure smooth and accurate video playback.
Adjust camera angles and settings as needed
Once you have verified the camera feed, it’s time to fine-tune the camera angles and settings to achieve the best coverage and image quality. Here are some tips:
- Physically adjust the camera angles by tilting or rotating them as needed.
- Use the camera’s built-in settings to adjust parameters such as brightness, contrast, and resolution.
- Experiment with different camera settings to find the optimal balance between clarity and storage space.
- Consider the monitoring area and adjust the camera settings accordingly, such as enabling night vision or motion detection.
Explore additional features and software for enhanced security
To take your security system to the next level, explore additional features and software that can further enhance the security of your premises. Here are some options to consider:
| Feature/Software | Description |
|---|---|
| Remote Viewing | Access your security camera feed from anywhere using your smartphone or computer. |
| Mobile Alerts | Receive instant notifications on your smartphone when motion is detected or when a specific event occurs. |
| Two-Way Audio | Interact with people near the camera by using the built-in microphone and speaker. |
| Intelligent Analytics | Utilize advanced algorithms to detect suspicious activities, such as unauthorized entry or loitering. |
| Cloud Storage | Store your camera recordings securely in the cloud for easy access and backup. |
By exploring these additional features and software options, you can tailor your security system to meet your specific needs and further enhance the safety and protection of your property.
With the installation now finalized, you can have peace of mind knowing that your security camera wiring is correctly set up and ready to provide reliable surveillance for your home or business.
Frequently Asked Questions For How To Install Security Camera Wiring
Can I Install Wired Security Cameras Myself?
Yes, you can install wired security cameras yourself. Installing an indoor camera is usually simple and only requires finding the right spot, plugging it in, and syncing it with your app. Some cameras may require drilling, but most only need a screwdriver.
What Is The Best Way To Run Security Camera Wires?
To run security camera wires, you can follow these steps: 1. Plan the camera locations and cable routes. 2. Use a spade bit to create holes for the wires. 3. Secure the wires to the walls or ceiling using screws and holders.
4. Waterproof the connections using a waterproofing kit. 5. Connect the wires to the NVR or DVR. Installing security camera wiring can be done yourself with basic tools.
How Do You Wire A Security Camera In Your House?
To wire a security camera in your house, follow these steps: 1. Plan camera placement and coverage. 2. Determine the type of cable needed. 3. Use a spade bit to drill holes for the cable in the wall or attic. 4.
Run the cable through the drilled holes. 5. Connect the cable to the camera and connect the camera to the NVR. Note: Some cameras may require professional installation.
How Hard Is It To Install A Wired Security Camera System?
Installing a wired security camera system can be relatively easy. It may involve finding the right spot, drilling holes, and connecting the cables. However, most systems come with easy-to-follow instructions and require only basic tools like a screwdriver.
Conclusion
Installing security camera wiring requires careful planning and execution to ensure an effective and efficient surveillance system. By following the right steps, you can conceal the cables and ensure a neat and professional installation. Remember to select the appropriate cable, plan out camera locations, and use the necessary tools for drilling and pulling cables.
With proper weather sealing and the setup of the NVR or camera app, you can have peace of mind knowing your property is secure. So, take charge of your security and confidently install security camera wiring yourself.