To install a pocket door handle, first measure and mark the height of the handle on the door edge, then drill holes and attach the handle using screws. Installing a pocket door handle involves measuring, drilling, and attaching the handle securely to ensure proper functioning.
The following steps outline the process in detail.
Factors To Consider Before Selecting A Pocket Door Handle
Installing a pocket door handle requires careful consideration of various factors to ensure that you choose the right handle for your door. By taking into account the door thickness and dimensions, door material and weight, as well as your style and aesthetic preferences, you can make an informed decision that not only enhances the functionality of your pocket door but also adds a touch of style to your space. Let’s delve into each of these factors in more detail.
Door Thickness and Dimensions
One of the first things you should consider before selecting a pocket door handle is the thickness and dimensions of your door. This is important because the handle needs to fit seamlessly onto the door surface without obstructing its movement. Measure the thickness of the door accurately to ensure that you choose a handle that is compatible. Additionally, take into account the dimensions of the door to determine whether a specific handle design will be visually proportionate and aesthetically pleasing.
Door Material and Weight
Another factor to consider is the material and weight of your pocket door. Different materials, such as wood, glass, or metal, require different types of handles for optimal functionality. For instance, a heavy solid wood pocket door might need a sturdier handle that can withstand the weight, while a glass pocket door might require a handle that is lightweight and delicate to avoid damaging the fragile material. Make sure to select a handle that not only complements the material of your door but also supports its weight for smooth and effortless operation.
Style and Aesthetic Preferences
Your style and aesthetic preferences play a crucial role in the overall look and feel of your space. When selecting a pocket door handle, consider the design elements of your interior décor and choose a handle that harmonizes with the existing style. The handle can serve as a decorative accent, adding a unique touch to your pocket door while complementing the overall aesthetic. Whether you prefer a modern, minimalist handle or a more ornate, traditional one, there is a wide range of options available to suit your personal taste.
By taking these factors into account, you can ensure that the pocket door handle you select not only fits your door perfectly but also enhances the overall functionality and aesthetic appeal of your space.
Essential Tools For Installing A Pocket Door Handle
| Essential Tools for Installing a Pocket Door Handle | |
|---|---|
| Screwdriver | A screwdriver is an indispensable tool when it comes to installing a pocket door handle. It will allow you to securely fasten the screws and ensure that the handle is securely attached to the door. Make sure to choose a screwdriver that is the right size for the screws you will be using. |
| Drill | A drill is essential for creating holes in the door where the handle will be installed. It is important to use the appropriate drill bit size and securely hold the door in place before drilling. Double-check the measurements of the handle and mark the holes with a pencil before drilling. |
| Measuring Tape | A measuring tape is crucial for ensuring accuracy when installing a pocket door handle. Measure the distance between the edge of the door and the center of the handle, as well as the distance between the two screw holes. This will help you position the handle correctly and avoid any unevenness. |
| Chisel | A chisel is necessary for creating a recessed area on the edge of the door where the latch plate will be installed. This recess will help the latch sit flush with the surface of the door. Take care to remove only the necessary amount of wood and test the fit of the latch plate before proceeding. |
| Pencil | A pencil is a versatile and handy tool for marking measurements, drilling points, and indicating where to chisel. It is crucial to use a sharp pencil when making accurate marks on the door to ensure the proper placement of the pocket door handle. |
Now that we’ve discussed the essential tools needed for installing a pocket door handle, it’s time to get started. Keep in mind that having the right tools not only makes the installation process easier but also ensures a professional and secure result.
First and foremost, we have the screwdriver. A screwdriver comes in various sizes and types, so make sure to select one that matches the screws you’ll be using. Tightening the screws properly will ensure that the handle is securely fastened to the door.
Next on the list is the drill. This power tool is essential for creating the necessary holes in the door where the handle will be installed. To avoid any mishaps, double-check the measurements of the handle and mark the drilling points on the door with a pencil before proceeding with the drill.
To ensure accuracy, a measuring tape is indispensable. Use it to measure the distance between the edge of the door and the center of the handle, as well as the distance between the two screw holes. These measurements will help you position the handle correctly and avoid any unevenness.
Additionally, a chisel is necessary for creating a recessed area on the edge of the door where the latch plate will be installed. This area allows the latch to sit flush with the door’s surface, enabling smooth operation. Take your time to remove only the necessary amount of wood with the chisel and test the fit of the latch plate before proceeding.
Lastly, the pencil plays a vital role in the installation process. Use a sharp pencil to mark measurements, drilling points, and guidelines for chiseling. This will ensure accurate placement of the pocket door handle and a professional-looking result.
Remember, having these essential tools at hand will make your pocket door handle installation process much smoother and ensure a long-lasting and functional handle. So gather your tools, follow the instructions carefully, and enjoy the satisfaction of a job well done!
Necessary Materials For The Installation Process
Installing a pocket door handle requires specific materials to ensure a seamless process. By gathering these necessary tools and supplies beforehand, you can save time and avoid any unnecessary delays. Let’s take a look at the essential materials you will need:
Pocket door handle set
A pocket door handle set is a crucial component of the installation process. It typically includes the handle, latch, and other necessary hardware. When selecting a pocket door handle set, consider the style and design that aligns with your interior decor. Ensure it is sturdy and well-made to withstand frequent usage.
Screws
Screws play a vital role in securing the pocket door handle onto the door itself. It is important to use the right length and type of screws for optimal stability. Make sure the screws are appropriate for the material of your door, whether it’s wood or another material.
Strike plate
A strike plate is a metal plate that is attached to the door jamb. It serves as the counterpart to the latch, ensuring a secure closure. Look for a strike plate that matches the finish and size of your pocket door handle set to achieve a cohesive look.
Mortise lock
A mortise lock is a type of lock that is installed within the door itself. It provides an additional level of security and privacy for pocket doors. When choosing a mortise lock, ensure that it is compatible with your pocket door size and thickness. Follow the manufacturer’s instructions to properly install and adjust the mortise lock.
Step 1: Preparing The Door
If you’re tired of the traditional swinging door taking up valuable space in your home, installing a pocket door can be a great solution. Not only do pocket doors save space, but they also add a touch of modernity to any room. Before you can enjoy the benefits of a pocket door, however, you’ll need to install the handle. This step-by-step guide will walk you through the first step of the installation process – preparing the door.
Measure and mark the placement of the handle
The first thing you’ll want to do is measure and mark the exact placement of the pocket door handle. This is crucial for ensuring that the handle is installed at the right location and height. To do this accurately, follow these steps:
- Gather your measuring tape and a pencil.
- Stand facing the side of the door where you want the handle to be.
- Measure and mark the desired height of the handle on the edge of the door. This is typically around 36 inches from the bottom of the door, but you can adjust it to your preference.
- Using the measuring tape, find the center point of the door edge and mark it with a pencil. This will be the reference point for the handle.
By measuring and marking the exact placement of the handle, you ensure that it is installed at a comfortable height and in the center of the door edge. This step is crucial for a successful pocket door handle installation.
Use a template or a guide to ensure accuracy
Once you have measured and marked the placement of the handle, it’s time to ensure accuracy during the installation process. One way to do this is by using a template or a guide. Here’s how:
- Look for a template or guide that matches the style and size of the handle you have chosen.
- Place the template or guide on the marked spot, lining it up with the center point.
- Ensure that the template is level by using a level tool or by visually aligning it with the door.
- Once the template is in the correct position, use a pencil to trace the outline onto the door. This will serve as a guide for drilling the necessary holes.
Using a template or guide provides a visual aid and ensures that the handle is installed accurately. It eliminates the guesswork and helps you achieve a professional-looking result.
By following these steps and preparing the door correctly, you’re setting the foundation for a successful pocket door handle installation. The next steps will involve drilling the necessary holes and attaching the handle. Stay tuned for the rest of the installation guide!
Step 2: Drilling Holes
Drilling the necessary holes for the pocket door handle and lock mechanism is an essential step in the installation process. It ensures that the handle and lock will function properly and be securely attached to the door. Follow the instructions below to drill the holes with precision and accuracy.
Drill holes for the handle
Start by measuring the height at which you want the handle to be installed on the door. Using a measuring tape or ruler, mark the desired height with a pencil. This will serve as a guide for drilling the holes.
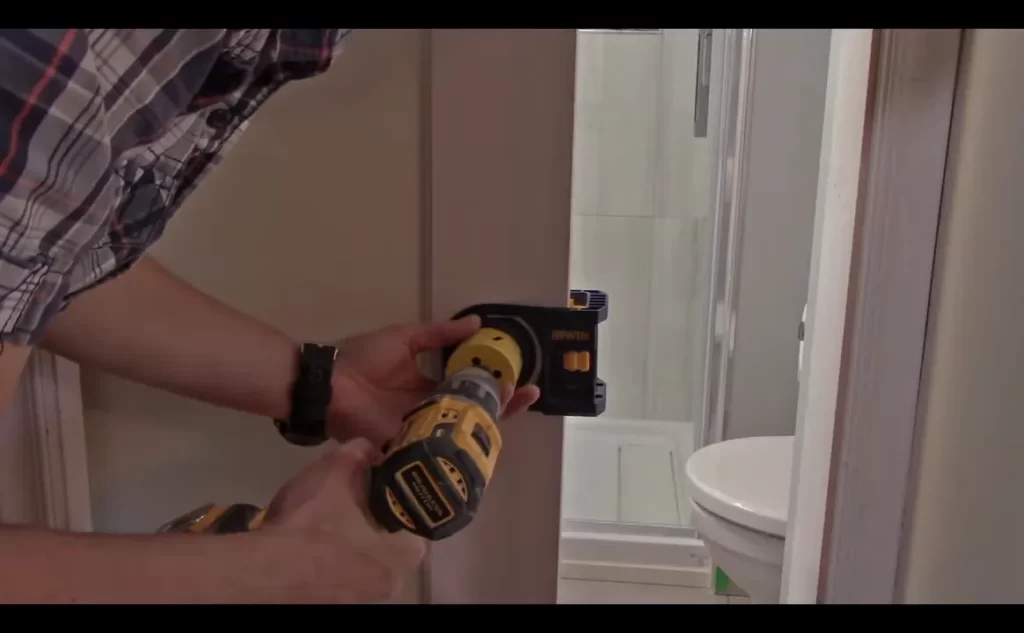
Next, select an appropriately sized drill bit for the handle. The size will depend on the specifications provided by the manufacturer of the handle. Refer to the instructions or product packaging for guidance. Attach the drill bit to your power drill.
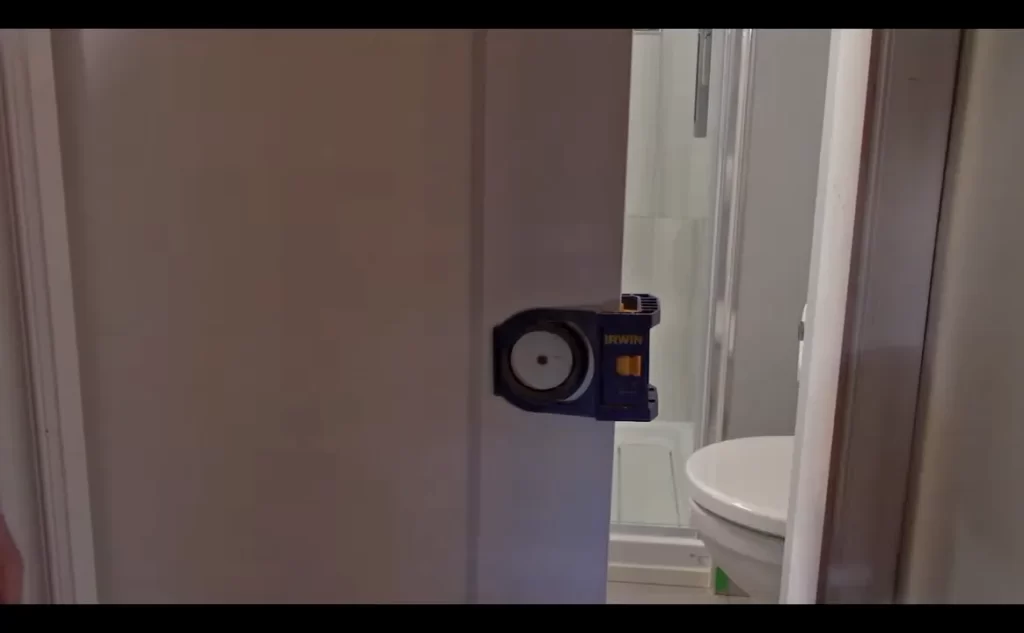
Position the drill bit on the marked spot and apply gentle pressure. Slowly drill into the door, keeping the drill perpendicular to the surface. Be cautious not to drill too deep or at an angle, as this can affect the handle’s functionality.
Once the hole is drilled, remove any wood shavings or debris from the area. Test the fit of the handle in the hole to ensure it is aligned and secure. Adjustments can be made by enlarging the hole if needed.
Drill holes for the lock mechanism
Similar to drilling holes for the handle, start by measuring and marking the desired height for the lock mechanism. Use a pencil to make an accurate mark on the door as a reference.
Select an appropriate drill bit for the lock mechanism, consulting the manufacturer’s instructions for guidance. Attach the drill bit to your power drill and align it with the marked spot on the door.
Gently drill into the door, applying even pressure and keeping the drill vertical. Take care not to drill too deeply or at an angle. The hole should be deep enough to accommodate the lock mechanism properly.
Remove any debris or wood shavings from the hole. Test the fit of the lock mechanism to ensure it aligns correctly and can be securely fastened. If necessary, make adjustments to the hole size or depth.
Following these steps will ensure that the holes for the pocket door handle and lock mechanism are accurately drilled. This will allow for a smooth installation process and ensure that the handle and lock function as intended. Stay tuned for the next step, where we will delve into the proper installation of the pocket door handle and lock mechanism.
Step 3: Mortising The Door
Create a recess for the lock mechanism
After marking the location of the pocket door handle on the door edge, it’s time to mortise the door to create a recess for the lock mechanism. This step is crucial to ensure that the handle sits flush with the door surface and functions properly. Follow the steps below to carry out this task with precision.
Use a chisel to remove excess material
Start by grabbing a sharp chisel and positioning it at the edge of the marked area, ensuring it aligns with the depth of the lock mechanism. With a firm grip on the chisel, strike it gently with a hammer to make an initial cut. Be cautious and use controlled force to avoid damaging the door.
Continue chiseling along the marked area, gradually removing the excess material. Work carefully and take your time, as precision is key for a neat and professional-looking result. Make sure to check the depth frequently, comparing it with the dimensions of the lock mechanism, to ensure a proper fit.
Once you have removed a significant amount of material, it’s time to refine the recess to achieve a smooth and even surface. Use the chisel at a slight angle to trim the edges and corners, keeping the recess squared and aligned with the handle’s dimensions.
Take breaks if needed and recheck the depth and alignment during the process. Remember, it’s always easier to remove more material than to add it back, so approach this step with patience and caution.
Pro tip: To make the mortising process easier and more accurate, consider using a mortising jig or template. These helpful tools ensure consistent results and minimize the risk of errors.
Once you are satisfied with the depth and shape of the recess, clean away any wood debris from the mortised area. You can use a vacuum cleaner or a brush to thoroughly remove any sawdust or wood shavings.
Important: Before proceeding to the next step, double-check the measurements and ensure the lock mechanism perfectly fits into the recess you’ve created. Any minor adjustments can be made using the chisel to achieve the desired fit.
Congratulations! You have successfully mortised the door to accommodate the pocket door handle’s lock mechanism. In the next step, we will focus on installing the handle itself, bringing us closer to completing the pocket door installation.
Step 4: Attach The Handle
After successfully drilling the holes for the pocket door handle, it is time to attach the handle securely. This step requires careful alignment and fastening to ensure a sturdy and functional handle. Follow the instructions below to complete this process.
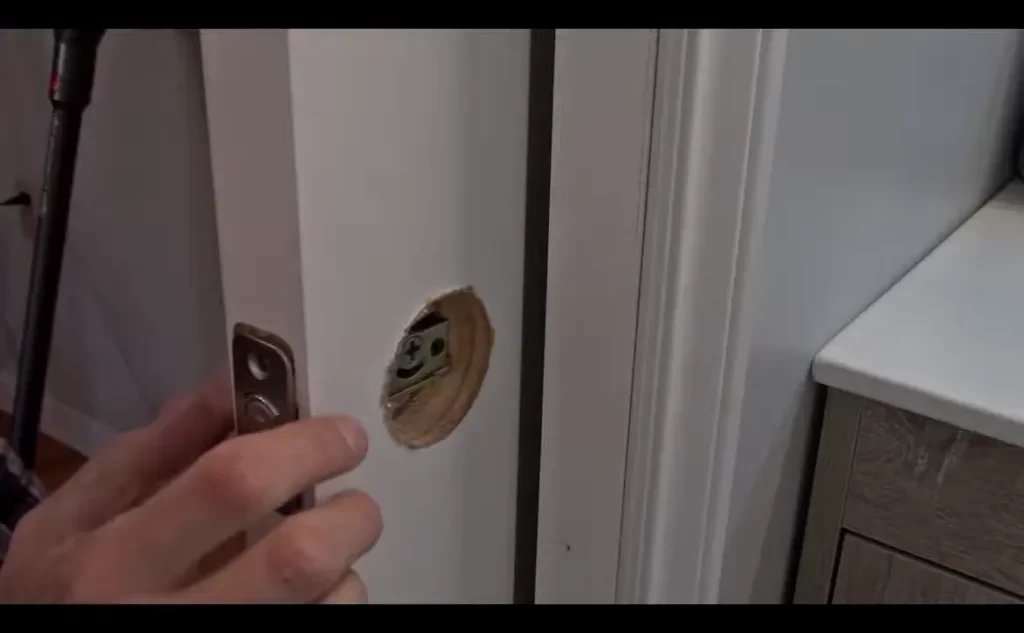
Align the handle with the drilled holes
Begin by placing the handle on the door, making sure to align it perfectly with the drilled holes. The handle should be positioned horizontally or vertically, depending on your preference and the design of the handle. Take your time to adjust the handle until it lines up accurately with the holes. This alignment is crucial for both the aesthetic appeal and smooth operation of the pocket door.
Securely fasten the handle using screws
Once the handle is properly aligned with the drilled holes, it’s time to secure it in place. Take the appropriate screws provided with the handle and insert them through the holes. Ensure that each screw is inserted tightly and holds the handle firmly. Depending on the type of door handle you have chosen, there may be additional steps or components required to complete the installation. Refer to the handle’s manufacturer instructions for any specific guidelines. To maximize the sturdiness of the handle, it is recommended to use all the screws provided. Make sure each screw is fastened evenly and firmly to distribute the weight and stress evenly across the handle. This will help prevent any potential damage or loosening over time, ensuring the longevity of your pocket door handle.
Step 5: Install The Lock Mechanism
Once you have successfully prepared the recess for the pocket door handle, it’s time to move on to the next crucial step, which involves installing the lock mechanism. The lock mechanism not only ensures the privacy and security of the space but also adds a sophisticated touch to the overall aesthetic. Follow the steps below to install the lock mechanism for your pocket door handle.
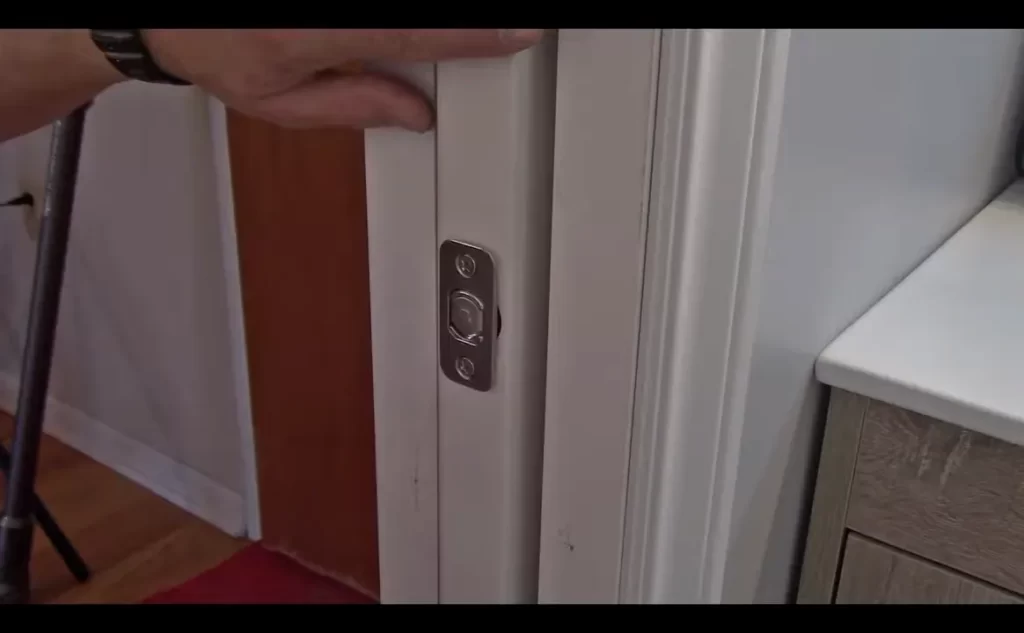
Insert the mortise lock into the prepared recess
The first step is to carefully insert the mortise lock into the recess you have prepared. Make sure the lock fits snugly into the recess and aligns properly with the door frame.
To make the installation process smoother, you can apply a small amount of lubricant to the lock mechanism. This will allow the lock to slide in more easily and reduce any potential damage to the door or lock during installation.
Secure it in place with screws
Once the lock mechanism is properly aligned and inserted into the recess, it is time to secure it in place. Take the screws provided with your pocket door handle set and carefully screw them into the pre-drilled holes on the lock mechanism. Make sure to tighten the screws adequately, but be cautious not to overtighten as it may damage the lock or door.
It is important to note the type and size of screws needed for your specific pocket door handle model. If the screws provided do not fit properly or seem too loose, it is recommended to consult the product manual or reach out to the manufacturer for guidance. Using the appropriate screws will ensure a secure and durable lock installation.
Once the lock mechanism is securely fastened with screws, give it a gentle test to ensure it functions properly. The lock should smoothly engage and disengage without any resistance or wobbling.
By successfully installing the lock mechanism, you are one step closer to completing the installation of your pocket door handle. Carry on with the subsequent steps to align, attach, and finish the installation process, and soon you will have a fully functioning and stylish pocket door handle that adds convenience and elegance to your space.
Step 6: Test And Adjust
Once you have successfully installed your pocket door handle, it is important to test its functionality and make any necessary adjustments to ensure smooth operation. Here are a few key steps to follow:
Check the functionality and smoothness of the handle and lock
Begin by testing the handle and lock to ensure they are working properly. Try opening and closing the pocket door multiple times to evaluate the smoothness of the handle’s operation. Pay attention to any sticking or difficulty in maneuvering the handle. This step will help you identify any issues that may need to be addressed before finalizing the installation.
Make any necessary adjustments to ensure proper operation
If you encounter any problems during the functionality test, it may be necessary to make some adjustments. Start by examining the handle’s alignment with the door frame. Ensure that it is properly aligned and centered. If not, adjust the handle’s positioning by loosening the screws and repositioning it accordingly. Tighten the screws securely to ensure a stable installation.
Next, check the height and clearance of the handle. It should be easily accessible and comfortable to use. If needed, adjust the handle’s height by adjusting the screws or handles provided by the manufacturer. Make sure to follow the manufacturer’s instructions for any adjustments to ensure proper functionality.
Additionally, verify that the lock mechanism is functioning correctly. Test the locking and unlocking mechanism to ensure smooth operation. If the lock is not engaging or disengaging properly, adjustments may be needed. Consult the installation manual or contact the manufacturer for guidance on adjusting the lock mechanism.
After making any necessary adjustments, retest the handle and lock to ensure that they are now functioning smoothly. Pay attention to any improved performance and make sure there are no more issues with the handle’s operation.
Remember, the testing and adjustment phase is crucial to ensure that your pocket door handle functions optimally. By following these steps, you can address any issues and make the necessary adjustments for a seamless and reliable pocket door handle installation.
Common Issues During Pocket Door Handle

Installation
Installing a pocket door handle may seem like a straightforward task, but there are a few common issues that you may encounter during the process. By being aware of these potential challenges, you can effectively troubleshoot and ensure a smooth installation. In this section, we will address three main issues that frequently arise: misaligned holes, sticky or stiff handle operation, and difficulty in mortising the door correctly.
Misaligned Holes
One common issue during pocket door handle installation is misaligned holes. This occurs when the pre-drilled holes on the door and the handle do not line up correctly. It can be frustrating and time-consuming. To resolve this issue, follow these steps:
- Measure and mark the correct placement of the handle on the door.
- If the holes are misaligned, carefully unscrew the handle.
- Using a drill bit with the appropriate diameter, enlarge the existing holes gradually.
- Reposition the handle and attach it securely to the door.
Sticky or Stiff Handle Operation
Another issue you may encounter is a sticky or stiff handle operation. This can make it challenging to open and close the pocket door smoothly. To address this problem:
- Remove the handle from the door.
- Inspect the interior mechanism for any debris, dust, or dirt.
- Clean the mechanism using a mild household cleaner and a soft cloth.
- Apply a small amount of lubricant to the moving parts of the handle.
- Reinstall the handle and test its operation.
Difficulty in Mortising the Door Correctly
The third common issue you may encounter is difficulty in mortising the door correctly. Mortising involves creating a recess in the door to fit the handle mechanism. If the mortise is not done properly, it can result in an uneven or unstable handle. Here’s how to overcome this challenge:
- Measure and mark the area where the handle will be installed, ensuring it is at the correct height and distance from the edge.
- Use a chisel and a hammer to carefully remove the excess wood within the marked area.
- Check the fit of the handle in the mortise, making any necessary adjustments.
- Securely attach the handle to the door.
By addressing these common issues during pocket door handle installation, you can ensure a successful and hassle-free process. Taking the time to properly align holes, troubleshoot handle operation, and mortise the door correctly will result in a functional and aesthetically pleasing pocket door handle for your space.
Tips For A Successful Installation
Double-check measurements and markings before drilling
One of the most important tips for a successful installation of a pocket door handle is to double-check your measurements and markings before drilling. This step is crucial to ensure that your handle is positioned correctly and functions properly. Start by measuring the height and width of the door edge, as well as the distance from the top and bottom of the door. Mark the spot where you want to place the handle with a pencil, making sure it is aligned with the door’s edge. Double-check these measurements and markings to avoid any mistakes that could lead to an uneven or misaligned installation.
Use lubrication for smooth handle operation
To ensure that your pocket door handle operates smoothly, it is essential to use lubrication during the installation process. Applying a small amount of lubricant, such as silicone spray or powdered graphite, to the moving parts and mechanisms of the handle will help reduce friction and allow for effortless operation. This will also prevent any unwanted squeaking or sticking that may occur over time. Remember to follow the manufacturer’s instructions regarding the type and amount of lubrication to use, as different handles may require specific maintenance methods. With proper lubrication, your pocket door handle will glide open and shut with ease.
Seek professional help if facing major difficulties
If you find yourself facing major difficulties during the installation of a pocket door handle, it is wise to seek professional help. Installing a pocket door handle can sometimes be more complex than it initially seems, and trying to tackle significant challenges on your own can lead to further complications. A professional installer will have the experience and knowledge necessary to troubleshoot any issues and ensure your handle is installed correctly. While minor adjustments and installations can be done by the average DIY enthusiast, major difficulties should not be underestimated. Seeking professional assistance will save you time, effort, and potential damage to your pocket door or handle.
Frequently Asked Questions For How To Install A Pocket Door Handle
How Do Pocket Door Handles Work?
Pocket door handles work by allowing you to conveniently slide the door open or closed. They are designed with a recessed grip that fits into the door, allowing you to pull or push it effortlessly. This type of handle is great for saving space and creating a sleek, modern look in your home.
What Hardware Do I Need To Install A Pocket Door?
To install a pocket door, you’ll need specific hardware. This includes a pocket door kit, which typically includes the track, frame, and hardware like hangers and rollers. Additionally, you’ll need screws, a drill, a level, a saw, and molding to finish the project.
How High Should A Pocket Door Handle Be?
The pocket door handle should be installed at a height that is comfortable for most people to reach. A general guideline is to place it at around 36 inches from the floor.
Do Pocket Doors Have Handles On Both Sides?
Yes, pocket doors usually have handles on both sides for easy access and convenience.
Conclusion
Installing a pocket door handle doesn’t have to be a daunting task. With the right tools and a well-structured approach, you can easily accomplish it. By following the step-by-step guide and tips provided in this blog post, you can successfully install a pocket door handle and enhance the functionality and aesthetics of your space.
So, don’t hesitate to give it a try and enjoy the convenience of a pocket door in your home.