To install a spring door stop, first, measure and mark the desired height on the door, then pre-drill a hole and attach the base plate using screws. Finally, secure the spring door stop to the base plate by aligning the holes and inserting the pin.
Welcome to our guide on how to install a spring door stop. Have you ever had a door handle banging against the wall or damaging the surface? A spring door stop can prevent that by cushioning the impact and protecting your wall.
We will provide you with step-by-step instructions on how to install a spring door stop effectively. You will learn the necessary measurements, how to attach the base plate, and secure the spring door stop in place. Follow our easy guide and say goodbye to noisy door handles and damaged walls.
Understanding The Importance Of A Spring Door Stop
Understanding the Importance of a Spring Door Stop
A spring door stop is a small but essential device that helps protect your doors and walls from damage caused by forcefully opening doors. It acts as a buffer, preventing the door from banging against the wall and leaving unsightly marks or even causing holes.
Reasons Why a Spring Door Stop is Necessary
- Prevents damage to walls: One of the primary reasons to install a spring door stop is to protect your walls from dents, scratches, and scuff marks caused by doors swinging open.
- Preserves the door’s quality: By providing a cushioning effect, a spring door stop helps to maintain the integrity of your door. It prevents the door from slamming into the wall, which can lead to loosened hinges or even cracked panels.
- Eliminates sound disturbances: The constant rattling of doors banging against walls can be incredibly annoying. Installing a spring door stop helps eliminate these disruptive noises and creates a more peaceful environment.
Benefits of Installing a Spring Door Stop
Now that we understand why a spring door stop is necessary, let’s dive into the benefits it offers:
- Easy installation: Installing a spring door stop is a quick and straightforward process that requires minimal tools and expertise. With a few simple steps, you’ll have your door protected in no time.
- Affordable solution: Compared to the potential costs of repairing damaged walls or doors, a spring door stop is an incredibly cost-effective option. It is a small investment that can save you from expensive repairs in the long run.
- Customizable options: Spring door stops come in a wide variety of sizes, designs, and finishes to suit your specific aesthetic preferences. You can choose a door stop that seamlessly blends with your interior decor while providing the necessary protection.
- Added safety: By preventing doors from swinging freely and potentially injuring someone, a spring door stop enhances the overall safety of your home or office space. It reduces the chances of accidents, especially in high-traffic areas.
With the importance and benefits of a spring door stop in mind, it’s clear why this small device is a worthwhile addition to any space. Not only does it protect your walls and doors, but it also offers peace of mind and added convenience. Installation is a breeze, and you’ll quickly reap the rewards of this simple yet effective safety measure.
Tools And Materials Needed For The Installation
Before you begin installing a spring door stop, it’s important to gather all the necessary tools and materials. With the right equipment at hand, the installation process will be a breeze. In this section, we will discuss the list of required tools, choosing the right kind of spring door stop, and additional materials that may be needed.
List of required tools for installing a spring door stop
Installing a spring door stop requires a few essential tools. These tools will help you achieve a secure and effective installation. Here is a list of the tools you will need:
- Tape measure: This tool will help you accurately measure the distance where the door stop will be installed.
- Pencil: Use a pencil to mark the desired location for the door stop.
- Screwdriver: Depending on the type of door stop, you may need either a Phillips or flathead screwdriver for installation.
- Drill: If you are installing a door stop that requires screws, a drill will be necessary to create pilot holes for the screws.
- Screws: Make sure you have the appropriate screws for the door stop you have chosen.
- Level: A level will help you ensure that the door stop is installed straight.
- Safety glasses: It’s always important to protect your eyes when using tools.
Choosing the right kind of spring door stop for your needs
Now that you have gathered the necessary tools, it’s time to choose the right kind of spring door stop for your needs. Spring door stops come in various designs and materials, so it’s important to consider a few factors:
- Door type: Determine whether you have a standard interior door or a heavy exterior door. Heavier doors may require a more robust door stop.
- Design: Consider the aesthetic of your door and choose a door stop that complements its style.
- Material: Spring door stops are available in materials like brass, stainless steel, and rubber. Choose a material that suits your preferences and durability requirements.
- Installation method: Some spring door stops can be installed using adhesive, while others require screws. Consider which installation method suits your door and personal preference.
Additional materials that may be needed
In addition to the tools mentioned earlier, there may be some additional materials needed depending on your specific installation requirements. Here are a few examples:
- Adhesive: If you are installing a door stop that uses adhesive, make sure you have the appropriate adhesive for the surface of your door.
- Wall anchors: If you are installing a spring door stop on a wall instead of the door, you may need wall anchors for added stability.
- Extra screws: It’s always a good idea to have some extra screws on hand in case you need them during the installation process.
By having these additional materials readily available, you’ll be prepared for any unforeseen challenges that may arise during the installation process.
Now that you know the tools and materials needed for installing a spring door stop, you are ready to proceed with the installation process. In the next section, we will guide you through the step-by-step instructions to ensure a successful installation.
Step-By-Step Guide To Installing A Spring Door Stop
Installing a spring door stop is a simple and effective way to prevent damage to your walls and doors. By following this step-by-step guide, you’ll have your door stop installed in no time. In this guide, you’ll learn how to prepare the door and the wall for installation, mark the placement of the spring door stop, drill holes for the door stop, install the spring door stop, adjust the tension, and test the functionality of the installed door stop.
Preparing the door and the wall for installation
Before installing a spring door stop, it’s important to ensure that both the door and the wall are properly prepared. This will help to ensure that the door stop functions correctly and is securely anchored.
Here are the steps to prepare the door and the wall:
- Begin by cleaning the area where the door stop will be installed. Remove any dust, dirt, or debris from the surface to ensure a smooth installation.
- Next, make sure that the door is closed properly. This will prevent any accidental damage to the door or the wall during installation.
Marking the placement of the spring door stop
After preparing the door and the wall, the next step is to mark the placement of the spring door stop. This will ensure that the door stop is installed in the correct position.
Follow these steps to mark the placement:
- Open the door to the desired position where you want the door stop to make contact with the wall.
- Using a pencil or a marker, make a small mark on the wall at the point where the door makes contact.
Drilling holes for the door stop
Once you have marked the placement of the spring door stop, the next step is to drill holes for its installation. This will provide a secure anchor for the door stop.
Here’s how you can drill holes for the door stop:
- Using a drill and the appropriate size drill bit, carefully drill holes at the marked points on the wall. Ensure that the holes are deep enough to accommodate the screws that came with the door stop.
- After drilling the holes, remove any dust or debris from the holes to ensure a proper fit.
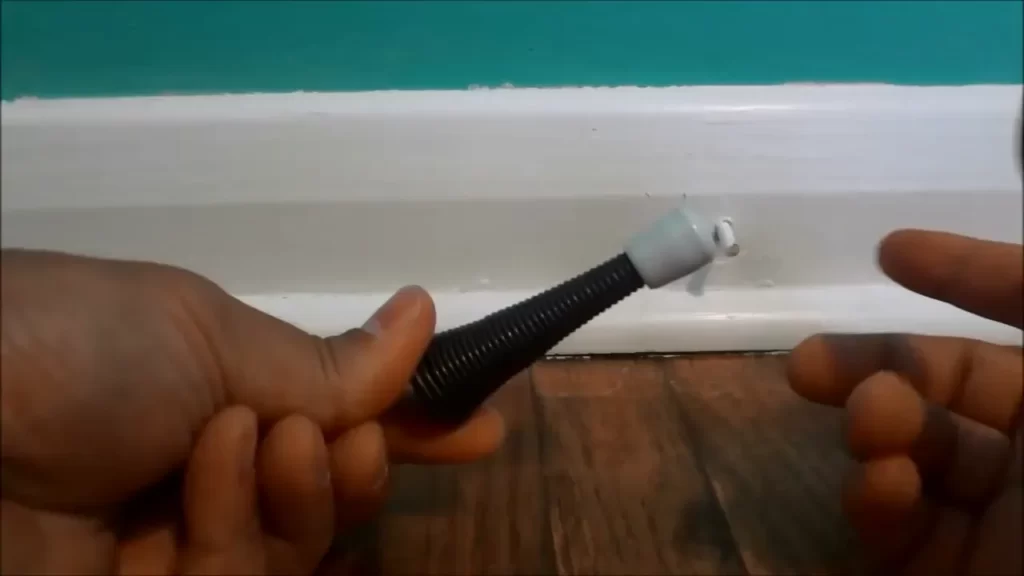
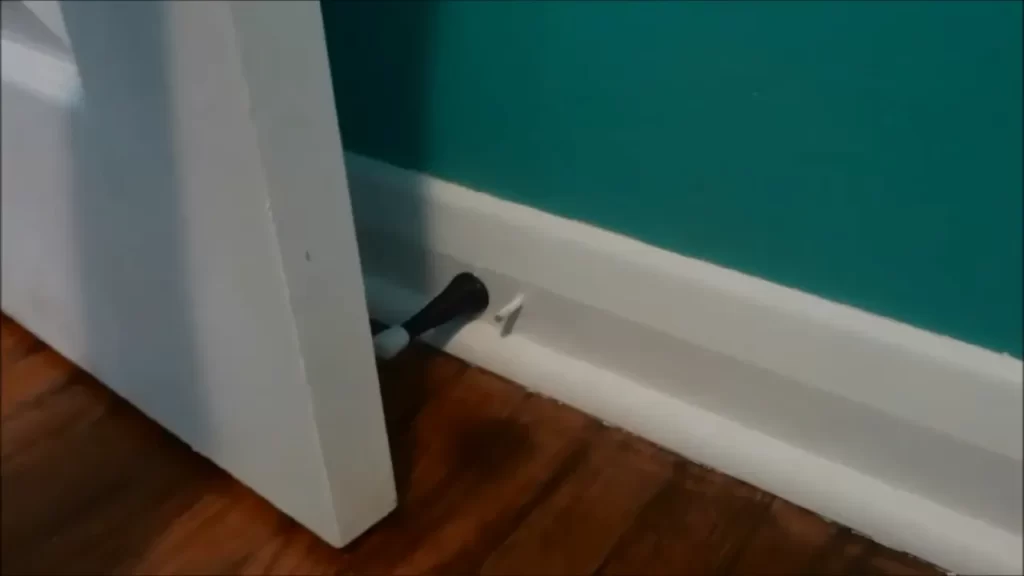
Installing the spring door stop
With the holes drilled, it’s time to install the spring door stop. This step will secure the door stop in place.
Follow these steps to install the spring door stop:
- Place the door stop over the drilled holes, aligning the screw holes on the door stop with the holes on the wall.
- Insert the screws into the holes and tighten them using a screwdriver. Ensure that the door stop is securely attached to the wall.
Adjusting the tension of the spring door stop
After installing the door stop, it’s important to adjust the tension of the spring to ensure it functions correctly. This will prevent the door from slamming shut or from not closing properly.
Here’s how you can adjust the tension of the spring door stop:
- Locate the adjustment screw on the door stop, usually located at the end of the spring.
- Using a screwdriver, turn the adjustment screw clockwise to increase the tension or counterclockwise to decrease the tension. Adjust the tension until the door stop provides the desired resistance.
Testing the functionality of the installed door stop
Finally, it’s important to test the functionality of the installed door stop to ensure that it works correctly and effectively prevents the door from damaging the wall.
Here’s how you can test the functionality of the installed door stop:
- Open the door to the desired position where the door stop makes contact with the wall.
- Allow the door to gently come into contact with the door stop. Observe if the door stop effectively prevents the door from further opening or closing.
- Check for any unwanted movement or looseness in the door stop. If necessary, tighten the screws to secure the door stop in place.
By following this step-by-step guide, you can easily install a spring door stop and protect your walls and doors from unnecessary damage. Remember to prepare the door and the wall, mark the placement, drill the holes, install the door stop, adjust the tension, and test its functionality. Enjoy the benefits of a properly installed spring door stop!
Troubleshooting And Common Issues
Installing a spring door stop may seem like a simple task, but sometimes you may encounter some problems along the way. Whether it’s a faulty installation or a malfunctioning component, it’s important to know how to address these common issues. In this section, we will discuss the problems that may arise during installation and provide helpful tips for fixing them. Additionally, we will help you determine when it’s time to seek professional help for installation or repairs.
Problems that may arise during installation
Even though installing a spring door stop is relatively straightforward, there are a few common problems that you may encounter during the process. It’s important to be aware of these issues so you can troubleshoot and resolve them effectively. Here are some problems to look out for:
- The spring door stop doesn’t fit properly: If you find that the door stop is not aligning correctly with the wall or if the measurements seem off, double-check your measurements and ensure that the door stop is compatible with the thickness of your door.
- The door stop doesn’t stay in place: One common issue is when the door stop fails to hold its position and constantly slides down. This may indicate that the tension in the spring is not set correctly. Make sure to follow the manufacturer’s instructions for adjusting the tension and test the door stop multiple times to ensure it stays in place.
- The door stop is making noise: If you notice a squeaking or creaking sound when opening or closing the door, it could be due to a lack of lubrication. Apply a small amount of lubricant to the hinges and moving parts of the door stop to alleviate the noise.
Tips for fixing common issues with spring door stops
Fortunately, many common issues with spring door stops can be easily resolved with a few simple steps. Here are some tips to help you fix these problems:
- Re-measure and reposition: If the door stop doesn’t fit properly, double-check your measurements and make sure it is positioned correctly. Adjust the position and try reattaching it to the wall.
- Adjust the tension: If the door stop doesn’t stay in place, adjust the tension in the spring according to the manufacturer’s instructions. This will help ensure that the door stop remains in the desired position.
- Apply lubricant: To address any noise issues, apply a lubricant to the hinges and moving parts of the door stop. This will help reduce friction and eliminate squeaking or creaking sounds.
When to seek professional help for installation or repairs
While many issues with spring door stops can be resolved on your own, there are certain situations where it’s best to seek professional help. Consider the following scenarios:
- Complex installations: If you’re dealing with a complex or specialized door stop installation, such as a heavy-duty or concealed door stop, it’s recommended to consult a professional to ensure it is installed correctly.
- Structural issues: If you suspect that there may be underlying structural problems with your door or wall, it’s advisable to seek the assistance of a professional contractor. They can assess the situation and provide the necessary repairs or reinforcements.
- Persistent issues: If you have attempted to fix a problem multiple times and it continues to persist, it may be time to call in a professional. They will have the expertise to diagnose and address the issue effectively.
By being aware of the potential problems that may arise during spring door stop installation and knowing how to troubleshoot them, you can ensure a smooth and successful installation process. However, when in doubt, don’t hesitate to seek the assistance of a professional to avoid any potential complications.
Maintenance And Care For Your Spring Door Stop
Proper maintenance and care of your spring door stop are essential for ensuring its optimal performance and longevity. In this section, we will discuss three crucial aspects of maintaining and caring for your spring door stop: cleaning and lubricating, checking for any loose parts or damages, and replacing worn-out or broken components.
Cleaning and Lubricating the Door Stop
To keep your spring door stop in top condition, regular cleaning and lubrication are necessary. Follow these simple steps:
- Start by wiping off any dust or debris on the door stop using a clean, damp cloth.
- Next, apply a silicone-based lubricant to the spring and other moving parts of the door stop. This will help ensure smooth operation.
- After applying the lubricant, gently move the door stop back and forth a few times to distribute the lubrication evenly.
- Lastly, wipe off any excess lubricant with a clean cloth, leaving the door stop clean and ready for use.
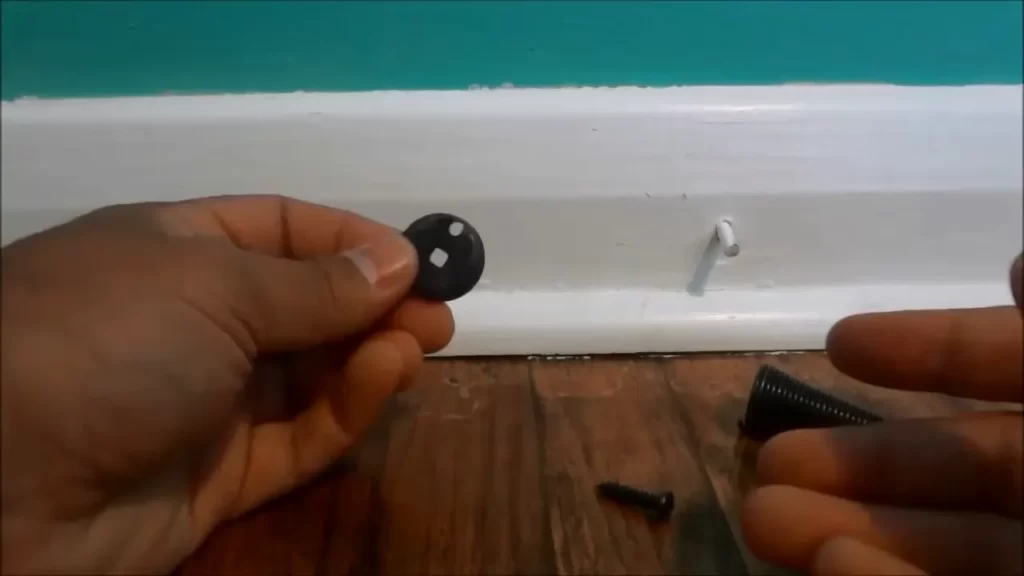
Checking for Any Loose Parts or Damages
Regularly inspecting your spring door stop for any loose parts or damages is crucial for maintaining its functionality. Here’s what you need to do:
- First, visually examine the door stop, looking for any loose screws or other fasteners. Tighten them if necessary using a screwdriver.
- If you notice any cracks or damages on the door stop, consider replacing it to prevent further issues.
- Additionally, check the mounting bracket or plate for any signs of wear or damage. Replace it if needed to ensure proper stability.
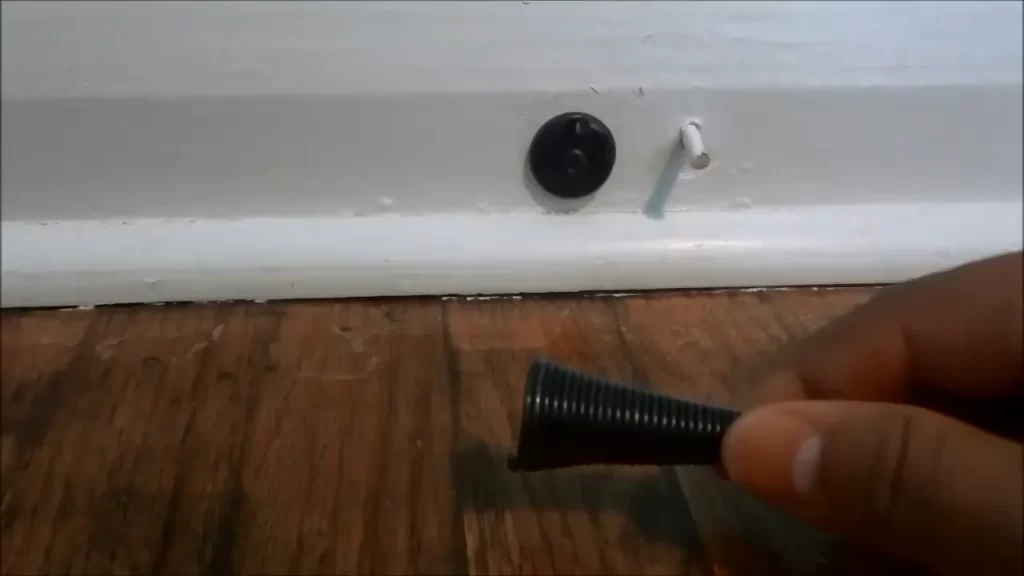
Replacing Worn-out or Broken Components
If you encounter any worn-out or broken components in your spring door stop, it’s crucial to replace them promptly. Here’s how:
- Identify the specific component that needs replacement, such as the spring, bumper, or hinge.
- Remove the damaged component by following the manufacturer’s instructions.
- Obtain a suitable replacement part from a reputable hardware store or contact the manufacturer for assistance.
- Once you have the new component, carefully install it according to the manufacturer’s guidelines.
- After replacing the component, double-check the functionality of the door stop to ensure it’s working correctly.
Remember, proper maintenance and care of your spring door stop will not only enhance its lifespan but also contribute to the overall safety and convenience of your home. By following these guidelines regularly, you can enjoy the benefits of a well-functioning spring door stop for years to come.
Different Types Of Spring Door Stops Available
Overview of various styles and designs
When installing a spring door stop, it is essential to choose the right type that suits your needs and complements your interior design. There are different styles and designs available, each with its own unique features and advantages. By understanding the options, you can select the perfect spring door stop that not only prevents damage to your walls and doors but also adds aesthetic value to your space.
Pros and cons of each type
Here, we will discuss the pros and cons of some popular types of spring door stops:
| Types of Spring Door Stops | Pros | Cons |
|---|---|---|
| Rubber Tipped Spring Door Stop | Soft rubber tip minimizes noise when the door closes.Helps prevent damage to walls or doors.Easy to install and replace if necessary. | The rubber tip may wear out over time and need replacement.Not suitable for heavy doors. |
| Magnetic Spring Door Stop | Magnetic catch holds the door open securely.No need to bend down to engage or disengage the stop.Available in various finishes to match your door hardware. | Requires careful positioning to ensure proper engagement.May not be suitable for doors with metal components. |
Choosing the right spring door stop for different locations
When choosing the right spring door stop, consider the location where it will be installed. Different locations may have varying requirements:
- Residential Homes:
- Opt for a rubber tipped spring door stop or magnetic spring door stop for light to medium doors.
- Consider a heavy-duty floor-mounted spring door stop for doors that require extra support.
- Commercial Spaces:
- Choose a heavy-duty spring door stop or floor-mounted door stop to withstand frequent use and heavy doors.
- Consider using wall-mounted spring door stops in areas where floor space is a concern.
- Public Areas:
- Install wall-mounted spring door stops near high traffic areas to prevent damage to walls and doors.
- Opt for rubber tipped or magnetic spring door stops for noise reduction.
By understanding the different types of spring door stops available, their pros and cons, and selecting the suitable one for each location, you can ensure the smooth functioning of your doors while maintaining the integrity of your walls and adding a touch of style to your space.
Enhancing The Functionality And Aesthetics Of Your Spring Door Stop
Upgrading to a decorative spring door stop
When it comes to enhancing the functionality and aesthetics of your spring door stop, upgrading to a decorative option is a fantastic choice. Decorative spring door stops not only serve the purpose of preventing your doors from slamming shut but also add a touch of style to your home. With a wide range of designs and finishes available, you can easily find one that complements your existing interior decor.
By choosing a decorative spring door stop, you can transform a simple functional element into a statement piece that catches the eye of your guests. Whether you prefer a sleek and modern design or a more traditional and ornate appearance, there is a decorative spring door stop out there to suit your taste and elevate the overall look of your home.
Adding a door stopper with additional features
In addition to upgrading to a decorative spring door stop, you can further enhance its functionality by opting for a door stopper with additional features. These innovative door stoppers offer more than just basic door prevention.
| Additional Features | Benefits |
|---|---|
| Soft-closing mechanism | Provides a gentle and quiet door closure |
| Magnetic hold | Keeps the door securely in place |
| Adjustable height | Allows customization to fit different door sizes |
Adding a door stopper with these additional features not only improves the functionality of your spring door stop but also enhances convenience and ease of use. Imagine a door that effortlessly closes softly and securely, without any loud slamming noises. With these added features, your spring door stop becomes a valuable and practical addition to your home.
Customizing your spring door stop to match your interior design
Another way to enhance the functionality and aesthetics of your spring door stop is by customizing it to match your interior design. By ensuring that your door stop seamlessly blends with the rest of your decor, you create a cohesive and visually appealing space.
Consider the following customization options for your spring door stop:
- Painting it in a color that complements your walls or trim
- Applying decorative finishes, such as faux wood grain or metallic effects
- Adding decorative elements like beads or patterns
Customizing your spring door stop allows you to make it an integral part of your overall interior design scheme. By incorporating it into the design rather than treating it as an afterthought, you create a harmonious and polished look that reflects your personal style.
Safety Considerations When Installing A Spring Door Stop
Ensuring proper installation to prevent accidents or injuries
When it comes to installing a spring door stop, safety should be your top priority. By adhering to some basic precautions and following the correct installation techniques, you can minimize the risk of accidents or injuries. Before diving into the installation process, it’s important to consider the following safety considerations:
Childproofing your spring door stop
If you have little ones running around the house, childproofing your spring door stop is an essential step. Children are curious by nature, and it’s not uncommon for them to accidentally pinch their fingers in a spring door stop. To prevent such mishaps, follow these childproofing measures:
- Install the spring door stop at a height that is out of reach for children.
- Make sure the door stop is securely fastened to the wall or baseboard to prevent any wobbling or loosening.
- Consider using a door stop with a soft cushion or rubber tip to minimize the chances of injury if a child happens to come into contact with it.
By implementing these childproofing techniques, you can create a safe environment for your little ones without compromising the functionality of your spring door stop.
Frequently Asked Questions For How To Install A Spring Door Stop
How Do You Replace A Spring Door Stop?
To replace a spring door stop, follow these steps: 1. Remove the old door stop by unscrewing it from the base. 2. Take the new spring door stop and line it up with the existing screw holes. 3. Screw the new door stop into place with a screwdriver.
4. Test the door stop by opening and closing the door to ensure it functions properly. 5. Adjust the tension of the spring if necessary using the provided tools.
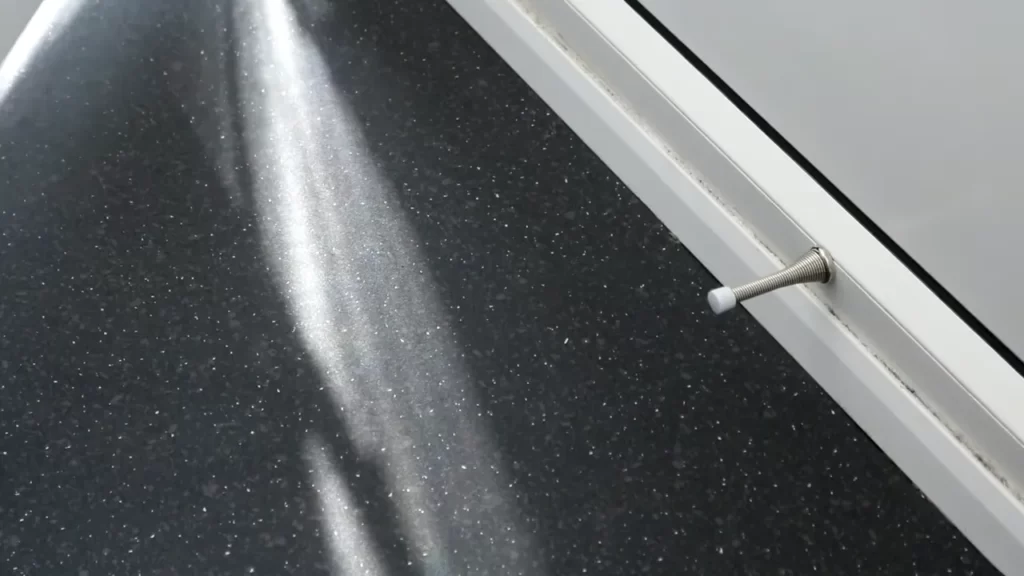
Do Spring Door Stops Go On Door Or Wall?
Spring door stops are typically installed on the baseboards of walls, not directly on the doors. They help protect walls and doors from damage caused by opening too forcefully.
How Do You Install A Sliding Door Stop?
To install a sliding door stop, follow these steps: 1. Measure and mark the desired location for the door stop. 2. Drill pilot holes in the marked area. 3. Attach the door stop using screws or adhesive. 4. Test the door stop’s functionality by sliding the door and ensuring it stops at the desired point.
5. Make any necessary adjustments or tighten screws if needed.
What Is The Purpose Of A Spring Door Stop?
A spring door stop is used to prevent doors from hitting and damaging walls, furniture, or other objects. It acts as a buffer, absorbing the impact and gently stopping the door’s movement.
Conclusion
Installing a spring door stop is a quick and easy way to protect your walls and doors from damage. By following the simple steps outlined in this guide, you can ensure that your door stops are securely installed and functioning properly.
Remember to choose the right type of door stop for your needs and always prioritize safety. Enjoy the added convenience and peace of mind that a spring door stop provides.