To install a wireless doorbell, follow these steps: first, select a suitable location for your doorbell receiver; second, install the receiver using screws or adhesive; third, affix the doorbell button outside your door using screws or adhesive; and finally, test the doorbell to ensure it is working properly. Installing a wireless doorbell is a simple process that adds convenience and security to your home.
With no messy wires to deal with, it’s a quick and efficient upgrade. We will guide you through the installation process, providing clear and concise instructions to help you get your wireless doorbell up and running in no time.
Before You Start
Installing a wireless doorbell can provide convenience and security to your home. Before diving into the installation process, there are a few important things to consider. In this section, we will discuss these considerations, the benefits of using a wireless doorbell, and the necessary tools and materials for a smooth installation. So, let’s get started!
Things to Consider Before Installing a Wireless Doorbell
- The range of the wireless doorbell: Make sure that the wireless doorbell you choose has a range suitable for your home. Consider the size of your property and any potential obstacles that may affect the signal strength.
- Power source: Determine whether the wireless doorbell requires batteries, or if it can be wired directly to your home’s electrical system. Battery-powered doorbells are portable and easy to install, while wired ones require professional assistance.
- Compatibility: Check if the wireless doorbell is compatible with your existing security system or smart home devices. Integration with other devices can enhance the functionality and convenience of your doorbell.
- Weather resistance: If you plan to install the wireless doorbell outdoors, ensure that it is weather-resistant. Look for models that are waterproof and can withstand extreme temperatures.
- Security features: Some wireless doorbells come with built-in cameras and motion sensors, providing an added layer of security to your home. Consider these features if you prioritize safety.
The Benefits of Using a Wireless Doorbell
A wireless doorbell offers several advantages over traditional wired doorbells. Here are some benefits:
- Easy installation: Unlike wired doorbells, wireless ones require minimal wiring, making installation hassle-free.
- Portability: You can easily relocate a wireless doorbell, making it convenient for renters or those who frequently move.
- Expandable and customizable: Many wireless doorbell systems allow you to add additional receivers or integrate them with other devices for a customized setup.
- Convenience: With wireless doorbells, you have flexibility in terms of where you place the receiver. You can position it wherever it’s most convenient for you.
- No drilling required: Avoid the hassle of drilling holes in walls or running wires through your home by opting for a wireless doorbell.
Necessary Tools and Materials for the Installation Process
To ensure a successful installation of your wireless doorbell, you’ll need the following tools and materials:
| Tools | Materials |
|---|---|
| Screwdriver | Wireless doorbell kit |
| Tape measure | Batteries (if required) |
| Drill (if needed for mounting) | Mounting screws or adhesive tape |
Having these tools and materials ready before you start the installation process will save you time and ensure a smooth setup.
Step 1: Choosing The Right Wireless Doorbell
Installing a wireless doorbell not only adds convenience to your life but also enhances the security of your home. With a wide range of models available in the market, it’s important to choose the right wireless doorbell that suits your needs and preferences. In this step-by-step guide, we will walk you through the process of selecting the perfect wireless doorbell for your home.
Factors to consider when selecting a wireless doorbell
Before making a purchase, it’s essential to consider certain factors that will help you make an informed decision. Here are some key factors to keep in mind:
- Range: Determine the distance between your doorbell button and the receiver to ensure that the wireless doorbell can transmit signals effectively within that range.
- Installation: Look for a wireless doorbell that is easy to install, without the need for complex wiring or professional assistance.
- Design and Style: Consider the aesthetics of the wireless doorbell and choose a design that complements the exterior of your home.
- Sound Options: Check if the wireless doorbell offers a variety of sound options, allowing you to customize the ringtone according to your preference.
- Battery Life: Ensure that the wireless doorbell has a long-lasting battery life, so you don’t have to frequently replace or recharge it.
- Weather Resistance: If your doorbell is exposed to the elements, opt for a wireless doorbell that is weatherproof and can withstand rain, snow, or extreme temperatures.
Understanding different types of wireless doorbells available in the market
When browsing for wireless doorbells, you’ll come across various types, each offering its own set of features and benefits. Familiarize yourself with the different types before making a decision:
| Type | Description |
|---|---|
| Radio Frequency (RF) Doorbells | These doorbells use radio waves to transmit signals between the button and the receiver. They typically have a longer range and are suitable for larger homes or buildings. |
| Wi-Fi Doorbells | Wi-Fi doorbells connect to your home’s Wi-Fi network, allowing you to receive notifications on your smartphone or tablet. They often come with advanced features like video streaming and two-way audio. |
| Plug-In Doorbells | These doorbells are designed to be plugged into an electrical outlet, eliminating the need for batteries. They are easy to install and are ideal for those who prefer a hassle-free setup. |
Features to look for in a wireless doorbell
When choosing a wireless doorbell, make sure to check for the following features:
- Volume Control: Look for a wireless doorbell with adjustable volume control, so you can set the perfect level that suits your needs.
- Flash Alerts: Some wireless doorbells include a flashing light feature, which is useful for individuals with hearing impairments or in noisy environments.
- Motion Detection: Consider a wireless doorbell that has built-in motion sensors to alert you when someone approaches your doorstep.
- Expandability: If you have a large property or multiple entry points, opt for a wireless doorbell that can support additional receivers and buttons.
By taking into account the factors mentioned above and understanding the different types and features of wireless doorbells available in the market, you can choose a wireless doorbell that perfectly suits your requirements. In the next step, we will discuss how to install your selected wireless doorbell.
Step 2: Planning The Installation
Assessing the location for optimum signal reception
Before installing your wireless doorbell, it’s crucial to assess the location to ensure optimum signal reception. The placement of the doorbell and receiver plays a vital role in the overall performance of the wireless system. Here are a few key factors to consider:
- Identify a central location: Choose a spot that provides equal distance between the front door and the receiver. This will help ensure that the signal reaches the receiver without any interference.
- Avoid obstructions: Make sure the chosen location is free from any obstructions such as thick walls, metal objects, or large furniture that could hinder the signal strength.
- Consider the elevation: To maximize signal reach, consider installing the doorbell at an elevated location, such as on the wall or door frame, rather than placing it on the ground.
Determining the distance between the doorbell and the receiver
When planning the installation of your wireless doorbell, it is essential to determine the distance between the doorbell and the receiver. This distance can impact the signal strength and the overall functionality of the doorbell system. Follow these steps to ensure an optimal placement:
- Measure the distance: Use a measuring tape or ruler to determine the distance between the front door and the desired location for the receiver.
- Consider signal range: Check the specifications provided by the manufacturer to understand the signal range of your wireless doorbell. Ensure that the distance between the doorbell and receiver falls within this range for reliable performance.
- Take into account obstacles: Take note of any obstacles that may affect the signal, such as walls, floors, or large objects. If necessary, make adjustments to the placement of the receiver to avoid signal interference.
Considering the power source for the wireless doorbell
Another crucial aspect to address during the planning stage of installing a wireless doorbell is determining the power source. Unlike traditional wired doorbells, wireless doorbells rely on batteries or AC power adapters. Here are a few factors to consider:
- Battery-powered or AC-powered: Decide whether you prefer the convenience of battery-powered operation or the continuous power supply provided by an AC adapter. Ensure that the chosen doorbell model is compatible with your preferred power source.
- Battery lifespan: If opting for battery-powered, check the estimated battery lifespan provided by the manufacturer. This will help you understand how frequently you may need to replace or recharge the batteries.
- Backup options: In the event of power outages, consider having a backup plan in place. Ensure the doorbell model has the option for backup batteries or an emergency power supply.
By carefully assessing the location for optimum signal reception, determining the distance between the doorbell and the receiver, and considering the power source, you can efficiently plan the installation of your wireless doorbell. This preparation will help ensure a reliable and functional doorbell system that meets your needs. In the next step, we will dive into the actual installation process.
Step 3: Preparing For Installation
Before you jump into installing your new wireless doorbell, it’s crucial to take some time to prepare. Following these steps will not only ensure a smooth installation process but also help you avoid any potential mishaps or damage along the way.
Gathering the necessary tools and materials
First things first, gather all the tools and materials you’ll need for the installation. Being prepared in advance will save you from running back and forth during the process. Here’s a handy checklist to get you started:
- A wireless doorbell kit (including the doorbell button and receiver)
- A screwdriver or drill with appropriate bits
- Batteries or a power source for the doorbell
- A level for properly aligning the doorbell
- Electrical tape or wire connectors for securing the wiring
Always double-check the manufacturer’s instructions as they may recommend additional tools or materials specific to your doorbell model. Once you have everything, you’re ready to move on to the next step.
Reading the manufacturer’s instructions
Now that you have your tools and materials ready, it’s essential to familiarize yourself with the manufacturer’s instructions. These instructions are designed to guide you through the installation process and ensure you complete it correctly. They will also provide valuable information about any specific requirements or considerations you need to be aware of.
Take the time to carefully read and understand the instructions before proceeding. This will give you a clear idea of what to expect and help you avoid any unnecessary mistakes or confusion during installation.
Ensuring safety precautions are in place
When it comes to any electrical installation, safety should be your top priority. Before you begin, make sure to take the necessary safety precautions to protect yourself and your property. Here are a few key measures to keep in mind:
- Disconnect power: If you’re working with a wired doorbell, ensure that the power is switched off at the circuit breaker or fuse box before starting.
- Handle wiring with care: If you encounter any exposed wiring during the installation process, be cautious and avoid direct contact to prevent electric shock.
- Follow proper wiring guidelines: When connecting wires, use wire connectors or electrical tape to secure them properly. This will prevent any accidental short circuits or loose connections.
- Secure loose wiring: If you notice any loose or frayed wires, be sure to fix them before proceeding with the installation. Loose wiring can be a fire hazard and should never be ignored.
By taking these safety precautions, you can ensure a successful and risk-free installation of your wireless doorbell.
Step 4: Installing The Doorbell Button
Now that you have successfully mounted the doorbell receiver, it’s time to move on to the next step: installing the doorbell button. This is an important part of the installation process, as it is the component that visitors will interact with to alert you of their presence at the door. Here’s how you can install the doorbell button in a few simple steps.
Locating the ideal position for the doorbell button
The first step is to find the perfect spot where you want to install the doorbell button. When choosing the location, consider factors such as visibility, accessibility, and weather protection. You want to ensure that the button is easily accessible to your visitors and is visible from the entrance. In addition, make sure to choose a spot that provides some protection from direct sunlight, rain, and other harsh weather conditions. Take your time to choose the ideal position before proceeding to the next step.
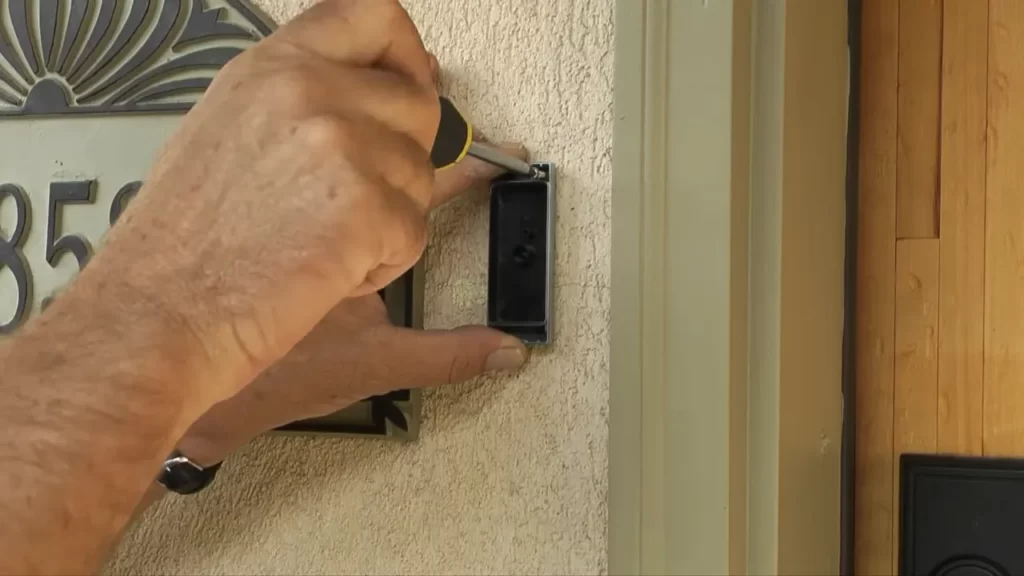
Mounting the doorbell button on the wall or doorframe
Once you have found the perfect location, it’s time to mount the doorbell button. Most wireless doorbell buttons come with adhesive backing, making it easy to stick them to a flat surface. Begin by removing the protective film from the adhesive, then firmly press the button against the wall or doorframe in the chosen location. Make sure to apply even pressure to ensure a secure attachment. Hold the button in place for a few seconds to allow the adhesive to bond properly. Take a step back and admire your newly installed doorbell button.
Connecting the wires to the doorbell button
Next, it’s time to connect the wires to the doorbell button. Start by removing the cover of the doorbell button to expose the wiring terminals. You will typically find two terminals labeled “Front” or “F” and “Transformer” or “T”. Carefully strip the ends of the wires that were connected to the old doorbell button, if applicable. If you’re installing a brand new system, refer to the manufacturer’s instructions for wiring guidance.
Once the wires are prepared, insert them into the corresponding terminals on the doorbell button. The positive wire, typically colored red, should be connected to the terminal labeled “Front” or “F”. The negative wire, usually colored white, should be connected to the terminal labeled “Transformer” or “T”. Once the wires are securely inserted, tighten the screws on the terminals to ensure a solid connection. Replace the cover of the doorbell button and ensure it is properly closed.
With the doorbell button installed and the wiring correctly connected, you are one step closer to enjoying the convenience of a wireless doorbell system. In the next step, we will cover the final installation process: syncing the doorbell button with the receiver. Stay tuned!
Step 5: Installing The Receiver
Once you have successfully mounted the doorbell button and ensured it is working properly, the next step is to install the receiver. The receiver is the unit that will emit the chime or alert whenever the doorbell button is pressed. Here’s a step-by-step guide on how to install the receiver:
Finding the optimal location for the receiver
Before you begin the installation process, it is important to find the optimal location for the receiver. This will ensure that you can hear the chime from anywhere in your home or office. Consider these factors when choosing a location:
- Place the receiver within a reasonable distance from the doorbell button but away from any potential obstructions that could weaken the wireless signal.
- Avoid placing the receiver near large metal objects or dense walls that could interfere with the signal.
- If possible, choose a central location in your home or office to maximize the coverage area.
Plugging in the receiver or connecting it to a power source
Depending on the type of wireless doorbell you have purchased, the receiver may either need to be plugged into a power outlet or connected to a power source. Follow these instructions:
- If your receiver requires an electrical outlet, find a suitable location near an available power source.
- Plug the receiver into the power outlet securely.
- If your receiver doesn’t have a built-in power supply, connect it to an external power source following the manufacturer’s instructions. This may involve using batteries or a power adapter.
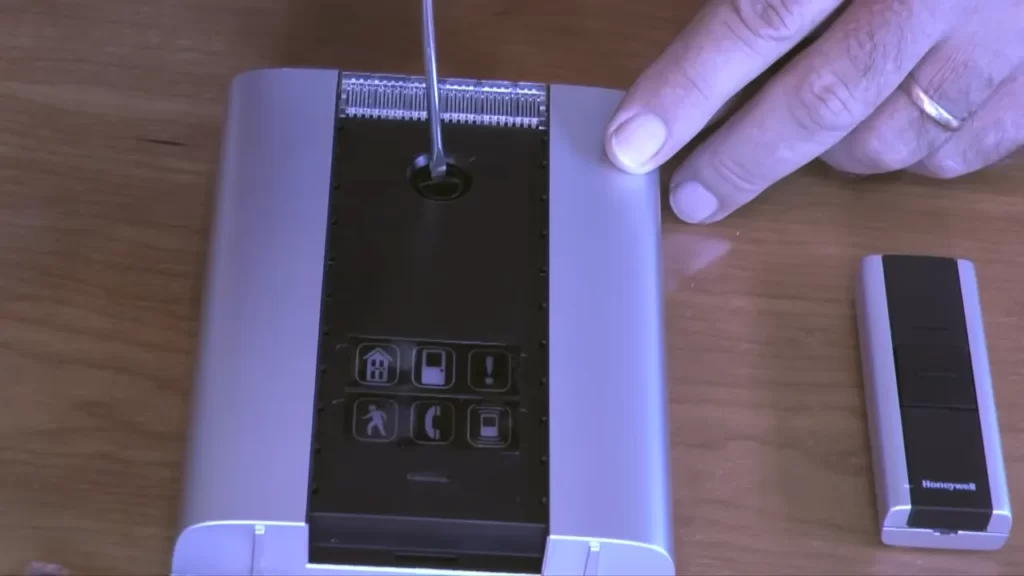
Pairing the receiver with the doorbell button for wireless communication
Now that the receiver is properly positioned and powered, it’s time to pair it with the doorbell button. This step ensures wireless communication between the two units. Here’s how to do it:
- Refer to the receiver’s user manual to locate the pairing instructions or buttons. This varies depending on the model and brand of your wireless doorbell.
- Typically, you will need to press and hold a button on the receiver while simultaneously pressing and holding the button on the doorbell button.
- Once the receiver and doorbell button are successfully paired, you should hear a confirmation chime or see a notification light on the receiver.
Congratulations! You have successfully installed the receiver for your wireless doorbell. Make sure to test the system by pressing the doorbell button to ensure everything is working as expected. Now you can enjoy the convenience of a wireless doorbell and never miss a visitor again!
Step 6: Testing And Troubleshooting
After successfully completing the installation process of your wireless doorbell, it’s time to test its functionality and address any common installation issues or troubleshooting problems. This step is crucial to ensure that your newly installed doorbell system is working properly and ready to serve its purpose. Here’s what you need to do:
Testing the functionality of the wireless doorbell system
To test your wireless doorbell system, follow these simple steps:
- Ensure that the doorbell receiver or chime is plugged into a functioning power outlet.
- Press the doorbell button located outside your door.
- Listen for a chime or see if any indicator lights on the receiver or chime are activated.
- If you hear a chime or see the indicator lights, it means that your wireless doorbell system is functioning correctly. Congratulations on a successful installation!
- If you do not hear a chime or see any indicator lights, proceed to the next section for troubleshooting tips.
Addressing common installation issues and troubleshooting tips
If your wireless doorbell system isn’t working as expected, you may encounter common installation issues that can be easily addressed. Here are some troubleshooting tips:
| Issue | Troubleshooting Tip |
|---|---|
| No power to the doorbell receiver or chime | Check if the power outlet is functioning and the receiver or chime is properly plugged in. Try using a different power outlet or inspect the wiring connections. |
| Weak or no signal between the doorbell button and the receiver or chime | Verify that the doorbell button and receiver or chime are within the recommended range specified by the manufacturer. Adjust their positioning or consider adding a wireless signal repeater to enhance signal strength. |
| Faulty doorbell button or receiver/chime | Try replacing the batteries in the doorbell button or the receiver/chime. If the problem persists, contact the manufacturer for assistance or consider purchasing a replacement component. |
| Interference from other wireless devices | Move any potential sources of interference, such as cordless phones or Wi-Fi routers, away from the wireless doorbell system. Switch to a different wireless frequency or adjust the channel settings if available. |
By addressing these common installation issues and following the troubleshooting tips, you should be able to resolve most problems with your wireless doorbell system. However, if you continue to experience difficulties, don’t hesitate to seek further assistance from the manufacturer or a professional installer.
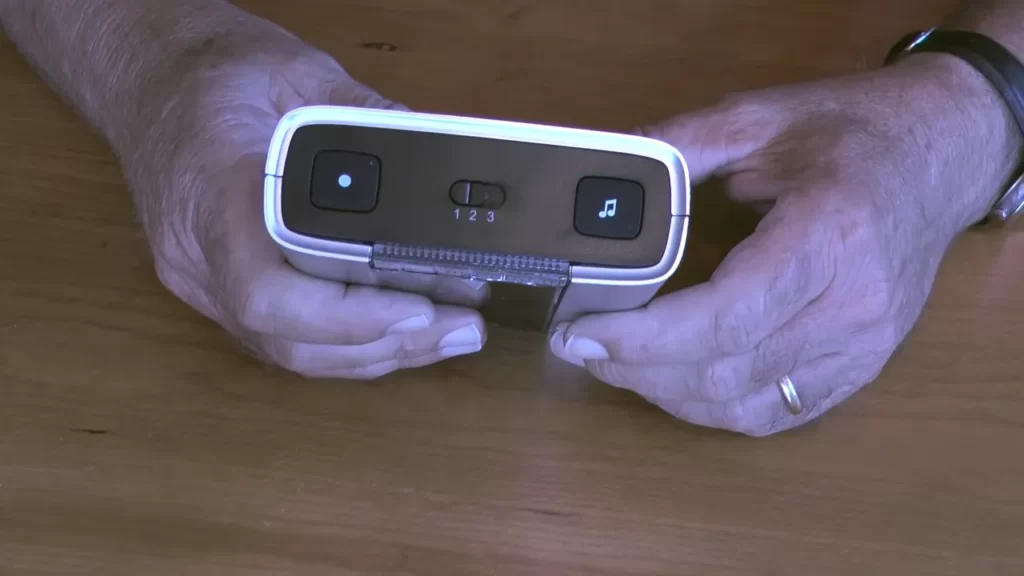
Adjusting volume, chime, and other settings as needed
Once your wireless doorbell system is fully operational, you may want to adjust the volume, chime sounds, or other settings to your liking. Consult the manufacturer’s instructions for specific guidance, as the process can vary depending on the model and brand of your doorbell system. Typically, these adjustments can be made on the receiver or chime using buttons or switches.
Remember to test the changes you make to ensure they meet your preferences. You can adjust the volume to be loud enough to hear throughout your home or quiet enough to avoid disturbing others. Additionally, select a chime sound that suits your taste and compliments your living space.
By following these steps, testing the functionality, troubleshooting any issues, and adjusting the settings, you will have successfully installed and ensured the proper functioning of your wireless doorbell. Now you can enjoy the convenience and security it brings to your home!
Step 7: Maintaining Your Wireless Doorbell
Regular maintenance tips for optimal performance
Maintaining your wireless doorbell is essential to ensure its optimal performance and longevity. By following some simple maintenance tips, you can keep your doorbell in top shape and avoid any potential issues that may arise.
- Regularly check and tighten the mounting screws: Over time, the mounting screws of your wireless doorbell may become loose due to natural vibrations or exposure to the elements. Performing regular checks and tightening the screws can prevent your doorbell from becoming loose or dislodged.
- Inspect and clean the battery contacts: The battery contacts of your wireless doorbell can accumulate dirt, dust, or corrosion, which may affect its performance. It’s important to inspect and clean these contacts periodically. Use a soft cloth or a cotton swab dipped in rubbing alcohol to gently remove any buildup.
- Ensure proper positioning: Verify that your wireless doorbell is correctly positioned and aligned with the receiver unit. Any misalignment can hinder the signal transmission and impact the functioning of your doorbell. Adjust the position if necessary, keeping in mind the maximum recommended distance between the doorbell and the receiver.
- Protect the doorbell from extreme weather conditions: Extreme temperatures, rain, snow, or direct sunlight can damage the components of your wireless doorbell. Consider installing a protective cover or housing to shield it from such elements. This will help prolong its lifespan and maintain its performance.
- Test the doorbell periodically: Periodically test your wireless doorbell to ensure that it is working properly. Press the doorbell button and check if the receiver unit responds promptly with the expected sound or alert. If you notice any delays, weak signals, or no response, it may be an indication of a battery issue or a range problem.
Replacing batteries or addressing power-related issues
Over time, batteries in your wireless doorbell may lose their effectiveness and need to be replaced. It’s important to keep a check on the battery status and address any power-related issues promptly.
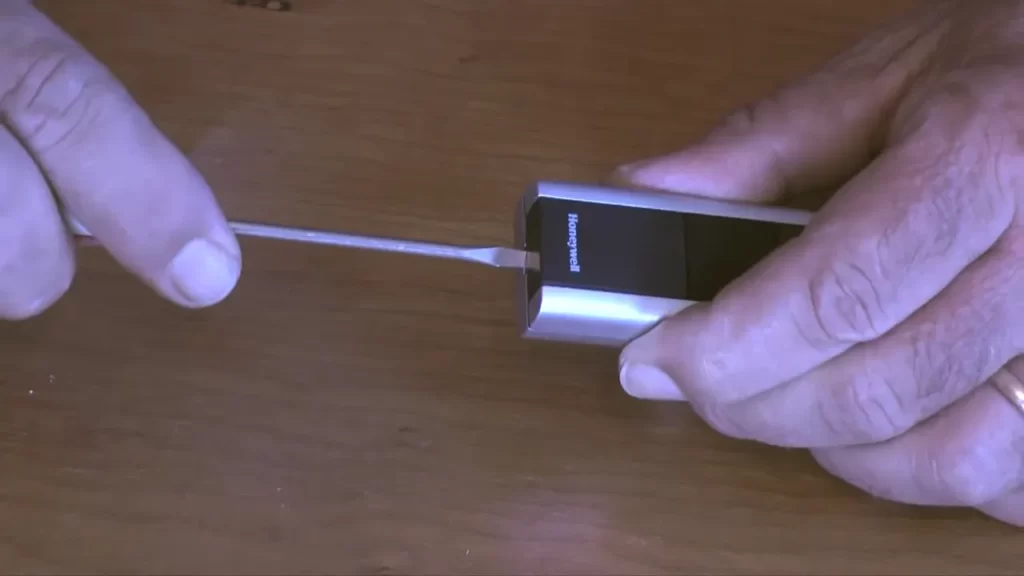
To replace the batteries:
- Locate the battery compartment: Refer to the user manual to find the battery compartment on your wireless doorbell. It is usually located on the back or underside of the unit.
- Remove the old batteries: Gently remove the old batteries from the compartment, following the polarity markings (usually + and -). Dispose of them properly, adhering to local waste disposal guidelines.
- Insert new batteries: Insert fresh batteries of the same type and brand as recommended by the manufacturer. Ensure they are inserted with the correct polarity.
- Close the battery compartment: Securely close the battery compartment, making sure it is properly sealed to protect the batteries from moisture, dust, or accidental dislodgment.
- Test the doorbell after battery replacement: Press the doorbell button to check if the wireless doorbell is functioning correctly after battery replacement. If it doesn’t work, double-check the battery orientation or try using a different set of batteries.
Cleaning and protecting the doorbell components
To maintain the overall cleanliness and longevity of your wireless doorbell, regular cleaning and protection are necessary.
To clean and protect the doorbell components, follow these steps:
- Power off the doorbell: Before cleaning, ensure that the wireless doorbell is turned off or disconnected from its power source to avoid any electrical mishaps.
- Remove the cover: If your wireless doorbell has a removable cover, gently remove it to access the internal components.
- Clean with a soft cloth: Use a soft, lint-free cloth to wipe away any dust, dirt, or fingerprints from the surface of the doorbell and the cover. If necessary, slightly dampen the cloth with a mild cleaning solution, but avoid any excessive moisture that may damage the electronics.
- Focus on the button and speaker areas: Pay special attention to the doorbell button and speaker areas as these can accumulate more dirt or grime. Use a cotton swab or a soft brush to delicately clean these areas.
- Reassemble and reattach: Once the cleaning is complete, carefully reassemble the cover (if applicable) and reattach the wireless doorbell to its mounting position.
By following these regular maintenance tips and addressing any battery or power-related issues, you can ensure that your wireless doorbell remains fully functional and reliable for years to come.
Step 8: Expanding Your Wireless Doorbell System
After successfully installing your wireless doorbell, you may find that you need to expand your system to accommodate multiple entryways or improve the coverage in larger homes. Expanding your wireless doorbell system is a simple and straightforward process that allows you to enjoy the convenience and security of a doorbell in every area of your home. In this step, we’ll explore how to add additional receivers or doorbell buttons for multiple entryways, sync multiple receivers and buttons together, and discover advanced features and customization options.
Adding additional receivers or doorbell buttons for multiple entryways
Whether you have multiple entry doors or want to be able to hear the doorbell from various areas in your home, adding additional receivers or doorbell buttons is the solution. With a wireless doorbell system, you have the flexibility to add as many receivers or buttons as you need, ensuring that you never miss a visitor, no matter where you are in your home.
To add additional receivers or doorbell buttons, follow these simple steps:
- Choose the location for the new receiver or button. Make sure it is within range of the existing wireless doorbell system.
- Insert the batteries into the new receiver or button, following the manufacturer’s instructions.
- Activate the pairing mode on the new receiver or button. This process may vary depending on the brand and model of your wireless doorbell system. Refer to the user manual for specific instructions.
- Sync the new receiver or button with the existing wireless doorbell system. This usually involves pressing a button on both the new and existing devices to establish a connection.
- Test the new receiver or button by pressing the doorbell button. If everything is set up correctly, the new receiver should chime or light up, indicating that it is successfully paired with the existing system.
Syncing multiple receivers and buttons together
If you have already added additional receivers or buttons to your wireless doorbell system, you might want to sync them together for seamless operation. Syncing multiple receivers and buttons ensures that all devices activate simultaneously when the doorbell button is pressed, providing a consistent and reliable notification system throughout your home.
To sync multiple receivers and buttons together, follow these steps:
- Ensure that all receivers and buttons are within range of the wireless doorbell system.
- Press and hold the pairing button on the main receiver until the LED light starts flashing.
- Press and hold the pairing button on each additional receiver or button until they are successfully synced with the main receiver. The LED light on each device should stop flashing and remain solid, indicating a successful connection.
- Test the synchronization by pressing any doorbell button. All receivers should chime or light up simultaneously, signaling that they are functioning together as a unified system.
Exploring advanced features and customization options
Wireless doorbell systems often come with advanced features and customization options that allow you to personalize the functionality and appearance of your doorbell system. These features can enhance your overall experience and provide added convenience and security.
Here are some advanced features and customization options you can explore:
- Adjusting the volume levels on different receivers for individual preferences.
- Choosing from a variety of chimes and melodies to suit your taste.
- Setting different chimes or melodies for specific buttons or entryways to easily identify which door has been activated.
- Integrating the wireless doorbell system with smart home devices for enhanced automation and control.
- Customizing the look of the doorbell by selecting different button designs or adding decorative covers.
By understanding and utilizing these advanced features and customization options, you can tailor your wireless doorbell system to perfectly fit your needs and preferences, adding a touch of personalization to your home.
Frequently Asked Questions Of How To Install A Wireless Doorbell
Can I Install A Wireless Doorbell Myself?
Yes, you can definitely install a wireless doorbell by yourself. It’s a simple process that doesn’t require professional assistance. Just follow the instructions provided with the doorbell kit, and you’ll have your wireless doorbell up and running in no time.
How Are Wireless Doorbells Attached?
Wireless doorbells are attached by following a simple installation process. First, the doorbell button is mounted outside the door using adhesive or screws. Then the receiver unit is plugged into an electrical outlet inside the house. The button and receiver communicate wirelessly to create a functioning doorbell system.
Do Wireless Doorbells Need To Be Plugged In?
No, wireless doorbells do not need to be plugged in. They operate on batteries, making them convenient to install and use.
How Do You Install A Ring Doorbell Without Wiring?
To install a Ring doorbell without wiring, follow these steps: 1. Download the Ring app and create an account. 2. Fully charge the doorbell using the provided USB cable. 3. Attach the doorbell to your desired location using the mounting bracket.
4. Connect the doorbell to your Wi-Fi network through the app. 5. Test the doorbell to ensure it’s working properly.
Conclusion
Installing a wireless doorbell is a simple and convenient way to enhance your home security and efficiency. By following the step-by-step guide in this blog post, you can easily set up your wireless doorbell without any professional help. With its wireless functionality and easy installation process, a wireless doorbell offers convenience and peace of mind.
So why wait? Install your wireless doorbell today and enjoy the benefits it brings to your home.