To install a spy camera, find a suitable location and position the camera discreetly for optimal coverage and visibility. Then, connect it to a power source and set up a recording device or monitor to capture the footage.
Step 1: Determine The Purpose Of Installation
Assessing the Need for a Spy Camera in a Specific Area
Before installing a spy camera, it is crucial to determine the purpose behind the installation. Assessing the need for surveillance in a specific area helps to ensure that the camera will serve its intended purpose effectively.
Start by considering the security concerns or issues that prompted the decision to install a spy camera. Is it to monitor a business premises, safeguard valuables, or keep an eye on personal property? Identifying the specific reason will guide the installation process, ensuring that the camera placement and settings align with the desired surveillance goals.
Additionally, think about the potential risks or threats that exist within the area of focus. Are there incidents of theft, vandalism, or unauthorized access? Understanding the potential dangers helps to better plan the camera installation, ensuring coverage of vulnerable areas and reducing risks.
Furthermore, consider the legal implications of installing a spy camera in the chosen location. Ensure compliance with local laws and regulations governing surveillance or privacy rights. It is essential to strike the right balance between security needs and respecting legal boundaries.
Identifying Potential Surveillance Blind Spots
No surveillance system is foolproof, and identifying potential blind spots is vital to maximize the camera’s effectiveness. Blind spots are areas within the target location that are not adequately covered by the camera’s field of view.
To identify blind spots, conduct a physical walkthrough of the area, paying close attention to corners, obstructed views, and areas with limited lighting. Look for factors such as furniture, plants, or architectural features that may obstruct the camera’s field of vision.
It may be helpful to create a floor plan or layout of the area, marking down the potential blind spots. This visual representation can guide the camera placement process and help determine the number of cameras required to ensure comprehensive coverage.
Remember to consider the angles and focal length of the spy camera lens. Different cameras offer varying degrees of coverage, so choose the one that best suits the specific surveillance needs.
By carefully assessing the need for a spy camera and identifying potential surveillance blind spots, the installation process can be planned strategically, ensuring optimal coverage and addressing security concerns effectively.
Step 2: Choose The Right Spy Camera
Now that you understand the importance of installing a spy camera, it’s time to choose the right one for your needs. With so many options available in the market, it can be overwhelming to find the best spy camera that suits your requirements. In this step, we will discuss the factors you should consider when selecting a spy camera and also explore the different types of spy cameras available.
Factors to consider when selecting a spy camera
Choosing the right spy camera involves considering several crucial factors. These factors will ensure that you find a camera that meets your needs and provides you with reliable surveillance. Here are some key factors to consider:
- Recording quality: Look for a spy camera with high-definition (HD) recording capability. This will ensure that you get clear and detailed video footage.
- Storage capacity: Check the camera’s storage capacity and make sure it is sufficient to store the recorded footage. Some cameras come with built-in memory, while others may require external storage devices like SD cards.
- Battery life: Consider the battery life of the spy camera, especially if you plan to use it for long durations without access to a power source. Look for cameras with extended battery life or ones that can be connected to a power outlet.
- Discreetness: Depending on your surveillance needs, consider the size and design of the spy camera. Look for models that are compact and easily blend into the environment.
- Connectivity options: If you want to access the live feed or recorded footage remotely, choose a spy camera that offers Wi-Fi or other connectivity options.
- Additional features: Some spy cameras come with added features like motion detection, night vision, and two-way audio. Consider these features based on your specific requirements.
Different types of spy cameras available in the market
When it comes to selecting a spy camera, you will come across various types, each with its own unique features and benefits. Here are some different types of spy cameras available:
| Type | Description |
|---|---|
| Hidden cameras | These cameras are designed to be concealed within the everyday objects such as pens, clocks, or even picture frames. They are perfect for discreet surveillance. |
| Wireless cameras | Wireless spy cameras transmit the video feed using Wi-Fi or other wireless technologies. They can be accessed remotely, providing you with real-time monitoring. |
| Outdoor cameras | Outdoor spy cameras are built to withstand harsh weather conditions while capturing high-quality footage. They are commonly used to monitor entrances and exterior areas. |
| Body-worn cameras | These cameras are designed to be worn on the body, allowing for hands-free recording. They are often used by law enforcement personnel or private investigators. |
These are just a few examples of the different types available in the market. It’s essential to choose the type that suits your specific surveillance needs and environment.
By considering the factors mentioned above and exploring the different types of spy cameras available, you will be able to select the right spy camera that fits your requirements perfectly. In the next step, we will cover the installation process of the chosen spy camera.
Step 3: Plan The Camera Placement
Identifying strategic locations for optimal surveillance:
Choosing the right locations for installing your spy cameras is crucial to ensure effective monitoring and achieve your desired surveillance goals. Strategic placement allows you to cover the areas of interest and keep a watchful eye on potential risks or vulnerabilities. Here are some key factors to consider when identifying the ideal spots for your spy cameras:
- Entry and exit points: Positioning cameras near entrances, exits, and other access points helps capture clear footage of anyone entering or leaving the premises. This includes front doors, back doors, windows, and other vulnerable areas.
- High-traffic areas: Placing cameras in areas with high foot traffic increases the chances of capturing important events. These areas could include hallways, stairwells, waiting rooms, or common areas where people frequently pass through.
- Valuable assets: If you are concerned about the security of specific assets such as safes, cash registers, or valuable inventory, it is essential to install cameras in these areas. This deters potential thieves and provides evidence in case of theft or unauthorized access.
- Blind spots: Identifying blind spots within your premises is crucial. These are areas where conventional surveillance is limited or ineffective. By installing cameras strategically in these blind spots, you can eliminate vulnerabilities and ensure comprehensive coverage.
Ensuring proper camera angles and coverage:
Once you have identified the strategic locations, it is important to ensure proper camera angles and coverage to maximize surveillance effectiveness. Consider the following tips to achieve optimal results:
- Adjustable positioning: Ensure that the spy cameras can be adjusted and angled as needed to cover the desired areas. This flexibility allows you to adapt the camera position based on specific surveillance requirements.
- Eliminate obstructions: Avoid placing cameras in areas where their view may be obstructed by objects such as furniture, plants, or decorations. Clearing these obstructions ensures unimpeded visibility and prevents blind spots.
- Test the camera view: Before finalizing the camera placement, test the camera view to ensure it covers the intended areas. This can be done by temporarily installing the camera and reviewing the footage to confirm that it captures the desired angles and provides clear images or videos.
By strategically planning the camera placement and optimizing the camera angles and coverage, you can enhance the effectiveness of your spy camera surveillance system and promote a safer environment.
Step 4: Gather The Necessary Tools And Equipment
Essential Tools Required for the Installation Process
Before getting started with installing your spy camera, it is crucial to have the right tools at your disposal. These tools will make the installation process smoother and ensure that you can complete the task effectively. Here are the essential tools you will need:
- Electric drill: An electric drill is necessary for making holes in the walls or any surface where you plan to mount your camera.
- Screwdriver set: A screwdriver set is essential for securing the mounting brackets and adjusting the camera’s position.
- Tape measure: To ensure precise placement of the spy camera, you will need a tape measure to measure the distance between the camera and your desired viewing area.
- Pencil: A pencil will come in handy for marking the spots where holes need to be drilled or where screws need to be inserted.
- Level: To ensure that the camera is mounted straight, a level will help you achieve a balanced and accurate installation.
- Wire stripper: If your spy camera requires wiring, a wire stripper will enable you to properly prepare and strip the wires for connection.
- Power adapter: Depending on the camera’s power requirements, you may need a power adapter to provide the necessary electrical supply.
- Batteries: In case your spy camera operates on batteries, make sure you have the appropriate batteries on hand for installation.
Additional Equipment for Mounting the Spy Camera Securely
Aside from the essential tools mentioned above, you might need some additional equipment to ensure a secure mounting for your spy camera. These extra items will aid in positioning the camera correctly and minimizing the risk of detection or tampering. Consider the following:
- Mounting bracket: A mounting bracket is a specialized accessory that allows you to attach the camera securely to a wall, ceiling, or other surfaces.
- Anchor screws: If you are mounting the spy camera on drywall or other fragile surfaces, anchor screws provide the necessary stability and support.
- Cable clips: Cable clips are useful for neatly managing and securing the camera’s wiring, preventing any tangles and ensuring a professional-looking installation.
- Extension cables: In case the camera’s default cables are not long enough to reach the desired location, extension cables will help bridge the gap.
- Wireless transmitter/receiver: If your spy camera has wireless capabilities but requires a transmitter and receiver to transmit the footage to your recording device or monitor, make sure you have these additional components.
- Concealment accessories: To maintain the covert nature of your spy camera, consider using concealment accessories such as camouflage skins or disguise kits that blend the camera seamlessly into its surroundings.
With these essential tools and additional equipment, you will be well-prepared to install your spy camera with confidence, ensuring a secure and inconspicuous placement.
Step 5: Prepare The Installation Site
To ensure a successful installation of your spy camera, it is essential to prepare the installation site properly. This step involves creating a clean and organized area, free from any obstacles or distractions that could hinder the camera’s functionality.
Ensuring a Clean and Organized Area for Installation
The first thing you need to do is make sure that the area where the spy camera will be installed is clean and tidy. This will not only help with the overall aesthetics of your installation but also prevent any interference that could affect the camera’s performance.
Here are a few steps to ensure a clean and organized area:
- Clear out any clutter or unnecessary objects from the installation site. This will create a more visually appealing space and eliminate any potential obstacles that might obstruct the camera’s view.
- Wipe down the surfaces in the area with a clean cloth to remove any dust or dirt. This will not only keep the area looking pristine but also prevent any unwanted debris from interfering with the camera’s lens.
- Arrange any necessary cables or wires neatly to avoid a messy tangle. Use cable management tools such as clips or zip ties to keep everything organized and prevent any accidental pulling or damage to the cables.
Removing Any Obstacles or Distractions
In addition to maintaining a clean and organized area, it is important to remove any potential obstacles or distractions that could obstruct the spy camera’s view or compromise its effectiveness. By doing so, you can ensure that you capture the desired footage without any disruptions.
Consider the following points while removing obstacles or distractions:
- Position furniture or other objects in a way that does not obstruct the camera’s view. Ensure that there are no large items directly in front of the camera that could block the line of sight.
- Take note of any reflective surfaces, such as mirrors or shiny furniture, that could cause glare or reflections in the footage. Adjust the positioning of the camera or the object to minimize any potential interference.
- Eliminate any sources of noise that could disrupt the audio recording capabilities of the spy camera. This includes turning off appliances or electronic devices that may generate unwanted background noise.
By adhering to these steps and guidelines, you can create an optimal installation site for your spy camera, ensuring clear and uninterrupted surveillance.
Step 6: Install The Spy Camera
Once you have made all the necessary preparations, it’s time to install your spy camera. This step will involve two main tasks: mounting the camera on a chosen surface and connecting it to a power source and network (if applicable). By following these steps, you will ensure that your spy camera is properly installed and ready to capture the desired footage.
Mounting the Spy Camera on a Chosen Surface
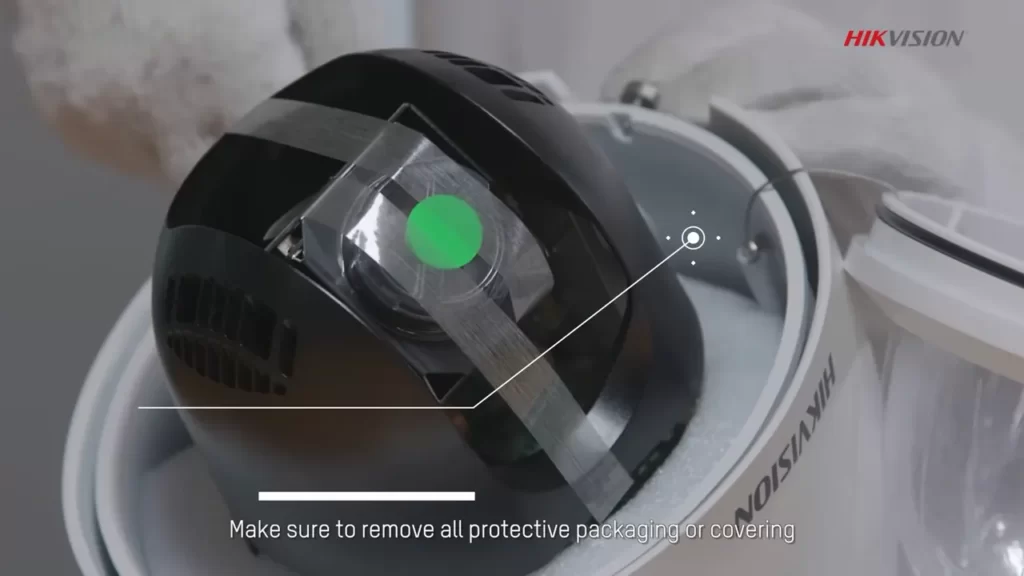
The first task in installing your spy camera is to mount it on a suitable surface. Consider the following steps and tips to ensure a secure and inconspicuous installation:
- Choose an optimal location: Select a spot that offers a clear view of the area you want to monitor. Ensure that the camera is discreetly positioned to avoid raising any suspicion.
- Prepare the surface: Clean the chosen surface thoroughly to ensure a strong adhesive or mounting connection. Remove any dust, dirt, or debris that could hinder the camera’s attachment.
- Attach the camera: Use the provided adhesive or mounting hardware to fix the camera securely onto the surface. Ensure that it is correctly aligned for the desired field of view.
- Test the stability: Gently apply pressure to the camera to check its stability. Make any necessary adjustments or reinforcements to ensure the camera remains securely in place.
Connecting the Camera to a Power Source and Network (if applicable)
Once the camera is mounted, the next step is to connect it to a power source and, if necessary, a network for remote access. Follow these instructions to properly connect your spy camera:
- Power source: Depending on the type of camera, connect it to a power outlet using the provided power adapter or batteries. Ensure that the camera is receiving a stable power supply.
- Network connection (if applicable): If your spy camera supports network connectivity, follow the manufacturer’s instructions to connect it to your Wi-Fi network. This will enable you to access the camera remotely and view the captured footage on your smartphone, tablet, or computer.
- Configure the settings: Once the camera is connected to the power source and network, configure any necessary settings using the provided software or mobile app. Set up features such as motion detection, recording schedules, and notifications to suit your surveillance needs.
- Test the camera: After completing the installation and configuration, perform a thorough test of the camera’s functionality. Verify that it is capturing clear footage, transmitting data (if applicable), and functioning as intended.
By following these steps, you can confidently install your spy camera, ensuring it is discreetly mounted and properly connected to power and network sources. With your spy camera in place, you can now focus on monitoring the desired area and ensuring the security and safety that you require.
Step 7: Test The Surveillance System
Once you have successfully installed the spy camera, it is crucial to test the surveillance system to ensure it functions as intended. This step will help you determine if the camera is working properly, if the video quality meets your expectations, and if any adjustments need to be made for optimal performance. Follow the instructions below to test your newly installed spy camera.
Checking Camera Functionality and Video Quality
Once your spy camera is installed, it’s important to check its functionality and video quality to ensure that the system is working correctly. Here are the steps you can follow to conduct this test:
- Power on the spy camera and make sure it is connected to the monitoring device or recording network.
- Check if the camera is capturing and transmitting live video footage. You can do this by directly viewing the video feed or accessing the surveillance system through a mobile app or software.
- Verify that the camera can record and save video files. Trigger the camera to start recording and then check if the footage is being successfully saved to the designated storage location.
- Move around the surveillance area to test the camera’s motion detection capabilities. Ensure that the camera detects motion and starts recording when someone enters the monitored space.
- Test the camera’s night vision capabilities by dimming the lights or conducting the test in a dark environment. Verify if the camera is able to clearly capture and display images even in low-light conditions.
- Assess the video quality by checking for sharpness, clarity, and color accuracy. Ensure that the recorded footage provides a clear and detailed view of the surveillance area.
- Check for any audio recordings if your spy camera is equipped with a microphone. Make sure that the audio is clear and that it synchronizes properly with the video.
Adjusting Camera Settings for Desired Performance
To ensure that your spy camera operates at its best performance and meets your specific surveillance requirements, you may need to adjust certain camera settings. Here’s how you can fine-tune the camera settings:
- Access the camera’s settings menu either through a dedicated app, software, or directly on the camera itself.
- Adjust the camera’s resolution to achieve the desired video quality. Keep in mind that higher resolutions consume more storage space.
- Configure the camera’s motion detection sensitivity. You may need to increase or decrease the sensitivity to eliminate false alarms or ensure that all events are properly detected.
- Enable any additional features or settings that are relevant to your surveillance needs, such as audio recording, scheduled recording, or remote access.
- Test the new settings by repeating the checks mentioned earlier to ensure that the changes have the desired effect.
- Make any necessary adjustments until you are satisfied with the camera’s performance and settings.
Remember, thorough testing and tweaking of your spy camera system will help you maximize its effectiveness and provide you with reliable surveillance footage. Take the time to ensure that the camera functions well and the video quality meets your expectations.
Step 8: Concealment And Maintenance
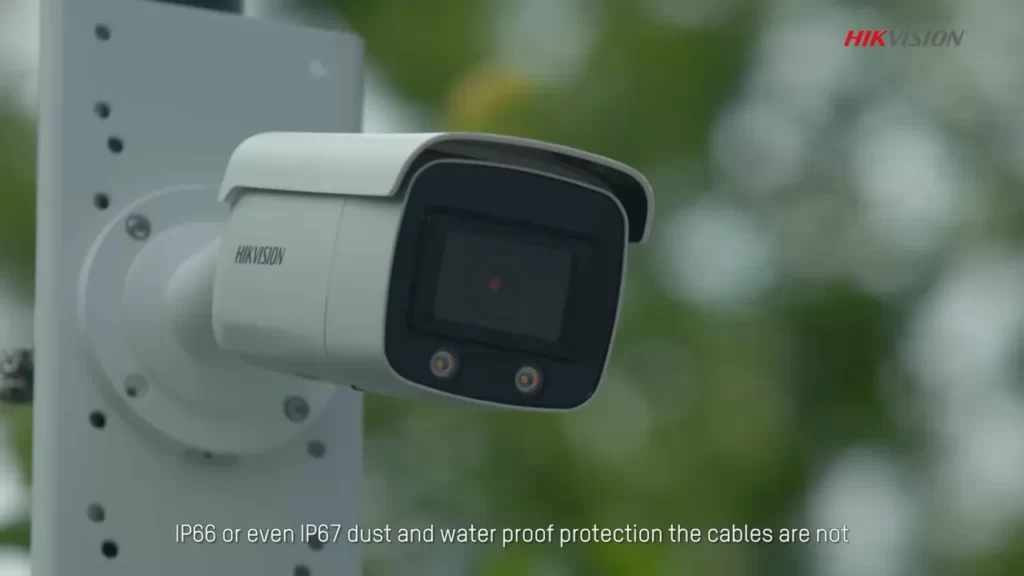
Once you have successfully installed your spy camera, it’s important to focus on concealment and regular maintenance to ensure optimal performance. This step plays a vital role in the effectiveness and longevity of your surveillance device. In this section, we will discuss how to camouflage the spy camera to blend seamlessly with the surroundings and the importance of regular maintenance and inspection.
Camouflaging the spy camera to blend with the surroundings
In order to maximize the effectiveness of your spy camera, it needs to remain undetected. One effective way to achieve this is by camouflaging the camera to blend with its surroundings. This will help to prevent any suspicion or curiosity that may arise from its presence. Here are a few tips on how to seamlessly hide your spy camera:
- Choose an inconspicuous location: Select a spot that is naturally concealed or hidden from plain sight. Look for areas that already have similar objects or décor to your spy camera.
- Utilize existing objects: Use existing objects in the area to hide your camera. For example, you can place it inside a plant pot, behind a painting, or even within a household item.
- Adjust camera lens angle: Ensure that the camera lens is positioned in a way that captures the desired area, while remaining discreet. Experiment with different angles to find the optimal placement.
- Consider the lighting: If the area has specific lighting conditions, adjust the camera settings accordingly to ensure clear footage. Discreetly adjust the lighting in the area by using dimmers or strategic placement of additional light sources.
By following these tips, you can effectively hide your spy camera in plain sight, increasing the chances of capturing valuable information without arousing suspicion.
Regular maintenance and inspection for optimal performance
To ensure that your spy camera continues to function optimally, regular maintenance and inspection are crucial. Here are some key steps to keep in mind:
- Clean the camera lens: Regularly clean the lens of your spy camera to remove any dust or smudges that may affect image quality. Use a microfiber cloth or lens cleaner to gently wipe the lens surface.
- Inspect the wiring: Check the wiring connections periodically to ensure they are secure and not damaged. Any loose or damaged wires should be replaced promptly to avoid any disruptions in the camera’s functionality.
- Test camera performance: Regularly test the camera’s performance by reviewing the captured footage. Look for any irregularities or issues that may need attention.
- Replace batteries or power source: If your spy camera is battery-powered, make sure to replace the batteries as needed. For wired cameras, ensure the power source is functioning properly.
By performing regular maintenance and inspections, you can prolong the lifespan of your spy camera and ensure it continues to provide you with reliable surveillance over time.
Frequently Asked Questions For How To Install A Spy Camera
How To Install Spy Hidden Camera?
To install a spy hidden camera, follow these steps: 1. Choose a suitable location. 2. Ensure a power source is nearby. 3. Mount the camera securely. 4. Connect the camera to your device or network. 5. Test the camera to ensure it functions properly.
Can A Spy Camera Work Without Wifi?
Yes, a spy camera can work without Wi-Fi. It may use other modes of connection like Bluetooth or 4G/5G networks to function.
How Do You Hide A Camera In Plain Sight?
To hide a camera in plain sight: 1. Choose a discreet camera with a small size and a design that blends with the surroundings. 2. Place the camera in common items like clocks, books, or decorations to make it inconspicuous. 3.
Position the camera in areas where it won’t attract attention, like high corners or hidden angles. 4. Use camouflage techniques like painting the camera to match the background or using camouflage tape. 5. Avoid obvious locations and be cautious about the camera’s angle and visibility.
What Is The Easiest Spy Camera To Install?
The Mini Spy Camera is the easiest to install. It requires minimal setup and can be discreetly placed anywhere. With its compact size and wireless capabilities, installation is hassle-free. Plus, its user-friendly interface makes it accessible even for beginners.
How Do I Choose The Right Spy Camera For My Needs?
When selecting a spy camera, consider factors such as functionality, size, recording quality, and budget.
Conclusion
Installing a spy camera may seem daunting, but with the right steps, it can be accomplished effortlessly. By following our simple guide, you can ensure the successful installation of a spy camera in your desired location. Remember to choose the right camera, select a strategic placement, and ensure proper setup and connection.
With the right knowledge and patience, you’ll have an efficient spy camera monitoring system.
