To install composite deck boards, start by creating a solid foundation with joists and bearers, then secure the boards using screws or hidden fasteners. You will need to plan and measure carefully to ensure a seamless fit for your beautiful new deck.
A composite deck offers a durable and low-maintenance alternative to traditional wood decking. Made from a combination of wood fibers and recycled plastic, composite boards are resistant to rot, mold, and pests, making them an ideal choice for outdoor spaces.
Whether you’re a seasoned DIYer or a first-time builder, this guide will walk you through the steps to install composite deck boards and create a stunning outdoor oasis for years to come. So, let’s get started!
Choosing The Right Composite Deck Boards
When it comes to installing a composite deck, choosing the right deck boards is crucial for both the aesthetic appearance and the functionality of your outdoor space. With so many options available in the market, it can be overwhelming to make the right choice. However, by considering a few factors, you can ensure that you select the perfect composite deck boards for your project.
Factors to Consider When Selecting Composite Deck Boards
Before diving into the selection process, it’s essential to understand the key factors that should influence your decision. By keeping these factors in mind, you can narrow down your options and find the ideal composite deck boards for your needs.
1. Budget
Setting a budget is the first step in any home improvement project, and installing a composite deck is no exception. Composite deck boards come in various price ranges, so it’s important to determine how much you are willing to spend. Consider factors such as board size, texture, and color, as these can affect the price.
2. Durability
When selecting composite deck boards, it’s crucial to consider their durability. Look for boards that are resistant to rot, mold, and fading, as these factors can significantly impact the longevity of your deck. Additionally, check if the boards are scratch-resistant and able to withstand heavy foot traffic.
3. Maintenance
One of the advantages of composite decking is its low maintenance nature. Unlike traditional wood decks, composite boards do not require regular staining or sealing. However, certain brands and models may require occasional cleaning or specific maintenance procedures. Be sure to choose deck boards that align with your desired level of maintenance.
4. Aesthetic Appeal
The appearance of your composite deck is paramount to create the desired ambiance in your outdoor space. Consider the color options, textures, and patterns available. Some boards mimic the look of natural wood, while others offer a sleek and modern design. Take into account the architectural style of your home and choose deck boards that complement it seamlessly.
5. Sustainability
In today’s environmentally conscious world, selecting sustainable materials is becoming increasingly important. Many composite deck boards are made from recycled materials, making them a greener option compared to traditional wood decking. Look for boards that are made from recycled plastic or reclaimed wood fibers to reduce your environmental footprint.
By keeping these factors in mind, you can make an informed decision when choosing the right composite deck boards. Remember to consider your budget, prioritize durability and low maintenance, select boards that enhance the aesthetic appeal of your outdoor space, and opt for sustainable options whenever possible. With careful selection, you’ll have a composite deck that not only looks beautiful but also stands the test of time.
Preparing The Deck Frame
Before you start installing the composite deck boards, it’s crucial to ensure that your deck frame is sturdy, level, and properly prepared. This step sets the foundation for a durable and long-lasting deck. Follow these essential substeps to ensure your deck frame is in optimal condition:
Ensuring the deck frame is sturdy and level
To begin, carefully inspect all supporting posts and beams to ensure they are structurally sound. Look for any signs of rot, decay, or damage, and address any issues before proceeding. Using a level, check that the frame is perfectly level in all directions. This will prevent your composite deck boards from sagging or warping over time and provide a solid base for installation.
Measuring and cutting joists for proper spacing
Next, it’s crucial to measure and cut the joists with precision to ensure proper spacing for your deck boards. Start by determining the recommended spacing as per the manufacturer’s guidelines, which typically range from 1/8 inch to 1/4 inch. Use a tape measure and pencil to mark the exact positions of the joists on the ledger board and the rim joist.
Once your marks are in place, carefully cut the joists to the appropriate length using a saw. Make sure each cut is clean and accurate to avoid any issues with spacing later on. Double-check your measurements before making any cuts to ensure a proper fit. When cutting, wear appropriate safety equipment to protect yourself from injury.

After cutting the joists, it’s essential to secure them to the ledger board and the rim joist. Use appropriate fasteners, such as deck screws or nails, to attach the joists firmly in place. Ensure they are evenly spaced and aligned with your marked positions, maintaining the recommended spacing.
Tip: If your deck is larger and requires multiple joists, consider using a joist hanger to ensure a secure and sturdy connection between the joists and the ledger board.
By following these guidelines for preparing the deck frame, you’ll be well on your way to a successful composite deck installation. A sturdy and level frame provides a solid foundation for your deck boards, ensuring longevity and a visually appealing finished result.
Installing The First Composite Deck Board
Cleaning the Deck Frame and Removing Any Debris
Before installing your first composite deck board, it is crucial to ensure that the deck frame is clean and free from any debris. A clean deck frame not only improves the overall aesthetic appeal but also helps in establishing a solid foundation for your new deck boards. Here are a few steps to follow in order to clean the deck frame effectively:
- Remove any leaves, dirt, or loose materials from the deck using a broom or leaf blower. This will prevent any build-up of debris between the frame and the deck boards.
- Inspect the deck frame for any nails or screws that may be sticking out. Use a hammer or screwdriver to recess these fasteners below the surface of the frame to ensure a smooth and safe installation.
- Inspect the deck frame for any signs of rot, decay, or structural damage. Replace any compromised wood to maintain the structural integrity of your deck.
Positioning and Fastening the First Deck Board Securely
Now that your deck frame is clean and ready, it’s time to position and fasten the first composite deck board securely. Paying attention to this crucial step will ensure a professional and durable finish for your deck. Follow these steps for a successful installation:
- Start by determining the layout and direction of your deck boards. This will depend on the design, orientation of your house, and personal preference. Keep in mind that composite deck boards expand and contract with changes in temperature, so leaving a small gap between each board is recommended.
- Place the first deck board against the outer edge of the deck frame. Ensure it is properly positioned and squared by using a tape measure and a carpenter’s square.
- With the board in position, use composite deck screws to fasten it to the deck frame. Pre-drilling the screw holes can help prevent any splitting or cracking of the deck boards. Space the screws approximately 1 inch from the edge of the deck board to provide optimal stability.
- Continue with this process, fastening each subsequent deck board securely to the frame while maintaining proper spacing between boards.
By following these steps, you can successfully install the first composite deck board on your deck. Taking the time to clean the deck frame and position the deck boards correctly will result in a beautiful and long-lasting outdoor space for you to enjoy.
Securing The Remaining Composite Deck Boards
After preparing the framework and installing the first few deck boards, it’s time to secure the remaining composite deck boards. This crucial step ensures that the deck surface is not only sturdy but also visually appealing. In this section, we will guide you through the process of creating consistent spacing between the boards and attaching them securely using screws or clips.
Creating Consistent Spacing Between Boards

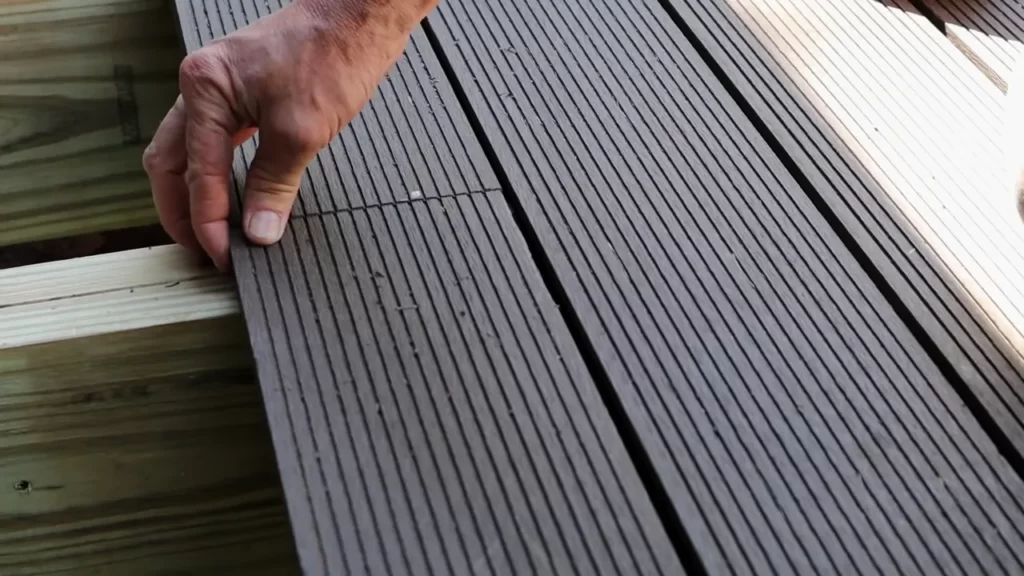
To achieve a professional and uniform look, it is important to create consistent spacing between the composite deck boards. This not only enhances the overall aesthetic but also allows for proper water drainage and ventilation beneath the decking boards. Here’s how you can do it:
- Start by measuring the width of the deck boards you are using. This measurement will help you determine the gap width between each board.
- Using a spacers, such as deck board spacers or even nails, place them between each deck board to ensure an equal gap. These spacers will hold the consistent spacing while you secure the boards in place.
- Continue this process for all the remaining deck boards, making sure to double-check the spacing at regular intervals.
Attaching the Remaining Deck Boards with Screws or Clips
Once the spacing between the composite deck boards is consistent, the next step is to attach them securely to the deck framework. There are two common methods for this: using screws or clips. Here’s a brief overview of both methods:
Screws:
Using screws is a reliable and traditional method of attaching composite deck boards. To do this:
- Step 1: Place the first deck board against the outer edge of the deck framework, ensuring it aligns with the spacing and is level.
- Step 2: Pre-drill pilot holes into the composite deck board, spacing them at regular intervals along the length of the board.
- Step 3: Attach the deck board to the framework by driving the screws through the pilot holes. Make sure to countersink the screws to achieve a flush surface.
- Step 4: Repeat this process for the remaining deck boards, ensuring each board is securely fastened to the framework.
Clips:
Using deck clips is a popular choice for those seeking a sleek, fastener-free deck surface. Here’s how you can attach the remaining deck boards using clips:
- Step 1: Install the first deck board against the outer edge of the deck framework, ensuring it aligns with the spacing and is level.
- Step 2: Slide deck clips onto the side of the first board, positioning them between the joists.
- Step 3: Secure the deck clip to the joist by driving screws or nails through the clip’s pre-drilled holes.
- Step 4: Repeat this process for the remaining deck boards, making sure each board is attached securely using deck clips.
By following these steps, you can securely attach the remaining composite deck boards while maintaining consistent spacing. Whether you choose to use screws or clips, it’s essential to ensure that each board is properly fastened to the deck framework, allowing for a safe and durable outdoor deck space.
Trimming And Finishing Touches
When it comes to installing composite deck boards, one of the most important steps is the trimming and finishing touches. This step not only ensures a polished and professional look but also adds the final touches to your deck installation. In this section, we will discuss two key aspects of trimming and finishing touches: cutting composite deck boards to fit around obstacles and adding fascia boards and trim for a polished look.
Cutting composite deck boards to fit around obstacles
Cutting composite deck boards to fit around obstacles such as posts, railings, or trees requires precision and careful planning. Here is a step-by-step guide to help you:
- Start by measuring the exact dimensions of the obstacle you need to cut the deck board around.
- Using a chalk line or a straight edge, mark the cutting line on the deck board.
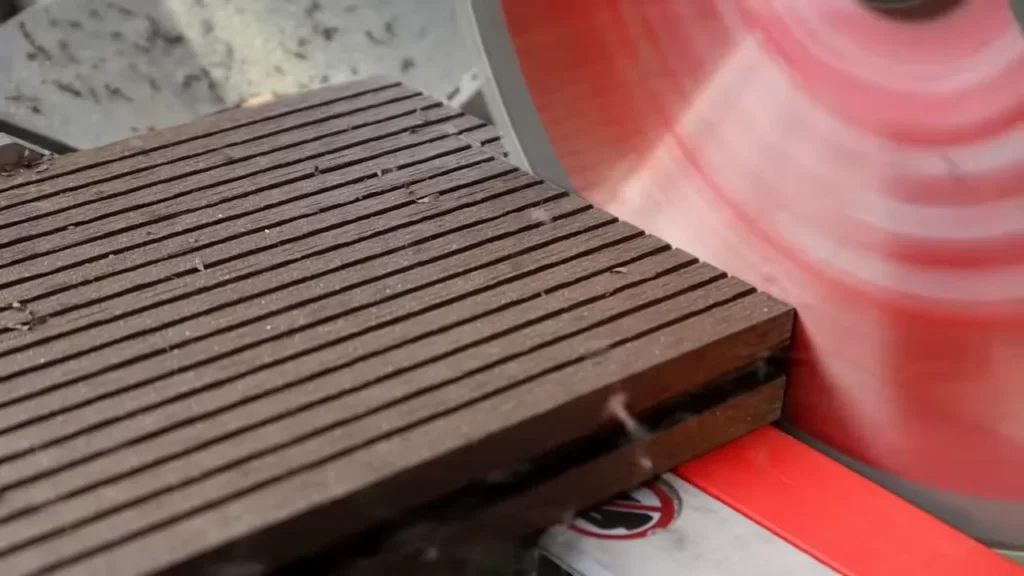
- For straight cuts, you can use a circular saw with a fine-toothed, carbide-tipped blade. Make sure to follow the manufacturer’s instructions for cutting composite materials.
- If you need to make curved cuts, you can use a jigsaw with a down-cutting blade designed for cutting composite materials.
- Once the cut is complete, use sandpaper or a file to smooth out any rough edges.
- Fit the trimmed deck board around the obstacle and secure it in place with screws or hidden fasteners, following the manufacturer’s guidelines.
Adding fascia boards and trim for a polished look

To give your composite deck a polished and finished appearance, it’s essential to add fascia boards and trim. Here’s how you can do it:
- Measure and cut the fascia boards to the desired length, leaving a slight overhang for a clean look.
- Attach the fascia boards to the outer edges of the deck with screws or hidden fasteners, ensuring they are level and aligned.
- For a more decorative touch, you can also add trim pieces around the posts or along the stair risers. Again, measure, cut, and secure them in place with the appropriate fasteners.
- Once all the fascia boards and trim are in place, give them a thorough cleaning to remove any dirt or debris.
- Finally, inspect the entire deck for any loose boards or fasteners and tighten or replace them as needed.
By following these steps, you can achieve a professional and polished finish to your composite deck installation. Remember to always refer to the manufacturer’s instructions and take necessary safety precautions when cutting and installing composite deck boards.
Tips For Maintenance And Longevity
Tips for Maintenance and Longevity
A composite deck is a beautiful addition to any outdoor space, providing a low-maintenance, durable, and long-lasting alternative to traditional wood decks. While composite deck boards are designed to withstand the elements and resist fading, they still require regular maintenance to keep them looking their best and ensure their longevity. In this section, we will discuss some essential tips for cleaning and caring for composite deck boards, as well as how to prevent mold, mildew, and staining.
Cleaning and caring for composite deck boards
Cleaning your composite deck boards regularly is essential to maintain their appearance and prevent the buildup of dirt, debris, and grime. Here are some tips to help you keep your deck looking pristine:
- Sweep regularly: Use a broom or a leaf blower to remove fallen leaves, dirt, and other debris from your deck’s surface regularly. This will prevent them from accumulating and potentially staining the boards.
- Use a mild detergent and water: For general cleaning, mix a mild detergent with warm water and apply it to your deck’s surface using a soft-bristle brush or a sponge mop. Gently scrub the boards in a circular motion, then rinse thoroughly with clean water.
- Avoid harsh chemicals: Harsh chemicals, such as bleach or ammonia-based cleaners, can damage the surface of composite deck boards. Stick to mild detergents specifically formulated for composite decking.
- Remove snow and ice carefully: If you live in an area with winter weather, be cautious when removing snow and ice from your deck. Use a plastic shovel or a plastic ice scraper to avoid scratching the boards.
Preventing mold, mildew, and staining
Composite deck boards are resistant to mold and mildew, but they can still develop if moisture is present. Additionally, certain substances, such as food and beverage spills, can cause staining if not addressed promptly. Here are some measures you can take to prevent mold, mildew, and staining on your composite deck:
- Ensure proper drainage: Make sure your deck has proper drainage to prevent water from pooling. Check for any areas where water may accumulate and address them promptly.
- Deal with spills promptly: Accidental spills happen, but it’s important to clean them up as soon as possible. Use a mild detergent and warm water to remove any stains and rinse thoroughly.
- Avoid leaving wet items on the deck: Wet leaves, pool toys, and other items can trap moisture on your deck and promote mold and mildew growth. Remove them promptly to allow the surface to dry.
- Create airflow: Ensure there is adequate airflow around and under your deck by keeping any vegetation trimmed and avoiding placing furniture or other items directly against the boards. This will help prevent mold and mildew from flourishing.
By following these tips for maintenance and preventing common issues, you can enjoy a stunning composite deck that will last for years to come. Regular cleaning, prompt attention to spills, and proactive measures against mold and mildew will help maintain the beauty and longevity of your outdoor oasis.
Enhancing The Appearance Of Your Composite Deck
Installing composite deck boards is a fantastic way to transform your outdoor space into a stunning retreat. Once the installation is complete, you can even take it a step further by enhancing the appearance of your composite deck. Doing so will not only create a more inviting atmosphere but also add value to your home. In this article, we will explore various ways to elevate the aesthetics of your deck, including adding railings, stairs, and other design elements, as well as choosing and applying deck stains or sealants.
Adding Railings, Stairs, and Other Design Elements
One way to enhance the visual appeal of your composite deck is by incorporating railings, stairs, and other design elements. These features not only provide safety and functionality, but they also serve as eye-catching accents that can elevate the overall look of your deck.
When it comes to railings, there are plenty of options to choose from. From sleek and modern cable railings to more traditional wooden balusters, you can select a style that complements your deck’s aesthetics. Ensure that your railings adhere to local building codes and regulations for safety purposes. Consider adding decorative post caps or lighting fixtures to further enhance the appearance of your deck.
Stairs are another opportunity to enhance the beauty of your deck. Whether you opt for a winding staircase or a simple flight of steps, pay attention to the design and materials. Natural wood treads can add warmth and character, while composite materials can provide a seamless and low-maintenance look.
In addition to railings and stairs, you can also incorporate other design elements such as built-in benches, planters, or even pergolas. These features not only add functionality but also create an inviting atmosphere for relaxing or entertaining.
Choosing and Applying Deck Stains or Sealants
To protect your composite deck and enhance its appearance, it’s important to choose and apply the right deck stain or sealant. These products not only offer protection against the elements but can also bring out the natural beauty of the composite material.
Before applying any stain or sealant, ensure that your deck is clean and free of any debris. Power washing or using a deck cleaner can help remove dirt, grime, and mold. Once clean and dry, you can choose between a variety of deck stains or sealants, such as transparent, semi-transparent, or solid color options.
Transparent stains allow the natural grain of the composite material to show through, providing a more subtle look. Semi-transparent stains enhance the color and texture of the deck, while solid color options offer a more uniform and vibrant appearance. Consider testing the stain or sealant on a small hidden area of the deck to ensure you achieve the desired look.
When applying the stain or sealant, follow the manufacturer’s instructions carefully. Use a brush, roller, or sprayer to apply the product evenly, making sure to cover all surfaces, including the gaps between the deck boards. Allow sufficient drying time before using the deck.
By adding railings, stairs, and other design elements, as well as choosing and applying deck stains or sealants, you can truly enhance the appearance of your composite deck. These simple yet effective techniques can take your outdoor space from ordinary to extraordinary, creating a beautiful and inviting area for you and your loved ones to enjoy.
Frequently Asked Questions On How To Install Composite Deck Boards
What Is The Best Way To Attach Composite Deck Boards?
The best way to attach composite deck boards is by using deck screws or hidden fasteners. Make sure to follow the manufacturer’s guidelines for spacing and installation. Use stainless steel screws or screws with a corrosion-resistant coating to prevent rusting.
Pre-drill holes to prevent splitting and ensure a secure attachment.
Should You Pre Drill Composite Deck Boards?
Yes, it is recommended to pre-drill composite deck boards. Pre-drilling helps prevent splitting and ensures accurate placement of screws. It is an important step to ensure a secure and long-lasting deck installation.
Should Composite Deck Boards Be Butted Together?
Yes, composite deck boards should be butted together for a seamless appearance. Butting them together ensures a uniform and clean look for your deck.
Do You Screw Down Composite Decking?
No, you do not screw down composite decking. Instead, it is usually installed using hidden fasteners or clips to create a cleaner, more polished look. This method also helps to prevent any surface damage or splitting of the boards.
Conclusion
Installing composite deck boards can be a straightforward process with the right tools and knowledge. By following the steps outlined in this guide, you can ensure a successful installation that will enhance the beauty and functionality of your outdoor space.
Remember to choose a high-quality composite material and carefully plan your layout for the best results. With some patience and attention to detail, you’ll soon be enjoying your new composite deck for years to come.