To install a threshold for an exterior door, measure the width and height of the door opening. Then, cut the threshold to fit those dimensions and attach it securely to the floor using screws or adhesive.
Materials Needed For Installing A Threshold
Installing a threshold for an exterior door can help to improve the energy efficiency of your home and enhance its overall appearance. Before you begin this project, it’s important to gather all the necessary materials. Here are the key items you will need:
Basic Hand Tools
Having the right tools on hand will make the installation process much easier. These basic hand tools will be essential:

Exterior Door Threshold Kit
An exterior door threshold kit will provide you with the necessary components to install the threshold properly. These kits typically include:
Measuring Tape and Pencil
To ensure the threshold is correctly aligned, you will need a measuring tape and pencil. Use these tools to accurately mark the placement of the threshold and make any necessary adjustments.
Safety Glasses
Protecting your eyes is crucial when working with tools and materials. Always wear safety glasses to shield your eyes from any potential hazards or debris.
Now that you have gathered all the necessary materials, you are ready to begin the installation process. Make sure to follow the instructions provided with your threshold kit and take the necessary precautions to ensure a safe and successful installation.
Step 1: Preparation And Safety
In order to successfully install a threshold for an exterior door, it is crucial to begin with proper preparation and safety measures. By taking the time to clear the workspace area, put on safety glasses, and gather all necessary materials, you can ensure a smooth and safe installation process. Here’s what you need to do:
Clear the workspace area
The first step in any installation project is to clear the workspace area. Remove any obstructions such as furniture, rugs, or debris that may hinder your access or movement. This will create a safe and clutter-free environment for you to work in.
Put on safety glasses
Safety should always be a top priority when working with tools and materials. Before you begin the installation process, put on a pair of safety glasses to protect your eyes from any potential hazards. This simple precaution can prevent accidents and ensure your well-being.
Gather all necessary materials
Before starting the installation, it’s important to gather all the necessary materials you’ll need for the job. This includes the threshold itself, screws or nails for securing it, a measuring tape, a pencil for marking, a level, and a screwdriver or hammer. Having everything ready and within reach will save you time and frustration during the installation.
Taking these preparatory steps will set the foundation for a successful threshold installation. Now, let’s move on to the next step: measuring and marking the placement of the threshold.
Step 2: Remove The Old Threshold
Once you have carefully inspected the old threshold, it’s time to remove it and make way for the new one. This step is crucial to ensure a smooth installation process. In this section, we will guide you through the necessary steps to remove the old threshold effectively.
Inspect the old threshold
Before you begin removing the old threshold, take a moment to inspect it thoroughly. Look for any signs of damage or decay that may have compromised its functionality. Check for loose screws, broken pieces, or any other indications that the threshold needs to be replaced. This evaluation will help you better understand the condition of the threshold and prepare you for the removal process.
Unscrew and remove the screws
The next step is to unscrew and remove all the screws securing the old threshold to the door frame. Use a screwdriver or an appropriate tool to carefully loosen and extract each screw. Keep the screws aside, as they may come in handy when installing the new threshold. Take care not to damage the surrounding area or the threshold itself during this process.
Pry off the old threshold
Once the screws have been removed, it’s time to pry off the old threshold. Gently insert a pry bar or a flathead screwdriver under the edge of the threshold and begin lifting it up. Apply even pressure to gradually pry the threshold away from the door frame. Take your time and work your way along the entire length of the threshold until it is completely separated from the frame.
In some cases, the old threshold may be stubbornly attached or sealed in place. If this is the case, you may need to use a hammer and chisel to chisel away any adhesive or sealant securing it. Be cautious while using this method to avoid causing any damage to the door frame or surrounding areas.
Once the old threshold has been successfully removed, inspect the door frame for any remaining debris or residues. Clean the area thoroughly and prepare it for the installation of the new threshold in the next step.
Remember: Removing the old threshold with caution and attention to detail will ensure that the installation of the new threshold goes smoothly and results in a secure and efficient seal for your exterior door.
Step 3: Measure And Cut The New Threshold
Once you have removed the old threshold and prepared the doorway for the new one, it’s time to measure and cut the new threshold to fit perfectly. This step ensures a seamless installation and prevents any gaps or unevenness that could compromise the door’s insulation and security. Follow these simple instructions to measure and cut the new threshold for your exterior door.
Measure the width of the door frame
Start by measuring the width of the door frame. Use a measuring tape to measure the distance between the two sides of the frame. Make sure to take accurate measurements as this will determine the exact size of the new threshold.
Mark the threshold for cutting
Once you have the width measurement, transfer it to the new threshold. Use a pencil or a marker to mark the threshold’s edges according to the measurements taken. You can mark both sides and the center for reference.
Use a saw to cut the threshold to size
Now it’s time to cut the threshold to the correct size. Use a saw that is suitable for the material of your threshold. If you are working with wood, a circular saw or a handsaw will do the job. If you are working with metal or PVC, a hacksaw or a jigsaw with the appropriate blade will work best.
Position the threshold securely on a workbench or any stable surface. Align the saw blade with the marked lines that indicate the desired length. Carefully apply firm and consistent pressure to cut through the material. Take your time and double-check the measurements and markings to ensure precision.
Once you have made the cut, remove any rough edges or burrs using sandpaper or a file. Smooth out the surface to ensure a clean finish.
Remember, it’s essential to make accurate measurements and cuts during this step to achieve a snug fit for your new threshold. Take your time, be careful, and double-check your work to ensure a successful installation.
Step 4: Prepare The Door Frame
Before installing a threshold for your exterior door, it is crucial to properly prepare the door frame. This step ensures a secure and long-lasting installation, creating a seamless transition between your door and the outside. Follow these three important sub-steps to get the door frame ready for your new threshold:
Remove any remaining debris
Become acquainted with your door frame by thoroughly inspecting it for any debris that might interfere with the installation process. Use a small brush or broom to sweep away any dirt, dust, or debris that might have accumulated over time. Pay close attention to the corners and crevices of the frame to ensure a clean surface to work with. This step may seem minor, but it is essential for achieving a professional-looking finish for your threshold.
Clean the door frame thoroughly
Next, clean the door frame to remove any lingering dirt or grime that may prevent proper adhesion of the sealant or caulk. Mix a mild detergent with warm water and use a soft cloth or sponge to wipe down the frame. Make sure to reach all the nooks and crannies, including the top and bottom edges. This thorough cleaning step ensures a smooth and secure application of the sealant, preventing any potential water damage in the future.
Apply a sealant or caulk to prevent water damage
Protect your door frame from water damage by applying a layer of sealant or caulk. This step is particularly crucial for exterior doors, as they are exposed to the elements. Choose a waterproof sealant or caulk specifically designed for outdoor use. Apply a thin and even layer along the edges of the door frame using a caulking gun, making sure to seal any gaps or cracks. This protective barrier safeguards your door frame against moisture, prolonging its lifespan and preventing potential structural issues.
Once you have completed these sub-steps, your door frame will be in perfect condition to proceed with the installation of the threshold. Properly preparing the door frame ensures a secure and weather-resistant seal, making your entrance more efficient and aesthetically pleasing.
Step 5: Install The New Threshold
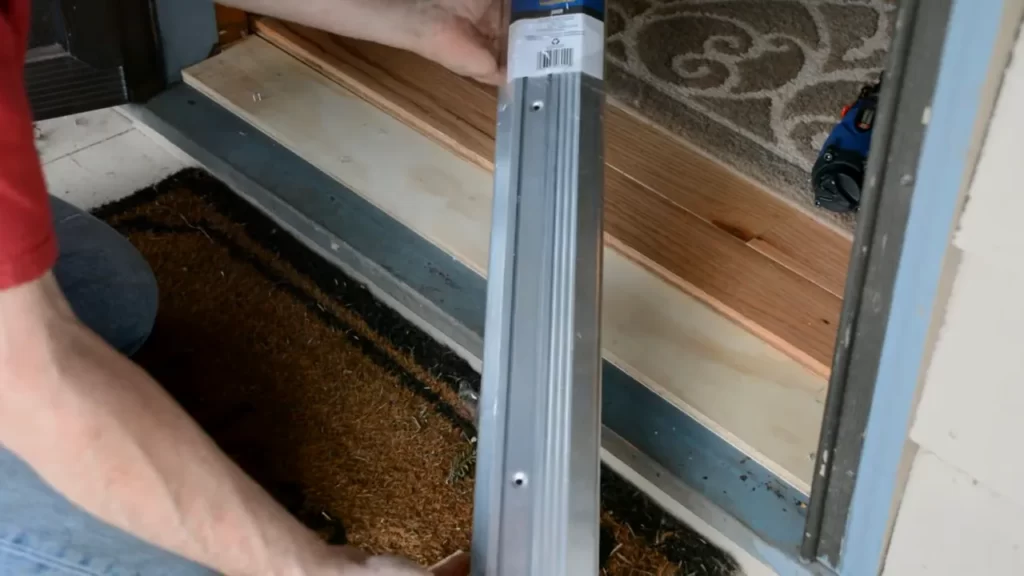
Position the new threshold in place
Once you have prepared the door frame and removed the old threshold, it’s time to position the new threshold in place. Make sure the threshold is aligned with the door frame to ensure a proper fit.
Align it with the door frame
Aligning the new threshold with the door frame is crucial for a secure installation. You want to ensure that the threshold maintains a straight and level position, so take your time to adjust it accordingly. Use a level tool for accuracy, making any necessary adjustments before moving on to the next step.
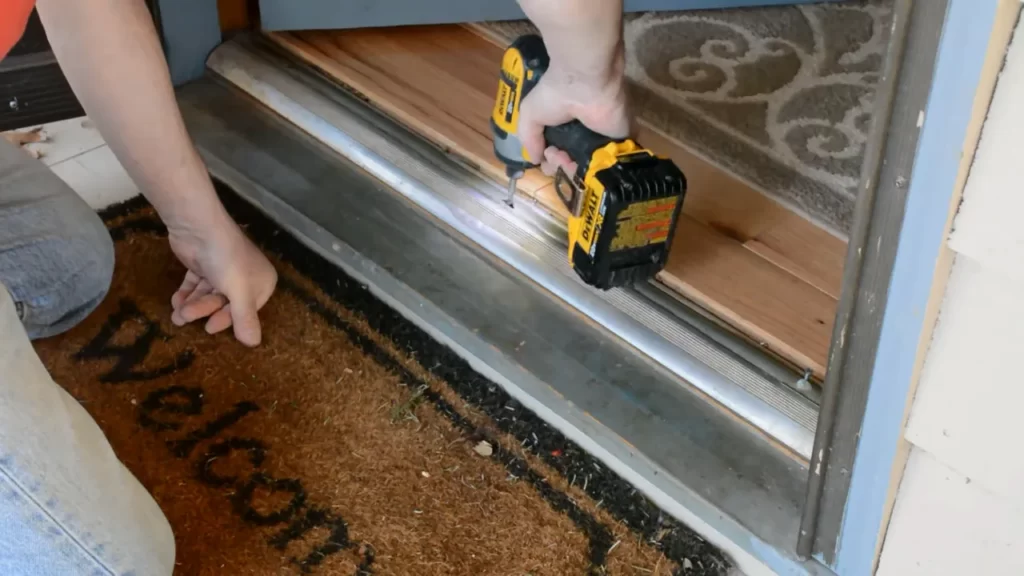
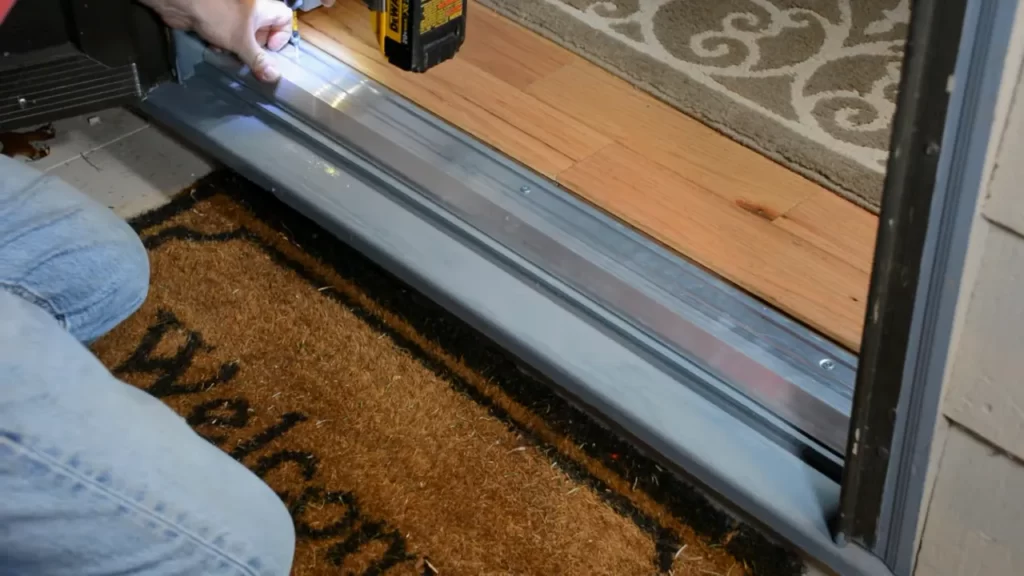
Screw it into place
Now that the new threshold is in position and aligned with the door frame, it’s time to secure it in place using screws. Position the threshold securely on the floor and use a drill to make pilot holes through the holes provided in the threshold.
Once the pilot holes are in place, insert the screws and tighten them to firmly secure the threshold. Make sure each screw is driven in all the way to ensure stability.
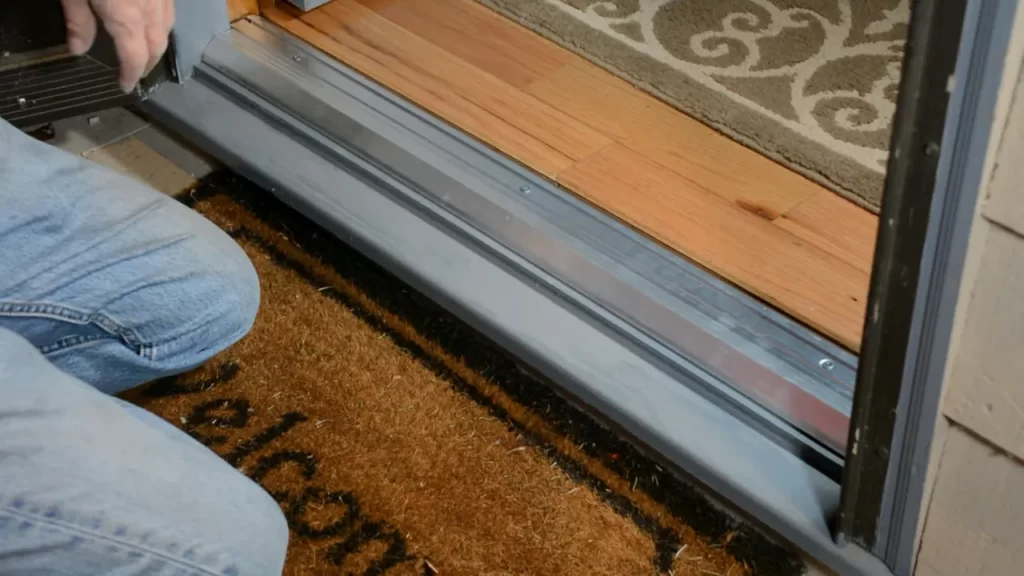
After all the screws are in place and tightened, give the threshold a final check to ensure that it is securely fixed and level with the door frame.
Your new threshold is now installed and ready to withstand regular use and weather conditions. With proper installation, you can enjoy better insulation, improved energy efficiency, and added protection for your exterior door.
Step 6: Test The Threshold
Once you have installed the threshold for your exterior door, it’s crucial to test it to ensure a proper fit. This step is essential as it will determine whether the threshold is correctly installed and functioning as expected. Testing the threshold involves two key aspects: checking for any gaps or unevenness and making necessary adjustments if needed. Let’s look at each of these aspects in detail.
Close and Open the Door to Ensure Proper Fit
To start, carefully close and open the door multiple times, paying attention to how it interacts with the threshold. The door should open and close smoothly without any resistance. If you notice that the door is rubbing against the threshold or requires excessive force to open or close, it indicates an improper fit. In this case, adjustments are needed to ensure the door glides effortlessly over the threshold. Check for Any Gaps or Unevenness Next, inspect the area where the threshold meets the door frame for any gaps or unevenness. Gaps can allow drafts, water, or insects to enter your home, while unevenness can create a tripping hazard. In order to prevent these issues, carefully examine the threshold from all angles, looking for any visible gaps or inconsistencies. Make Adjustments if Necessary If you discover any gaps or unevenness, adjustments may be required to rectify the problem. Start by determining the source of the issue. Is the threshold not aligned properly? Are the screws holding it in place too tight or too loose? Once you pinpoint the cause, you can make the necessary adjustments. This may involve loosening or tightening the screws, repositioning the threshold, or filling any gaps with weatherproof sealant. Remember, the goal is to achieve a seamless connection between the door and the threshold, ensuring a secure and weather-resistant seal. Taking the time to test the threshold and address any issues will ultimately contribute to the overall functionality and longevity of your exterior door. Now that you’ve completed step 6 and successfully tested the threshold, you can move on to the final step of the installation process, which involves applying a protective finish to the threshold to enhance its durability and aesthetic appeal.
Step 7: Seal And Finish The Threshold
Now that you have successfully installed the threshold for your exterior door, it’s time to seal and finish it. This step is crucial to protect the threshold from moisture, drafts, and other elements that can cause damage. Follow these simple steps to complete the installation process.
Apply a weatherproof sealant along the edges
The first thing you need to do is apply a weatherproof sealant along the edges of the threshold. This sealant will create a barrier, preventing any water or air from seeping through. Using a caulk gun, carefully squeeze the sealant along the edges, making sure to cover all the gaps and joints. This will ensure a tight and secure seal.
Smooth out the sealant with a putty knife
Once you have applied the sealant, take a putty knife and carefully smooth out the excess. This will not only give your threshold a neat and polished appearance but also help create a more uniform seal. Be sure to remove any excess sealant that may have been squeezed out during the application process.
Allow the sealant to dry
After smoothing out the sealant, allow it to dry completely. This drying process may take a few hours, depending on the brand and type of sealant you are using. It’s important to ensure that the sealant is completely dry before moving on to the next step. This will prevent any damage or smudging of the sealant.
Once the sealant is dry, your threshold installation is complete! You can now enjoy a well-sealed and finished threshold for your exterior door, providing enhanced protection and insulation.
Step 8: Clean Up And Final Touches
Congratulations! You’ve successfully installed a threshold for your exterior door. Now, it’s time to tidy up and add those final touches to ensure a polished finish. Follow these steps to give your entryway a clean and professional look:
Remove any excess sealant or debris
Once the threshold is securely in place, it’s common to have a bit of excess sealant or debris around the edges. To achieve a clean and neat appearance, take the time to remove any excess material. Using a putty knife or a scraper, gently scrape away any visible sealant or debris that may have seeped out during the installation process.
Clean the door and threshold
With the excess sealant removed, it’s important to clean both the door and the newly installed threshold. Start by wiping down the threshold with a damp cloth or sponge to remove any dust or dirt that may have accumulated. Pay extra attention to the corners and edges to ensure a thorough clean. Next, clean the exterior door by using a mild detergent mixed with warm water. Dip a clean cloth or sponge into the soapy water and gently scrub the door, focusing on any areas that may have come into contact with the installation materials. Rinse the door with clean water and dry it with a lint-free cloth to prevent streaks.
Admire your newly installed threshold
Finally, take a step back and admire your handiwork. Stand back and appreciate the clean lines and improved functionality that your new threshold brings to your home. Take a moment to ensure that the threshold is leveled and aligned correctly, allowing the door to open and close smoothly. By paying attention to these final touches, you’ll create a beautiful and well-maintained entrance to your home. Remember to regularly clean and maintain your threshold to maximize its longevity and keep your door area looking its best. Now that your threshold installation is complete, it’s time to sit back, relax, and enjoy the upgraded appearance and enhanced functionality that it brings to your exterior door.
Frequently Asked Questions On How To Install A Threshold For An Exterior Door
How Do You Install An Outside Door Threshold?
To install an outside door threshold, follow these steps: 1. Measure the width and height of the door opening. 2. Choose a threshold that matches the measurements and material of your door. 3. Remove the old threshold if there is one.
4. Place the new threshold in the doorway, ensuring it is level and aligned. 5. Secure the threshold in place with screws or adhesive.
Does An Exterior Door Need A Threshold?
Exterior doors require a threshold for several reasons. It helps keep out drafts, prevents water from seeping in, and provides a proper seal. A threshold also helps with energy efficiency by reducing airflow and heat loss. Additionally, it creates a smooth transition between the interior and exterior spaces.
What Do You Put Under An Exterior Door Threshold?
Under an exterior door threshold, you typically place a weatherstripping material like a door sweep or a door seal. This helps to prevent drafts, insects, and moisture from entering your home while also improving energy efficiency.
Does Threshold Go Under Door Jamb?
Yes, a threshold typically goes under the door jamb.
Conclusion
Installing a threshold for an exterior door is a crucial step to ensure the energy efficiency and security of your home. By following the step-by-step instructions outlined in this guide, you can successfully install a threshold without any professional assistance.
Remember to measure accurately, choose the right materials, and perform regular maintenance to extend the longevity of your threshold. With a sturdy and well-installed threshold, you can enjoy a more comfortable and secure living space for years to come.