To install a tarp on a roof, first, clean and dry the roof surface. Then, lay the tarp over the area, ensuring it covers the entire roof and drapes over the edges.
Secure the tarp using strong ropes or bungee cords, pulling them tight to minimize sagging or flapping. Installing a tarp on a roof is important for protecting the interior of a building from leaks and water damage. Whether it’s due to a damaged roof or ongoing construction work, a tarp can provide a temporary solution to keep the elements out.
This article will guide you through the process of installing a tarp on a roof, ensuring it is properly secured and provides effective protection. By following our simple steps, you can safeguard your property and belongings until the necessary repairs or construction work are completed.
Types Of Tarps For Roofing
When it comes to roofing, using the right type of tarp is crucial to protect your roof from the elements. There are various types of tarps available in the market that cater to different roofing needs. In this article, we will take a closer look at three popular types of tarps for roofing: Synthetic Tarps, Heavy-Duty Canvas Tarps, and Waterproof Polyethylene Tarps.
Synthetic Tarps
Synthetic tarps are lightweight and durable, making them a popular choice for many roofers. These tarps are made from synthetic materials such as polyethylene, nylon, or polyester coated with PVC or polyurethane. The synthetic construction of these tarps provides excellent resistance to UV rays, water, and mildew.
One of the key advantages of synthetic tarps is their lightweight nature, which makes them easy to handle and install on the roof. Additionally, their flexibility allows for better coverage of irregular roof shapes and angles. Synthetic tarps are available in various sizes and colors, so you can choose the one that best suits your roofing needs.
Heavy-Duty Canvas Tarps
Heavy-duty canvas tarps are known for their exceptional strength and durability. These tarps are made from heavy-weight cotton canvas, which is breathable and resistant to tearing. The canvas material is often treated with wax, oil, or silicone to enhance its water-resistant properties.
Due to their robust nature, heavy-duty canvas tarps are suitable for long-term roofing projects or when you need maximum protection for your roof. These tarps are commonly used for covering large areas and can withstand harsh weather conditions, including heavy rain, strong winds, and even hail. They provide reliable waterproofing and UV protection for extended periods.
Waterproof Polyethylene Tarps
Waterproof polyethylene tarps are widely used for short-term roofing projects or emergency repairs. These tarps are typically made from woven polyethylene fabric with a waterproof coating. The multiple layers of polyethylene make them resistant to tears and punctures, ensuring high durability.
What sets waterproof polyethylene tarps apart is their excellent resistance to water and UV rays. These tarps are specifically designed to keep the roof dry and protected from sudden rain showers. They are lightweight, easy to handle, and available in various sizes. Waterproof polyethylene tarps are an affordable and practical option for quick roof covers during emergencies or temporary roofing needs.
Conclusion
Choosing the right type of tarp for your roofing project is crucial to ensure the best protection for your roof. Synthetic tarps, heavy-duty canvas tarps, and waterproof polyethylene tarps offer different features and benefits based on your needs and budget. Consider the specific requirements of your roofing project, such as durability, weather resistance, and ease of installation, before selecting the most suitable tarp.
Preparing For Tarp Installation
Welcome to our blog post on how to install a tarp on a roof! In this section, we will be covering the important steps involved in preparing for the tarp installation. Proper preparation is crucial for a successful and safe installation process. So, let’s get started!
Assessing Roof Damage
Before you can begin the tarp installation process, it is essential to assess the extent of the roof damage. Take some time to carefully inspect the roof for any signs of leaks, cracks, or missing shingles. Look for areas where water might be pooling or where the roof structure might be compromised. This assessment will help you determine the size of the tarp needed and where it should be placed.
Gathering Tools and Materials
Now that you have assessed the roof damage, it’s time to gather all the necessary tools and materials for the tarp installation. Here’s a list of what you’ll need:
- Tarp: Choose a tarp that is specifically designed for roofing applications and is large enough to cover the damaged area. Make sure it is made of durable and waterproof material.
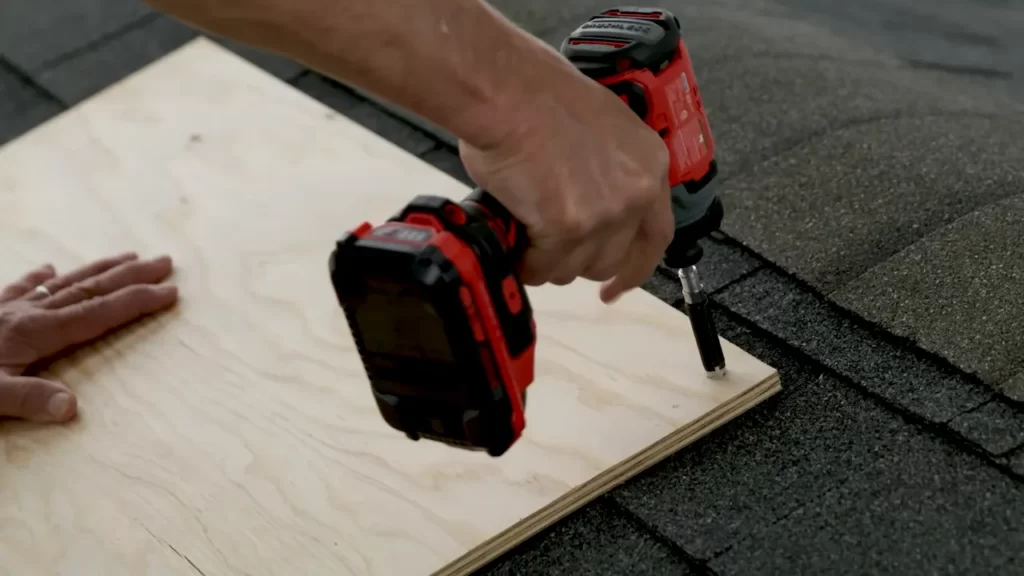
- Nails or Roofing Screws: You’ll need these to securely anchor the tarp to the roof. Opt for rust-resistant nails or screws to ensure longevity.
- Hammer or Screwdriver: Depending on your choice of fasteners, make sure you have the appropriate tool to drive them into the roof.
- Utility Knife: This will come in handy for cutting the tarp to the desired size and shape.
- Ladder or Scaffolding: To access the roof safely, you’ll need a sturdy ladder or scaffolding. Ensure it is stable and properly positioned.
- Protective Gear: Don’t forget to wear gloves, safety glasses, and non-slip footwear to protect yourself during the installation process.
Gather all these tools and materials before you start the tarp installation to avoid any unnecessary delays.
Ensuring Safety Measures
When it comes to installing a tarp on a roof, safety should be your top priority. Here are some important safety measures to consider:
- Weather Conditions: Choose a day with favorable weather conditions, such as a clear sky and minimal wind, to ensure your safety on the roof.
- Secure Footing: Before climbing onto the roof, make sure the ladder or scaffolding is secure and level. Consider using a safety harness for extra precaution.
- Clean Work Area: Remove any debris or loose materials from the roof before installing the tarp. This will reduce the risk of accidents or further damage.
- Proper Tarp Placement: Ensure the tarp is positioned securely and tightly over the damaged area, preventing water from entering. Use the appropriate fasteners and apply them at regular intervals.
- Careful Movements: Move slowly and cautiously on the roof to avoid any slips or falls. Take breaks if needed and never rush the installation process.
By following these safety measures, you can significantly reduce the risk of accidents and injuries while installing the tarp on your roof.
Step-By-Step Guide To Installing A Tarp On Your Roof
Are you in need of a temporary solution to protect your roof from further damage before repairs can be made? Look no further! In this step-by-step guide, we will walk you through the process of installing a tarp on your roof. By following these instructions, you can ensure that your roof remains protected from the elements and minimize the risk of any further damage. Let’s get started!
Clearing Debris and Cleaning the Roof
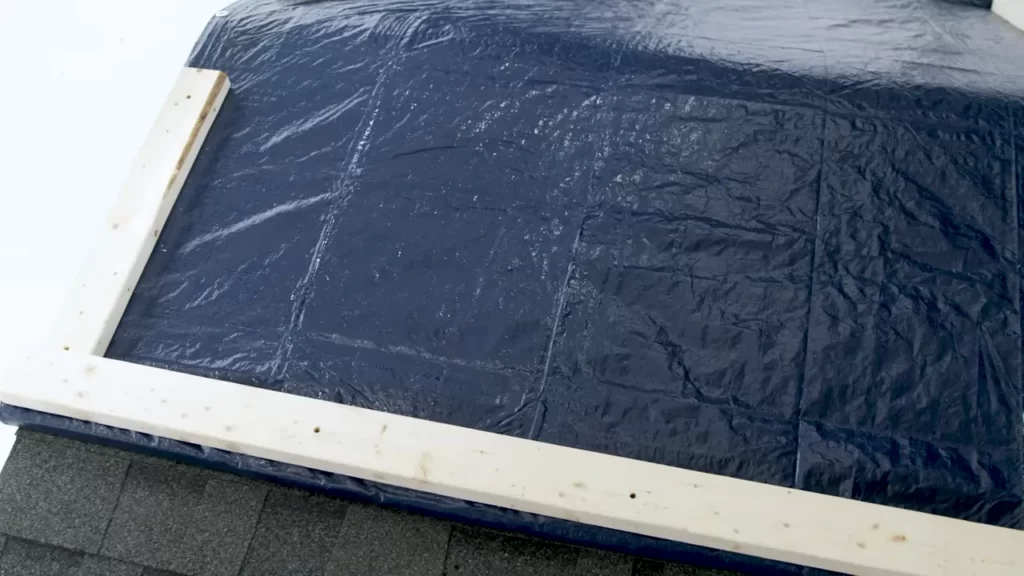
Before you begin installing the tarp, it’s important to remove any debris and clean the roof surface. Debris such as leaves, twigs, and branches can prevent the tarp from lying flat, compromising its effectiveness. Use a broom or leaf blower to sweep away any loose debris. If there are stubborn stains or dirt on the roof, you can use a pressure washer or a solution of water and mild detergent to clean the surface. Allow the roof to dry completely before proceeding with the next step.
Securing the Tarp’s Corners
Once the roof is clear and clean, it’s time to secure the tarp. Start by positioning the tarp over the damaged area, ensuring it extends beyond the affected area by at least 2 feet on each side. Pull the corners of the tarp tightly and secure them using heavy-duty ropes or bungee cords. Make sure the ropes are tied securely to prevent any movement or shifting of the tarp in strong winds or rain. Consider using wooden boards or sandbags to weigh down the corners for additional stability.
Adding Additional Anchoring Points
To further reinforce the tarp’s stability and prevent it from lifting or tearing, it’s recommended to add additional anchoring points along the edges. Use grommets or metal eyelets to create attachment points approximately 3 feet apart along the perimeter of the tarp. Secure these attachment points to the roof using roofing nails or screws. This will help distribute the tension evenly and ensure the tarp remains securely in place.
Applying Waterproofing Sealant
To enhance the tarp’s waterproofing capabilities and protect your roof from moisture, it’s advisable to apply a waterproofing sealant. Choose a high-quality sealant specifically designed for outdoor use on roofs. Follow the manufacturer’s instructions to apply the sealant along the edges of the tarp and any other areas where water might seep through. This will provide an extra layer of protection and help prolong the lifespan of the tarp.
Checking for Proper Tarp Tension
After you have completed the installation, it’s crucial to check for proper tarp tension. Ensure that the tarp is stretched tightly across the damaged area to prevent any sagging or pooling of water. Additionally, inspect the corners and edges to verify that they are securely fastened and haven’t come loose. Regularly monitor the tarp throughout its use to ensure it remains in place and make any adjustments as needed.
Tips And Tricks For Efficient Tarp Installation
Installing a tarp on a roof can be a challenging task, but with a few tips and tricks up your sleeve, you can ensure a smooth and efficient installation process. Whether you’re protecting your roof from leaks or repairing damage, these strategies will help you get the job done effectively. Here are some key factors to consider when installing a tarp on a roof:
Using Rope or Bungee Cords for Extra Support
In order to provide extra support for your tarp and prevent it from shifting or tearing, consider using rope or bungee cords. These materials can be used to secure the tarp tightly to the roof, keeping it in place even in strong winds or heavy rain.
To use rope, start by tying one end securely to a corner of the tarp. Then, work your way around the roof, stretching the rope tightly and tying it securely at each corner. Ensure that the rope is evenly spaced and taut. This will create a strong and stable foundation for your tarp.
If you prefer using bungee cords, simply attach one end to a grommet on the tarp and hook the other end onto a secure anchor point on the roof. The elasticity of the bungee cords will provide additional flexibility while still maintaining a firm grip on the tarp.
Choosing the Right Tarp Size
Selecting the appropriate tarp size is crucial for a successful installation. If the tarp is too small, it may not provide adequate coverage and protection for your roof. On the other hand, a tarp that is too large can be difficult to maneuver and secure properly.
Measure the dimensions of your roof before purchasing a tarp to ensure a proper fit. Remember to account for any overhangs or slopes that may require additional tarp coverage. Additionally, consider the material and weight of the tarp – a heavier-duty tarp may be required for longer-term installations or areas with harsh weather conditions.
Collaborating with a Helper
Installing a tarp on a roof can be a time-consuming and physically demanding task, so don’t hesitate to ask for assistance. Collaborating with a helper can significantly speed up the process and ensure a safer installation.
Consider assigning roles to each person involved, with one person handling the tarp positioning and the other securing it in place. Working together as a team will not only make the process more efficient but will also help prevent accidents or injuries by having an extra set of eyes and hands to evaluate the situation.
Protecting the Tarp from Elements
While a tarp can provide temporary protection against leaks and damage, it’s essential to take additional measures to safeguard it against the elements. A few simple precautions can extend the lifespan of your tarp and ensure its effectiveness.
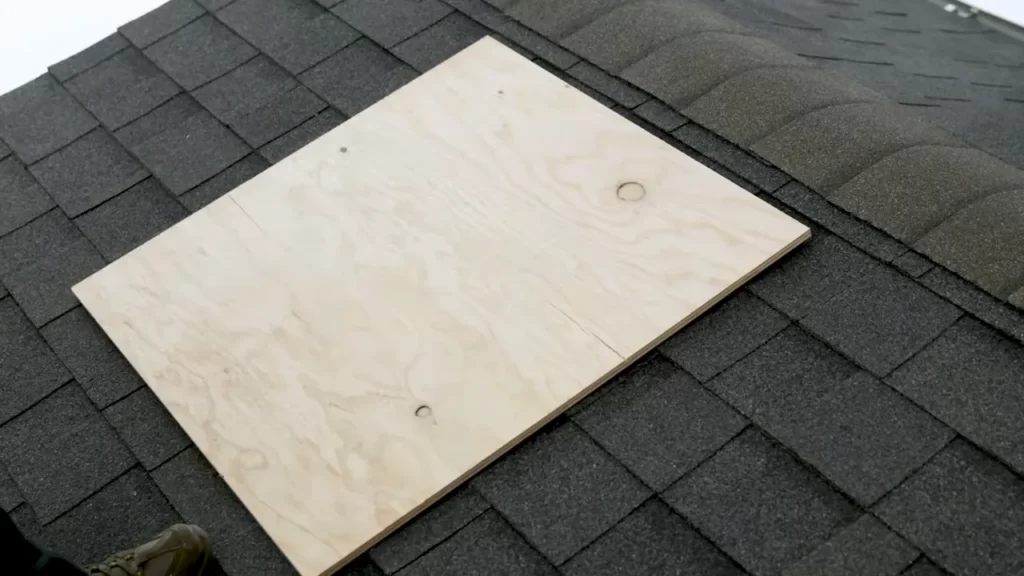
Firstly, make sure the tarp is securely fastened to prevent wind from getting underneath and causing it to lift. Additionally, regularly check the tarp for any tears or weak spots, and promptly repair or replace it as needed to maintain its integrity. If possible, provide some sort of support or reinforcement for the tarp, such as plywood or boards, if you anticipate high winds or heavy snowfall.
By following these tips and tricks, you’ll be able to install a tarp on your roof efficiently and effectively. Remember to use rope or bungee cords for extra support, choose the right tarp size, collaborate with a helper, and protect the tarp from the elements. With these strategies in place, your tarp installation will be hassle-free, providing the necessary protection for your roof.
Maintaining And Inspecting Your Tarp
When it comes to installing a tarp on your roof, one crucial aspect that should not be overlooked is the maintenance and inspection of the tarp. Regular cleaning and maintenance, addressing tears or damage, and inspecting for proper adhesion are key steps in ensuring the longevity and effectiveness of your tarp. In this section, we will delve into each of these aspects in detail, providing you with practical tips and guidance.
Regular Cleaning and Maintenance
Maintaining a clean tarp is essential for its optimal performance. Over time, debris, leaves, and other particles can accumulate on the tarp’s surface, leading to potential blockages or damage. To keep your tarp in pristine condition, follow these cleaning and maintenance tips:
- Regularly remove any leaves, sticks, or other debris that has accumulated on the tarp. Use a soft broom or brush to gently sweep away the debris, avoiding any harsh or abrasive motions that could damage the tarp material.
- If there are stubborn stains or grime on the tarp, try using a mild soap diluted in water. Apply the soapy solution using a soft cloth or sponge, and gently scrub the affected area. Rinse thoroughly with water afterward to remove any soap residue.
- Inspect the tarp for mold or mildew growth, especially in areas with high humidity. If you notice any signs of mold or mildew, prepare a solution of 1-part bleach to 3-parts water. Apply the solution to the affected area using a sponge or soft brush, ensuring the area is thoroughly saturated. Allow the solution to sit for a few minutes before rinsing it off with clean water.
- Regularly inspect the grommets or fasteners on the tarp to ensure they are secure and undamaged. Repair or replace any damaged grommets to maintain the tarp’s structural integrity.
Addressing Tears or Damage
Despite proper care, tears or damage can occur to your tarp over time, particularly during severe weather or other external factors. It is important to address any tears or damage promptly to prevent further issues. Here’s what you can do:
- Identify the location and extent of the damage. If the tear is small, you can easily repair it using a patch kit specifically designed for tarps. Follow the manufacturer’s instructions for applying the patch, ensuring clean and dry conditions for optimal adhesion.
- For larger tears or irreparable damage, consider replacing the tarp altogether. Procrastinating the replacement can worsen the situation and potentially compromise the protection provided by the tarp.
Inspecting for Proper Adhesion
Proper adhesion is critical to ensure that your tarp remains securely in place and effectively shields your roof. Regularly inspecting the tarp’s adhesion will help identify any areas that may require reinforcement or repairs. Follow these steps to inspect the adhesion:
- Check the edges and corners of the tarp to ensure they are securely anchored and not peeling or lifting.
- Inspect the tension of the tarp across the roof surface. Any sagging or areas with excessive slack may indicate a need for adjustment.
- If you notice any areas where the tarp is not properly adhered, consider using additional fasteners or grommets to reinforce those weak points.
- Regularly monitor the tarp during inclement weather or strong winds. If you notice any substantial movement or displacement, it may be necessary to reposition or reinforce the tarp to maintain optimal protection.
By following these guidelines for maintaining and inspecting your tarp, you can ensure its longevity and effectiveness in protecting your roof. Regular cleaning, prompt addressing of tears or damage, and meticulous adhesion inspection are key to a well-maintained tarp that will safeguard your roof for years to come.
Removing The Tarp Safely
Removing the Tarp Safely When it comes to removing the tarp from your roof, it is important to do so safely and effectively. This ensures that the roofing materials are not damaged further, and it also helps to prevent any potential injuries. In this section, we will go over the steps involved in removing the tarp safely, including unfastening the tarp anchors, folding and storing the tarp, and inspecting the roof for any additional damage. Unfastening the Tarp Anchors To begin, you’ll need to unfasten the tarp anchors that are holding the tarp securely to your roof. These anchors are typically in the form of ropes, bungee cords, or clips, and they are meant to keep the tarp in place during high winds or heavy rain. To remove the anchors, follow these steps: 1. Carefully untie any knots or release any clips that are holding the tarp in place. Be mindful of your surroundings and ensure that you are on a stable surface to avoid any accidents or falls. 2. Gently remove the ropes or bungee cords from their anchors, being cautious not to damage the tarp or the roof. If any of the anchors are stuck, use a pair of pliers or a similar tool to loosen them. 3. Once all the anchors are removed, carefully lower the tarp to the ground, making sure to avoid any contact with power lines or other hazards. Folding and Storing the Tarp After the tarp is safely removed from the roof, it is important to fold and store it properly. This ensures that it remains in good condition and can be reused if needed in the future. Follow these steps to fold and store the tarp: 1. Begin by removing any debris or dirt from the tarp by gently shaking it or using a soft brush. This helps to prevent any damage or staining while the tarp is in storage. 2. Lay the tarp flat on a clean and dry surface, ensuring that it is free of any wrinkles or folds. Smooth out any creases with your hands. 3. Starting from one corner, fold the tarp in half lengthwise, bringing the edges together. Repeat this step until the tarp is folded into a small, manageable size. 4. To store the tarp, place it in a waterproof container or bag to protect it from moisture and pests. Make sure the container is labeled with the tarp’s size and any other relevant information. Inspecting the Roof for Any Additional Damage Finally, before considering the job complete, take the time to inspect the roof for any additional damage that may have occurred during the tarp installation or while the tarp was in place. Look for signs of leaks, loose shingles, or any other issues that may compromise the integrity of your roof. If you notice any problems, it is recommended to consult a professional roofing contractor for further evaluation and repairs. In conclusion, removing the tarp safely from the roof is an essential part of the tarp installation process. By following the steps outlined in this section, you can ensure that the tarp is removed without causing further damage and that it is properly stored for future use. Additionally, inspecting the roof for any additional damage ensures that any underlying issues are addressed promptly. By taking these precautions, you can protect your roof and preserve its longevity.
Frequently Asked Questions Of How To Install A Tarp On A Roof
What Is The Best Way To Put A Tarp On A Roof?
The best way to put a tarp on a roof is to start from the bottom and work your way up, making sure it is secure and tight. Use nails or bungee cords to hold it in place and consider using a tarp with grommets for added stability.
How Do You Put A Tarp On A Roof Without Nails?
To put a tarp on a roof without nails, use alternative methods like adhesive tape or straps to secure it tightly. Make sure to clean and dry the roof surface before laying the tarp. Position it carefully to cover the damaged area, ensuring it overlaps the edges.
Regularly check the tarp’s condition and adjust if necessary.
Is It Ok To Nail A Tarp On A Roof?
Yes, it is acceptable to nail a tarp on a roof. However, it is crucial to ensure that the tarps are securely fastened and properly sealed to prevent any leaks or damage. It is advisable to consult a professional or follow specific manufacturer instructions for the best results.
Can You Screw A Tarp To The Roof?
Yes, you can screw a tarp to the roof for temporary covering. It helps prevent leaks and protects your roof from weather damage. Make sure to use proper screws and sealants to ensure a secure attachment.
Conclusion
Installing a tarp on a roof is an essential skill for any homeowner to have. By following the step-by-step guide provided in this blog post, you can ensure the protection of your property from leaks and further damage. Remember to choose a high-quality tarp and secure it properly to withstand weather conditions.
With this knowledge, you can confidently tackle the task of installing a tarp on a roof and safeguard your home.