To install pre-made wainscoting panels, measure and mark the desired height, cut the panels to size, apply adhesive, and attach the panels to the wall using finishing nails. Wainscoting panels can enhance the beauty and elegance of any room.
Whether you want to add a touch of sophistication to your dining area or give a fresh look to your hallway, installing pre-made wainscoting panels is a simple and effective way to achieve the desired effect. This article will guide you through the step-by-step process of installing these panels, ensuring a seamless and professional finish.
From measuring and cutting the panels to attaching them to the wall, you’ll learn all the necessary techniques to transform your space with ease. So, let’s dive into the world of pre-made wainscoting and create a stunning interior that will leave a lasting impression.
Choosing The Right Wainscoting Panels For Your Space
When it comes to adding character and charm to your home, installing pre-made wainscoting panels is an excellent choice. Not only do they enhance the aesthetics of your space, but they also provide lasting durability. However, selecting the right wainscoting panels for your specific space is crucial to ensure a seamless installation process and a stunning end result. In this section, we will discuss the factors to consider when choosing pre-made wainscoting panels, understanding the different materials available, and measuring your space accurately for perfect panel installation.
Factors to consider when selecting pre-made wainscoting panels
Choosing the right wainscoting panels involves considering various factors that can greatly impact the overall look and feel of your space. Here are a few key factors to keep in mind:
- Style: Determine the style of wainscoting that best suits your space. Whether you prefer a classic, traditional look or a more modern, contemporary feel, there are various styles available, such as beadboard, raised panel, or flat panel.
- Height: Consider the desired height of your wainscoting. Taller wainscoting can create a dramatic effect, while shorter panels may be more suitable for smaller rooms.
- Material: Different materials offer different advantages. Hardwoods like oak or maple provide a timeless appeal, while MDF (medium-density fiberboard) offers a budget-friendly option without compromising on quality.
- Finish: Decide on the finish that complements your space. Whether you prefer a natural wood stain for a rustic look or a painted finish for a more polished appearance, choose a finish that coordinates with your existing decor.
- Maintenance: Consider the level of maintenance required. Some materials may require more upkeep than others, so it’s important to choose panels that align with your lifestyle and available time for upkeep.
- Budget: Determine your budget for the project. While there are affordable options available, keep in mind that investing in higher-quality materials can often provide better long-term value.
Understanding the different materials available
When it comes to pre-made wainscoting panels, there are various materials to choose from. Each material offers its own unique benefits, so understanding the differences can help you make an informed decision.
| Material | Advantages | Disadvantages |
|---|---|---|
| Hardwood | Durable, natural beauty, long-lasting | Higher price point, requires regular maintenance |
| MDF (Medium-Density Fiberboard) | Budget-friendly, easy to paint, resistant to warping | Not as durable as hardwood, limited customization options |
Measuring your space accurately for panel installation
Accurate measurements are essential to ensure a seamless installation of your pre-made wainscoting panels. Here’s a step-by-step guide to measuring your space:
- Measure the length of each wall where you plan to install the wainscoting panels using a tape measure.
- Measure the height from the floor to the desired height of your wainscoting using the tape measure.
- Multiply the length and height measurements to determine the total square footage of paneling required.
- Take into account any windows, doors, or other obstacles that may require partial panels or special cuts.
- Add approximately 10% to your total square footage as a buffer for any mistakes or additional touch-ups needed.
By following these measurement guidelines, you can ensure that you purchase the correct amount of pre-made wainscoting panels for your space, preventing any delays or additional costs.
Now that you have a better understanding of how to choose the right wainscoting panels, the various materials available, and how to measure your space accurately, you are one step closer to achieving a beautifully transformed interior. Stay tuned for the next section, where we will dive into the installation process, ensuring a professional-looking finish.
Preparing Your Space For Installation
Before installing pre-made wainscoting panels, it’s essential to prepare your space properly. This involves clearing the walls and removing any existing fixtures, repairing any wall imperfections or damages, and priming the walls for better panel adhesion. By taking these steps, you’ll ensure a smooth installation process and a professional-looking result.
Clearing the walls and removing any existing fixtures
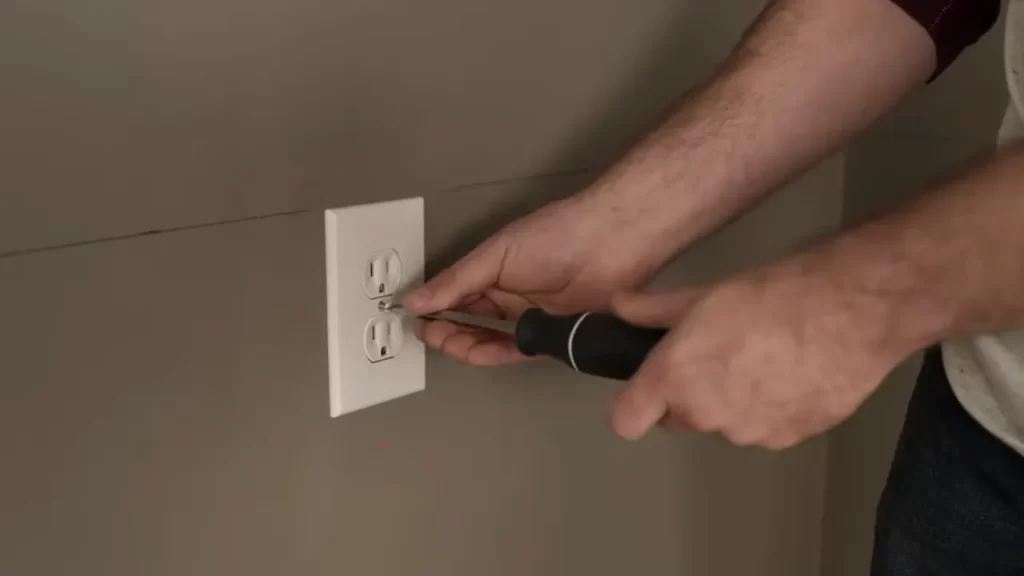
The first step in preparing your space for wainscoting installation is to clear the walls of any furniture, artwork, or decorations. This will give you a clear workspace and prevent any potential damage to your belongings during the process. Additionally, remove any existing fixtures such as electrical outlet covers, light switches, and baseboards. This will allow for a seamless installation and ensure that the wainscoting panels fit perfectly without any obstructions.
Repairing any wall imperfections or damages
Next, carefully inspect the walls for any imperfections or damages that need to be addressed before installing the wainscoting panels. Look for cracks, holes, or uneven surfaces that may affect the fit and appearance of the panels. Fill in any holes or cracks using a suitable wall filler or spackle, and sand down any rough areas to create a smooth and even surface. This step is crucial to achieve a professional finish and enhance the overall aesthetic of your wainscoting installation.
Priming the walls for better panel adhesion
Once you have repaired any wall imperfections, it’s time to prime the walls. Priming is essential as it creates a smooth and stable surface for the wainscoting panels to adhere to. Apply a high-quality primer using a paint roller or brush, and ensure that you cover the entire wall surface evenly. Allow the primer to dry completely before moving on to the next step. This primer will not only enhance the adhesion of the wainscoting panels but also help to prevent moisture damage and improve overall durability.
By following these steps to prepare your space for wainscoting installation, you’ll set the foundation for a successful and visually pleasing project. Clearing the walls and removing any existing fixtures, repairing any wall imperfections or damages, and priming the walls will ensure that your wainscoting panels are installed securely and seamlessly, providing a stylish enhancement to your space.
Step-By-Step Guide To Installing Pre-Made Wainscoting Panels
If you’re looking to add architectural charm and elegance to your home, installing pre-made wainscoting panels is a great option. Not only does wainscoting enhance the aesthetic appeal of any space, but it also adds an extra layer of protection to your walls. If you’re ready to tackle this DIY project, we’ve got you covered with a step-by-step guide to installing pre-made wainscoting panels.
Gathering the necessary tools and materials
Before you start the installation process, gather all the necessary tools and materials. This will ensure that you have everything you need to complete the project smoothly. Here’s a list of items you’ll need:
- Pre-made wainscoting panels
- Bottom rail
- Vertical stiles
- Tape measure
- Level
- Pencil
- Miter saw
- Drill
- Screws
- Painter’s tape
- Spackling compound
- Putty knife
- Sandpaper
- Primer
- Paint
- Paintbrush
Starting with the bottom rail installation
Once you’ve gathered all the necessary tools and materials, it’s time to begin the installation process. Start by installing the bottom rail, which will serve as the foundation for your wainscoting panels. Here’s how to do it:
- Measure the length of the wall where you’ll be installing the wainscoting panels.
- Cut the bottom rail to the measured length using a miter saw.
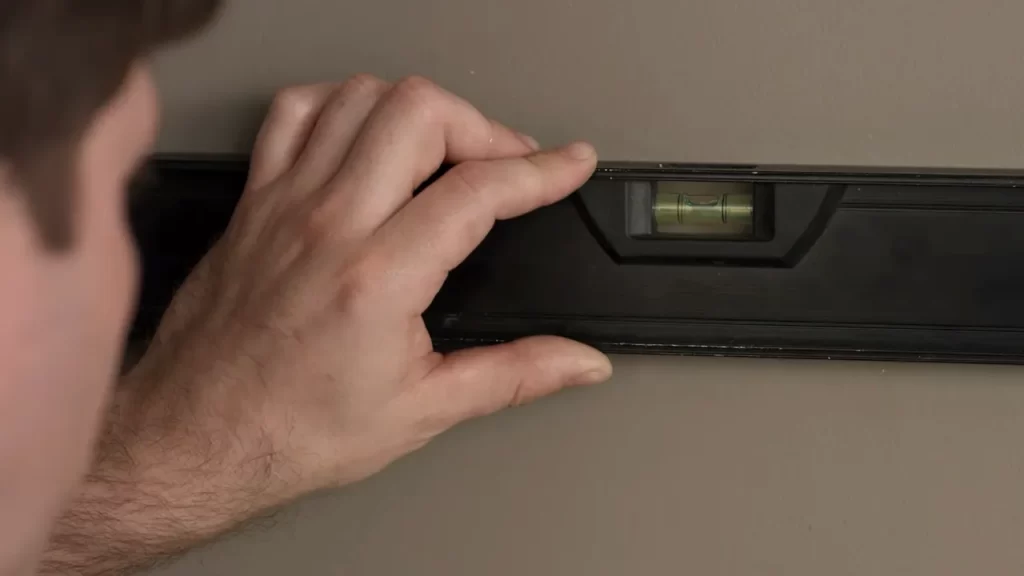
- Use a level to ensure the bottom rail is straight and mark the desired height on the wall using a pencil.
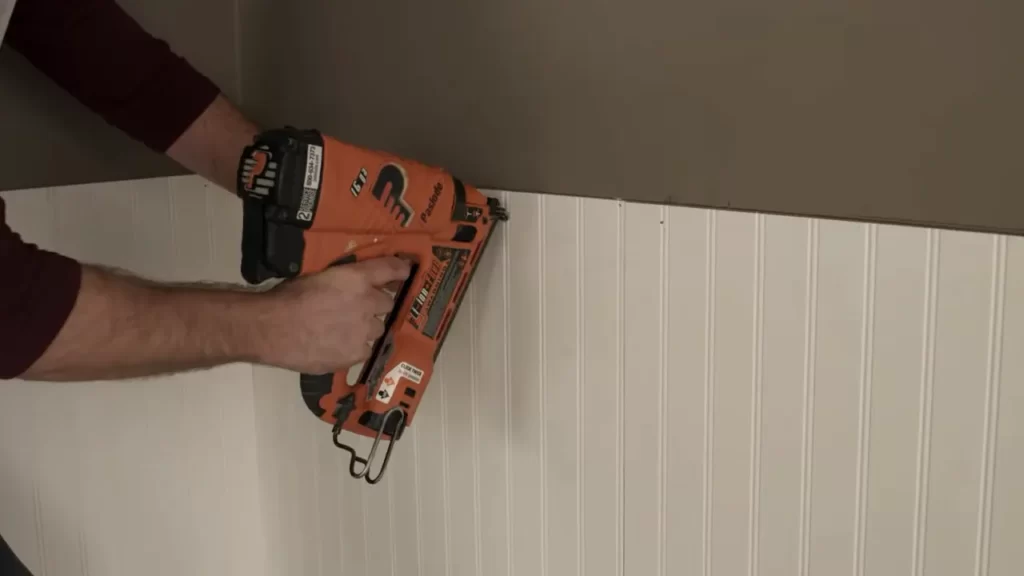
- Attach the bottom rail to the wall using screws, making sure it aligns with the marked height.
Installing the vertical stiles and measuring for spacing
With the bottom rail securely in place, it’s time to install the vertical stiles and ensure proper spacing between them. Follow these steps:
- Measure the height of the wall and divide it by the desired spacing between the vertical stiles.
- Using the measurement from the previous step, mark the spacing intervals on the wall using a pencil.
- Attach the vertical stiles to the wall, aligning them with the marked intervals.
- Use a level to ensure the stiles are straight and adjust as needed.
Placing the top rail and securing all panels
With the bottom rail and vertical stiles in place, it’s time to install the top rail and secure all the panels. Follow these steps:
- Measure the length of the wall and cut the top rail to the measured length using a miter saw.
- Attach the top rail to the wall, making sure it aligns with the top edge of the vertical stiles.
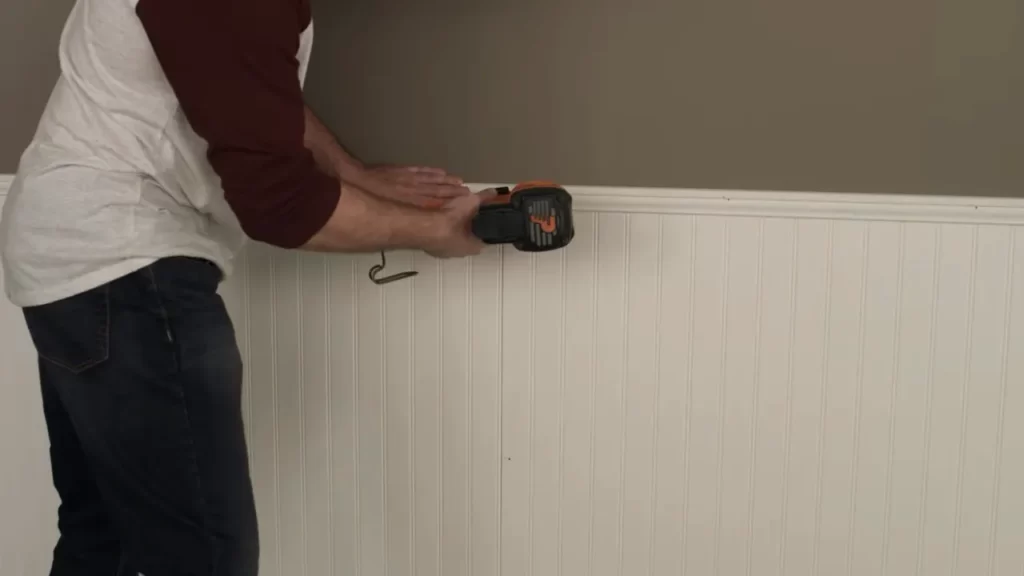
- Install the pre-made wainscoting panels into the space between the bottom and top rails, ensuring they fit securely.
- Secure the panels to the rails using screws, making sure they are level and aligned.
Adding the finishing touches and refinishing the panels
Once all the panels have been installed and secured, it’s time to add the finishing touches and refine the panels. Follow these steps:
- Fill any gaps or holes with spackling compound using a putty knife.
- Allow the spackling compound to dry and sand it smooth with sandpaper.
- Apply a coat of primer to the entire wainscoting surface and let it dry.
- Finish off by applying a coat or two of paint, ensuring even coverage.
There you have it! A step-by-step guide to installing pre-made wainscoting panels. With a little time and effort, you can transform any room in your home with this classic architectural feature.
Tips And Tricks For A Flawless Installation
Installing pre-made wainscoting panels can instantly transform the look of any space, adding elegance and charm. However, achieving a flawless installation requires attention to detail and proper execution. In this guide, we will share some essential tips and tricks that will help you achieve professional-looking results.
Ensuring Level Installation for a Professional Look
Properly aligning and leveling your wainscoting panels is crucial for a polished finish. Here are some tips to help you achieve a level installation:
- Begin by measuring and marking the desired height of your wainscoting panels on the wall, ensuring consistency throughout the installation.
- Use a level to draw a horizontal line across the wall, serving as a guide for the installation.
- Before attaching the panels, double-check their levelness with a spirit level to ensure accuracy.
- Adjust the panels as necessary and securely fasten them to the wall.
Dealing with Corners and Uneven Walls
Corners and uneven walls can present challenges during wainscoting panel installation. Consider the following suggestions:
- When encountering corners, use a miter saw to cut the panels at 45-degree angles for a seamless corner joint.
- If the walls are uneven, use shimming techniques to create a level surface for the panels.
- Before installing panels on uneven walls, apply a thin layer of joint compound to fill in any gaps or imperfections, ensuring a smooth and even surface.
Concealing Any Visible Seams or Gaps
To achieve a flawless finish, it’s important to properly conceal any visible seams or gaps in your wainscoting installation. Here’s how:
- Apply wood filler to any gaps between the panels or where they meet the baseboard or chair rail, ensuring a seamless appearance.
- Allow the wood filler to dry, then sand it down until smooth.
- Finish by painting or staining the wainscoting and the adjacent walls to blend the seams and gaps seamlessly into the overall design.
Applying a Protective Finish for Longevity
To ensure the durability and longevity of your wainscoting panels, it’s essential to apply a protective finish. Follow these steps:
- Clean the panels thoroughly to remove any dust or debris.
- Apply a coat of primer to the panels to create a smooth and uniform surface.
- Once the primer is dry, apply your chosen paint or stain, ensuring even coverage.
- Allow sufficient drying time between coats, following the manufacturer’s instructions.
- Apply a clear topcoat to protect the wainscoting panels from everyday wear and tear.
Maintenance And Care For Pre-Made Wainscoting Panels
Proper maintenance and care are essential to ensure that your pre-made wainscoting panels retain their beauty and functionality over time. By following a few simple steps, cleaning, preventing damage, and refinishing your wainscoting panels can be a breeze. In this section, we will discuss effective cleaning techniques and products to use, as well as how to prevent damage and wear. We will also touch on the importance of touching up and refinishing as needed to keep your panels looking their best.
Cleaning Techniques and Products to Use
Cleaning your pre-made wainscoting panels regularly can help keep them free from dirt, dust, and grime. The cleaning techniques and products you use will depend on the material of your panels. Here are some tips to consider:
- Wood panels: To clean wood wainscoting panels, use a soft cloth or sponge dampened with a mild detergent solution. Avoid using abrasive cleaners or harsh chemicals, as they can damage the wood finish. Wipe the panels gently, following the grain of the wood, and then dry them thoroughly to prevent any water damage.
- Vinyl panels: Vinyl wainscoting panels are relatively easy to clean. Simply mix a solution of warm water and mild dish soap. Use a soft cloth or sponge to apply the solution to the panels and remove any stains or dirt. Rinse the panels with clean water and dry them thoroughly.
- MDF panels: MDF wainscoting panels should be cleaned with a mild detergent solution and a soft cloth or sponge. Avoid excessive moisture, as MDF is prone to swelling if it gets wet. Wipe the panels gently and dry them completely to prevent any issues.
Regularly cleaning your pre-made wainscoting panels not only keeps them looking fresh, but it also helps maintain their durability and lifespan.
Preventing Damage and Wear Over Time
While wainscoting panels are designed to withstand everyday wear and tear, taking preventive measures can significantly extend their lifespan. Here are some tips to prevent damage and wear over time:
- Protective measures: Consider adding chair rails or baseboards to protect your wainscoting panels from potential damage caused by furniture and foot traffic. These additional elements act as barriers and reduce the risk of scratches, dents, and scuffs.
- Avoid excessive moisture: Keep your panels away from direct sources of moisture, such as leaky pipes or steam. Excessive moisture can cause warping, mildew, and other types of damage.
- Be mindful of cleaning techniques: Follow the cleaning techniques outlined earlier to ensure you don’t inadvertently cause damage to your wainscoting panels. Avoid using abrasive cleaning tools or harsh chemicals, as they can strip away the finish or scratch the surface.
By being proactive and taking preventive measures, you can maintain the pristine condition of your pre-made wainscoting panels for years to come.
Touching Up and Refinishing as Needed
Over time, even with proper care, your pre-made wainscoting panels may require some touch-ups or refinishing. This is normal wear and tear, and addressing it promptly will help keep your panels looking their best. Here are some steps to guide you:
- Assess the condition: Regularly inspect your wainscoting panels for any signs of damage, such as scratches, dents, or faded finishes. Addressing minor issues early on can prevent them from becoming more significant problems.
- Touch-up paint: If you notice any small scratches or chips in the paint, touch them up with the appropriate paint color. Use a small brush or a paint pen, following the manufacturer’s instructions for best results. Allow the paint to dry completely before touching the area.
- Refinish the panels: If your wainscoting panels have visible damage or an outdated finish, you may consider refinishing them completely. This process involves stripping off the existing finish, sanding the panels, applying a new finish or paint, and sealing it for added protection. Consult a professional or follow specific product instructions to ensure a successful refinishing job.
Regularly checking and touching up or refinishing your pre-made wainscoting panels will help maintain their appearance and ensure their longevity.
Enhancing Your Space With Wainscoting Panel Design Ideas
When it comes to adding charm and elegance to your space, wainscoting panels are an excellent choice. These pre-made panels not only provide a timeless appeal but also offer a practical solution for protecting your walls from everyday wear and tear. With the right combination of wainscoting panel styles, colors, and textures, you can transform any room into a sophisticated haven. In this article, we will explore different wainscoting panel styles and patterns to consider, as well as how to combine wainscoting with other architectural details to create a cohesive look. Additionally, we will delve into using color and texture to create visual interest and bring your wainscoting design to life.
Different Wainscoting Panel Styles and Patterns to Consider
When it comes to wainscoting panel styles, there is an array of options to choose from. Each style offers a unique aesthetic and can dramatically change the overall look and feel of a room. Whether you prefer a traditional, classic design or a more modern, contemporary approach, there is a wainscoting panel style that will suit your taste. Here are some popular styles and patterns to consider:
| Style/Pattern | Description |
|---|---|
| Raised Panel Wainscoting | A traditional style characterized by panels with raised edges, offering a sense of depth and visual interest. |
| Beadboard Wainscoting | A popular choice that features vertical panels with distinctive grooves, adding a touch of country charm. |
| Board and Batten Wainscoting | A versatile style that combines vertical battens with horizontal boards, creating a visually appealing pattern. |
| Picture Frame Wainscoting | A more intricate design that resembles a picture frame, adding an elegant touch to any room. |
Combining Wainscoting with Other Architectural Details
To create a cohesive and harmonious look, it’s essential to consider how wainscoting can be combined with other architectural details in your space. By integrating wainscoting with elements such as crown molding, chair rails, and baseboards, you can achieve a seamless transition from floor to ceiling. This combination of architectural details not only enhances the wainscoting design but also adds depth and character to the entire room. When selecting these additional elements, be sure to choose styles that complement your wainscoting panel design, creating a unified and visually appealing aesthetic.
Using Color and Texture to Create Visual Interest
One of the most exciting aspects of incorporating wainscoting panels into your space is the opportunity to play with color and texture. The color of your panels and the finish you choose can greatly impact the overall atmosphere of your room. For example, if you want to create a sense of warmth and coziness, consider using rich, earthy tones or textured finishes that add depth and dimension. On the other hand, if you prefer a more contemporary and airy feel, opt for lighter colors and smooth finishes that reflect natural light, making your space feel bright and open. Don’t be afraid to experiment with different combinations of color and texture to create a visually captivating and personalized wainscoting design.
In conclusion, wainscoting panels offer a multitude of design ideas to enhance your space. By exploring different styles and patterns, combining wainscoting with other architectural details, and using color and texture strategically, you can create a stunning wainscoting design that transforms your room into a work of art.
Frequently Asked Questions About Pre-Made

Wainscoting Panels
If you’re considering installing pre-made wainscoting panels in your home, you likely have some questions about the process. In this section, we’ll address some of the most common questions homeowners have about these panels. Read on to find out more.
Can pre-made wainscoting panels be customized?
One of the great advantages of pre-made wainscoting panels is that they can be customized to suit your specific needs and preferences. While they come in standard sizes and designs, many manufacturers offer options to customize the height, width, and overall design of the panels. This allows you to create a wainscoting look that perfectly complements your home’s aesthetic. Keep in mind that customization options may vary between manufacturers, so it’s important to check with the supplier to see what options are available.
How long does it typically take to install wainscoting panels?
The duration of installing wainscoting panels can vary depending on several factors, including the size of the room and the level of detail involved in the design. On average, the installation process can take anywhere from a few hours to a couple of days. However, it’s important to remember that this estimate may change depending on your experience with DIY projects and the complexity of the wainscoting design. To ensure a smooth installation process, it’s a good idea to thoroughly read the manufacturer’s instructions and plan ahead.
Can wainscoting panels add value to my home?
Yes, installing wainscoting panels can indeed add value to your home. Wainscoting is a classic architectural feature that can enhance the overall aesthetic appeal of a space. It brings an element of elegance and sophistication, which can be particularly appealing to potential buyers. Additionally, wainscoting can also help protect your walls from damage and wear over time. By investing in high-quality wainscoting panels, you are not only adding visual appeal but also potential long-term value to your home.
What are alternative options to pre-made wainscoting panels?
While pre-made wainscoting panels are a popular choice for homeowners, there are alternative options available if you’re looking for something different. If you’re feeling creative and want to add a personal touch to your wainscoting, you can opt for DIY wainscoting using individual wood boards. This allows you to customize every aspect of the design. Additionally, there are also ready-to-assemble wainscoting kits available for those who prefer a middle-ground between pre-made panels and a full DIY project.
Frequently Asked Questions Of How To Install Pre-Made Wainscoting Panels
Can You Just Glue Wainscoting?
Yes, you can glue wainscoting. Just make sure to properly prep the surface, use a strong adhesive, and secure the panels in place until the glue sets. It’s important to follow the installation instructions and ensure a secure bond for long-lasting results.
What Kind Of Glue Do You Use For Wainscoting?
For wainscoting, use an adhesive specifically designed for woodworking or paneling.
How To Install Wainscoting Lowes?
To install wainscoting from Lowes, follow these steps: 1. Measure the wall height and mark the desired wainscoting height. 2. Apply construction adhesive to the back of each wainscoting panel. 3. Press the panels firmly against the wall, making sure they are level.
4. Attach the baseboard and chair rail for a finished look. 5. Fill any gaps with caulk, sand the panels, and paint or stain as desired.
Should Wainscoting Be Glued?
Wainscoting should be glued to ensure a secure and long-lasting installation.
Conclusion
Installing pre-made wainscoting panels is a great way to enhance the appearance of your home. By following the step-by-step instructions provided in this blog post, you can easily achieve a professional-looking result. Remember to measure accurately, use the right tools, and take your time during the installation process.
With a little patience and effort, you can transform your walls with beautiful wainscoting panels that will add charm and character to any room.