To install a barn sliding door, measure the opening, mark the mounting holes, drill pilot holes, attach the track, install the door hangers, and hang the door. Barn sliding doors can enhance the aesthetics of your space while providing functional benefits.
Whether you want to create a rustic farmhouse look or you’re looking for an alternative to traditional swinging doors, barn sliding doors are a popular choice. This guide will walk you through the step-by-step process of installing a barn sliding door in your home or office.
Follow these instructions to add a touch of charm and functionality to your space with a barn sliding door.
Choosing The Right Barn Sliding Door: Factors To Consider
When it comes to adding a touch of rustic charm and functional elegance to your space, a barn sliding door is an excellent choice. Not only does it save space, but it also adds character and enhances the overall ambiance. However, before you embark on installing a barn sliding door, there are several factors you need to consider. In this guide, we will explore the different types of barn sliding doors, the size and dimensions to look out for, as well as the materials, finishes, style, and design options available.
Types of barn sliding doors
Before you begin shopping for a barn sliding door, it’s crucial to understand the different types available. Here are the most common options:
- Classic barn door: This is the traditional style that comes to mind when you think of barn sliding doors. It features a single panel and slides along a track mounted above the doorway.
- Dutch door: This unique style is divided horizontally, allowing you to open the top and bottom halves independently. It’s perfect for adding ventilation while maintaining privacy.
- Double barn door: If you have a larger opening, consider opting for a double barn door. This design features two panels that slide open in opposite directions, creating a stunning visual effect.
- Modern barn door: For a sleek and contemporary look, go for a modern barn door. These doors often feature clean lines, minimalistic designs, and can be made with various materials like glass and metal.
Size and dimensions
When it comes to choosing the right barn sliding door, size matters. Here are some key dimensions to consider:
| Description | Measurement |
|---|---|
| Door width | Measure the width of your doorway to determine the appropriate door size. Make sure to account for any trim or molding. |
| Height | Measure the height from the floor to the top of the doorway opening. This will help you select a door that fits perfectly within the available space. |
| Clearance | Consider how much clearance is needed for the door to slide correctly along its track. Ensure there is enough space on either side of the doorway. |
Materials and finishes
The choice of materials and finishes for your barn sliding door is essential for both durability and aesthetics. Consider the following options:
- Wood: Opt for solid wood doors for a traditional and rustic look. Different wood species, such as oak or pine, offer varying grain patterns and colors.
- Glass: If you want to add a modern touch or allow more light into a space, consider a glass panel or full-glass barn sliding door.
- Metal: Metal doors provide a contemporary industrial vibe. Look for options like steel or aluminum, which can be powder-coated for added protection.
- Finishes: Choose from various finishes, including stained wood, painted wood, frosted glass, or even custom finishes that match your existing décor.
Style and design options
The style and design of your barn sliding door should complement your overall interior décor. Here are some popular options to consider:
- X-brace: This classic design features diagonal crossbars that add visual interest and structural strength.
- Z-brace: A variation of the X-brace design, the Z-brace features angled boards forming the shape of a ‘Z’.
- Flush: For a minimalistic look, go for a flush barn door, which has a flat, smooth surface without any visible panels or designs.
Now that you have a better understanding of the different factors to consider when choosing a barn sliding door, you’re ready to select the perfect door that suits your needs and matches your interior design style.
Measuring And Preparing The Door Opening
Taking Accurate Measurements
To ensure a smooth and hassle-free installation of your barn sliding door, it is crucial to begin with accurate measurements. Before taking any measurements, make sure you have all the necessary tools including a tape measure, pencil, and a level. Start by measuring the width of the door opening, taking into account any trim or molding that may need to be accounted for. Next, measure the height of the opening from the floor to the top of the trim. Be sure to measure at multiple points to ensure accuracy.
Assessing the Door Opening for Installation
Once you have taken accurate measurements, it’s time to assess the door opening to determine if it is suitable for the installation of a barn sliding door. Check for any obstructions such as light switches, outlets, or vents that may impede the movement of the door. Additionally, evaluate the condition of the door opening, ensuring that it is structurally sound and capable of supporting the weight of the sliding door. If there are any concerns, it may be necessary to reinforce the door frame or seek professional assistance.
Preparing the Door Frame and Surrounding Area
Before you can begin installing the barn sliding door, it is essential to prepare the door frame and the surrounding area. Start by removing any existing doors or hardware, including hinges and strike plates. Clean the door frame and surrounding walls, removing any dirt or debris that could impact the installation process.
Next, inspect the door frame for any damage or imperfections. Fill any holes or cracks with wood putty or filler, sanding down the surface to create a smooth and level base. Ensure that the door frame is plumb, using a level to adjust if necessary. A properly aligned door frame is essential for smooth sliding functionality.
If you are planning to paint or stain the door frame, now is the time to do so. Apply a coat of primer followed by your chosen finish, allowing sufficient drying time between coats. This not only enhances the appearance but also provides protection against the elements.
Gathering The Necessary Tools And Materials
Before you dive into the installation process of your barn sliding door, it is crucial to have all the tools and materials handy. This will not only make the installation smoother but also save you from any last-minute hassle. In this section, we will discuss the essential tools you need, the required materials for mounting the door, and some optional accessories that can enhance the functionality or aesthetics of your barn sliding door installation.
Essential tools for the installation process
Make sure you have the following tools on hand before you begin installing your barn sliding door:
- Power drill with drill bits
- Tape measure
- Level
- Screwdrivers (Phillips and flathead)
- Socket wrench
- Chisel
- Hammer
- Pry bar
Having these essential tools at your disposal will make it easier to measure, drill, align, and secure the door during the installation process.
Required materials for mounting the door
In addition to the tools, you will also need the following materials to mount your barn sliding door:
- Barn sliding door kit
- Mounting hardware (such as screws and bolts)
- Lag bolts and washers
- Door stoppers
- Door handle or pull
- Door guide
- Door track
- Spacers
These materials are essential for ensuring a secure and functional installation of your barn sliding door. Be sure to check the instructions provided with your door kit for any specific requirements or additional materials needed.
Optional accessories for additional functionality or aesthetics
If you want to add an extra touch to your barn sliding door, there are several optional accessories you can consider:
- Soft close mechanism: This accessory ensures a smooth and quiet closing of the door.
- Floor guide: A floor guide helps in keeping the door aligned and prevents it from swinging.
- Decorative handles or pulls: These accessories can enhance the aesthetic appeal of your barn sliding door.
- Locking mechanism: If you need privacy or added security, a locking mechanism can be a valuable addition.
While these accessories are not necessary for the basic installation, they can greatly enhance the functionality and overall look of your barn sliding door.
Installing The Barn Sliding Door Track System
Once you have gathered all the necessary materials and tools for your barn sliding door installation, it’s time to start with the most crucial step – installing the track system. The track system provides support and stability to the sliding door, allowing it to smoothly glide open and closed. In this section, we will guide you through the process of determining the placement of the track, marking and drilling holes for track installation, and attaching the track securely to the wall or ceiling. Follow these steps and you’ll have your barn sliding door track system installed in no time!
Determining the placement of the track
Before you begin installing the barn sliding door track system, it’s important to determine the ideal placement for the track. This will depend on the size and design of your sliding door, as well as the available space in the room. To determine the placement of the track, follow these guidelines:
- Measure the height of the door opening from the floor to the top of the opening.
- Divide the height measurement in half to find the center point of the opening.
- Mark the center point on the wall or ceiling.
- Measure the width of the door opening and mark the side points on the wall or ceiling, ensuring they are equidistant from the center point.
- The track should be installed slightly wider than the door opening to allow for proper clearance.
Marking and drilling holes for track installation
Once you have determined the placement of the track, it’s time to mark and drill the holes for installation. Follow these steps:
- Hold the track against the wall or ceiling, aligning it with the marked points.
- Using a pencil, mark the hole locations on the wall or ceiling through the pre-drilled holes in the track.
- Remove the track and set it aside.
- Using an appropriate drill bit for your wall or ceiling material, drill pilot holes at the marked locations.
- Ensure the drilled holes are level and align with the center point and side points.
Attaching the track to the wall or ceiling securely

Now that you have marked and drilled the holes, it’s time to attach the track securely to the wall or ceiling. Follow these steps:
- Position the track against the wall or ceiling, aligning the pre-drilled holes with the pilot holes.
- Insert the appropriate screws or bolts through the holes and into the pilot holes.
- Tighten the screws or bolts using a screwdriver or wrench, ensuring they are securely fastened.
- Double-check the level of the track to ensure it is straight.
- Repeat the process for each set of holes along the length of the track.
Once you have attached the track securely to the wall or ceiling, you can proceed with the rest of the barn sliding door installation process. Stay tuned for the next section where we will guide you through attaching the door hangers and hanging the sliding door!
Mounting The Barn Sliding Door Panels
Mounting the barn sliding door panels is an essential step in the installation process. By following these steps, you can ensure that your door panels are securely attached and will glide smoothly along the track.
Preparing the door panels for installation
Before you can mount the barn sliding door panels, it’s crucial to prepare them properly. Here’s how:
- Measure and cut the door panels: Measure the height and width of the door opening and cut the door panels to the appropriate size. Ensure the edges are smooth and even.
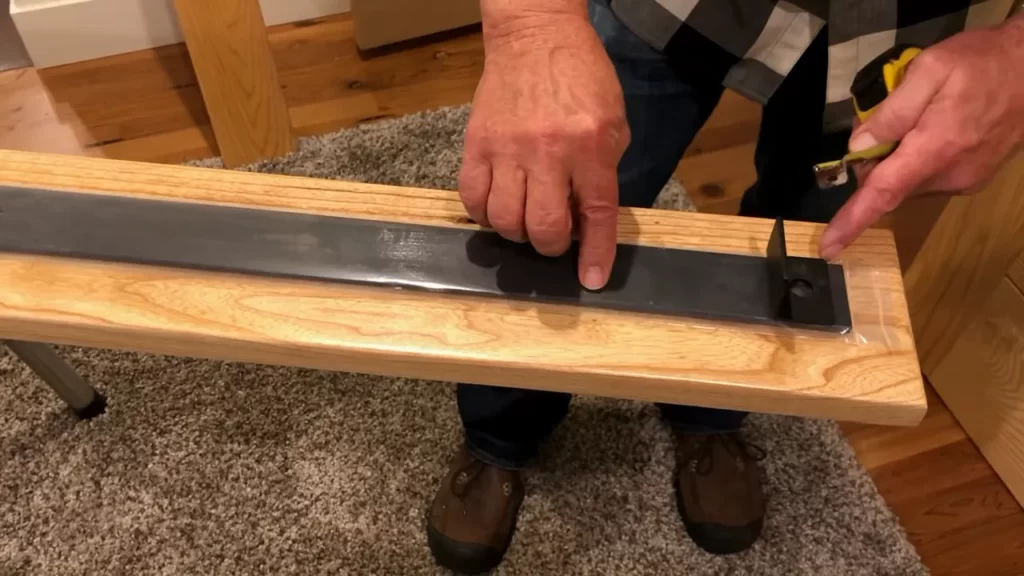
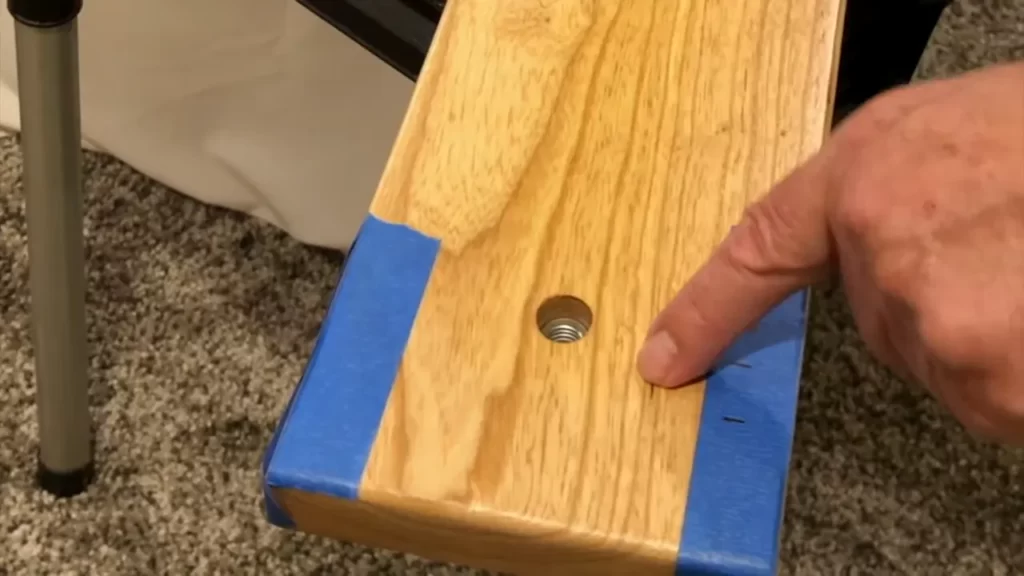
- Pre-drill holes: To prevent splitting, pre-drill holes on the top and bottom of the door panels for the hangers or rollers.
- Finish the door panels: Apply a finish or paint to the door panels according to your preference. This will protect the wood and enhance the overall look.
Installing the hangers or rollers on the door panels
Next, you’ll need to install hangers or rollers on the door panels. Follow these steps:
- Select the appropriate hangers or rollers: Choose hangers or rollers that are suitable for the weight and size of your door panels.
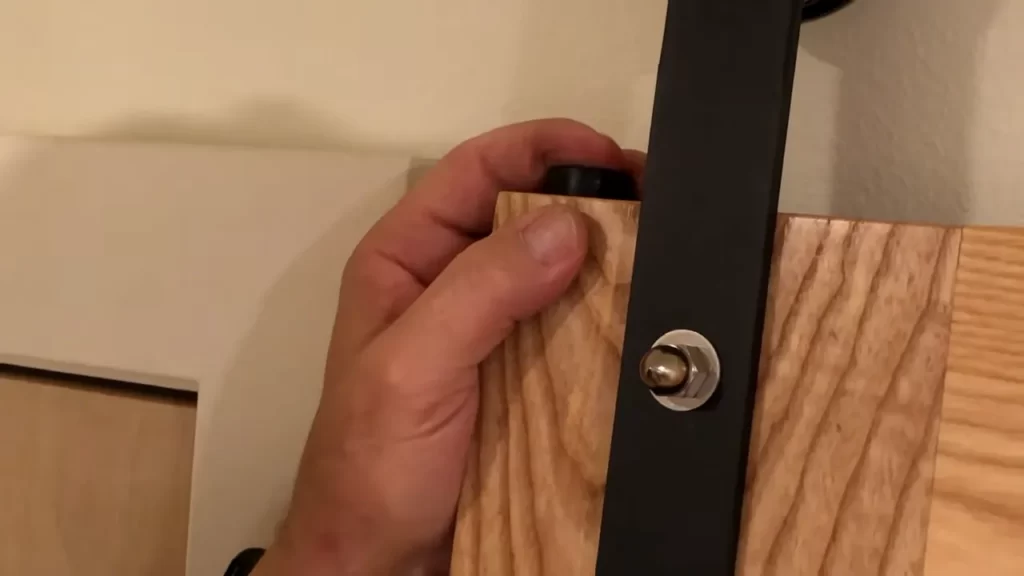
- Attach the hangers or rollers: Position the hangers or rollers on the top of the door panels and align them with the pre-drilled holes. Secure them firmly using screws or bolts.
- Adjust the hangers or rollers: Ensure that the hangers or rollers are properly adjusted. They should be level and allow the door panels to slide smoothly along the track.
Hanging the door panels on the track
Finally, it’s time to hang the door panels on the track. Follow these steps:
- Install the track: Measure and mount the track above the door opening. Ensure that it is level and securely attached to the wall.
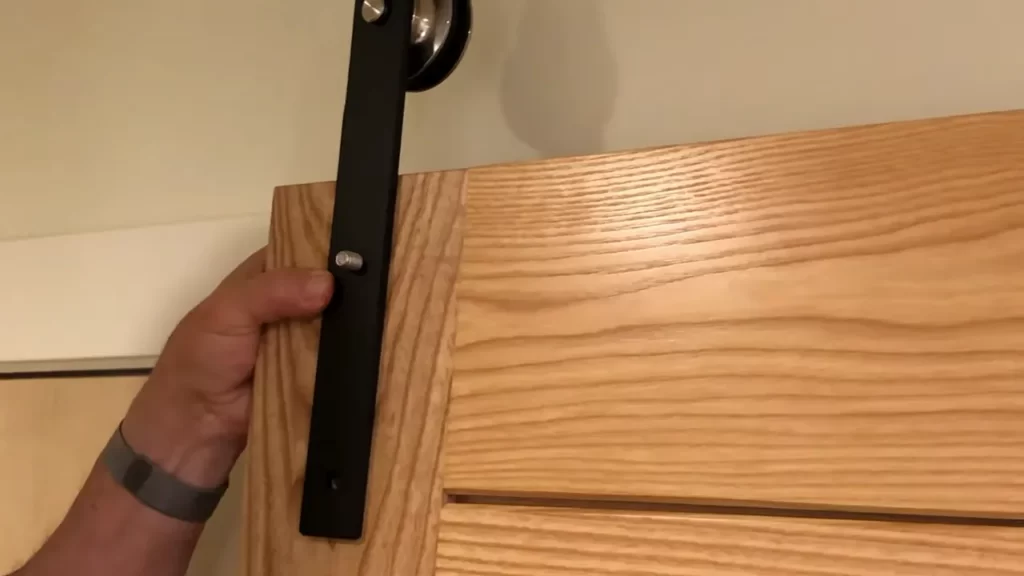
- Attach the door panels to the track: Lift the door panels and hook the hangers or rollers onto the track. Ensure that they are properly aligned and engaged with the track.
- Test the sliding movement: Slide the door panels back and forth to test the smoothness of the movement. Make any necessary adjustments to ensure optimal performance.
By following these steps, you can successfully mount your barn sliding door panels. With proper installation, your barn sliding door will not only add a rustic charm to your space but also provide functionality and easy access.
Adjusting And Fine-Tuning The Barn Sliding Door
Checking the Alignment of the Door Panels
Ensuring that your barn sliding door is properly aligned is crucial for its smooth operation. To begin, visually inspect the door panels and check if they are parallel to the frame and evenly spaced. Take note of any areas where the panels may be misaligned or not sitting flush with the frame.
If you notice any misalignment or uneven spacing, you can adjust the door panels by loosening the bolts or screws that hold them in place. Gently tap the panels with a rubber mallet to nudge them into the desired position. Make sure to check the alignment again after making adjustments to ensure the door panels are straight and properly aligned.
Adjusting the Rollers or Hangers for Smooth Movement
The rollers or hangers of your barn sliding door play a crucial role in its smooth movement. If you find that the door is difficult to slide or feels uneven, it may be necessary to adjust the rollers or hangers. Start by locating the adjustment screws or bolts on the hangers or track that hold the rollers in place.
Using a wrench or screwdriver, make small adjustments to these screws or bolts, turning them clockwise to raise the rollers and counterclockwise to lower them. This will help to ensure that the door slides smoothly along the track without any hitches or obstructions. Test the door’s movement after each adjustment, making further tweaks as needed until it glides effortlessly along the track.
Ensuring Proper Clearance and Leveling
Proper clearance and leveling are crucial for the smooth and secure operation of your barn sliding door. To ensure proper clearance, check that the door panels have enough space to slide freely without scraping against any obstructions or rubbing against the frame.
To achieve proper leveling, use a level tool to check if the top track or rail is horizontal. If it’s not, adjust the track or rail by tightening or loosening the screws holding it in place. This will help ensure that the door slides evenly and prevents any jams or uneven movement.
Additionally, check the bottom track or guide for any obstructions or debris that may hinder the door’s movement. Clear any debris and ensure that the guide is securely attached to the floor. This will help maintain stability and prevent any wobbling or misalignment.
Remember to test the door’s movement after making any adjustments to ensure that it slides smoothly and operates without any issues. By following these steps, you’ll be able to adjust and fine-tune your barn sliding door, ensuring its optimal performance.
Installing The Barn Sliding Door Hardware
Once you’ve chosen your perfect barn sliding door, it’s time to move on to the installation process. One crucial aspect of this installation is mounting the door hardware. This step ensures the door operates smoothly and securely. In this section, we will guide you through the key steps for installing the barn sliding door hardware, including securing the floor guide, adding door handles or pulls, and securing door stops.
Installing the floor guide for stability
One important element in the installation of barn sliding doors is the floor guide. The floor guide ensures the door stays in place and prevents any unwanted swinging or swinging during operation. To install the floor guide, follow these steps:
- Measure the distance from the bottom of the door to the desired location of the floor guide.
- Mark the position on the floor with a pencil or tape.
- Screw the floor guide into the marked position, ensuring it is secure and level.
Adding door handles or pulls for functionality
Door handles or pulls are not only functional but also enhance the overall appearance of your barn sliding door. To add door handles or pulls, follow these steps:
- Choose the type and design of handles or pulls that best match your door and personal style.
- Measure the desired height and position for the handles or pulls on the door.
- Use a measuring tape or ruler to mark the exact points where the handles or pulls will be installed.
- Securely attach the handles or pulls to the marked positions using screws or other provided hardware.
Securing door stops for preventing overextension or collision
To prevent your barn sliding door from overextending or colliding with anything in its path, it’s crucial to install door stops. Follow these steps to secure door stops:
- Measure and mark the desired locations for the door stops on the track.
- Attach the stops to the marked positions using the provided screws or hardware.
- Ensure the door stops are securely fastened and aligned to prevent the door from going beyond its intended limits.
By following these steps and properly installing the barn sliding door hardware, you can ensure smooth operation, stability, and overall functionality of your barn door. Take the time to carefully measure, mark, and secure each component for optimal results. With the right hardware and installation, your barn sliding door will be a beautiful and practical addition to your space.
Testing And Finishing Touches
Once you have successfully installed your barn sliding door, it is vital to test its functionality and make any necessary adjustments before adding the final finishing touches. Ensuring that the door operates smoothly and seamlessly is crucial for both practicality and aesthetics. In this section, we will explore the steps involved in testing the door’s functionality, making any necessary adjustments, and applying the finishing touches to complete the installation process.
Testing the door’s functionality and movement
Once your barn sliding door is securely installed, it’s time to test its functionality and movement. Testing the door will help identify any issues that need to be addressed, ensuring a smooth and hassle-free operation. Here’s how you can test the door’s functionality:
- Try opening and closing the door multiple times to ensure it moves smoothly along the track.
- Pay attention to any unusual noises or resistance during the operation. This could indicate a misalignment or other issues.
- Check the door’s locking mechanism, if applicable, to ensure it works properly.
- Verify that the door stays securely in place when closed, without any noticeable gaps or misalignment.
Making any necessary adjustments
If you encounter any issues during the functionality test, adjustments may be required. Here are the steps you can follow to make necessary adjustments:
- Inspect the door’s track and hangers for any signs of misalignment or damage.
- If you notice misalignment, use a level to make adjustments and ensure the track is straight.
- In case the door is sticking or rubbing against the wall, adjust the hangers accordingly to ensure smooth movement.
- Check the door’s guide wheels, making sure they are properly aligned and lubricated.
- Make any necessary adjustments to the door’s hardware, such as tightening loose screws or replacing damaged parts.
Applying finishing touches
With the functionality and adjustments taken care of, it’s time to add the final finishing touches to complete the barn sliding door installation. These finishing touches will enhance both the practicality and overall look of the door. Consider the following:
- Inspect the door for any scratches, dents, or imperfections. Apply touch-up paint or wood stain, if necessary, to restore its appearance.
- Consider adding trim around the door to give it a polished and finished look. Measure and cut the trim to match the dimensions of the door, then secure it in place using nails or adhesive.
- Ensure the door’s locking mechanism is functioning correctly and that any additional hardware, such as handles or pulls, are securely installed.
- Inspect the surrounding area for any debris or dust. Clean the door and its surroundings to achieve a pristine and presentable finish.
By following these steps, you can successfully test the functionality of your barn sliding door, make any necessary adjustments, and apply the finishing touches to complete the installation process. Taking the time to ensure a properly functioning and aesthetically pleasing barn sliding door will enhance the overall appeal and functionality of your space.
Maintenance And Care For Barn Sliding Doors
Introduction
Maintenance and care are essential for keeping your barn sliding doors functioning smoothly and looking great for years to come. By regularly cleaning and maintaining the door panels and track, lubricating the rollers or hinges, and addressing common issues promptly, you can ensure that your barn sliding door remains a reliable and attractive feature of your property. In this article, we will provide you with easy-to-follow tips and techniques to help you maintain and care for your barn sliding doors effectively.
Cleaning and Maintaining the Door Panels and Track
Regular cleaning and maintenance of the door panels and track are essential to prevent the buildup of dirt, debris, and grime that can hinder the smooth operation of your barn sliding doors. Here are some steps you can follow to keep your door panels and track clean:
- Start by removing any loose debris, such as leaves or dust, from the track using a soft brush or broom.
- Wipe down the door panels and track using a damp cloth or sponge to remove any dirt or stains. For tougher stains, you can use a mild detergent mixed with water.
- Once cleaned, ensure that the door panels and track are thoroughly dry before closing the door. This helps prevent moisture build-up that can lead to corrosion or damage.
Maintaining a regular cleaning schedule will not only keep your barn sliding doors looking their best but also prolong their lifespan.
Lubricating Rollers or Hinges for Smooth Operation
Lubricating the rollers or hinges of your barn sliding doors is crucial for ensuring smooth and quiet operation. Follow these simple steps to keep your doors running smoothly:
- Start by cleaning the rollers or hinges using a clean cloth to remove any dirt or debris.
- Apply a small amount of lubricant, such as silicone spray or white lithium grease, to the rollers or hinges.
- Move the door back and forth a few times to distribute the lubricant evenly.
- Wipe off any excess lubricant to avoid attracting dust or dirt.
Regular lubrication will minimize friction and keep your barn sliding doors operating effortlessly.
Addressing Common Issues and Troubleshooting Tips
Despite regular maintenance, barn sliding doors may encounter issues over time. By understanding common problems and implementing these troubleshooting tips, you can address minor issues before they become major headaches:
| Issue | Troubleshooting Tips |
|---|---|
| Door sticking or difficult to slide | Check the track for any obstructions and remove them.Ensure that the track is properly aligned and adjusted.Clean and lubricate the rollers or hinges. |
| Unusual noises during operation | Tighten any loose screws or bolts.Inspect the rollers or hinges for damage and replace if necessary.Apply lubricant to the rollers or hinges. |
| Door not closing completely | Check for any loose or damaged hardware and tighten or replace as needed.Ensure that the track is clear from debris.Adjust the track or door alignment if necessary. |
By following these troubleshooting tips, you can quickly resolve common issues and keep your barn sliding doors in excellent working condition.
Regular cleaning, proper lubrication, and prompt troubleshooting are the key to maintaining and caring for barn sliding doors. By investing a little time and effort, you can enjoy the beauty and functionality of your barn sliding doors for many years to come.
Enhancing The Barn Sliding Door Installation
Once you have successfully installed a barn sliding door, there are several ways to take your project to the next level. By enhancing the barn sliding door installation, you can elevate the aesthetic appeal and functionality of your door, making it a standout feature in any space.
Adding embellishments or decorative elements
One way to enhance the barn sliding door installation is by adding embellishments or decorative elements. These elements can bring a touch of personality and style to your door, making it a unique focal point. Consider options such as:
- Custom hardware: Opt for decorative handles, locks, or pulls that match the overall design scheme of your space.
- Barn door art: Experiment with stencils, decals, or even hand-painted designs to add charm and character to your door.
- Window inserts: If privacy is not a concern, incorporating window inserts can bring natural light into the room while adding a touch of elegance.
Incorporating additional features, such as soft-close mechanisms
A barn sliding door can be further enhanced by incorporating additional features that improve its functionality. This includes the installation of a soft-close mechanism, which ensures a smooth and quiet closing motion. By preventing the door from slamming shut, a soft-close mechanism adds a touch of luxury and convenience to your barn sliding door. This feature is especially beneficial in spaces where peace and quiet are important.
Customizing the door for personalized style and functionality
Another way to enhance the barn sliding door installation is by customizing the door itself to match your unique style and improve its functionality. This involves making modifications that cater to your specific needs. Some customization options to consider include:
- Paint or stain: Apply a color or finish that complements your interior design scheme, making the barn sliding door seamlessly blend with the overall aesthetics of the room.
- Added storage: Incorporate shelves, hooks, or pockets onto the barn door to maximize space and create a practical storage solution.
- Mirrored panels: Utilize mirrored panels to create the illusion of a larger space and add a touch of glamour.
- Soundproofing: If you require complete sound insulation, consider adding soundproofing materials to the door to minimize noise transfer between rooms.
By enhancing the barn sliding door installation through the addition of embellishments, incorporation of additional features like soft-close mechanisms, or customizing the door for personalized style and functionality, you can transform a simple sliding door into a stunning and functional element of your space.
Frequently Asked Questions Of How To Install A Barn Sliding Door
Is It Easy To Install A Sliding Barn Door?
Yes, installing a sliding barn door is easy. It can be done in a few simple steps without requiring advanced skills.
Can I Install A Barn Door Over Existing Trim?
Yes, it is possible to install a barn door over existing trim. The existing trim will serve as a frame for the door, providing a seamless and stylish look. Make sure to measure the door and trim correctly for a proper fit.
Do Sliding Barn Doors Need A Bottom Track?
Yes, sliding barn doors typically require a bottom track to ensure stability and prevent the door from swinging or moving off its intended path. The bottom track helps to maintain smooth and straight movement when opening or closing the door.
Can I Install A Sliding Door Myself?
Yes, you can install a sliding door yourself. Just make sure to follow the installation instructions carefully and use the right tools. It is a DIY project that can save you money. Remember to measure accurately and ensure the door is level for smooth operation.
Conclusion
Installing a barn sliding door can be a rewarding DIY project that adds character and functionality to your space. By following the step-by-step instructions outlined in this blog post, you’ll be able to successfully transform your room with a stylish and efficient sliding door.
Remember to carefully choose the materials and tools needed, measure accurately, and take your time throughout the process. With patience and a little bit of effort, you’ll have a beautiful barn sliding door that will enhance the aesthetic appeal of your home.