To install outdoor security camera wiring, start by locating the appropriate power source and running a cable from the camera to the power outlet. Then, run a separate cable from the camera to the video recorder or monitoring device, ensuring it is connected securely.
Finally, test the camera to ensure it is functioning properly. Installing outdoor security camera wiring requires careful planning and execution to ensure proper function and connectivity. By following a few simple steps, you can install your outdoor security camera wiring and enhance the security of your property.
We will provide you with a step-by-step guide on installing outdoor security camera wiring. Let’s get started!
Choosing The Right Outdoor Security Camera Wiring
Selecting the appropriate wiring material for outdoor security cameras
Choosing the right outdoor security camera wiring is crucial to ensure the efficiency and durability of your surveillance system. With a myriad of options available in the market, it can be overwhelming to find the best wiring material that suits your needs. To make your selection process easier, consider the following factors:
Factors to consider when choosing outdoor security camera wiring
When it comes to outdoor security camera wiring, there are several factors that you should take into account. These factors will influence the performance and longevity of your surveillance system. Consider the following:
- Weather resistance: Outdoor security camera wiring is exposed to harsh weather conditions, so it is essential to choose a wiring material that is resistant to moisture, extreme temperatures, and UV rays. Opt for wiring with a durable and weatherproof coating, such as PVC or polyethylene.
- Cable type: There are different types of cables available for outdoor security camera wiring, such as coaxial cables, twisted pair cables, and ethernet cables. Coaxial cables are commonly used for long-distance transmission and have excellent signal quality.
- Cable length: Determine the required cable length for your outdoor security camera installation. It is advisable to measure the distance between your surveillance camera and the recording device to ensure that you purchase the right length of wiring. This will prevent any signal loss or interference.
- Power requirements: Consider the power requirements of your outdoor security cameras. Some cameras require PoE (Power over Ethernet) cables, while others may require separate power cables. Ensure that the wiring you choose can handle the power demands of your cameras.
- Installation ease: Opt for outdoor security camera wiring that is easy to install. Look for wires that come pre-terminated with connectors, as this simplifies the installation process and saves you valuable time and effort.
By considering these factors, you can select the most suitable outdoor security camera wiring for your surveillance needs. Remember that investing in quality wiring is essential for ensuring the reliability and performance of your outdoor security cameras.
Planning The Wiring Layout For Outdoor Security Cameras
When it comes to installing outdoor security cameras, planning the wiring layout is a crucial step. Properly planning the wiring layout ensures that you have a clean and efficient installation that maximizes the effectiveness of your cameras. This includes assessing the area for camera installation and determining camera positions, as well as understanding the different types of wires and cables required.
Assessing the area for camera installation and determining camera positions
Before you start installing the outdoor security camera wiring, it’s important to assess the area where you plan to install the cameras. This involves evaluating the potential entry points, vulnerable areas, and any blind spots that need surveillance. By identifying these areas, you can determine the optimal positions for your cameras.
Next, you’ll need to determine the camera positions within these identified areas. Consider factors such as the field of view required, the height at which the cameras should be mounted, and the distance between the cameras and any potential obstacles.
- Assess the vulnerable areas and potential entry points.
- Identify any blind spots that require surveillance.
- Determine the field of view required for each camera.
- Decide on the mounting height for the cameras.
- Consider the distance between the cameras and any potential obstacles.
Understanding the different types of wires and cables required
Once you have identified the camera positions, it’s important to understand the different types of wires and cables required for the outdoor security camera wiring. The type of wiring will depend on various factors such as the distance between the camera and the recording device, the power requirements of the camera, and the environmental conditions the wiring will be exposed to.
There are three main types of wires and cables used for outdoor security camera installation:
- Power cables: These cables provide electrical power to the cameras. It’s important to choose cables that are suitable for outdoor use and can handle the power requirements of your cameras.
- Video cables: These cables transmit the video signals from the cameras to the recording device. Depending on the distance between the camera and the recording device, you may need to use coaxial cables or Ethernet cables for longer runs.
- Network cables: If you plan to connect your security cameras to a network, you’ll need network cables such as Ethernet cables. These cables allow you to access your camera feeds remotely and integrate them with other security systems.
By understanding the different types of wires and cables required, you can ensure that you have the right materials for your outdoor security camera wiring installation.
Essential Tools And Equipment For Outdoor Security Camera Wiring
In order to ensure a smooth and successful installation of your outdoor security camera wiring system, it is important to have the right tools and equipment on hand. By being properly prepared, you can save time and frustration during the installation process. Below, we have outlined the essential tools and equipment you will need to get started.
Recommended tools for installing outdoor security camera wiring
To make the installation process of your outdoor security camera wiring as seamless as possible, it is recommended to have the following tools:
- A drill with various drill bits
- Screwdrivers of different sizes (both Phillips and flathead)
- Wire cutters/strippers
- Pliers
- A staple gun or cable tacker
- A fish tape or wire snake
- A ladder or scaffold
These tools will help you in drilling holes, securing wires, stripping insulation, and maneuvering cables during the installation process. Having these tools readily available will help ensure the job is done accurately and efficiently.
Necessary equipment to ensure a successful installation
In addition to the recommended tools, it is also essential to have the following equipment for a successful installation of your outdoor security camera wiring:
| Equipment | Description |
|---|---|
| Outdoor-rated Ethernet cables | These cables are specifically designed to withstand the elements and provide a reliable connection between your cameras and the recorder. |
| Weatherproof cable connectors | These connectors are essential for protecting the connections between the individual wires of your Ethernet cables. |
| Power over Ethernet (PoE) injectors or switches | These devices deliver power and data to your outdoor security cameras through a single Ethernet cable, simplifying the installation process. |
| Mounting brackets | Mounting brackets are necessary for securely mounting your outdoor security cameras to walls, ceilings, or other surfaces. |
| Sealant or caulk | Applying sealant or caulk around the drilled holes will help prevent water from entering your home or building. |
By having these necessary equipment items on hand, you can ensure that your outdoor security camera wiring system is properly installed, protected from the elements, and providing you with the security and peace of mind you desire.
Gathering The Required Materials For Wiring Installation
Identifying the necessary materials for outdoor security camera wiring
When it comes to installing an outdoor security camera, proper wiring is essential for effective and reliable performance. Before getting started, it’s crucial to gather all the necessary materials to ensure a smooth installation process. By identifying the required materials and creating a comprehensive checklist, you can save time and make sure you have everything you need on hand.
Creating a checklist to ensure all materials are available
Creating a checklist can help you stay organized and ensure you have all the materials required for your outdoor security camera wiring installation. To make it easier for you, here’s a comprehensive checklist that covers all the essential items:
| Item | Quantity | Additional Information |
|---|---|---|
| Outdoor security camera | 1 or more, depending on your needs | Check for the specific model and features you want |
| Power supply | 1 | Make sure the power supply is compatible with the camera |
| BNC connectors | 2 for each camera | Ensure they are suitable for outdoor use |
| Coaxial cable | Length depends on your wiring requirements | Choose a high-quality, weatherproof cable for outdoor installation |
| Power cable | Length depends on your wiring requirements | Opt for a power cable that is suitable for outdoor use |
| Drill | 1 | Make sure you have the appropriate drill bits for your mounting surface |
| Screwdriver | 1 | Check that it fits the screws provided with your camera |
| Waterproof sealant | 1 | Applies to outdoor installations to protect against moisture |
| Mounting accessories | As required | Includes brackets, screws, and anchors for securing the camera |
It’s important to note that this checklist serves as a general guide, and you may need additional materials based on your specific camera model and installation requirements. Always refer to the manufacturer’s instructions to ensure you have all the necessary components.
By gathering the required materials and creating a checklist, you’ll be well-prepared for your outdoor security camera wiring installation. Having everything you need readily available ensures a seamless and efficient process, allowing you to enhance the security of your outdoor space with peace of mind.
Measuring And Cutting Outdoor Security Camera Wiring
When installing outdoor security cameras, one of the most crucial steps is measuring and cutting the wiring to the correct size. This ensures that the wiring is neither too long nor too short, guaranteeing optimal functionality and appearance. In this section, we will discuss the proper techniques for taking accurate measurements and cutting the wiring with precision.
Taking accurate measurements for the wiring length
Before you start cutting the outdoor security camera wiring, it is crucial to take accurate measurements to determine the required length. Follow these steps:
- Identify the camera placement: Decide on the exact location where you will be installing the security camera. Take into consideration factors such as coverage area, angle of view, and proximity to power sources.
- Measure the distance: Use a measuring tape to determine the distance between the camera placement and the power source. Make sure to consider any obstacles or corners that the wiring needs to navigate.
- Add extra length: It’s always better to have a little extra wiring length for flexibility and potential future adjustments. Add a few extra feet to your measurement to accommodate any unforeseen changes or requirements.
Proper techniques for cutting the wiring to the correct size
Once you have obtained accurate measurements for the required wiring length, it’s time to cut the wire to the correct size. Here are some proper techniques to ensure precise cutting:
- Use a wire cutter: Invest in a high-quality wire cutter that can cleanly sever the wiring without causing any damage or frayed edges. This will ensure a neat and professional installation.
- Make a clean cut: Hold the wire securely and position the wire cutter just below the desired length. Apply even pressure and make a single, clean cut through the wire. Avoid using excessive force that may distort the shape or impair the functionality of the wire.
- Check the ends: After cutting the wire, inspect the ends for any irregularities. Trim any rough edges or excess strands to achieve a smooth finish.
- Test the length: Once the wire has been cut to the proper size, test its length by connecting it to the security camera and power source. Ensure that the wire is long enough to reach the desired locations and that the camera is receiving sufficient power.
By using these proper techniques for measuring and cutting outdoor security camera wiring, you can ensure a seamless installation process. Taking accurate measurements and making precise cuts will result in a professional-looking setup that enhances the security and functionality of your outdoor surveillance system.
Preparing Outdoor Areas For Wiring Installation
Before you start installing outdoor security camera wiring, it’s important to properly prepare the installation area. This will ensure that the process goes smoothly and that your wiring is protected from any potential damage. In this section, we will cover two important steps: clearing obstacles and debris from the installation area, and installing conduit or protective coverings to shield the wiring from the elements.
Clearing Obstacles and Debris from the Installation Area
One of the first things you should do when preparing the outdoor area for wiring installation is to clear away any obstacles and debris. This will not only provide a clear path for the wiring but will also prevent any potential tripping hazards or obstructions. Here are a few steps to follow:
- Survey the area: Take a thorough look at the installation area and identify any objects, such as rocks, tree branches, or flower pots, that may hinder the installation process.
- Remove obstacles: Remove any large objects that are obstructing the area. This may involve moving potted plants, clearing away furniture, or trimming overhanging branches.
- Clean up debris: Clear away any loose debris, such as leaves, dirt, or small rocks. This will help prevent any interference with the wiring and ensure a clean installation area.
By taking the time to properly clear the installation area, you can ensure a smoother and more efficient wiring installation process.
Installing Conduit or Protective Coverings
Once the installation area is clear of obstacles and debris, the next step is to install conduit or protective coverings to shield the wiring from the elements. This will help prevent damage to the wiring and ensure its longevity. Follow these steps to install conduit or protective coverings:
- Select appropriate materials: Choose the right conduit or protective coverings based on the outdoor conditions and the type of wiring you are installing.
- Measure and cut: Measure the length of the wiring path and cut the conduit or protective coverings accordingly. Make sure to leave some extra length for any bends or turns.
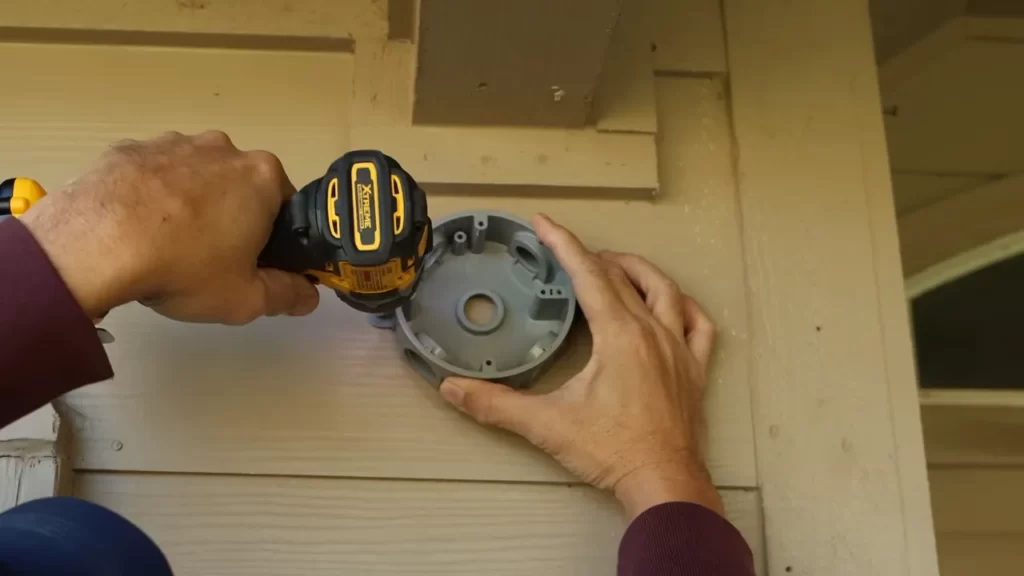
- Secure in place: Attach the conduit or protective coverings to the surface using appropriate fasteners or adhesive. Ensure that it is securely fastened and does not move or shift.
- Route the wiring: Thread the wiring through the conduit or protective coverings, ensuring a neat and organized layout.
Protecting your outdoor security camera wiring from the elements is crucial for its proper functionality and longevity. By following these steps, you can ensure that your wiring remains secure and well-protected.
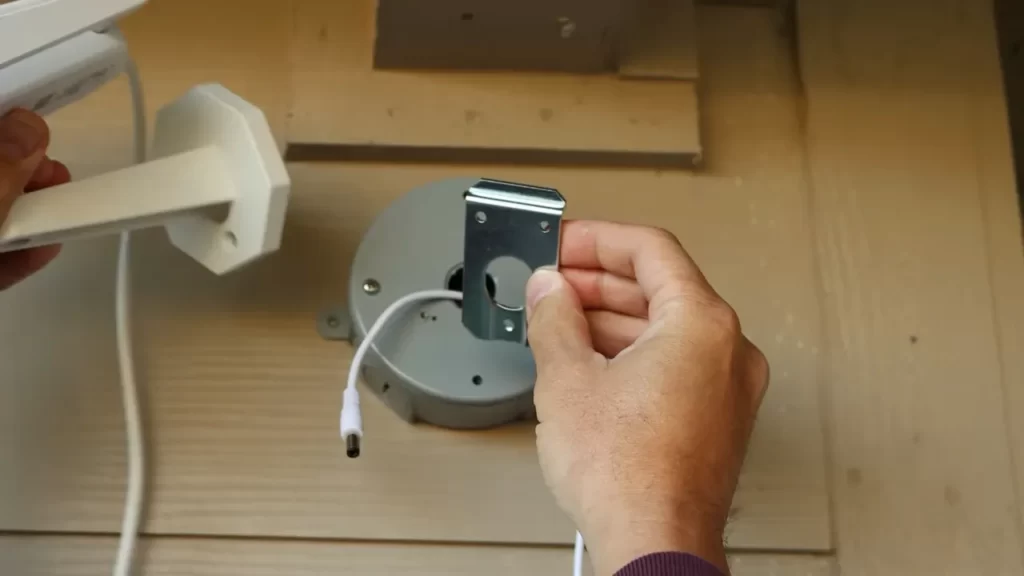
Mounting And Positioning The Security Camera
When it comes to installing outdoor security cameras, one of the first steps is to determine suitable mount locations. This is crucial for ensuring optimal surveillance coverage and achieving the desired security outcomes. Here are some key factors to consider:
- High Traffic Areas: Identify areas with high foot traffic or vehicle movement, such as entrances, driveways, and walkways. These locations are ideal for capturing any suspicious activities that may occur.
- Key Entry Points: Focus on mounting cameras near key entry points like doors and windows. This will help in monitoring unauthorized access attempts and providing valuable evidence if a break-in occurs.
- Vantage Points: Look for vantage points with a wide field of view that can cover larger areas. Mounting cameras at elevated positions or corners can provide a better perspective and reduce blind spots.
- Shadow-Free Zones: Ensure that the selected mount locations are free from obstructions, such as trees or walls, which can create shadows. Shadows can affect the quality of footage and make it difficult to identify individuals.
Once you have determined suitable mount locations for your outdoor security cameras, the next step is to adjust the camera position for optimal surveillance coverage. Consider the following tips:
- Orientation: Position the camera in a way that it covers the desired area horizontally and vertically. Depending on the camera’s lens, you may need to adjust the tilt, pan, and zoom to capture the right area.
- Height: Mount the camera at an appropriate height to avoid tampering or vandalism. For example, placing it at a height of 9 to 10 feet can deter potential intruders while still capturing clear footage.
- Camera Angle: Adjust the camera angle to minimize glare from direct sunlight or other light sources. This will prevent overexposed footage and ensure better visibility in different lighting conditions.
- Test the View: Before finalizing the camera position, test the view by accessing the live feed from a monitoring device. Ensure that there are no obstructed views, and the camera captures the expected field of view.
Running Outdoor Security Camera Wiring
When it comes to installing outdoor security cameras, one crucial step that often gets overlooked is properly running the wiring. The effectiveness of your security system relies heavily on the quality of the wiring installation. In this section, we will explore essential techniques for running the wiring from the camera to the designated recording area, ensuring both functionality and a neat, professional appearance.
Techniques for running the wiring from the camera to the designated recording area
Running the wiring from the camera to the designated recording area requires careful planning and execution. Here are some tried-and-true techniques to ensure a successful installation:
- Choose the best pathway: Before diving into the installation process, carefully consider the most optimal pathway for running the wiring. Look for existing conduits, such as guttering or downspouts, that can provide a safe and hidden passage for the wires.
- Measure twice, cut once: Before cutting any holes or running the wires, accurately measure the distance between the camera and the recording area. This step helps prevent any unnecessary wastage or potential damage to the wiring.
- Select appropriate cables: It’s vital to choose the appropriate cables for your outdoor security camera installation. Opt for reliable, weatherproof cables that can withstand various outdoor elements, such as rain, extreme temperatures, and UV exposure.
- Use cable clips and anchors: To ensure a clean and secure installation, utilize cable clips and anchors to fasten the wiring along the chosen pathway. These accessories not only help keep the wires in place but also minimize the risk of accidental damage.
- Seal any openings: Once the wiring is in place, remember to seal any openings or gaps in walls or outdoor fixtures to prevent water or critters from interfering with the wiring. Proper sealing helps maintain the integrity and functionality of your installation.
Concealing the wiring to maintain a neat and professional appearance
Concealing the wiring is crucial to maintain a neat and professional appearance for your outdoor security camera system. Here are some effective methods to hide those unsightly wires:
- Use cable channels or raceways: Cable channels or raceways are excellent solutions to conceal exposed wiring, running it along walls or other structures. These discreet channels come in various sizes and can be easily painted to match your surroundings, delivering a seamless integration.
- Bury wiring underground: If your outdoor security camera system requires long-distance wiring, burying the cables underground is a fantastic option. This technique not only hides the wiring but also protects it from potential hazards, such as accidental tripping or damage from harsh weather conditions.
- Utilize shrubs or bushes: If you have landscaping elements like shrubs or bushes near your camera locations, take advantage of them to conceal the wiring. Strategically route the wires through the foliage, ensuring they remain hidden while also avoiding any strain on the cables.
- Paint the wires: For an even more discreet appearance, consider painting the exposed wires to match the color of the surrounding background. This method helps camouflage the wiring and minimizes its visual impact.
By following these techniques for running and concealing outdoor security camera wiring, you can achieve a well-installed system that not only functions effectively but also maintains a professional and aesthetically pleasing look.
Connecting Outdoor Security Camera Wiring To The Power Source
Identifying the power source for the security camera system
Before you can connect the outdoor security camera wiring to the power source, it’s important to identify where the power will be coming from. Typically, there are two main options for powering your security camera system: using an existing electrical outlet or utilizing a dedicated power supply. Let’s explore both these options in detail:
- Existing Electrical Outlet: If you already have an electrical outlet in close proximity to where you plan to install your outdoor security camera, this can be a convenient power source. Simply ensure that the outlet has a reliable power supply and is rated to handle the power requirements of your camera system. Remember to consider weatherproofing and protection from the elements when using an existing electrical outlet.
- Dedicated Power Supply: In some cases, it may be more practical to use a dedicated power supply for your security camera system. This involves running a dedicated electrical wire from your main electrical panel to the location of your camera system. A dedicated power supply can provide a more stable and reliable power source, especially if you have multiple cameras or require longer cable runs.
Once you have identified the power source that suits your needs, you can move on to connecting the outdoor security camera wiring.
Properly connecting the wiring to ensure a reliable power supply
Connecting the wiring of your outdoor security camera system to the power source is crucial for ensuring a reliable power supply. Follow these steps to do it properly:
- Turn off the power: Before you begin any electrical work, ensure that the power to the designated circuit is turned off. This will help prevent any accidents or electrical shocks.
- Prepare the outdoor outlet or power supply: If you are using an existing electrical outlet, ensure that it is weatherproofed and suitable for outdoor use. Clean any dirt or debris from the outlet and check the connections for any damage. If you are using a dedicated power supply, ensure that it is securely mounted and accessible.
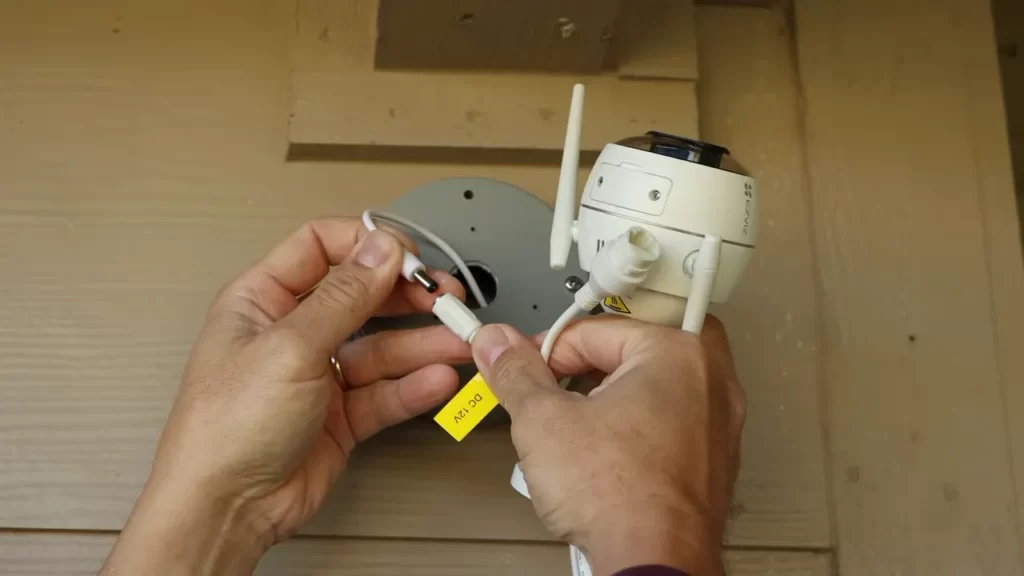
- Connect the wiring: carefully strip the protective coating from the end of your camera’s wiring. Match the colors of the wires to their corresponding terminals – typically red for positive (+) and black for negative (-). Use wire connectors or electrical tape to secure the connections and prevent any loose or exposed wires.
- Test the power supply: Once the wiring is securely connected, turn the power back on and test the camera’s functionality. Ensure that both the video feed and power supply are working correctly before finalizing the installation.
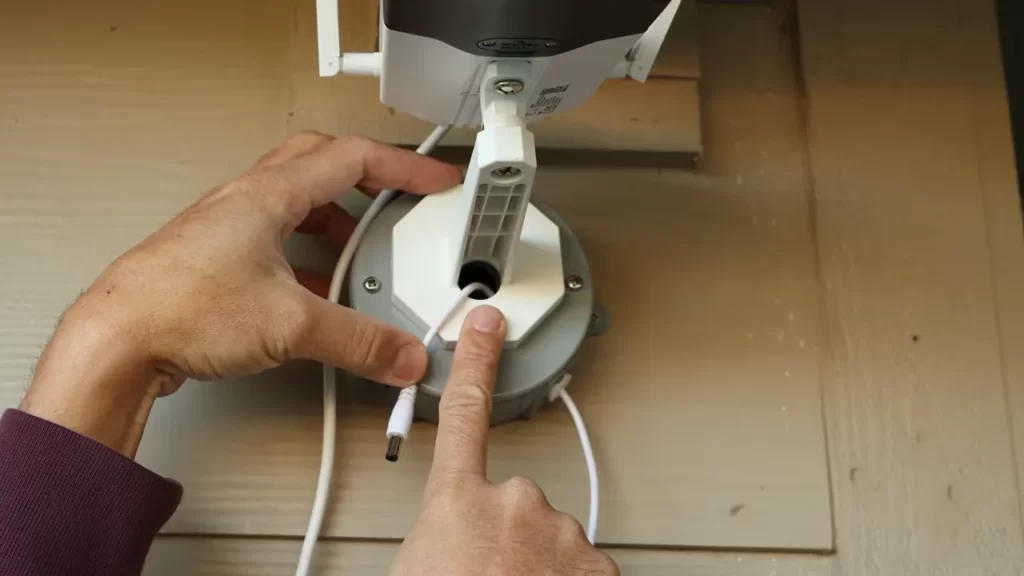
- Secure the wiring: To protect the wiring from damage and ensure longevity, consider using cable clips or conduit to secure it in place. This will help prevent accidental disconnection or damage from environmental factors.
By properly connecting the outdoor security camera wiring to the power source, you can ensure a reliable and uninterrupted power supply for your system. This is essential for capturing high-quality footage and keeping your property secure. Following these steps will help you complete the installation with confidence.
Testing The Wiring And Camera Functionality
Verifying the proper functioning of the wired security camera system
Once you have successfully installed the outdoor security camera wiring, it is crucial to test the system’s functionality before considering the job complete. Verifying that the wiring is connected correctly and that the camera is working as intended is essential for the overall effectiveness of your security setup. Here are some steps to follow to ensure the proper functioning of your wired security camera system.
Troubleshooting common wiring and connectivity issues
Even if you carefully install your outdoor security camera wiring, it’s not uncommon to encounter some issues with connectivity and wiring. Troubleshooting these problems promptly will help ensure that your camera system operates seamlessly. Here are some common issues you might come across and how to address them:
- Checking power supply: Start by verifying that the power supply is properly connected to the camera. Ensure that the power cables are securely plugged in and that there is a stable power source.
- Inspecting video cables: Examine the video cables for any signs of damage or loose connections. Ensure that the cables are tightly connected to both the camera and the recording device.
- Testing camera feed: To test the camera feed, connect the wiring to the recording device and check if you are receiving a clear and uninterrupted video signal. Adjust the camera angle if necessary.
- Verifying network connectivity: If you have a wired security camera system that connects to the internet, ensure that the network cables are properly connected to the camera and the network router. Check if the camera is correctly recognized by your network and if you can access the live feed remotely.
By carefully following these troubleshooting steps, you can identify and resolve any common wiring and connectivity issues that may arise during the installation process. Doing so will help you ensure the optimal performance and functionality of your outdoor security camera system.
Securing The Outdoor Security Camera Wiring
Applying weatherproofing measures to protect the wiring from moisture and extreme conditions
When it comes to securing the outdoor security camera wiring, one of the essential steps is to apply weatherproofing measures. This is crucial to protect the wiring from moisture and extreme weather conditions that can potentially damage the system. By taking proper precautions, you can ensure the longevity and optimal functioning of your security camera system.
Here are some effective weatherproofing measures you can implement:
- Use outdoor-rated cables: Make sure to choose outdoor-rated cables that are specifically designed to withstand the elements. These cables are typically constructed with waterproof materials such as polyethylene or gel-filled insulation to provide added protection against moisture.
- Install conduit or protective tubing: To safeguard the wiring, consider installing conduit or protective tubing. This will provide an extra layer of defense against external factors like rain, snow, or extreme temperatures. Ensure the conduit or tubing is properly sealed to prevent any water or debris from entering.
- Apply silicone sealant: Seal any openings or connections in the wiring using a high-quality silicone sealant. This will create a watertight barrier and prevent moisture from seeping into vulnerable areas. Apply the sealant generously around cable entry points, junction boxes, and any other exposed connections.
- Elevate the wiring: To minimize the risk of water damage, elevate the wiring off the ground. This can be achieved by attaching it to a wall or using mounting brackets to keep it away from potential puddles or flooding.
- Choose appropriate locations: When positioning your outdoor security camera, select areas that offer natural shelter or coverage. This can include areas under eaves, near overhead structures, or under the protection of awnings. By placing the camera in a sheltered location, you can reduce the exposure to harsh weather conditions.
Securing the wiring to prevent tampering or accidental damage
In addition to protecting the wiring from the elements, it’s crucial to secure it properly to prevent tampering or accidental damage. This will ensure the overall effectiveness of your security camera system and maintain its integrity.
Here are some effective ways to secure your outdoor security camera wiring:
- Conceal the wiring: Whenever possible, conceal the wiring to deter potential tampering or vandalism. By running the cables through walls, in attics, or under siding, you can make them less accessible and less likely to be interfered with.
- Use cable clips or staples: Secure the wiring along walls or other surfaces using cable clips or staples. This will prevent it from hanging loosely and becoming a tripping hazard. Ensure the clips or staples are properly fastened to provide a secure hold, but avoid over-tightening to prevent damage to the cables.
- Utilize protective housing or enclosures: Consider investing in protective housing or enclosures for your security camera system. These specialized cases provide an extra layer of protection for both the camera and the wiring. They are designed to resist tampering and protect against physical damage, while still allowing for proper functionality.
- Lock access points or junction boxes: If applicable, lock all access points or junction boxes where the wiring is connected. This will prevent unauthorized individuals from manipulating the system or tampering with the wiring.
- Regularly inspect and maintain: Lastly, regularly inspect the wiring and perform routine maintenance checks. Look for any signs of damage, loose connections, or potential vulnerabilities. Address any issues promptly to ensure the continued security and reliability of your outdoor security camera system.
By taking the necessary steps to secure your outdoor security camera wiring, you can protect your investment, deter potential threats, and promote peace of mind. Implementing weatherproofing measures and utilizing proper security practices will help ensure the longevity and functionality of your system in various environmental conditions.
Organizing And Labeling Outdoor Security Camera Wiring
Organizing and Labeling Outdoor Security Camera Wiring
When installing outdoor security camera wiring, one crucial step that often gets overlooked is organizing and labeling the wiring connections. Proper organization and labeling not only make installation easier but also ensure that future maintenance and troubleshooting are hassle-free. In this section, we will discuss the importance of labeling wiring connections and components and how to create an organized system for efficient management.
Proper labeling of wiring connections and components for easy identification
Labeling the wiring connections and components of your outdoor security camera system is essential for easy identification. By clearly labeling each connection and component, you eliminate confusion and save time during installation and any subsequent maintenance or troubleshooting.
To label the wiring connections, you can use small labeling tags or adhesive markers to identify each wire. It is recommended to indicate the purpose of each wire, such as power, video, audio, or ground. Additionally, labeling the connectors or terminals on each end of the wires will help in quickly identifying the correct connections during setup or repairs.
When labeling components, such as the camera, DVR, or power supply, use clear and concise labels to avoid any ambiguity. For example, instead of labeling a camera as “Camera 1,” it’s better to label it as “Front Door Camera” or “Backyard Camera.” This way, anyone handling the system will understand the purpose of each component without confusion.
Creating an organized system for future maintenance and troubleshooting
Organizing the outdoor security camera wiring not only streamlines the installation process but also facilitates future maintenance and troubleshooting. By following a systematic approach, you can easily locate and identify any faulty connections or components.
An effective way to create an organized system is to keep a detailed record or diagram of the wiring connections. This record can include information such as the wire colors, labeling tags, and the connection points on each component. Storing this record in a safe and easily accessible place ensures that it can be referred to whenever required.
Furthermore, you can utilize cable management tools such as cable ties, cable clips, or conduit to keep the wiring organized and protected from external elements. Grouping the wires together and securing them using these tools not only minimizes the chance of damage but also makes it easier to locate specific connections when needed.
In conclusion, organizing and labeling your outdoor security camera wiring is a crucial step in the installation process. It simplifies the setup, future maintenance, and troubleshooting, allowing for an efficient and reliable surveillance system. By taking the time to properly label and create an organized system, you can ensure that your security camera wiring is tidy, easily manageable, and functions optimally.
Conducting A Final System Check
Once you have successfully installed the outdoor security camera wiring and completed all the necessary connections, it is crucial to conduct a final system check to ensure that your camera system is performing optimally. This step is essential in guaranteeing the effectiveness of your security measures and providing you with peace of mind. In this section, we will discuss how to check the overall camera system performance and functionality, as well as making any necessary adjustments or refinements to enhance its effectiveness.
Checking the overall camera system performance and functionality
Before considering any adjustments or refinements, it is important to evaluate the performance and functionality of your camera system. Conduct a comprehensive assessment to ensure that all cameras are recording and capturing footage correctly. Consider the following factors:
- Verify that each camera is capturing clear and high-quality video.
- Make sure that all cameras are properly positioned to cover the desired areas.
- Check the camera angles to ensure they capture the optimal view.
- Test the camera’s night vision capabilities to ensure they function properly in low-light conditions.
- Confirm that the cameras are correctly synced with the recording device or surveillance system.
- Ensure that the camera’s motion detection feature is working effectively by conducting tests.
Making any necessary adjustments or refinements to improve the system’s effectiveness
After evaluating the overall performance of your camera system, you may find areas where adjustments or refinements are necessary to enhance its effectiveness. Consider the following steps:
- Reposition any cameras that are not covering the desired areas or are capturing irrelevant footage.
- Install additional cameras in blind spots or areas with limited coverage.
- Adjust the camera angles to optimize their field of view.
- Install superior lenses or upgrade cameras to improve video quality.
- Ensure that all camera connections are secure and weatherproof.
- Test and calibrate the motion detection settings to reduce false alarms.
By conducting a final system check and making necessary adjustments or refinements, you can maximize the effectiveness of your outdoor security camera wiring installation. Regularly reviewing and maintaining your camera system will help provide reliable surveillance, contributing to the safety and security of your property.
Frequently Asked Questions For How To Install Outdoor Security Camera Wiring
What Is The Best Way To Run Security Camera Wires?
The best way to run security camera wires is to plan the path beforehand, use conduit or cable trays for protection, and avoid any interference sources. Keep wire lengths to a minimum and use proper connectors for a reliable connection.
How Do You Run Power For Outdoor Security Cameras?
To run power for outdoor security cameras, you can use either a power outlet nearby or a power over Ethernet (PoE) setup. By plugging into a nearby electrical outlet or using a PoE injector or switch, you can ensure your cameras have the necessary power supply for continuous operation.
Can You Run Security Camera Wires Outside?
Yes, it is possible to run security camera wires outside your premises.
How Many Wires Does A Security Camera Need?
A security camera typically requires just one wire for power supply and another wire for video transmission.
How Deep Should Outdoor Security Camera Wiring Be Buried?
Outdoor security camera wiring should be buried at least 18 inches underground to protect it from weather and potential damage.
Conclusion
Installing outdoor security camera wiring may seem daunting at first, but by following these simple steps, you can ensure a safe and efficient installation. From gathering the necessary tools to carefully routing the cables, this guide has covered all the essential aspects.
Remember to always prioritize safety and consult a professional if needed. With a well-installed wiring system, you can rest easy knowing that your outdoor security cameras are providing the utmost protection for your property. Stay vigilant and secure!