To install door hinges, simply follow these steps: measure and mark the hinge placement on the door and frame, drill pilot holes for the screws, attach the hinges to the door and frame using the screws provided, and finally, test the door to ensure smooth operation. When installing door hinges, it is important to have the right tools and follow the correct procedure.
Whether you are replacing old hinges or installing new ones, this guide will provide you with the necessary steps to ensure a successful installation. By following these instructions, you will be able to enhance the functionality of your doors and maintain their longevity.
So, let’s dive into the details of how to install door hinges and transform your doors.
Importance Of Proper Door Hinge Installation
Proper door hinge installation plays a crucial role in the overall functionality and security of your doors. Whether you are installing new hinges or replacing existing ones, ensuring a correct installation is essential for several reasons.
Ensure smooth door operation
One of the primary benefits of proper door hinge installation is ensuring smooth door operation. When hinges are installed correctly, the door can open and close effortlessly without any friction or resistance. This ensures a seamless user experience, preventing any frustrating moments of struggling to open or close the door.
Prevent sagging and misalignment
Inadequate hinge installation can lead to door sagging and misalignment over time. This not only affects the appearance of the door but also affects its functionality. A sagging door can scrape against the floor or frame, causing damage and making it difficult to open or close. Proper hinge installation prevents these issues and ensures that the door remains aligned and level.
Enhance door security
Properly installed door hinges also play a significant role in enhancing door security. When hinges are securely attached to both the door and the frame, they provide added strength and stability. This makes it harder for intruders to forcefully breach the door. In contrast, improperly installed hinges can create vulnerabilities, compromising the security of your property.
Therefore, taking the time to install door hinges correctly is essential for smooth door operation, prevention of sagging and misalignment, and enhanced door security. It is a simple yet crucial step in ensuring the overall functionality and longevity of your doors.
Types Of Door Hinges For Different Applications
When it comes to installing a door, selecting the right type of door hinge is crucial to ensure proper functionality and durability. Different doors require different types of hinges to cater to their specific needs. In this article, we will explore the various types of door hinges and discuss their applications, allowing you to make an informed decision for your door installation project.
Butt Hinges
Butt hinges are one of the most common types of door hinges used in residential and commercial applications. These hinges consist of two rectangular plates, referred to as leaves, joined together by a pin or a rod. Butt hinges are typically surface-mounted and provide a simple and reliable solution for interior doors. They allow for smooth opening and closing of doors while offering stability and durability.
Continuous/Piano Hinges
Continuous hinges, also known as piano hinges, are constructed from a long, continuous piece of metal that runs the entire length of the door. This type of hinge offers enhanced strength and distributes the weight of the door evenly along its length, making it ideal for heavy doors such as those found in commercial settings or industrial applications. Continuous hinges provide a seamless appearance and allow for full 180-degree door swing.
Pivot Hinges
Pivot hinges are a unique type of hinge that allows the door to rotate on a single pivot point. These hinges are mounted at the top and bottom of the door, allowing it to swing in either direction. Pivot hinges offer a clean and contemporary aesthetic and are commonly used in modern architectural designs. They are particularly suitable for large or heavy doors, as they distribute the weight evenly, reducing stress on the frame.
Concealed Hinges
Concealed hinges, as the name suggests, are hinges that are concealed when the door is closed, providing a sleek and seamless appearance. These hinges are installed inside the door and frame, allowing for a clean and minimalist look. Concealed hinges are commonly used in high-end cabinetry and interior doors, where aesthetics are of utmost importance. They offer smooth and silent operation, making them perfect for spaces that require a peaceful environment, such as bedrooms or offices.
By understanding the different types of door hinges available and their respective applications, you can ensure that your door installation project is not only functional but also visually appealing. Whether you’re installing a door in your home, office, or commercial space, selecting the right hinge will make a significant difference in the performance and overall look of your door.
Tools And Materials Required For Installing Door Hinges
Installing door hinges properly is essential for ensuring smooth operation and proper alignment of your doors. To accomplish this task, you’ll need a few specific tools and materials. Here are the key items you’ll need to gather before you begin:
Screwdriver
A screwdriver is one of the most important tools you’ll need for installing door hinges. It allows you to secure the hinges to the door and frame using screws. Make sure to choose a screwdriver that matches the type and size of screws you’ll be using. This will help prevent damage to the screw heads and ensure a tight connection.
Chisel
A chisel is a sharp, flat-bladed tool that will be used to carve out recesses or mortises in the door and frame for the hinges to sit flush. It’s crucial to select a chisel that matches the width of your hinge leaves, as this will ensure a precise and snug fit. The chisel’s sharp edge will also allow you to create clean and professional-looking mortises.
Hinge Template
A hinge template is a handy tool that helps guide your chisel in creating accurate mortises. It typically comes with pre-measured holes and outlines, ensuring consistent and symmetrical mortises for each hinge. This eliminates the guesswork and simplifies the installation process, especially if you’re installing multiple hinges on multiple doors.
Wood Filler
Wood filler is a putty-like substance used to fill in gaps, holes, and imperfections in the wood. During the installation of door hinges, you may need wood filler to rectify any mistakes, cover up chisel marks, or reinforce weak spots. Using wood filler ensures a clean and professional finish, enhancing the overall appearance and durability of the door.
By gathering these essential tools and materials, you’ll be well-prepared to install door hinges with precision and efficiency. Remember to double-check the fit and alignment before securing the hinges in place. With the right tools and attention to detail, you’ll have doors that open and close smoothly in no time!
Preparing The Door And Frame For Hinge Installation
Before you can install door hinges, it is important to properly prepare both the door and the frame to ensure a secure and accurate installation. This step is crucial in order to achieve a smooth and functional door operation. In this section, we will guide you through the necessary steps to prepare the door and frame for hinge installation, including marking the hinge locations, using a hinge template for accuracy, and creating hinge mortises.
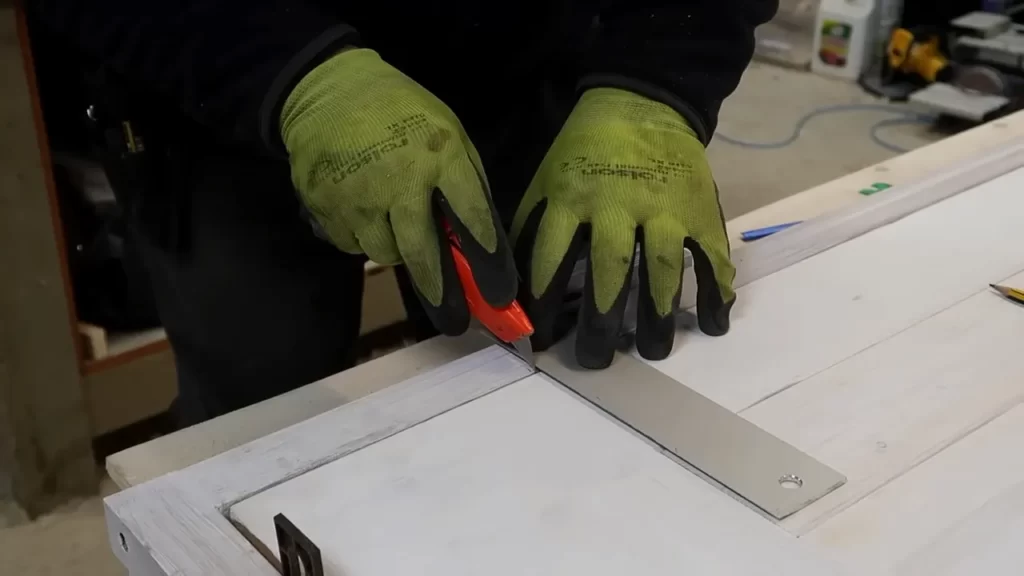
Marking the Hinge Locations
Properly marking the hinge locations is the first step in preparing the door and frame for hinge installation. To do this, follow these simple steps:
- Place the door in the frame, aligning it in the desired position.
- Using a pencil, make small marks on the door and frame at the top, middle, and bottom of where the hinge should be located.
- Remove the door from the frame and draw a straight line through the marks on both the door and the frame. This will serve as a reference line for your hinge placement.
Using a Hinge Template for Accuracy
To ensure accurate hinge placement, using a hinge template can be extremely helpful. Here is how you can use a hinge template for precise results:
- Obtain a hinge template that matches the size and style of the hinges you will be installing.
- Position the hinge template on the door edge where the hinges will be installed.
- Align the template with the reference line previously drawn, ensuring it is centered on the door edge.
- Secure the template in place using tape or clamps to prevent it from moving during the marking process.
- Use a pencil or marker to trace the outline of the hinge template onto the door edge. This will provide you with an accurate guide for hinge placement.
- Repeat this process for each hinge location on the door.
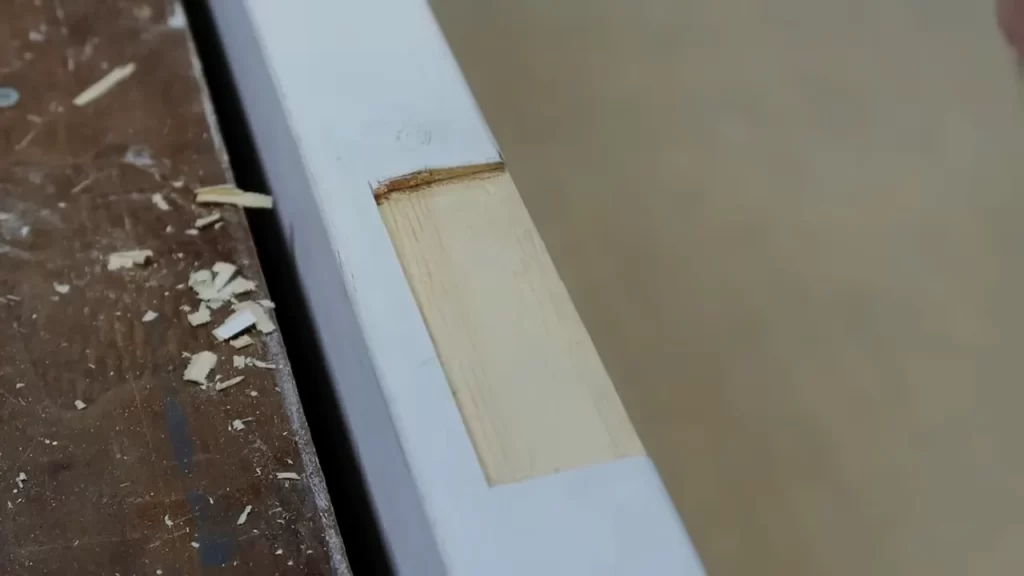
Creating Hinge Mortises
Once the hinge locations are marked, the next step is creating hinge mortises. These mortises allow the hinges to sit flush with the door edge, providing a neat and professional appearance. Here is how you can create hinge mortises:
- Use a chisel and a mallet to carefully remove the wood within the traced outline of the hinge template.
- Take your time and make precise cuts to ensure the mortises are deep enough for the hinges but not too deep, as this could weaken the door structure.
- Check the depth and fit of each mortise by placing the hinges within the mortises. These should fit snugly and sit flush with the door edge.
- If necessary, make any adjustments or corrections to the mortises to ensure a proper fit.
By following these steps to prepare the door and frame for hinge installation, you can ensure a secure and accurate installation that will allow your door to function smoothly. Take your time with each step and pay attention to detail to achieve the best results.
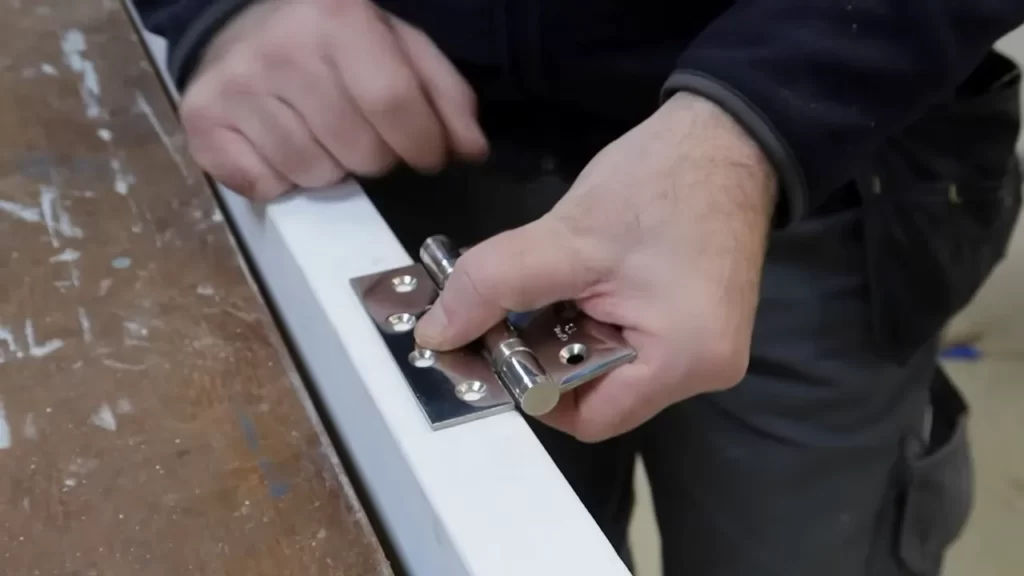
Installing The Hinges On The Door And Frame
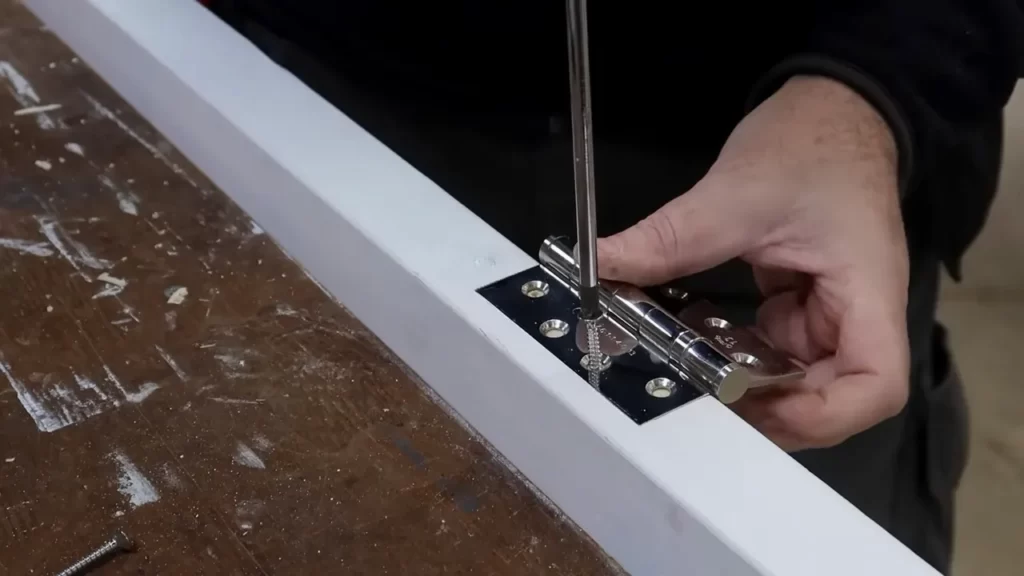
Installing the Hinges on the Door and Frame Positioning and aligning the hinges: Aligning the hinges on the door and frame is crucial to ensure smooth operation and proper function of the door. Here’s how you can position and align the hinges for flawless installation: 1. Measure and mark: Start by measuring the height of the door and the corresponding height on the frame where the hinges will be placed. Use a pencil to mark these measurements on both the door and the frame. 2. Determine the hinge type: Before proceeding, make sure you have the correct hinge type for your door. There are different types of hinges available, such as butt hinges, pivot hinges, and concealed hinges. Choose the hinge that suits your specific door design and needs. 3. Place the hinges: Position the hinges on the marks you made earlier. Make sure they are centered vertically along the height of the door and frame. Use a level to ensure they are also aligned horizontally. 4. Check the swing direction: Determine the swing direction of the door (inward or outward) and mark the appropriate side of the hinges. This will help you ensure that the hinges are properly oriented. Screw placement and tightening: Proper screw placement and tightening are essential to secure the hinges firmly in place. Follow these steps to ensure a strong and durable hinge installation: 1. Pre-drill holes: Before inserting the screws, pre-drill pilot holes at the marked positions. This will prevent the wood from splitting and make it easier to drive the screws. 2. Insert the screws: Begin by inserting the screws into the pre-drilled holes. Start with the center screw first, and gradually work your way outward. Use an electric screwdriver or a drill with a screwdriver attachment for faster and more efficient installation. 3. Tighten the screws: Once all the screws are in place, use a screwdriver or drill to tighten them. Avoid over-tightening, as this can strip the screw holes or cause the hinges to crack. Ensure that the screws are snug and secure, but not overly tight. 4. Test the hinge movement: After tightening the screws, test the hinge movement to ensure smooth operation. Open and close the door multiple times to confirm that there are no binding or sticking issues. Make adjustments if necessary. With these simple steps, you can accurately position, align, and secure the hinges on your door and frame. By taking the time to install the hinges properly, you’ll enjoy a properly functioning door that enhances the overall aesthetics and functionality of your space. Now it’s time to put these guidelines into practice and enjoy a hassle-free and perfectly installed door.
Checking The Door Hinge Alignment And Functionality
To ensure the proper functioning of your door, it is essential to regularly check the alignment and functionality of the door hinges. Over time, door hinges may become loose or misaligned, causing the door to sag or stick. In this section, we will discuss the steps involved in checking the door hinge alignment and ensuring its smooth operation.
Closing and Opening the Door
Start by thoroughly observing the door’s movement as you close and open it. Pay close attention to any signs of resistance, sticking, or uneven movement. A well-aligned door should open and close smoothly without any obstructions.
Ensuring Smooth Operation and Proper Alignment
Once you’ve assessed the door’s movement, it’s time to inspect the hinges to identify any misalignment or loose screws. Begin by examining the hinge plates, ensuring they are securely attached to the door and the door frame. Look for any visible gaps or wobbling that could indicate a misaligned hinge.
If you notice any alignment issues, it may be necessary to make adjustments to restore proper functionality. This step is crucial in maintaining the longevity of your door and preventing further damage or unnecessary repairs.
Making Necessary Adjustments
To rectify misalignment, first, check the screws holding the hinges in place. If they are loose, tighten them using a screwdriver but remember not to overtighten, as it can lead to stripped screw holes.
If the hinges are correctly screwed, but the door is still misaligned, additional adjustments may be required. Use a shim, such as a thin piece of cardboard or wood, to create additional support if needed. Place the shim between the hinge plates and the door or door frame, adjusting its thickness until the door aligns properly.
Remember to check both the top and bottom hinges for alignment, as issues with one hinge can affect the entire door’s operation.
| Checklist: | Description: |
|---|---|
| Inspect hinge plates | Ensure they are securely attached with no visible gaps or wobbling. |
| Tighten loose screws | Using a screwdriver, tighten any loose screws on the hinges. |
| Use shims | Place a shim between the hinge plates and the door or door frame if additional support is needed to align the door properly. |
Regularly checking and maintaining your door hinges will help ensure the smooth operation of your doors. By addressing any alignment issues promptly, you can prevent further damage and enjoy a fully functional door for years to come.
Choosing The Right Size And Material For Door
Hinges
When it comes to installing door hinges, it’s essential to choose the right size and material for a secure and long-lasting installation. The size of the hinge must be compatible with the weight and size of the door, while the material should match the door and frame to ensure optimal durability and functionality.
Considering the weight and size of the door
Before choosing door hinges, it’s crucial to consider the weight and size of the door. The weight of the door determines the load-bearing capacity required for the hinges. An inadequate hinge size can lead to sagging doors, which can be both inconvenient and unsafe. To determine the appropriate hinge size, you need to measure the thickness and height of the door.
Matching the hinge material to the door and frame
The material of the door hinges should be carefully matched to the door and frame material to ensure a proper fit and long-lasting performance. Different hinge materials offer varying levels of strength, corrosion resistance, and aesthetics.
Here are some common materials used for door hinges:
| Material | Characteristics |
|---|---|
| Steel | Strong, durable, and suitable for heavy-duty applications. It is resistant to wear and tear, making it ideal for high-traffic areas. |
| Brass | Provides an elegant and classic look. It has excellent corrosion resistance and is often used for interior doors. |
| Stainless Steel | Offers exceptional corrosion resistance and is ideal for exterior applications or environments with high humidity or moisture. |
| Chrome | Creates a sleek and modern aesthetic. It is resistant to rust and corrosion and is commonly used in contemporary interior designs. |
By matching the hinge material to the door and frame, you ensure not only a secure installation but also a cohesive look that complements the overall design of your home or space.
Remember, choosing the right size and material for your door hinges is crucial for the functionality, security, and aesthetic appeal of your doors. Take the time to assess the weight and size of the door and select a high-quality hinge material that suits your needs. By doing so, you’ll enjoy doors that open and close smoothly while enhancing the overall appearance of your space.
Maintaining Door Hinge Performance And Longevity
Properly maintaining your door hinges is essential for ensuring their performance and longevity. Neglecting regular maintenance can lead to squeaky hinges, loose screws, and even damaged hinges. By following a few simple steps, you can keep your door hinges in top condition and avoid unnecessary repairs or replacements.
Regular Lubrication
One of the most effective ways to maintain door hinge performance is by regularly lubricating them. Lubrication not only reduces friction but also prevents rust and corrosion, which can hinder the functionality of the hinges. To lubricate your door hinges, follow these steps:
- Choose a suitable lubricant, such as silicone spray or white lithium grease.
- Carefully spray or apply a small amount of lubricant to the hinges, focusing on the pivot points and moving parts.
- Use a cloth or paper towel to wipe off any excess lubricant.
- Open and close the door a few times to evenly distribute the lubricant.
Regular lubrication, ideally every six months or as needed, will help keep your door hinges functioning smoothly and silently.
Tightening Loose Screws
Over time, the screws on your door hinges can become loose due to constant use, causing the door to sag and affect its overall performance. To tighten loose screws, follow these simple steps:
- Inspect the hinges and identify any loose screws.
- Using a screwdriver, tighten the loose screws by turning them clockwise.
- Check the door to ensure it opens and closes smoothly without any sagging.
- If necessary, repeat the process for any remaining loose screws.
Regularly checking and tightening loose screws will help maintain the stability and functionality of your door hinges.
Repairing or Replacing Damaged Hinges
In some cases, door hinges may become damaged or worn out beyond repair. It is crucial to address these issues promptly to prevent further damage to your door and ensure proper security. To repair or replace damaged hinges, consider these steps:
- Inspect the hinges for any signs of damage such as bent pins, cracks, or excessive wear.
- If the hinges are repairable, gently straighten any bent pins or lubricate them to improve their functionality.
- If the hinges are beyond repair, it is recommended to replace them with new ones.
- Carefully remove the damaged hinges by unscrewing the screws from the door and frame.
- Install the new hinges using the appropriate screws and tighten them securely.
Properly maintaining your door hinges by addressing any damage promptly will help prolong their lifespan and ensure optimal performance.
By following these maintenance techniques, you can keep your door hinges functioning optimally, preventing unnecessary repairs or replacements. Regular lubrication, tightening loose screws, and addressing any damage promptly are key to maintaining door hinge performance and longevity.
Troubleshooting Common Issues With Door Hinges
When it comes to the smooth operation of your doors, properly functioning hinges are essential. However, like any other component of a door, hinges can sometimes encounter common issues that affect their performance. In this section, we will discuss troubleshooting tips for three common issues with door hinges: door sagging or misalignment, hinge squeaking or sticking, and loose hinge screws.
Door Sagging or Misalignment
One of the most common hinge-related problems is door sagging or misalignment. This can occur over time due to frequent use of the door or improper installation. If you notice that your door is not closing properly, rubbing against the door frame, or leaving a gap at the top or bottom, it is likely experiencing sagging or misalignment.
To troubleshoot and resolve this issue, follow these steps:
- 1. Examine the hinges: Check if the hinges are loose or damaged. If any hinge is loose, tighten the screws with a screwdriver. If a hinge is damaged, it may need to be replaced.
- 2. Adjust the hinges: If the hinges are in good condition, but the door is still sagging, you may need to adjust the hinges. Loosen the screws on the hinges slightly, lift the door to the desired position, and tighten the screws back up.
- 3. Use shims: If the door is still misaligned after adjusting the hinges, you can use shims to fill the gap between the hinge and the door frame. This will help bring the door back into alignment.
Hinge Squeaking or Sticking
Hinges can develop squeaks or become sticky over time, causing an annoying noise when opening or closing the door. This can be caused by dirt, rust, or lack of lubrication. To resolve this issue, follow these steps:
- 1. Clean the hinges: Start by cleaning the hinges using a soft brush or cloth. Remove any dirt, dust, or debris that may have accumulated in and around the hinges.
- 2. Lubricate the hinges: Apply lubricating oil or silicone spray to the hinge pins and moving parts of the hinges. This will help reduce friction and eliminate squeaking or sticking.
- 3. Wipe off excess lubricant: After lubricating the hinges, make sure to wipe off any excess oil or spray to prevent it from attracting dirt or becoming sticky again.
Loose Hinge Screws
Over time, the screws that hold the hinges in place can become loose, causing the door to wobble or sag. Loose hinge screws not only affect the door’s functionality but also pose a security risk. To fix this issue, follow these simple steps:
- 1. Tighten the screws: Using a screwdriver, tighten any loose screws in the hinges. Ensure that they are securely fastened to the door and door frame.
- 2. Replace damaged screws: If any screws are damaged or stripped, replace them with new screws of the appropriate size and material.
- 3. Use longer screws or anchors: If tightening the existing screws doesn’t solve the problem, you can opt for longer screws or anchors to provide better support and stability to the hinges.
By troubleshooting and addressing these common hinge issues promptly, you can ensure that your doors operate smoothly, ensure proper alignment, and prolong the lifespan of your hinges. Remember to regularly inspect and maintain your door hinges to prevent further problems and ensure the overall functionality and security of your doors.
Frequently Asked Questions Of Door Hinges How To Install
Do You Put The Hinge On The Door Or The Frame First?
Attach the hinge to the door before the frame.
Which Leaf Of A Hinge Goes On The Door?
The door leaf of a hinge is the part that goes on the door.
How Do You Put New Hinges On A Door And Rehang It?
To put new hinges on a door and rehang it, follow these steps: 1. Remove the old hinges by unscrewing them from the door and frame. 2. Place the new hinges in the same position as the old ones and mark their positions.
3. Screw the new hinges onto the door and frame using a screwdriver. 4. Align the hinges and test the door’s movement. 5. Make any necessary adjustments for a proper fit. Done!
How Do You Put A Door Back On Hinges By Yourself?
To put a door back on hinges by yourself, follow these steps: 1. Align the hinge plate with the door frame and mark the screw holes. 2. Drill pilot holes in the marked spots. 3. Attach the hinge plate using screws.
4. Place the door on the hinge pins. 5. Test the door for smooth opening and closing.
Conclusion
Proper installation of door hinges is crucial for enhancing the functionality and security of your doors. By carefully following the steps outlined in this blog post, you can ensure a smooth and hassle-free installation process. Remember to select the right type of hinges for your doors and use high-quality tools for precise measurements and adjustments.
With these tips, you’ll be able to enjoy well-aligned and smoothly operating doors for years to come.