To install 3 sliding closet doors, measure the opening width, purchase the appropriate doors, and use a screwdriver and drill to secure the tracks to the top and bottom of the door frame. Align the doors with the tracks and attach them using the provided hardware.
Then, adjust the rollers to ensure smooth sliding functionality. Finally, check the doors for proper alignment and make any necessary adjustments. Installing sliding closet doors can be a simple and effective way to enhance the functionality and style of any space.
Whether you are revamping your bedroom or organizing your storage area, sliding closet doors offer a convenient solution. By following a few straightforward steps, you can easily install three sliding closet doors without any hassle. In this guide, we will walk you through the installation process, from measuring the opening width to adjusting the rollers for smooth operation. So let’s get started and transform your closet with these sleek and practical doors.
Planning And Preparation
Planning and Preparation are crucial steps to ensure a successful installation of sliding closet doors. By taking the time to determine the right type of doors, measuring the closet opening accurately, and gathering the necessary tools and materials, you can save yourself time and frustration later on. In this guide, we’ll walk you through each step in detail so that you can confidently complete the installation process. Let’s get started!
Determining the Right Type of Sliding Closet Doors
Before diving into the installation process, it’s important to determine the right type of sliding closet doors for your space. There are various options available, including bypass doors, bi-fold doors, and mirrored doors. Consider the following factors when making your decision:
- Budget: Determine how much you are willing to invest in the doors. This will help you narrow down your options and find doors that fit within your budget.
- Space: Assess the available space in your closet. Measure the width and height to ensure that the doors you choose will fit properly.
- Style: Consider the overall style of your room and choose doors that complement the existing decor. Whether you prefer a modern, traditional, or transitional look, there are sliding doors available to match your aesthetic.
Measuring the Closet Opening
Accurate measurements are essential to ensure a smooth installation process. Follow these steps to measure your closet opening:
- Measure the width: Use a measuring tape to measure the width of the closet opening from one side to the other. Take multiple measurements at different heights to account for any variations.
- Measure the height: Measure the height of the closet opening from the floor to the top. Again, take multiple measurements to ensure accuracy.
- Check for level and square: Use a level and a square to ensure that the closet opening is level and square. Adjustments might be necessary if the opening is not perfectly square.
Gathering the Necessary Tools and Materials
Before starting the installation, gather all the necessary tools and materials to streamline the process. Here’s a list of items you’ll likely need:
| Tools | Materials |
|---|---|
| Screwdriver | Sliding closet doors |
| Measuring tape | Screws |
| Pencil | Door tracks |
| Level | Door handles or knobs |
| Square | Anchors |
Gathering these tools and materials in advance will help you stay organized and ensure that you have everything you need for a successful installation.
Removing Old Doors (If Applicable)
If you’re looking to give your closet a fresh new look, installing sliding doors can be a game-changer. But before you can start with the installation process, you need to remove the old doors and tracks, if applicable. This step is essential to ensure a smooth and hassle-free installation of your new sliding closet doors. In this section, we’ll guide you through the process of removing the old doors and tracks safely, so you can get started on your exciting closet makeover project.
Inspecting the Existing Doors and Tracks
The first step in removing your old sliding closet doors is to carefully inspect the existing doors and tracks. This inspection will help you determine the condition of the doors and if they can be salvaged or need to be replaced entirely. Additionally, you’ll want to check the tracks for any damages or wear and tear that may hinder the smooth movement of the new doors.
To inspect the doors, check for any cracks, warping, or damages. If the doors are made of wood, look for signs of moisture damage or rot. For mirrored doors, ensure that the mirrors are intact and not cracked. If you notice any significant damages, it’s recommended to replace the doors to ensure a flawless finish.
When inspecting the tracks, make sure they are clean and free from any obstructions. Check for any dents, bends, or loose screws that may affect the functionality of the sliding mechanism. If the tracks are damaged beyond repair, you will need to purchase new tracks as well.
Removing the Doors and Tracks Safely
Now that you have inspected the existing doors and tracks, it’s time to remove them safely. Follow these steps to ensure a smooth removal process:
- Start by removing any screws or nails that are securing the doors and tracks to the frame or wall. Use a screwdriver or a drill to carefully unscrew them.
- Once the screws or nails are removed, gently lift the doors off the tracks. Make sure to have someone assist you to avoid any accidents or damage to the doors.
- If the doors are heavy or large, it’s advisable to place them on a padded surface to prevent scratching or breakage.
- Next, remove the tracks from the frame or wall. Depending on the type of installation, tracks can be secured with screws or brackets. Unscrew them carefully, ensuring you keep track of all the hardware for future use.
- After removing the doors and tracks, take the time to clean the area thoroughly. Remove any dirt, dust, or debris that may have accumulated over time.
By following these steps, you have successfully removed the old sliding closet doors and tracks in a safe and efficient manner. Now you can proceed to the exciting part, installing your brand new sliding doors!
Installing The Tracks
When it comes to installing sliding closet doors, one crucial step is installing the tracks. The tracks will guide the doors smoothly along the opening, ensuring easy and hassle-free operation. In this section, we will guide you through the process of marking the placement of the top and bottom tracks, as well as installing them correctly.
Marking the Placement of the Top and Bottom Tracks
Before you begin marking the placement of the tracks, it’s important to measure the width of the closet opening. This will help you determine the length of the tracks needed. Once you have the measurements, follow these steps:
- Clean the closet opening thoroughly and ensure it is free from any dirt or debris.
- Using a tape measure and a pencil, mark the desired height of the top track on both sides of the opening.
- Measure and mark the same height from the floor, ensuring that the marks are level.
- Next, measure and mark the desired height of the bottom track on both sides of the opening.
- Measure and mark the same height from the floor, again ensuring that the marks are level.
Once you have marked the placement of the top and bottom tracks, you are ready to proceed to the next step.
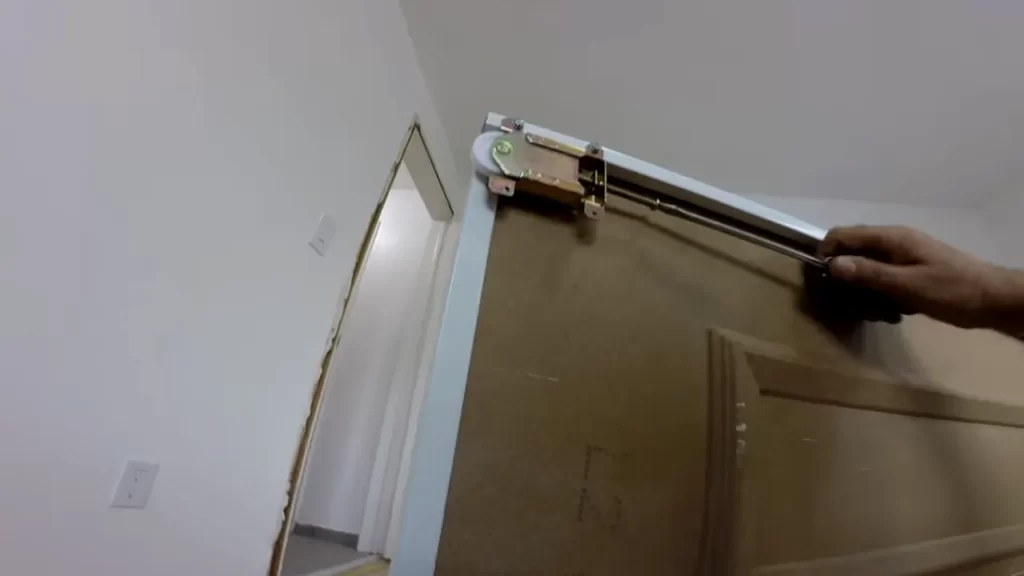
Installing the Top Track
The top track plays a crucial role in supporting the weight of the sliding doors. To install the top track:
- Position the top track against the marked height, ensuring that it is level.
- Using a drill and appropriate screws, secure the top track to the wall or ceiling, depending on the installation method specified by the manufacturer.
- Double-check the levelness of the top track and make any necessary adjustments before fully tightening the screws.
With the top track securely installed, you can now move on to installing the bottom track.
Installing the Bottom Track
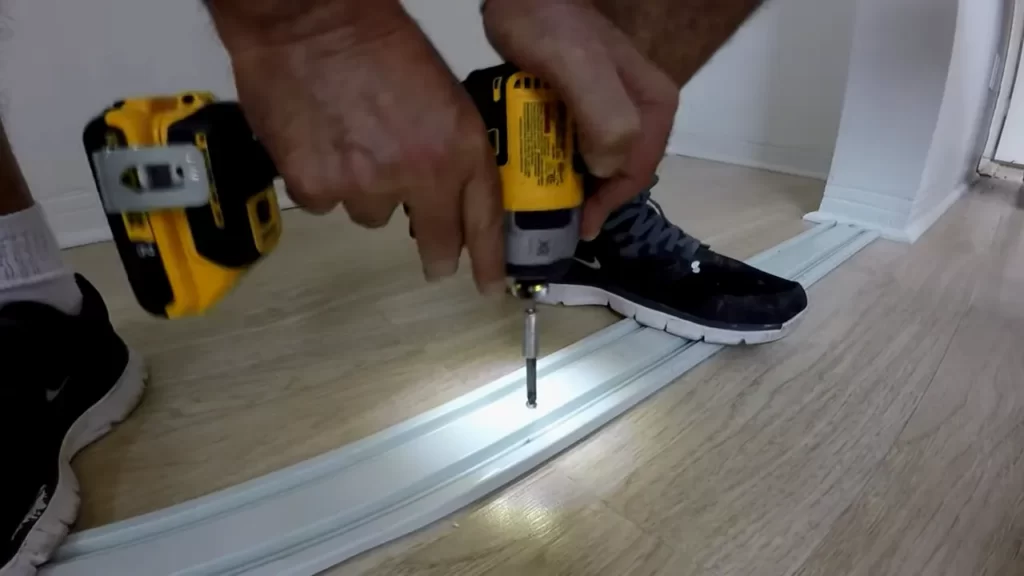
The bottom track provides stability and further guides the sliding doors along the opening. To install the bottom track:
- Position the bottom track against the marked height, ensuring that it aligns perfectly with the top track.
- Using a drill and appropriate screws, secure the bottom track to the floor, making sure it is level.
- Check the alignment of the top and bottom tracks to ensure they are parallel and adjust if needed.
Now that both the top and bottom tracks are installed, you are ready to move on to the next step of installing the sliding closet doors.
Mounting The Door Panels
Mounting the door panels is an essential step in the installation process of sliding closet doors. This is where you attach the panels to the rollers and make them functional. In this section, we will guide you through the process of preparing the door panels, inserting the rollers into the bottom of the door panels, and finally, mounting the rollers onto the bottom track.
Preparing the Door Panels for Installation
Before you begin mounting the door panels, it’s important to ensure that they are properly prepared. Here’s a step-by-step guide to help you with this:
- Carefully unwrap the door panels, making sure not to damage them in the process.
- Inspect the panels for any visible defects or damage. If you notice any issues, contact the manufacturer for assistance.
- Remove any protective film or packaging from the door panels.
- Measure and mark the desired height for the door panels, ensuring they are aligned and level.
- Using a stud finder, locate the studs in the wall where you’ll be installing the door panels. Mark the positions of the studs.
- Pre-drill holes into the door panels at the marked stud positions, using an appropriate drill bit size.
- Securely attach the mounting brackets or clips to the door panels, using the provided screws and a screwdriver or drill.
Inserting the Rollers into the Bottom of the Door Panels
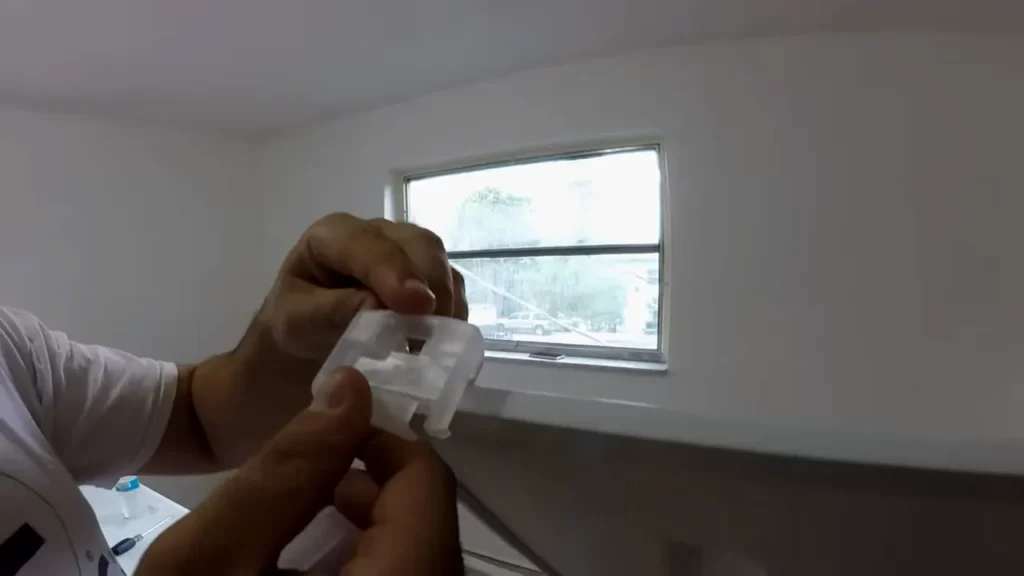
Once the door panels are properly prepared, you can proceed to insert the rollers into the bottom of the panels. This step allows for smooth sliding motion and proper functionality of the doors. Follow these steps:
- Lay the door panel flat on a clean and stable surface.
- Locate the pre-drilled holes on the bottom of the door panel.
- Insert the rollers into the holes, ensuring they fit snugly and securely.
- Repeat the process for each roller and panel.
- Test the rollers by sliding the door panel back and forth to ensure smooth movement.
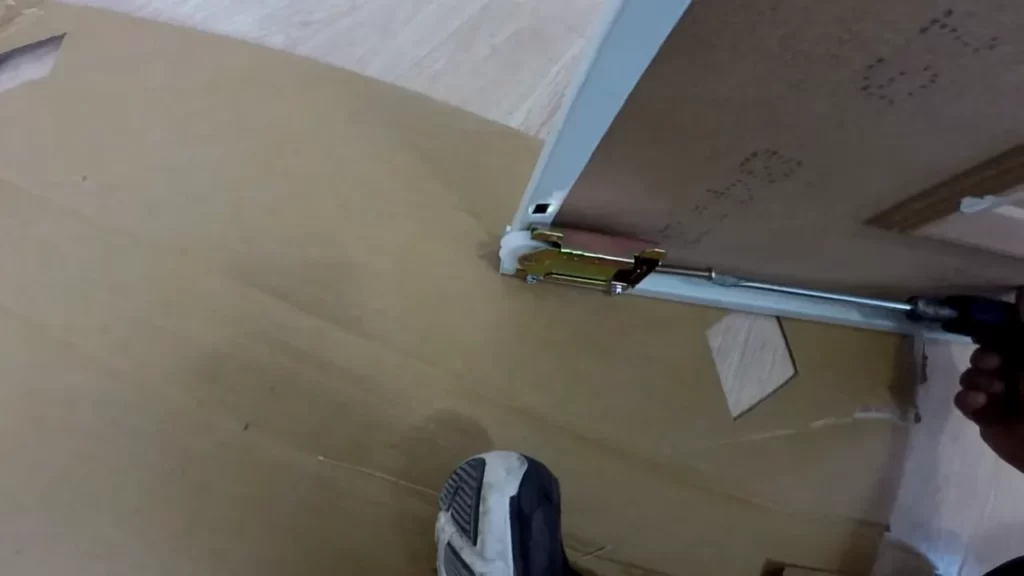
Mounting the Rollers onto the Bottom Track
After inserting the rollers into the bottom of the door panels, the next step is to mount the rollers onto the bottom track. The bottom track provides stability and support for the door panels. Follow these steps to complete the installation:
- Position the bottom track in the desired location, aligning it with the studs in the wall.
- Securely attach the bottom track to the floor using the provided screws or nails. Make sure it is level and straight.
- Position the door panels in front of the bottom track, aligning the rollers with the track.
- With a gentle upward motion, guide the rollers into the track, ensuring they fit properly and slide smoothly.
- Double-check the alignment and adjust if necessary to ensure the door panels are level and centered.
Congratulations! You have successfully mounted the door panels of your sliding closet doors. The next step is to make any necessary adjustments and fine-tune the installation for optimum functionality. Stay tuned for the final section of this guide, where we will cover the adjustments and finishing touches to complete your sliding closet doors installation.
Adjusting The Height And Level Of The Doors
Properly aligning the height and ensuring levelness of your sliding closet doors is crucial for seamless functionality and a polished appearance. In this section, we will guide you through the necessary steps to achieve these desired results.
Ensuring the Correct Height Alignment
Before you begin adjusting the height of your sliding closet doors, make sure you have measured and marked the appropriate height for installation. Ensure that the measurements are accurate to avoid any future mishaps. Once you have double-checked the measurements, follow these steps:
- Start by finding the adjustment screws located at the bottom of the doors. These screws control the height alignment of the doors.
- Using a screwdriver or an appropriate wrench, turn the adjustment screws clockwise or counterclockwise to increase or decrease the height accordingly.
- Make small adjustments at a time, checking the alignment after each turn of the screws. This will allow for incremental changes and prevent drastic misalignments.
- When the doors are at the desired height, tighten the adjustment screws to secure the position.
Checking the Doors for Levelness
Now that you have ensured the correct height alignment of your sliding closet doors, it’s time to check their levelness. Follow these steps to achieve a balanced and visually appealing installation:
- Place a level tool on top of each door, one at a time, and check for any discrepancies in the bubble position.
- If the bubble is not centered, it indicates that the door is not level.
- Using the appropriate tools, loosen the screws on the top track or the bottom of the doors, as necessary, to allow for adjustments.
- Gently tap the higher side of the door with a rubber mallet, gradually bringing it into level position.
- Periodically recheck the levelness by placing the level tool on top of the door until the bubble is centered.
- Once the door is perfectly level, tighten the screws to secure its position.
Adjusting the Doors if Necessary
Despite your meticulous measurements and adjustments, there might still be situations where further tweaking is required. If you notice any issues with door operation, gaps, or uneven alignment, follow these steps to fine-tune your installation:
- Inspect the door for any visible misalignments or gaps between the doors and the frame.
- If there are gaps, adjust the roller screws located on the side of the doors to minimize the space.
- For misalignments, adjust the roller screws by turning them clockwise or counterclockwise until the doors are parallel and properly aligned.
- Do a final check of the height and levelness to ensure the desired result is achieved.
By following these steps, you will be able to adjust the height and level of your sliding closet doors, resulting in a flawless and functional installation.
Installing The Door Guides
Once you have prepared your closet opening and measured it correctly, it’s time to move on to the next step of installing your sliding closet doors. This step will focus on the crucial process of installing the door guides. Proper installation of the door guides is essential to ensure smooth and effortless sliding of the doors. In this section, we will cover the two main aspects of installing the door guides – marking and installing the floor guide, and mounting the wall guides for stability.
Marking and Installing the Floor Guide
The floor guide is an essential component that keeps the sliding doors in place and prevents them from swinging out of alignment. To install the floor guide, follow these steps:
- Measure the width of the opening and mark the center point on the floor using a pencil or marker. This will act as your reference point for the installation.
- Position the floor guide in line with the center point, making sure it is parallel to the opening. Use a level to check its alignment.
- Once you are satisfied with the position, mark the screw holes of the floor guide on the floor.
- Using an appropriate drill bit, carefully drill pilot holes on the marked spots.
- Align the floor guide with the pilot holes and secure it in place using the provided screws. Make sure to tighten the screws firmly but not excessively.
By following these steps, you will successfully install the floor guide, which will serve as the foundation for smooth and stable sliding of your closet doors.
Mounting the Wall Guides for Stability
Wall guides are crucial for providing stability to your sliding closet doors and preventing them from swaying or falling off the track. To mount the wall guides, follow these steps:
- Measure and mark the desired height for the wall guides on both sides of the opening.
- Using a level, ensure that the marked spots are perfectly aligned and plumb.
- Once you have verified the alignment, drill pilot holes at the marked spots.
- Align the wall guides with the pilot holes and secure them to the wall using suitable screws. Ensure that the wall guides are firmly attached and level with each other.
Mounting the wall guides correctly will provide stability and support to the sliding doors, ensuring smooth and reliable operation.
With the floor guide and wall guides properly installed, you have completed a significant part of the sliding closet door installation process. The door guides play a vital role in maintaining the functionality and longevity of your closet doors, so it’s essential to pay attention to their correct installation. In the next section, we will go through the final steps of installing the sliding doors and making necessary adjustments for proper operation.
Testing And Finishing Touches
Once the installation of your 3 sliding closet doors is complete, it’s crucial to perform some testing and add those final finishing touches to ensure smooth operation and enhance the overall appearance of the doors. In this section, we’ll guide you through the process of testing the sliding motion of the doors, making any necessary adjustments, and adding optional finishing touches like handles and locks.
Testing the Sliding Motion of the Doors
Before considering the installation complete, it’s essential to test the sliding motion of your closet doors. Follow these steps to ensure they glide effortlessly:
- Begin by gently sliding each door back and forth along the track.
- Observe if there are any sticking points or areas where the doors don’t slide smoothly. Take note of these areas for further inspection.
- Check that the doors align properly and don’t rub or bump into each other or the frame.
- If the doors are not sliding smoothly, you may need to adjust the rollers or tracks. Refer to the manufacturer’s instructions or seek professional assistance if necessary.
- Repeat the sliding motion test after making any adjustments to ensure smooth operation.
Making Any Final Adjustments

During the testing process, you might identify areas that require adjustments to achieve optimal functionality. Follow these steps to make any necessary final adjustments:
- If the doors overlap or fail to align properly when closed, adjust the hanging brackets or hinges to ensure proper alignment.
- Inspect the bottom tracks and make sure they are securely attached to the floor. If there are any loose or misaligned sections, adjust or replace them accordingly.
- Check the rollers and ensure they are properly aligned and functioning smoothly. Lubricate them if necessary, following the manufacturer’s guidelines.
- Re-test the sliding motion after making adjustments to verify that the doors operate seamlessly.
Adding Optional Finishing Touches
To complete the installation and add a polished look to your sliding closet doors, consider these optional finishing touches:
- Handles: Choose handles that complement your closet doors and match the overall style of the room. Install them securely, ensuring they are positioned ergonomically for easy operation.
- Locks: If you desire extra security or privacy, consider adding locks to your sliding closet doors. Opt for locks that are suitable for sliding doors and follow the manufacturer’s instructions for proper installation.
- Decorative Elements: Enhance the aesthetic appeal of your closet doors by adding decorative elements such as decals, trim, or molding. Ensure they are securely attached while maintaining the functionality of the doors.
- Organizational Features: Further optimize your closet space by incorporating organizational features like hanging rods, hooks, or shelves behind the doors.
By testing the sliding motion of your doors, making any final adjustments, and adding optional finishing touches, you can ensure that your newly installed sliding closet doors not only function smoothly but also enhance the overall aesthetic and functionality of your space.
Maintenance And Care Tips
Maintenance and care tips are essential to keep your sliding closet doors in optimal condition and ensure their smooth operation. By following these simple steps, you can prevent any potential issues and extend the lifespan of your doors. In this section, we will discuss some key maintenance and care tips that are easy to implement and will help keep your sliding closet doors working efficiently for years to come.
Keeping the Tracks Clean and Lubricated
One of the most important aspects of maintaining sliding closet doors is to keep the tracks clean and lubricated. Over time, dust, dirt, and debris can accumulate in the tracks, causing them to become clogged and hindering the smooth sliding motion of the doors. To prevent this, it is recommended to clean the tracks regularly and remove any build-up. You can use a soft brush or vacuum cleaner to remove loose dirt and debris. For stubborn dirt, you can use a mild detergent and a soft cloth to gently scrub the tracks. Once the tracks are clean, apply a silicone-based lubricant to ensure smooth sliding. Avoid using oil-based lubricants, as they can attract more dirt and cause the tracks to become sticky over time.
Checking for Loose or Damaged Parts Regularly
Regularly inspecting your sliding closet doors for loose or damaged parts is crucial to prevent any potential issues. Start by checking the screws and bolts that hold the doors and tracks in place. Tighten any loose screws or bolts to ensure stability and smooth operation. Additionally, inspect the rollers and hinges for any signs of wear or damage. If you notice any worn-out rollers or hinges, they should be replaced promptly to prevent further damage and ensure the doors continue to operate smoothly. It is also important to check the alignment of the doors regularly. Misaligned doors can cause friction and hinder the sliding motion. Adjust the doors’ position if necessary, ensuring they are aligned and level.
Addressing Common Issues and Troubleshooting
Despite proper maintenance, sliding closet doors may encounter some common issues over time. Being aware of these issues and knowing how to troubleshoot them can help you resolve them quickly. One common issue is doors that refuse to slide smoothly or get stuck along the track. In such cases, check if there is any debris or obstruction in the tracks and clean them as mentioned earlier. If the problem persists, you may need to adjust the height of the doors or replace worn-out rollers. Another issue that may occur is doors that come off the tracks. If this happens, carefully lift the door and place it back onto the track. If the door keeps coming off repeatedly, it may indicate a more significant problem that requires professional intervention.
Frequently Asked Questions On How To Install 3 Sliding Closet Doors
How Do You Install A 3 Panel Sliding Door?
To install a 3-panel sliding door, follow these steps: 1) Measure the opening and purchase a compatible door. 2) Remove the existing door and track. 3) Install the bottom track, ensuring it is level. 4) Attach the side jambs and head track.
5) Hang the doors on the track and adjust for smooth operation.
How Do You Install Triple Bypass Doors?
To install triple bypass doors, follow these steps: 1. Measure the door opening and purchase the correct size bypass doors. 2. Attach the top track to the wall above the door, ensuring it is level. 3. Install the bottom track on the floor.
4. Hang the bypass doors on the top track, making sure they slide smoothly. 5. Adjust the doors and secure them in place. Enjoy your triple bypass doors!
How Do 3 Sliding Doors Work?
3 sliding doors work by sliding on a track. They have rollers at the top and bottom, allowing them to smoothly move from side to side. This design saves space and provides easy access to the opening.
Can You Install Sliding Closet Doors Without Bottom Track?
Yes, you can install sliding closet doors without a bottom track. This option is called a top-hung system, where the doors hang from a track attached to the ceiling. This allows for a cleaner look and eliminates the need for a track on the floor.
How Do I Measure For Sliding Closet Doors?
To measure for sliding closet doors, measure the width and height of the opening, ensuring to account for any trim or baseboards.
What Tools Do I Need To Install Sliding Closet Doors?
To install sliding closet doors, you will need a tape measure, level, drill, screwdriver, hammer, and a saw.
Conclusion
Installing sliding closet doors can be a straightforward and rewarding project that adds both style and functionality to your space. By following these step-by-step instructions, you can easily install three sliding closet doors yourself. From measuring and marking to aligning and securing, the process is manageable for even the most novice DIYers.
With careful attention to detail and the right tools, you’ll have beautifully installed sliding closet doors in no time. So, go ahead and transform your space with this simple yet effective upgrade.