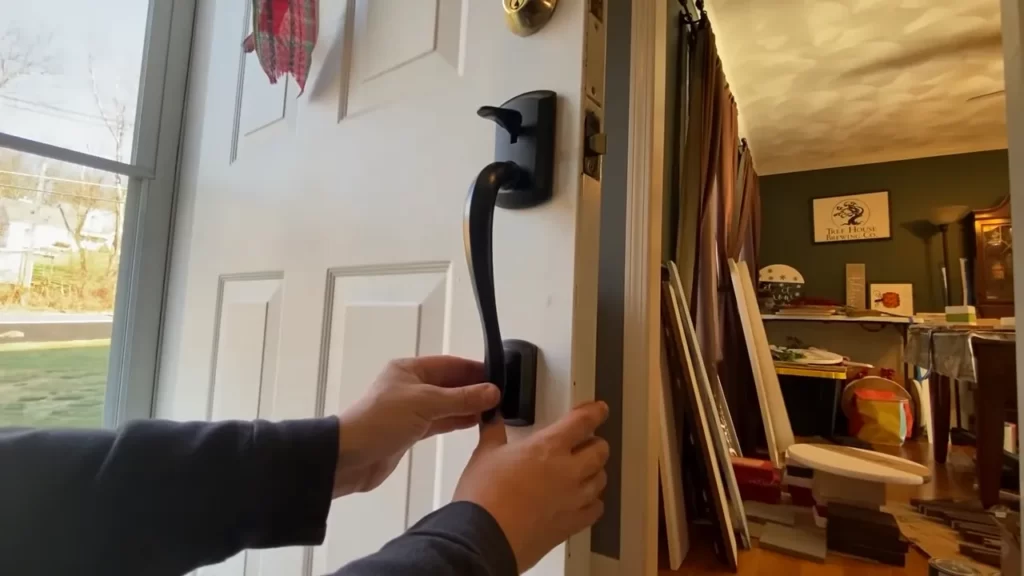
nstalling a door pull is simple and can be done in a few steps. Here’s how: measure and mark the desired position, pre-drill holes, attach the pull, and secure it with screws.
Are you looking to add a stylish touch to your doors? One way to achieve this is by installing a door pull. Whether you want to enhance the functionality of your door or give it a decorative touch, a door pull can be the perfect solution.
In this guide, we will take you through the steps to install a door pull in a simple and efficient manner. By following these easy steps, you can quickly and easily add a door pull to your doors and enjoy its benefits. Let’s get started!
Choosing The Right Door Pull: Aesthetic And Functional Considerations
When it comes to installing a door pull, choosing the right one is essential for both aesthetic and functional purposes. The door pull serves as a crucial element in enhancing the overall look and feel of your door, while also ensuring convenience and ease of use. To help you make the right choice, this guide will take you through the important factors to consider when selecting a door pull that perfectly matches your door style and décor.
Factors to consider when choosing a door pull
Selecting the ideal door pull requires careful consideration of various factors. Whether you are looking to replace your existing door pull or installing a new one, keep the following points in mind:
- Door Material: Different door materials require different types of door pulls. For instance, consider a heavy-duty door pull made of durable materials like stainless steel or brass for solid wood or metal doors. On the other hand, a decorative door pull made of materials like glass or ceramic enhances the aesthetic of a paneled or glass door.
- Door Style: The door pull you choose should seamlessly integrate with the overall style of your door. For vintage or traditional doors, classic door pulls with intricate designs and textured finishes add a touch of elegance. For contemporary or modern doors, sleek and minimalist door pulls in brushed or polished finishes create a streamlined look.
- Door Size: Consider the dimensions of your door to ensure that the door pull you choose is proportionate. A small door pull might get lost on a large door, whereas an oversized door pull can look overwhelming on a small door. Finding the right balance is key.
- Budget: Set a budget that aligns with your requirements and preferences. Door pulls come in a wide range of prices, depending on the materials, design, and brand. Determine what you are willing to spend to narrow down your options.
- Maintenance: Consider the level of maintenance required for different materials. Door pulls made of materials like brass and copper may develop a natural patina over time, while stainless steel or chrome door pulls require regular cleaning to maintain their shine.
- Security: While aesthetic considerations are important, do not overlook the security aspect. Ensure that the door pull you choose is sturdy and provides a secure grip, making it difficult for outsiders to tamper with the door.
Selecting a door pull that matches your door style and décor
When selecting a door pull, it is crucial to choose one that harmonizes with the existing door style and overall décor of your space. A well-chosen door pull can elevate the visual appeal of your door and create a cohesive look. Here are a few tips to help you find a door pull that matches your door style and décor:
- Consider the Finish: Look for a door pull finish that complements the other hardware and fixtures in the room. Matching finishes, such as brushed nickel or matte black, can tie the entire interior together.
- Coordinate with Door Trim: If your door has decorative trim, consider selecting a door pull that complements the trim style. Opt for a door pull with similar accents or design motifs to achieve a coordinated look.
- Reflect Your Personal Style: Choose a door pull that reflects your personal style and taste. Whether you prefer a rustic, industrial, or modern look, there is a wide variety of door pulls available to cater to different aesthetics.
- Take Inspiration from Door Architecture: Look at the architectural style of your door and find a door pull that evokes a similar vibe. For instance, if you have a Craftsman-style door, choose a door pull with clean lines and a warm finish to complement the traditional charm.
- Consider the Surroundings: Consider the other elements in the vicinity of your door, such as wall color, flooring, and furniture. Select a door pull that maintains consistency and visual harmony within the space.
Ensuring the door pull is ergonomically designed for ease of use
While aesthetics play a significant role in choosing a door pull, functionality is equally important. After all, a door pull needs to be easy to grip and operate. When considering the ergonomics of a door pull, keep the following in mind:
- Grip Comfort: Ensure that the door pull offers a comfortable grip, so that it can be easily used by individuals of all ages and abilities. Look for door pulls with rounded edges or contoured designs that provide a pleasant tactile experience.
- Size and Shape: Consider the size and shape of the door pull. It should be proportionate to the size of the door and allow enough space for a firm grip. Avoid door pulls that are too small or have sharp edges that may be uncomfortable.
- Installation Height: Place the door pull at an appropriate height for easy accessibility. Consider the average height of the users and ensure that the door pull is neither too high nor too low.
- Mounting Stability: Make sure the door pull is securely mounted to the door to prevent any wobbling or instability. A sturdy and well-installed door pull provides a sense of reliability and durability.
By considering both aesthetic and functional factors when choosing a door pull for your door, you can enhance the overall appeal of your space while ensuring ease of use. Take the time to explore the options available and find a door pull that perfectly matches your door style, décor, and personal preferences.
Measuring And Marking: Precise Placement For A Professional Finish
Installing a door pull may seem like a simple task, but taking the time to measure and mark your door accurately is crucial for achieving a professional finish. In this guide, we’ll walk you through the essential steps of measuring and marking, ensuring that your door pull is aligned properly and functions smoothly.
Determining the ideal height for your door pull
The first step in achieving precise placement of your door pull is determining the ideal height. While personal preference plays a role, there are general guidelines to follow for a visually appealing and functional door pull placement.
Begin by measuring the height of the door, typically from the floor to the top edge of the door. For most standard interior doors, the recommended height for a door pull is around 36 to 42 inches above the floor. However, it is advisable to consider factors such as the height of the potential users and the overall design aesthetics.
Marking the centerline for accurate placement
Once you have determined the ideal height, the next step is marking the centerline of the door. This ensures that your door pull is visually centered and perfectly aligned.
To mark the centerline, start by measuring the width of the door and dividing it in half. Use a tape measure or ruler to find this midpoint, and make a small pencil mark at the top and bottom edges of the door. Connect these marks with a straight edge to create the centerline.
Measuring and marking for proper hole alignment
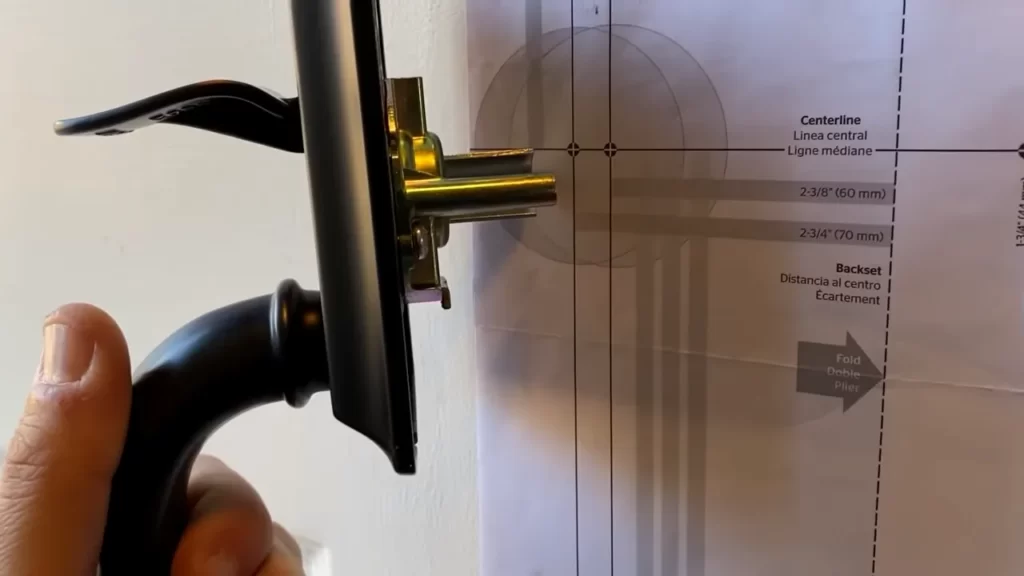
Now that you have the centerline marked, it’s time to measure and mark for proper hole alignment. This step is crucial to ensure that the door pull is securely attached and functions smoothly.
Start by measuring the distance between the screw holes on the back of the door pull. Transfer these measurements onto the centerline, marking the precise locations where the holes should be drilled. Make sure to measure accurately and double-check your markings before proceeding.
Using a pencil or a marker, lightly mark the spot where you will drill the holes. This step will guide you during the drilling process and prevent any mistakes or misalignment.
Remember to use appropriate tools and follow manufacturer guidelines while drilling the holes and installing the door pull. Take your time and ensure that the door pull is securely attached to the door, aligning perfectly with your markings.
By following these steps for measuring and marking, you will achieve precise placement of your door pull and achieve a professional finish. Taking the time to ensure accurate alignment will not only enhance the functionality of your door pull but also add a touch of visual appeal to your doors.
Drilling And Installing: Step-By-Step Guide To A Flawless Installation
Installing a door pull may seem like a straightforward task, but it requires attention to detail and precision. In this step-by-step guide, we will walk you through the process of drilling and installing a door pull to ensure a flawless installation.
Preparing the door for drilling
Before you begin drilling, it is important to properly prepare the door. Here are the steps to follow:
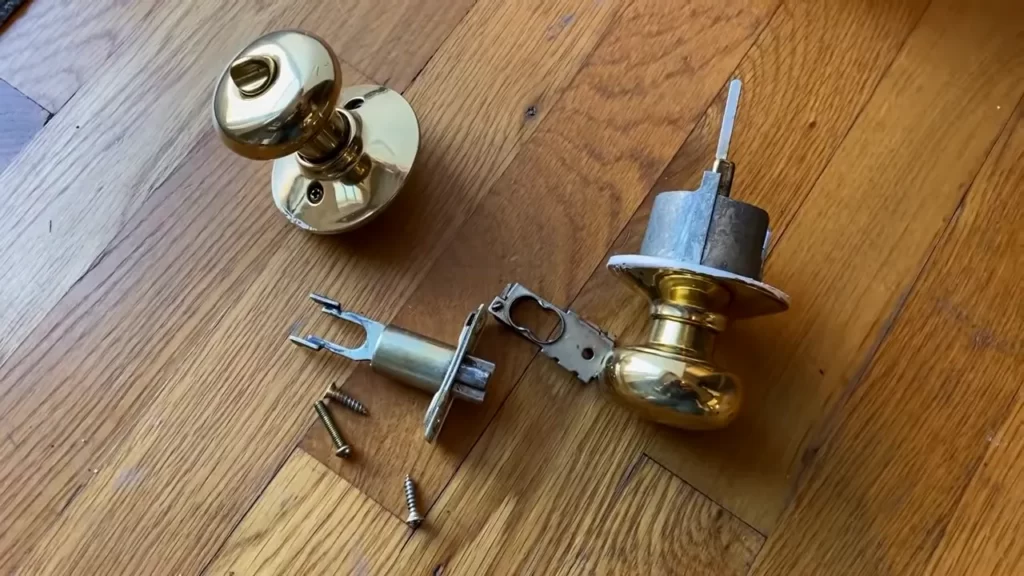
- Remove any existing hardware or accessories from the door.
- Clean the surface of the door to ensure a smooth and dust-free drilling area.
- Measure and mark the desired location for the door pull. Make sure to consider the optimal height and placement for convenient use.
Choosing the right drill bit for your door pull
Choosing the correct drill bit is essential for a secure and professional-looking installation. Here’s how to select the right one:
- Determine the material of your door. Common materials include wood, metal, and fiberglass.
- Refer to the manufacturer’s instructions or consult a hardware specialist to identify the appropriate drill bit for your specific door material.
- Ensure that the drill bit is the appropriate size for the screws or bolts that will be used to attach the door pull.
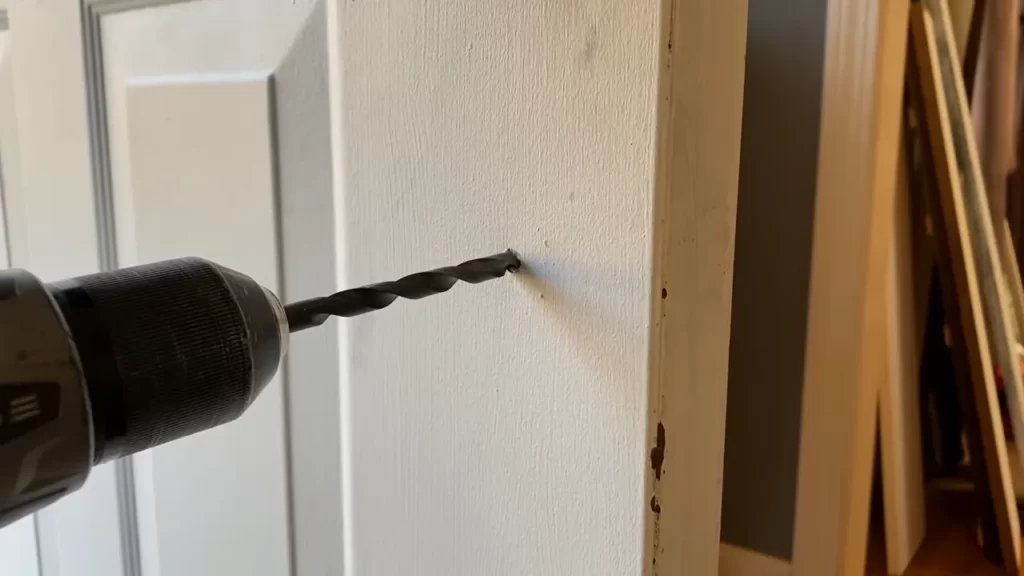
Drilling precise holes for perfect fit
Now that you have prepared the door and selected the correct drill bit, it’s time to drill the holes for your door pull. Follow these steps:
- Secure the door in a stable position, ensuring that it doesn’t move during the drilling process.
- Attach the chosen drill bit to your drill, making sure it is securely fastened.
- Place the tip of the drill bit on the marked spot for the first hole.
- Apply gentle pressure and begin drilling at a slow and steady speed to avoid splintering or damaging the door surface.
- Repeat the drilling process for any additional holes needed.
Installing the door pull using screws or bolts
Now that the holes have been drilled, it’s time to install the door pull. Follow these steps:
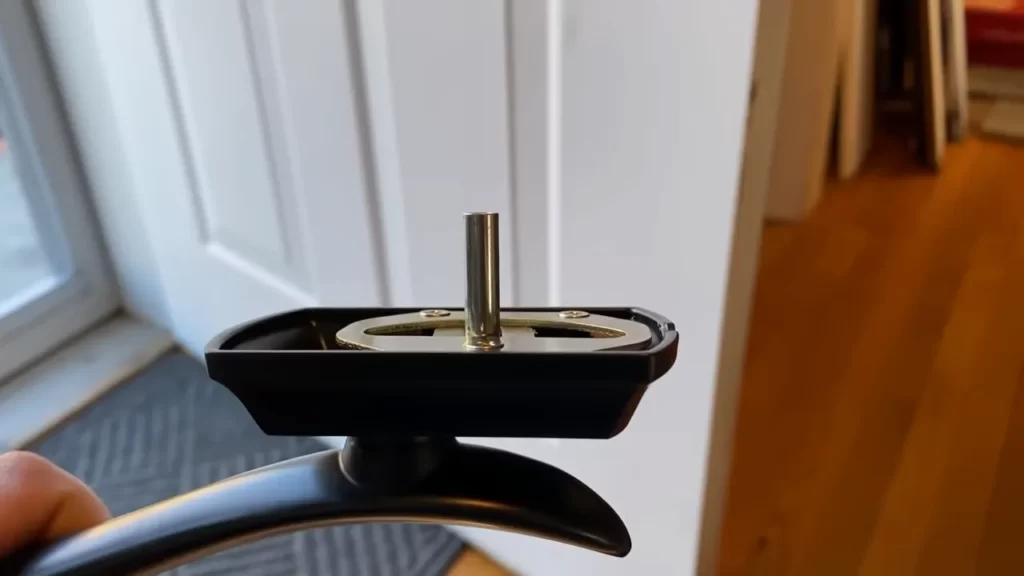
- Align the holes in the door pull with the drilled holes in the door.
- Insert the screws or bolts through the holes and into the drilled holes in the door.
- Tighten the screws or bolts using a screwdriver or wrench, ensuring that the door pull is securely attached to the door.
With these simple steps, you can achieve a flawless installation of a door pull. By following proper drilling techniques and using the right tools, you can ensure that your door pull not only enhances the functionality of your door but also adds a stylish touch to your space.
Securing And Testing: Ensuring Durability And Functionality
Once you have successfully installed your door pull and aligned it properly, it’s crucial to take the necessary steps to ensure its durability and functionality. In this section, we will guide you through the process of securing the door pull and thoroughly testing it for sturdiness. We’ll also discuss how to make any necessary adjustments to optimize its functionality.
Adding additional support for heavy-duty door pulls
If you have chosen a heavy-duty door pull, it is essential to provide additional support to ensure its longevity. Here’s how you can reinforce it:
- Identify the areas on your door or doorframe that will serve as anchor points for the door pull.
- Measure the door pull’s length, and mark the exact positions where you will be drilling holes for the anchor bolts.
- Using a drill, carefully create the necessary holes, ensuring they are deep enough to securely hold the anchor bolts.
- Insert the anchor bolts into the holes, making sure they are tightly fitted.
- Align the door pull with the anchor bolts, and fasten it using the provided screws or bolts.
Testing the door pull for sturdiness and proper alignment
Once the door pull is secured, it’s time to test its sturdiness and ensure proper alignment. Follow these steps:
- Apply gentle pressure to the door pull in different directions, checking for any excessive movement or looseness.
- If you detect any wobbling or instability, tighten the screws or bolts that secure the door pull.
- Ensure that the door pull is perfectly aligned with the door’s design and aesthetic.
- Check if the door pull’s height and placement are comfortable and easy to grip.
Making necessary adjustments for optimal functionality
To maximize the functionality of your door pull, you may need to make some adjustments. Here’s what you can do:
- If the door pull feels uncomfortable or requires too much effort to grip, consider adding grip covers or utilizing a different style or size of door pull.
- If the door pull’s position causes inconvenience or obstructs the door’s movement, you may need to reposition it.
- Regularly check the screws or bolts securing the door pull and tighten them if necessary to prevent any loosening due to frequent use.
- Keep the door pull clean and free from debris, as this can affect its functionality over time.
Following these steps will help ensure the durability and functionality of your newly installed door pull. Periodically inspect and maintain it to enjoy years of seamless door operation and aesthetic appeal.
Final Touches: Cleaning And Maintenance Tips For Longevity
The final touches of installing a door pull do not stop at simply attaching it to your door. To ensure a pristine look and prolong the lifespan of your door pull, it is important to follow a regular cleaning and maintenance routine. In this section, we will explore essential cleaning and maintenance tips that will keep your door pull looking its best and functioning smoothly for years to come.
Cleaning and Polishing the Door Pull for a Pristine Look
To maintain a polished and pristine appearance, it is crucial to regularly clean your door pull. Here are some steps to follow: 1. Start by removing any visible dirt or debris from the surface of the door pull using a soft microfiber cloth or a feather duster. Gently wipe the entire surface of the pull to ensure no residue is left behind. 2. For tougher stains or grime, create a mild soap solution by mixing a few drops of dish soap with warm water. Dip a clean cloth into the soapy water and gently scrub the affected areas. Avoid using abrasive cleaners or scrub brushes as they can damage the finish of the door pull. 3. After cleaning, rinse the door pull thoroughly with clean water to remove any soap residue. Use a separate cloth dampened with clean water to wipe away any excess soap. 4. To achieve a sparkling shine, it is recommended to use a non-abrasive metal polish specifically designed for the type of finish on your door pull. Apply a small amount of polish to a soft cloth and buff the surface of the pull in circular motions. This will remove any tarnish and restore its original luster. 5. Once you are satisfied with the shine, use a dry microfiber cloth to buff the door pull gently. This will help remove any excess polish and leave a streak-free finish.
Regular Maintenance to Prevent Wear and Tear
Proper maintenance is essential to prevent wear and tear on your door pull. Follow these maintenance tips to keep your pull functioning smoothly: 1. Check the screws periodically to ensure they are tightly secured. Loose screws can lead to a wobbly or unstable door pull. If you notice any loose screws, tighten them using a screwdriver. 2. Lubricate the moving parts of the door pull with a silicone-based lubricant to minimize friction and ensure smooth operation. Apply a small amount of lubricant to a cloth and wipe it onto the hinges or pivots of the pull. 3. Avoid exposing the door pull to excessive moisture or harsh chemicals, as they can damage the finish. Wipe away any spills or splatters immediately using a soft cloth to prevent staining or corrosion.
Troubleshooting Common Issues and Repairs
Even with proper maintenance, issues may occasionally arise with your door pull. Here are some common problems and their solutions: 1. If the door pull becomes loose over time, tighten the screws using a screwdriver. If the problem persists, consider replacing the screws with longer ones for a more secure fit. 2. If the finish starts to fade or chip, touch-up paint or a matching metal polish can be used to restore its appearance. Apply the touch-up paint or polish to the affected area using a small brush or cloth, following the manufacturer’s instructions. By incorporating these cleaning and maintenance tips into your routine, you can ensure that your door pull remains in top condition, both aesthetically and functionally. Regular cleaning, proper maintenance, and timely repairs will contribute to the longevity of your door pull, allowing it to complement your door for years to come.
Frequently Asked Questions On How To Install A Door Pull
How Do You Install A Door Pull Handle?
To install a door pull handle, follow these steps: 1. Measure and mark the desired height for the handle on the door. 2. Drill holes at the marked points, using a drill bit that matches the handle’s screw size. 3.
Insert the handle into the holes and use a screwdriver to tighten the screws. 4. Test the handle to ensure it is securely attached. 5. Enjoy your newly installed door pull handle!
Where Do You Put A Door Pull?
Place a door pull on the side of the door that makes it convenient for users to open or close the door. Generally, it should be installed at a height of 36 inches from the floor.
How Do You Install Back To Back Door Pulls?
To install back to back door pulls, follow these steps: 1. Measure the distance between the two door pulls and mark the points. 2. Drill holes at the marked points using a drill and appropriate drill bit. 3. Insert the screws through the door pulls and tighten them into the drilled holes.
4. Ensure the pulls are securely attached and aligned. 5. Test the door pulls to ensure smooth functionality.
How Do You Install Barn Door Pulls?
To install barn door pulls, follow these steps: 1. Mark the ideal placement on the door for the pulls. 2. Drill holes based on the marking. 3. Insert the screws through the pulls and secure them with a screwdriver. 4.
Ensure the pulls are aligned and tightened properly. 5. Test the door pulls to ensure they function smoothly.
Faq 1: What Tools Do I Need To Install A Door Pull?
To install a door pull, you will need a screwdriver, a measuring tape, and a level.
Faq 2: Can I Install A Door Pull On Any Type Of Door?
Yes, you can install a door pull on most types of doors, including wooden, metal, and glass doors.
Conclusion
Installing a door pull may seem daunting, but with the right tools and a straightforward approach, it can be a quick and easy DIY project. By following the step-by-step instructions provided in this blog post, you can ensure a secure and stylish door pull installation.
Remember to choose a door pull that complements your overall décor and be mindful of proper measurements. With a little patience and attention to detail, you’ll have a functional and visually appealing door pull in no time.