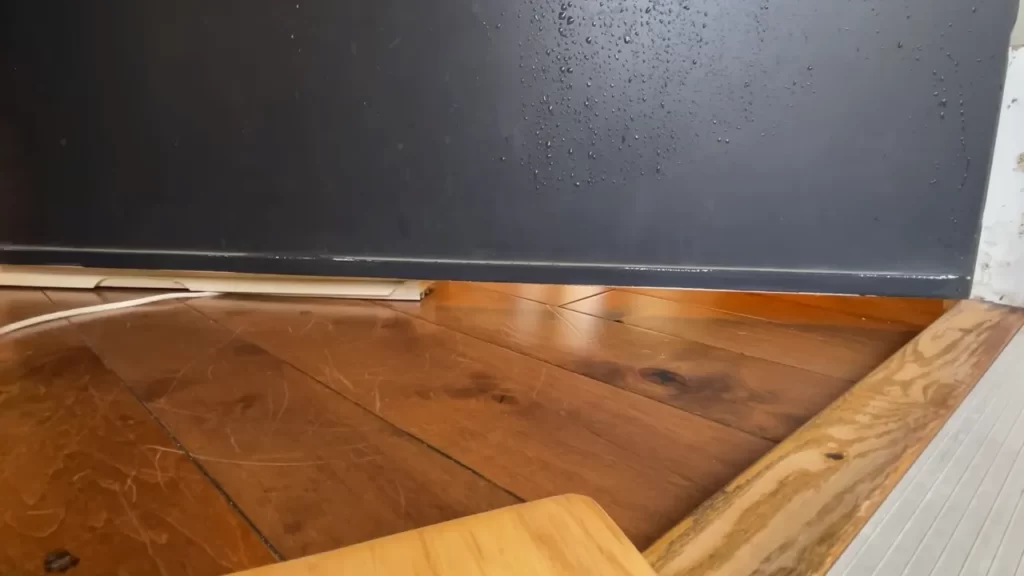
To install a door sweep, measure the width of your door, cut the sweep to size, and attach it to the bottom of the door with screws or adhesive. A door sweep is a simple and effective way to prevent drafts and reduce energy loss in your home.
By sealing the gap between the bottom of the door and the threshold, a door sweep helps to keep out cold air, insects, and noise. Installing a door sweep is a relatively easy task that can be completed in just a few steps.
We will guide you through the process of installing a door sweep, allowing you to enjoy a more comfortable and energy-efficient home. So, let’s get started!
The Importance Of A Draft-Free Home
The importance of a draft-free home
One of the keys to creating a comfortable and energy-efficient living space is to ensure that your home is free from drafts. Drafts are not only uncomfortable, but they can also have a significant impact on the energy efficiency of your home. By allowing cold air to enter and warm air to escape, drafts can make your heating and cooling systems work harder, leading to higher energy bills and unnecessary wear and tear on your HVAC equipment.
Drafts and energy efficiency
When it comes to maintaining an energy-efficient home, addressing drafts should be at the top of your to-do list. Even small gaps or cracks around doors and windows can result in significant air leakage, causing your heating and cooling systems to work overtime to maintain the desired indoor temperature. By installing a door sweep, you can effectively eliminate drafts and improve the overall energy efficiency of your home.
Common areas where drafts occur
Drafts can occur in various areas around your home, and it’s essential to identify these trouble spots to effectively combat them. Some common areas where drafts can occur include:
| Area | Potential Draft Sources |
|---|---|
| Doors | Gaps at the bottom, sides, or between the door and the frame |
| Windows | Cracks or gaps around the window frame |
| Attic | Misaligned or insufficiently insulated attic access panels |
| Basement | Cracks in the foundation or improperly sealed windows |
By paying attention to these areas and taking the necessary steps to address the drafts, you can create a more comfortable and energy-efficient living environment for you and your family.
Now that we understand the importance of a draft-free home and where drafts commonly occur, let’s explore how to install a door sweep to effectively eliminate drafts around your doors.
Understanding Door Sweeps
Understanding door sweeps When it comes to keeping your home comfortable and energy-efficient, ensuring a tight seal around your doors is essential. One effective way to achieve this is by installing a door sweep. Door sweeps are simple yet effective devices that can help reduce drafts, keep out insects, and improve energy efficiency in your home. In this section, we will delve into the details of door sweeps, including what they are, the different types available, and how to select the right door sweep for your door. What is a door sweep? A door sweep is a strip of material that is attached to the bottom of a door, sealing the gap between the door and the floor when it is closed. This strip acts as a barrier against drafts, dust, insects, and noise, preventing them from entering your home. Door sweeps are typically made from materials such as rubber, vinyl, or aluminum, and they come in various lengths and thicknesses to accommodate different door sizes. Types of door sweeps There are several types of door sweeps available, each designed for specific purposes and door types. Here are a few common types of door sweeps: 1. Rubber door sweep: This type of door sweep is made from durable rubber and is suitable for both residential and commercial use. It provides a flexible seal that can effectively block out drafts and noise. 2. Vinyl door sweep: Vinyl door sweeps are affordable and easy to install. They offer good insulation and are resistant to moisture, making them ideal for exterior doors. 3. Aluminum door sweep: Aluminum door sweeps are sturdy and durable, making them suitable for heavy-duty applications. They provide excellent insulation and can withstand high temperatures. Selecting the right door sweep for your door To ensure that you select the right door sweep for your door, there are a few factors to consider: 1. Measure the door: Before purchasing a door sweep, measure the width of your door to determine the appropriate size. Door sweeps are typically available in standard sizes, but it’s important to ensure a proper fit. 2. Consider the door type: Different door types require different door sweeps. For example, exterior doors may require a more robust door sweep to withstand weather conditions, while interior doors may require a less heavy-duty option. 3. Check for compatibility: Ensure that the door sweep you choose is compatible with the type of flooring you have. Some door sweeps are designed for carpeted floors, while others are suitable for hardwood or tile floors. By understanding the different types of door sweeps and considering factors such as size, door type, and flooring compatibility, you can select the right door sweep for your door. Installing a door sweep is a simple yet effective way to improve energy efficiency, reduce drafts, and enhance the comfort of your home.
Gathering The Necessary Tools And Materials
Before installing a door sweep, it’s important to gather all the necessary tools and materials. Having everything on hand will save you time and ensure a smooth installation process. In this section, we will discuss the essential tools you’ll need as well as the materials needed for a successful installation.
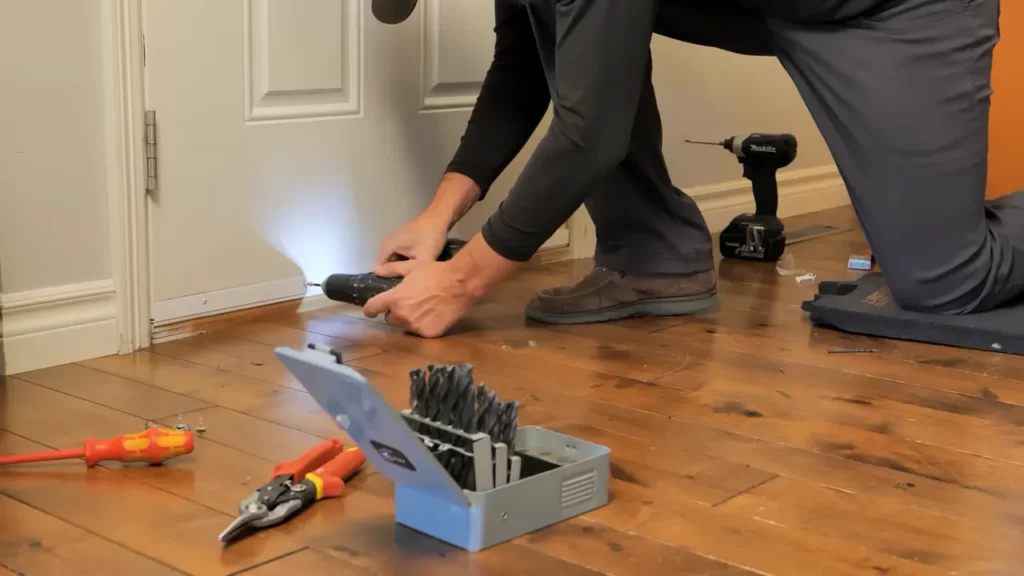
Essential tools for installation
Installing a door sweep is a simple DIY project that requires just a few basic tools. Here are the essential tools you’ll need:
- Tape measure: To accurately measure the width of your door frame and determine the length of the door sweep needed.
- Electric drill: For drilling pilot holes and securing the door sweep in place.
- Drill bits: To fit the size of your screws and ensure a secure installation.
- Screwdriver: To tighten the screws and secure the door sweep firmly.
- Pencil: To mark the location of the pilot holes on your door frame.
- Safety glasses and gloves: To protect your eyes and hands during the installation process.
Materials needed for a successful installation
Along with the tools, you’ll also need a few materials to ensure a successful installation. Here are the materials you’ll need:
- Door sweep: Choose a door sweep that fits the width of your door frame and is suitable for your specific needs. There are different types available, such as vinyl, aluminum, or brush sweeps. Select the one that best suits your requirements.
- Screws: The door sweep usually comes with screws, but make sure you have extras on hand in case any get misplaced or damaged.
- Pilot hole drill bit: To create pilot holes for the screws, ensuring a secure attachment of the door sweep.
- Masking tape: This can be used to mark the location of the pilot holes and prevent splintering or chipping of the door frame while drilling.
In conclusion, gathering the necessary tools and materials before starting the installation process is crucial for a smooth and successful door sweep installation. Make sure you have the essential tools such as a tape measure, electric drill, and screwdriver, along with the required materials including the door sweep, screws, and pilot hole drill bit. With everything prepared, you’ll be ready to install your door sweep and enjoy the benefits of a more energy-efficient and draft-free home.
Measuring Your Door
Determining the correct size
Before installing a door sweep, it is important to measure your door accurately. The correct size will ensure a proper and secure fit, effectively blocking drafts and preventing energy loss. Additionally, measuring your door correctly will save you time and effort in the installation process.
Measuring techniques for accuracy
When measuring your door, make sure you follow these techniques to ensure accuracy:
- Measure the width: Use a measuring tape to determine the width of your door. Start from one side of the door frame and measure across to the opposite side. Round the measurement to the nearest inch.
- Measure the height: Measure the height of your door by starting at the top of the door frame and going down to the bottom. Again, round the measurement to the nearest inch.
- Check for irregularities: Inspect your door frame for any bumps, curves, or other irregularities that may affect the installation. Take note of these irregularities and consider them when selecting the door sweep size.
Once you have determined the correct size for your door, you can proceed with purchasing and installing the appropriate door sweep. Proper measurement and installation will ensure that your door is effectively sealed, reducing energy costs and creating a more comfortable living environment.
Removing The Old Door Sweep
Removing the old door sweep is the first step in installing a new one. Over time, door sweeps can become worn out or damaged, creating gaps that allow drafts, pests, and even water to enter your home. By replacing the old door sweep, you’ll not only improve the energy efficiency of your home but also enhance its overall comfort and security.
Reasons for replacing
There are several reasons why you might need to replace the old door sweep:
- Wear and tear: Door sweeps can deteriorate over time due to constant usage, exposure to weather elements, and general wear and tear. Cracks, tears, or missing pieces indicate a need for replacement.
- Drafts and energy loss: Inadequate door sweeps can allow drafts to enter your home, leading to higher energy bills and decreased comfort. Replacing the old door sweep will help seal gaps and prevent energy loss.
- Pest intrusion: Worn-out door sweeps can provide an entry point for pests such as insects, rodents, and even snakes. Installing a new door sweep will effectively block these unwanted visitors.
- Noise reduction: A properly installed door sweep can help minimize noise from outside, providing a quieter and more peaceful indoor environment.
Step-by-step removal process
Follow these steps to successfully remove the old door sweep:
- Gather the necessary tools: Before starting the removal process, gather the following tools: a utility knife, pliers, a flathead screwdriver, and a putty knife.
- Inspect the door sweep: Take a close look at the old door sweep to determine the type of attachment method used. Some door sweeps are held in place by screws, while others may be attached with adhesive or a combination of both.
- Remove screws (if applicable): If the door sweep is secured with screws, use a screwdriver to remove them and set them aside safely.
- Release adhesive (if applicable): For adhesive-based door sweeps, use a putty knife to gently pry the old sweep off the door. Take care not to damage the door surface in the process.
- Use pliers (if necessary): In some cases, the door sweep may have additional securing clips or nails. Use pliers to carefully remove these fasteners, ensuring not to damage the door frame.
- Clean the door surface: Once the old door sweep is removed, use a clean cloth or sponge to wipe away any dirt, debris, or adhesive residue from the door surface.
- Inspect and repair: Take this opportunity to inspect the bottom of the door for any signs of damage or rot. If necessary, make any repairs or modifications before proceeding with the installation of the new door sweep.
Removing the old door sweep may require some effort and caution, but it’s an essential step in preparing for the installation of a new one. By following these steps, you’ll be well on your way to a more energy-efficient, pest-free, and comfortable home. Next, we’ll guide you through the process of installing the new door sweep.
Installing The New Door Sweep
Installing a door sweep is an essential step in improving energy efficiency, reducing noise, and preventing drafts. By sealing the gap between your door and the floor, a door sweep helps to maintain a comfortable temperature inside your home while saving on energy bills. Follow these steps to install a new door sweep:
Follow manufacturer’s instructions
Before starting the installation process, it is important to carefully read and follow the instructions provided by the manufacturer of the door sweep. Each door sweep model might have specific requirements and guidelines for installation. Adhering to these instructions will ensure a proper and secure installation.
Step-by-step installation process
Below is a step-by-step guide to installing a door sweep:
- Measure the width of your door: Use a tape measure to determine the width of your door. This measurement will help you choose the correct size of door sweep.
- Prepare the door: Clean the bottom of the door to ensure a clean and smooth surface for the door sweep. Remove any dirt, dust, or debris that might hinder the effectiveness of the adhesive or mounting screws.
- Choose the appropriate door sweep: The market offers a variety of door sweeps, such as adhesive strips, slide-on sweeps, and sweeps with mounting screws. Depending on your door type and personal preference, select the most suitable door sweep.
- Position the door sweep: Hold the door sweep against the bottom edge of the door, aligning it with the hinge side. Make sure it extends slightly beyond the edges of the door to provide maximum coverage.
- Mark the mounting holes: With the door sweep in position, mark the locations of the mounting holes. These marks will serve as a guide for drilling or inserting screws.
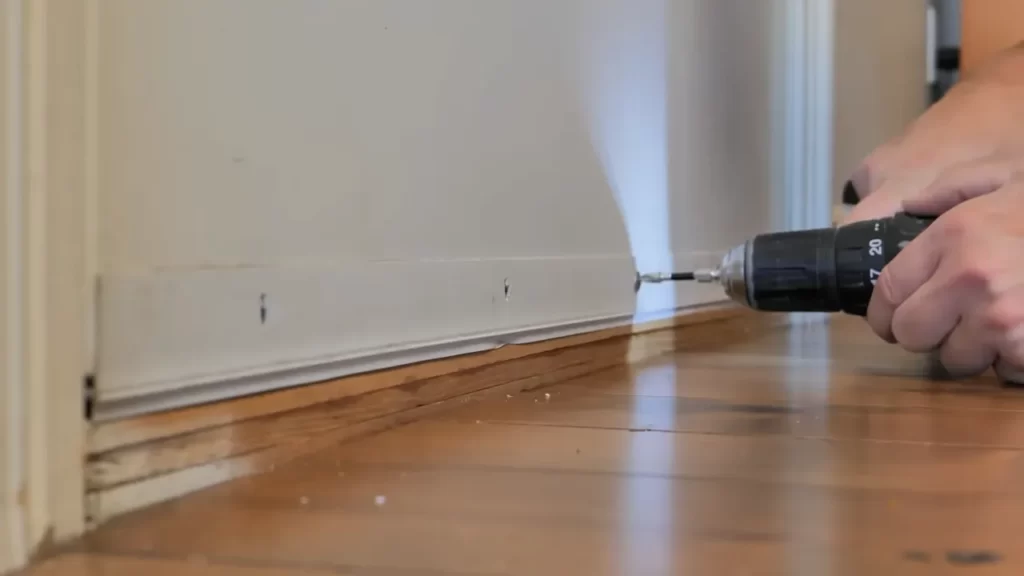
- Install the door sweep: Depending on the type of door sweep, you will either need to peel off the protective backing of an adhesive strip and press it firmly onto the door, or insert screws through the pre-drilled holes into the door. Make sure the door sweep is securely fastened.
- Check the seal: Close the door and check if the door sweep is creating a tight seal. Gently run your hand along the bottom of the door to feel for any air leaks or gaps. If necessary, adjust the position of the door sweep for a better seal.
By following these simple steps and taking the time to install a door sweep correctly, you can enjoy the benefits of improved insulation and energy efficiency in your home. Remember to regularly inspect and maintain the door sweep to ensure its proper functioning over time.
Adjusting And Testing The Door Sweep
Installing a door sweep is an effective way to prevent drafts and reduce energy costs. However, simply installing a door sweep is not enough. Proper adjustment and testing are essential to ensure its effectiveness. In this section, we will discuss two crucial steps in the process: ensuring proper placement and testing for a draft-free seal.
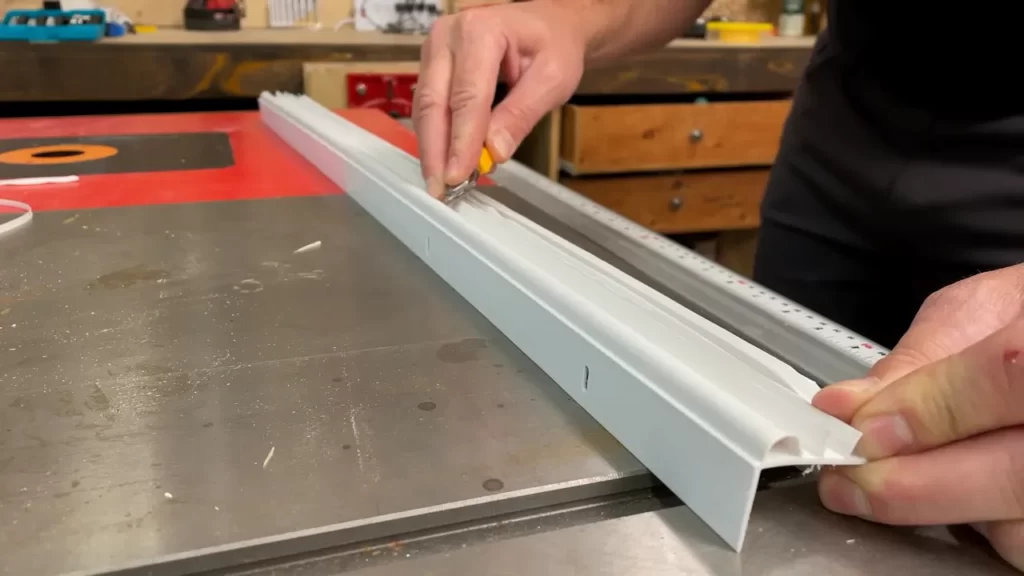
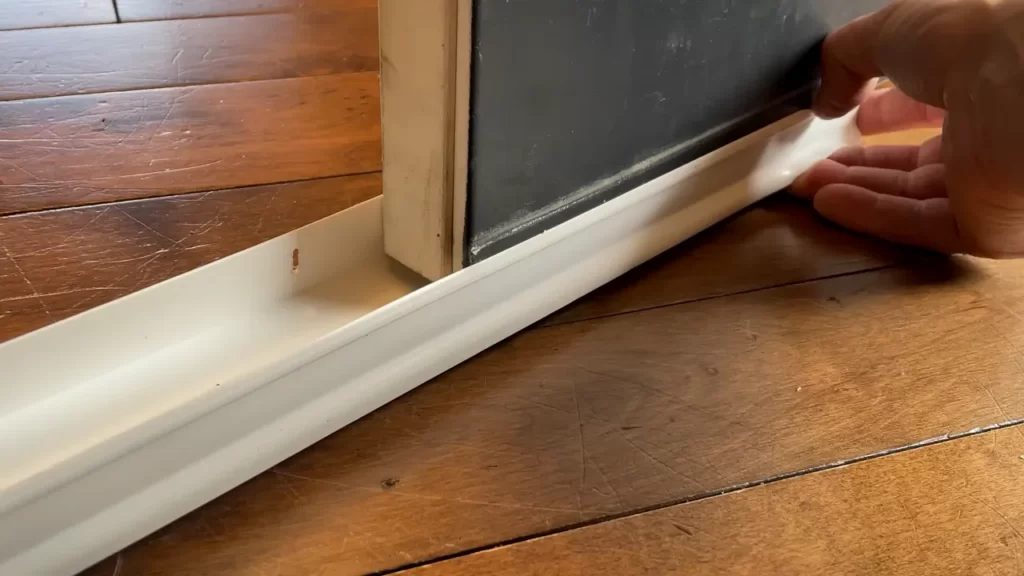
Ensuring Proper Placement
Before testing the door sweep, it is crucial to ensure that it is installed correctly and in the right position. Following these steps will help you achieve the desired results: 1. Start by fully extending the door sweep. This will allow you to gauge its overall length and confirm that it covers the entire width of the door. 2. Position the door sweep at the bottom of the door. Make sure that the flexible seal is in contact with the threshold and that the rigid portion of the sweep is flush against the door. 3. Check for any obstructions or gaps between the door sweep and the door or threshold. These can compromise the sweep’s effectiveness. If you notice any, you may need to readjust the placement or trim the sweep to fit your door’s dimensions. 4. Once you are satisfied with the position, secure the door sweep using the provided screws or adhesive, depending on the type of sweep you have.
Testing for a Draft-Free Seal
After ensuring proper placement, it’s time to test the door sweep for a draft-free seal. This step will help determine if any adjustments are necessary to achieve maximum efficiency. Here’s how you can do it: 1. Close the door gently to avoid any unnecessary force that could affect the seal. 2. Stand inside the room, facing the closed door. Carefully observe the gap between the door and the floor. 3. Run your hand along the bottom of the door, feeling for any cold air drafts. If you feel a draft, it means there is a gap that needs to be addressed. 4. If there is a gap or draft, adjust the door sweep accordingly. You may need to lower or raise the sweep, or trim it to fit your door’s specifications. Repeat the testing process until you achieve a draft-free seal. Testing and adjusting the door sweep may require some trial and error, but it is essential to ensure the effectiveness of your insulation efforts. By following these steps, you can enjoy a more comfortable and energy-efficient home.
Regular Inspection And Cleaning
Regular inspection and cleaning are essential for maintaining the functionality and longevity of your door sweep. By regularly inspecting and cleaning your door sweep, you can ensure that it effectively seals the gap at the bottom of your door, keeping out drafts, dust, and insects. In this section, we will discuss the importance of maintenance and share cleaning techniques that will help prolong the lifespan of your door sweep.
Importance of maintenance
Regular maintenance of your door sweep is important for several reasons. First and foremost, a well-maintained door sweep will provide a tight seal, preventing air leakage and improving energy efficiency. This can result in lower energy bills and a more comfortable living environment. Additionally, regular inspection and cleaning will help extend the lifespan of your door sweep, saving you money in the long run.
Cleaning techniques for longevity
To ensure that your door sweep functions optimally and lasts for as long as possible, it is crucial to clean it regularly. Here are some cleaning techniques that you can follow to maintain your door sweep:
- Remove any loose debris: Start by removing any loose debris such as dust, dirt, and pet hair from the door sweep. You can use a vacuum cleaner or a soft brush to gently sweep away the dirt.
- Wipe with a damp cloth: After removing the loose debris, dampen a cloth with mild soap and water. Gently wipe down the door sweep, paying close attention to the bottom part that comes in contact with the floor. This will help remove any stubborn dirt or grime.
- Rinse and dry: Once you have wiped the door sweep with a damp cloth, rinse it
- thoroughly with clean water to remove any soap residue. Then, use a dry cloth to pat it dry. It is important to ensure that the door sweep is completely dry before reinstalling it, as moisture can lead to mold or mildew growth.
- Apply lubricant: If your door sweep is made of rubber or silicone, you can apply a silicone-based lubricant to keep it flexible and prevent cracking. Be sure to follow the manufacturer’s instructions when applying the lubricant.
Regular inspection and cleaning of your door sweep will significantly contribute to its longevity and performance. By incorporating these simple cleaning techniques into your regular maintenance routine, you can ensure that your door sweep remains in top condition, providing effective protection against drafts and improving energy efficiency.
Troubleshooting Common Issues
When it comes to installing a door sweep, you might encounter some common issues that can affect its effectiveness. Don’t worry, though! We’ve got you covered with some troubleshooting tips to help you overcome these problems and ensure your door sweep is sealing properly. Let’s take a look at each issue and how you can address it.
Door sweep not sealing properly
If you notice that your door sweep is not sealing properly, it could be due to a few reasons. One of the main culprits is misalignment. Over time, the door sweep may become misaligned, preventing it from making full contact with the floor. This can result in drafts and energy loss. To address this issue, follow these steps:
- Close the door and inspect the gap between the door bottom and the floor. Look for any areas where the door sweep is not making contact.
- If you notice a gap, use a measuring tape to measure the distance between the door bottom and the floor. This will help you determine the amount of adjustment needed.
- To realign and adjust the door sweep, you will likely need to unscrew it from the door. Refer to the manufacturer’s instructions for guidance on removing the door sweep.
- Once the door sweep is removed, adjust its position so that it comes into contact with the floor across the entire width of the door.
- With the door sweep properly aligned, carefully screw it back into place. Ensure the screws are tightened securely.
By realigning and adjusting the door sweep as needed, you can ensure that it seals properly and effectively blocks drafts from entering your home.
Frequently Asked Questions On How To Install A Door Sweep
What Is The Best Way To Install A Door Sweep?
To install a door sweep, follow these simple steps: First, measure the width of the door and purchase the appropriate size of sweep. Next, clean the bottom of the door to ensure a smooth surface. Then, align the sweep to the door bottom and screw it in place using the provided screws.
Finally, test the sweep by closing the door to ensure proper sealing.
Are Door Sweeps Easy To Install?
Yes, door sweeps are easy to install. They require no special tools and can be installed in just a few simple steps. Simply measure the width of your door, cut the sweep to the appropriate length, and attach it to the bottom of the door.
It’s a quick and effective way to prevent drafts and keep your home more energy efficient.
Can You Install Door Sweep Without Removing Door?
Yes, you can install a door sweep without removing the door. It can be easily attached to the bottom of the door to block drafts and keep out noise and debris.
Do You Install Door Sweep Inside Or Outside?
Install door sweep on the inside of the door.
Conclusion
Installing a door sweep is a simple and cost-effective way to improve energy efficiency, reduce noise, and keep pests out of your home. By following the steps outlined in this guide, you can easily install a door sweep yourself without the need for professional assistance.
Take the initiative to ensure your doors are properly sealed and start enjoying the benefits of a more comfortable and secure home. With a few simple tools and a little bit of time, you can make a big difference in your home’s insulation and overall comfort.