o install a gate, measure the desired location, dig holes for the posts, set the posts in concrete, attach the gate hardware, and hang the gate. Installing a gate involves several steps: measuring the area where you want to place the gate, digging holes for the gate posts, setting the posts in concrete, attaching the necessary hardware, and finally, hanging the gate.
By following each step carefully, you can ensure that your gate is securely installed and functional. Whether you are adding a gate for security or aesthetic purposes, a well-installed gate can enhance the appearance and functionality of your property.
Researching The Right Gate Type And Materials
Considering the Purpose and Style of the Gate
Before installing a gate, it’s important to consider its purpose and style. Evaluating the purpose will help determine the type of gate that best suits your needs. Are you installing a gate for added security, to keep pets or children safe, or simply for aesthetic reasons? Identifying the purpose will guide your gate selection process.
Next, consider the style of the gate that complements your property. Do you prefer a traditional wooden gate that blends with the surroundings? Or perhaps a modern metal gate for a sleek and contemporary look? By matching the style of your gate to your home’s architecture, you can enhance its overall curb appeal.
Exploring Different Gate Materials and their Pros and Cons
There are various gate materials to choose from, each with their own advantages and disadvantages. Exploring these options will help you select the most suitable material for your gate.
| Gate Material | Pros | Cons |
|---|---|---|
| Wood | Provides a classic and natural aesthetic. Can be customized easily. | Requires regular maintenance such as staining or painting. Prone to warping or rotting over time. |
| Metal | Durable and offers excellent security. Requires minimal maintenance. | Can be more expensive compared to other materials. May rust if not properly cared for. |
| Wrought Iron | Offers a sophisticated and elegant look. Provides superior strength and durability. | Can be pricey. Requires occasional maintenance to prevent rust. |
| Vinyl | Low maintenance and resistant to rot, rust, and fading. Comes in a variety of styles and colors. | Not as strong as metal or wrought iron. May become brittle over time in extreme weather conditions. |
Taking Accurate Measurements for the Gate
Once you have determined the type and material for your gate, it’s crucial to take accurate measurements to ensure a proper fit. Follow these steps:
- Start by measuring the width of the opening where the gate will be installed.
- Measure the height from the ground to the desired top of the gate.
- If there are any slope or uneven ground, use a level to measure the highest point and the lowest point to ensure a balanced gate.
- Consider hinge and latch placement and measure accordingly.
By taking precise measurements, you can avoid the hassle of returns or having to make adjustments after the gate is already installed.
Gathering The Necessary Tools And Materials
Before you start installing a gate, it is crucial to gather all the necessary tools and materials. Having everything you need at hand will not only make the installation process smoother but also save you time and hassle. In this section, we will discuss the important tools and equipment, as well as the essential materials, required for gate installation. Additionally, we will highlight the importance of personal protection gear to ensure safety throughout the process.
Creating a Checklist of Required Tools and Equipment
Creating a checklist of the required tools and equipment is a smart way to stay organized and ensure that you have everything you need for the gate installation. To guide you through the process, consider the following table:
| Tools | Equipment |
|---|---|
| Screwdriver | Measuring tape |
| Drill | Level |
| Wrench | Hammer |
| Adjustable pliers | Saw |
| Socket set | Nut driver |
| Wire cutters |
Keep in mind that this is a general list, and the specific tools required may vary depending on the type and size of the gate you are installing. It is always recommended to refer to the manufacturer’s instructions or seek professional advice to ensure you have all the necessary tools.
Collecting the Essential Materials for Gate Installation
In addition to the tools and equipment, collecting the essential materials is equally important for a successful gate installation. The materials required may include:
- Gate panels and frame
- Hinges and screws
- Latches and locks
- Post and concrete
- Gate hardware
- Support posts
- Gate opener (if applicable)
Again, this is a general list, and specific materials may be needed based on the type and style of gate you are installing. Take into consideration factors such as gate size, material, and the location where the gate will be installed to ensure you have all the necessary materials.
Ensuring Safety Gear for Personal Protection
While installing a gate, it is essential to prioritize personal safety. Wearing the appropriate safety gear will minimize the risk of potential injuries. Consider gathering the following safety gear for gate installation:
- A pair of safety goggles
- Protective gloves
- Ear protection
- Hard hat
- Dust mask
These safety gears will help protect your eyes, hands, ears, head, and respiratory system from any potential harm. Remember, safety should always be your top priority, and using the right gear will ensure a smooth and secure installation process.
Digging And Preparing The Post Holes
When it comes to installing a gate, one of the most crucial steps is digging and preparing the post holes. This is the foundation of your gate and ensures the stability and durability of your installation. In this section, we will guide you through the process, from determining the correct location and alignment for the posts to preparing the holes for installation.
Determining the Correct Location and Alignment for the Posts
Determining the correct location and alignment for the posts is essential to ensure that your gate functions properly and complements the overall aesthetic of your property. Start by considering the purpose of the gate and the path it will span. Consider any obstructions that may affect its swing, such as trees or uneven surfaces. Once you have a clear idea of where the gate should be, mark the positions for the posts using stakes or spray paint.
Measuring and Marking the Post Hole Locations
After determining the correct location and alignment, it’s time to measure and mark the post hole locations. Start by measuring the width of your gate and add extra space for the posts. Typically, this is about 3 to 4 inches on each side. Use a tape measure and mark the spots where the center of each post will be placed. This will serve as a guide when digging the holes.
Digging the Holes According to the Specified Dimensions
With the post hole locations marked, it’s time to start digging. Use a post hole digger or an auger to dig the holes according to the specified dimensions. The depth of the holes should be below the frost line to prevent frost heave from impacting the stability of the posts. Refer to the manufacturer’s instructions or local building codes for the recommended depth and diameter of the holes. As you dig, ensure that the sides of the holes are straight and smooth for better post placement.
Preparing the Holes, Checking for Level, and Removing Debris
Once the holes are appropriately dug, it’s important to prepare them before installing the posts. Start by checking the levelness of the holes using a level tool. Adjust the depth or add gravel at the bottom if necessary to achieve a level surface. Also, remove any debris or loose soil from the holes to ensure a firm and stable foundation for the posts. Cleaning the holes thoroughly will prevent any settlement or shifting of the posts over time.
In conclusion, digging and preparing the post holes is a vital step in installing a gate. Determining the correct location and alignment, measuring and marking the post hole locations, digging the holes according to the specified dimensions, and preparing the holes are crucial to ensure a stable and long-lasting gate installation.
Setting The Gate Posts
Inserting the Posts into the Holes
Once you have determined the ideal location for your gate, the next step in installing it is setting the gate posts. These posts will provide the necessary support and stability for your gate. Inserting the posts into the holes is a crucial part of the installation process.
First, you’ll need to dig two holes, one for each post. The holes should be deep enough to accommodate at least one-third of the length of the posts. This will ensure that they are securely anchored in the ground.
After digging the holes, place the gate posts into them, ensuring that they are positioned upright and parallel to each other. If you are installing a heavier gate, it might be beneficial to enlist the help of a friend to hold the posts steady while you proceed to the next step.
Aligning and Leveling the Posts
Proper alignment and leveling of the gate posts are vital for ensuring that your gate operates smoothly. Alignment ensures that the gate will open and close without any obstructions, while leveling guarantees that it will be aesthetically pleasing and sit squarely on the ground.
To align the posts, use a level and adjust them until they are perfectly vertical. This step will prevent your gate from sagging or sticking in the future. Additionally, use a tape measure to ensure that the distance between the two gate posts is consistent.
With the posts properly aligned, proceed to level them. Adjust the height of each post until the top surface is even. This will provide a solid foundation for the gate and prevent any uneven weight distribution.
Securing the Posts with Concrete or Gravel Fill
After aligning and leveling the gate posts, it’s time to secure them in place. This can be done using either concrete or gravel fill, depending on your preference and the soil conditions.
If you opt for concrete, prepare a mix of concrete according to the manufacturer’s instructions. Fill the holes around the posts with the concrete mix, making sure it reaches the desired depth. Use a shovel or trowel to compact the concrete and eliminate any air pockets. Allow the concrete to set and cure as per the instructions provided, usually around 24 to 48 hours.
Alternatively, if you choose to use gravel fill, pour it around the posts until the holes are completely filled. Compact the gravel using a tamper or the back of a shovel to provide stability and support.
Allowing Sufficient Time for the Posts to Settle
Once the posts are secured with concrete or gravel fill, it’s crucial to allow sufficient time for them to settle. This step helps prevent any movement or shifting after the gate is installed, ensuring long-term stability.
Although the exact time needed for the posts to settle may vary, it’s generally recommended to wait at least a few days before proceeding with the gate installation. During this time, it’s important to avoid putting any weight or pressure on the posts.
By continually gauging the stability of the gate posts and waiting for them to settle, you can ensure that your gate is installed securely and will function properly for years to come.
Measuring And Marking For Hinges And Latch
One of the essential steps in installing a gate is measuring and marking for hinges and a latch. Proper measurements and accurate marking are crucial to ensure that the gate functions correctly and securely. In this section, we will guide you through the process of determining the placement of hinges and a latch, taking accurate measurements for mounting points, and marking the locations for hardware installation.
Determining the Placement of Hinges and Latch
Before you begin measuring, it is important to determine the placement of hinges and a latch on your gate. The hinges are responsible for providing stability and allowing the gate to swing open and closed smoothly. The latch, on the other hand, ensures that the gate stays securely closed when needed.
To determine the ideal placement of hinges and a latch, consider the weight and size of your gate. Heavier gates may require additional hinges for better support, while the placement of the latch will depend on whether you want it to be at waist height or higher.
Taking Accurate Measurements for Mounting Points
Once you have determined the placement of hinges and a latch, it’s time to take accurate measurements for the mounting points. These measurements will help you align the hinges and latch properly, ensuring that the gate functions smoothly.
Here’s a step-by-step guide to taking accurate measurements:
- Using a tape measure or ruler, measure the width and height of your gate.
- Divide the width measurement by two to determine the center point of the gate.
- Measure the distance from the top of the gate to the desired placement of the hinges and latch.
Remember to double-check your measurements to avoid any errors that could affect the gate’s installation and functionality.
Marking the Locations for Hardware Installation

Once you have taken accurate measurements, it’s time to mark the locations for hardware installation. Marking the gate will make it easier for you to install the hinges and latch precisely.
Here’s how you can mark the locations:
- Using a pencil or marker, make a small mark on the gate indicating the center point for the hinges.
- Measure and mark the distance from the top of the gate to the desired placement of the hinges and latch.
- Ensure that the markings are level and aligned with each other.
By marking the locations accurately, you will have a clear guide for installing the hinges and latch, resulting in a sturdy and properly functioning gate.
Remember, the measurements and markings are critical to the overall installation process, so take your time and double-check your work before moving on to the next step.
Installing The Hinges And Latch
When it comes to installing a gate, one of the most crucial steps is properly attaching the hinges and latch. These components not only ensure the gate’s stability and functionality but also contribute to its overall aesthetic appeal. In this section, we will guide you through the process of installing the hinges to both the gate and gate posts, ensuring proper alignment and a smooth swing. We will also cover the installation of the latch mechanism for secure closure and how to test the functionality of both the hinges and latch.
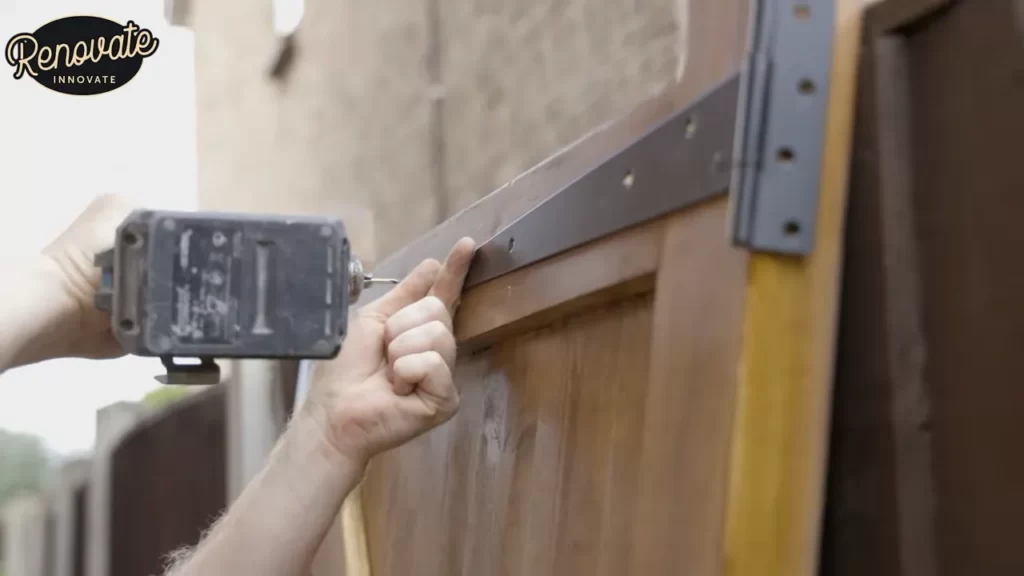
Attaching the Hinges to the Gate and Gate Posts
Start the installation process by attaching the hinges to both the gate and gate posts. This step requires careful measurement and consideration to achieve proper alignment and optimal functionality. Follow these steps to ensure a successful installation:
- Begin by placing the gate on a flat surface, ensuring it is oriented correctly as per your desired swing direction.
- Measure and mark the positions where the hinges will be attached to the gate. These markings should be equidistant from the top and bottom of the gate, ensuring stability and balance.
- Using a drill and appropriate screws or bolts, attach the hinges to the marked positions on the gate.
- Next, move to the gate posts and repeat the measuring and marking process. The key here is to align the hinges on the gate posts with the hinges on the gate, creating a seamless connection.
- Once marked, use a drill and suitable hardware to securely attach the hinges to the gate posts.
Ensuring Proper Alignment and Smooth Swing of the Gate
After attaching the hinges, it’s essential to ensure proper alignment and a smooth swing of the gate. Here are some tips to accomplish this:
- Check that the gate is aligned properly with the gate posts, ensuring it is level vertically and horizontally.
- Make any necessary adjustments by tightening or loosening the hinge screws or bolts to achieve the desired alignment.
- Gently swing the gate back and forth to test its movement. If it feels stiff or doesn’t swing smoothly, inspect the alignment and make additional adjustments as needed.
Installing the Latch Mechanism for Secure Closure
Once the hinges are properly installed and the gate swings smoothly, it’s time to install the latch mechanism for secure closure. Follow these steps to ensure a safe and reliable latch:
- Select a suitable latch mechanism that meets your requirements and complements the gate’s design.
- Measure and mark the spot on the gate where the latch will be installed. It should be at a comfortable height and easily accessible from both sides of the gate.
- Using a drill and appropriate screws, attach the latch mechanism to the marked spot on the gate, following the manufacturer’s instructions.
- Next, locate the corresponding position on the gate post for the strike plate. Mark it and securely attach the strike plate using a drill and suitable hardware.
Testing the Functionality of the Hinges and Latch
Once the hinges and latch are installed, it’s crucial to test their functionality to ensure proper operation. Follow these steps to perform a thorough test:
- Open and close the gate several times, checking for any obstructions or abnormalities in the swinging motion.
- Test the latch mechanism by engaging and disengaging it multiple times to ensure smooth and secure closure.
- Inspect the gate’s alignment and stability during the testing process. Make any necessary adjustments to the hinges or latch if needed.
- Finally, check the overall appearance of the gate, ensuring it meets your aesthetic standards and complements the surrounding environment.
By following these guidelines, you can successfully install the hinges and latch mechanism for your gate, ensuring proper alignment, smooth swing, and secure closure. Remember to conduct regular maintenance and inspections to keep your gate functioning optimally for years to come.
Adjusting And Fine-Tuning The Gate
Once you have successfully installed your gate, it’s time to adjust and fine-tune it to ensure smooth operation and optimal performance. This step is crucial as it guarantees that your gate functions properly and provides the necessary security and convenience. In this section, we will guide you through the important aspects of adjusting and fine-tuning your gate, including checking for smooth opening and closing, making necessary alignments and level adjustments, and ensuring adequate clearance for proper gate operation.
Checking for Smooth Opening and Closing of the Gate
One of the first things you need to do after installing a gate is to test its opening and closing mechanism. This step ensures that the gate moves smoothly without any hitches or obstructions. To check for smooth operation, follow these steps:
- Manually open the gate and observe its movement. Ensure that it moves along its tracks or hinges without excessive force or resistance.
- If you notice any difficulties while opening or closing the gate, inspect the tracks, hinges, or rollers for any debris, damage, or misalignment that may be causing the issue.
- Remove any obstructions, clean the tracks or hinges, and lubricate them with a suitable lubricant to ensure smooth operation.
- Test the gate again to ensure that it opens and closes smoothly.
Making Necessary Adjustments to Alignment and Leveling
Proper alignment and leveling are essential for the gate to function smoothly and securely. Here’s how you can make the necessary adjustments:
- Use a level to check if the gate is hanging straight and level. If it appears uneven, adjust the hinges or supporting posts as needed.
- Check the alignment of the gate with the adjoining structures such as fences or walls. Make adjustments to ensure that the gate aligns properly without any gaps or overlaps.
- Tighten or loosen the screws or bolts on the hinges or supporting posts to achieve the desired alignment and level.
- Recheck the level and alignment after making adjustments to confirm that the gate is properly aligned and leveled.
Ensuring Adequate Clearance and Proper Gate Operation
In order for the gate to operate smoothly, it’s essential to ensure adequate clearance and proper operation. Follow these steps to guarantee optimal gate performance:
- Measure the clearance between the gate and the ground or any obstructions above or below it. Ensure there is enough space for the gate to open and close without hindrance.
- If necessary, adjust the gate’s height or bottom clearance to achieve proper clearance.
- Inspect the gate’s hinges, locks, and latches to ensure they are secure and functioning correctly. Make any necessary adjustments or repairs.
- Test the gate by opening and closing it multiple times to ensure it operates smoothly and securely.
By following these guidelines and carefully adjusting and fine-tuning your gate, you can ensure that it operates smoothly, aligns correctly, and provides the security and convenience you desire. Taking the time to properly adjust and fine-tune your gate will save you from potential issues and ensure years of trouble-free operation.
Applying Protective Coatings And Finishes
One of the crucial steps in installing a gate is applying protective coatings and finishes. This not only enhances the overall appearance of the gate but also ensures its durability against weather elements and other damaging factors. By taking the time to select appropriate protective coatings and applying them correctly, you can significantly extend the lifespan of your gate. In this blog post, we will discuss two important aspects related to protective coatings and finishes: considering weather resistance and longevity of the gate, and applying protective coatings or paint as desired.
Considering Weather Resistance and Longevity of the Gate
When it comes to protecting your gate from the harsh elements of nature, it is crucial to consider the weather resistance and longevity of the gate. Different climatic conditions can have varying effects on the gate’s materials. For instance, gates installed in coastal areas might be exposed to high humidity, saltwater, and strong winds, which can accelerate corrosion and deterioration.
In such cases, it is recommended to opt for protective coatings that are specifically designed to withstand these adverse weather conditions. These coatings are often made with corrosion-resistant materials that provide an additional layer of protection against saltwater, moisture, and UV rays. By choosing the right protective coating, you can ensure that your gate remains durable and visually appealing for years to come.
Applying Protective Coatings or Paint as Desired
Once you have considered the weather resistance and longevity of your gate, it’s time to apply protective coatings or paint as desired. The choice between protective coatings and paint largely depends on your preference, the gate’s materials, and the level of protection you desire.
If you prefer a natural look and want to enhance the natural beauty of your gate’s materials, you can opt for protective coatings. These coatings typically come in clear or tinted varieties, allowing the original color and texture of the gate to shine through while providing an additional layer of protection.
On the other hand, if you wish to add a personal touch and customize the appearance of your gate, paint can be an excellent option. Paint allows you to choose from a wide range of colors and finishes, transforming your gate into a standout feature of your property. However, it’s crucial to select paint that is specifically formulated for exterior use and is capable of withstanding weather conditions.
Tip: When applying protective coatings or paint, make sure to follow the manufacturer’s instructions and guidelines. This will ensure that the coatings adhere properly to the gate’s surface and provide the desired level of protection.
Regardless of the protective coating or paint you choose, it is essential to allow sufficient drying time before putting your gate into use. Proper drying time not only ensures that the protective coatings or paint bond securely to the gate but also prevents surface imperfections and potential damage.
Caution: Rushing the drying process can lead to a subpar finish and reduced longevity of the protective coatings or paint. Hence, it’s crucial to be patient and let the coatings dry completely before using the gate.
Remember, applying protective coatings and finishes is an important step to maintain the longevity and visual appeal of your gate. By considering weather resistance, choosing the right protective coating or paint, and allowing sufficient drying time, you can ensure that your gate remains a sturdy and beautiful asset to your property for years to come.
Frequently Asked Questions Of How To Install A Gate
How Do You Attach A Gate To A Fence?
To attach a gate to a fence, follow these steps: 1. Position the gate within the fence opening. 2. Ensure the gate is level and plumb. 3. Mark the spots where the gate will be attached to the fence. 4.
Install hinges on the gate and the fence post. 5. Attach the gate latch to keep it closed.
How Much Gap Between Gate And Post Chain Link?
The ideal gap between a gate and post in a chain link fence is around 2 inches for proper functionality and durability.
How Much Does It Cost To Set Up A Gate?
The cost to set up a gate varies depending on factors like material, size, customization, and installation complexity. Generally, gate installation can range from a few hundred to several thousand dollars.
How Do You Anchor A Gate To The Wall?
To anchor a gate to the wall, follow these steps: 1. Position the gate against the wall where you want it. 2. Use a level to ensure it is straight. 3. Mark the location for the hinges on the wall.
4. Use a drill to create pilot holes for the screws. 5. Attach the hinges to the wall using screws.
How Long Does It Take To Install A Gate?
The time it takes to install a gate varies depending on the size, complexity, and materials used. Generally, it can take a few hours to a full day.
What Tools Are Needed To Install A Gate?
Common tools required for gate installation include a measuring tape, level, screwdriver, drill, saw, and wrench. The specific tools needed will vary based on the gate type and material.
Conclusion
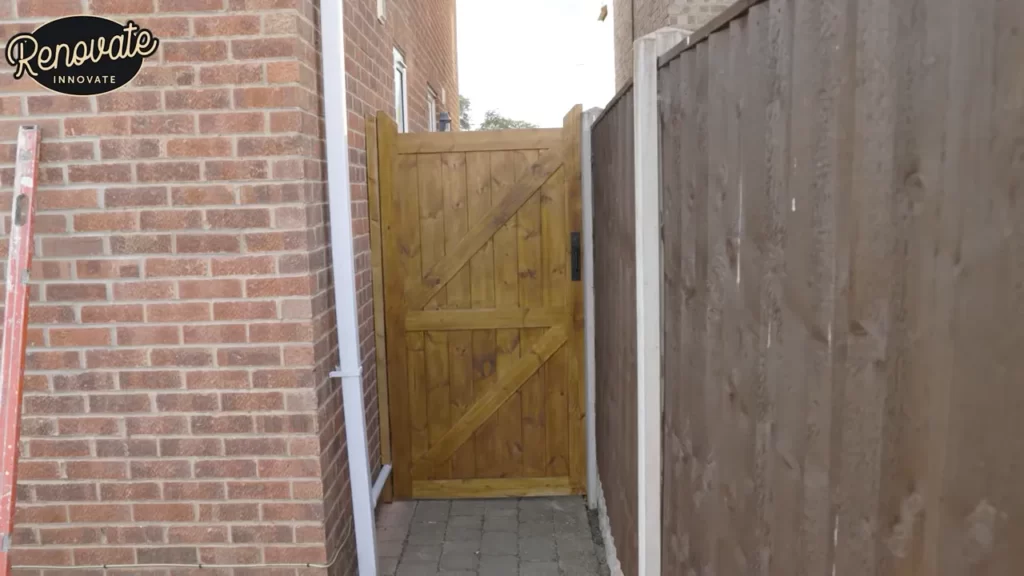
Installing a gate is a straightforward process that can enhance both the security and aesthetics of your property. By following the step-by-step guide outlined in this blog post, you can confidently take on this DIY project. Remember to choose the appropriate gate style, gather the necessary tools, and carefully measure and install the gate.
With proper planning and attention to detail, you can enjoy the benefits of a functional and stylish gate for years to come. So why wait? Get started on installing your gate today!