To install a hinged glass shower door, measure the opening width, attach the hinges to the door, mark the position for the hinges on the shower jamb, drill pilot holes, and secure the hinges with screws. Once the hinges are in place, install the handle on the door using the provided hardware, and attach the door to the hinges.
Adjust the hinges to ensure proper alignment and functionality of the door. Finally, check that the door opens and closes smoothly before completing the installation process.
Measuring The Shower Opening
Measuring the Shower Opening
Before installing a hinged glass shower door, it is crucial to take accurate measurements of the shower opening. By doing so, you can ensure that the glass door fits perfectly, providing a seamless and functional addition to your bathroom. To determine the size of the glass door, you will need to perform a few measurements. Let’s dive into the step-by-step process.
Taking accurate measurements of the shower opening
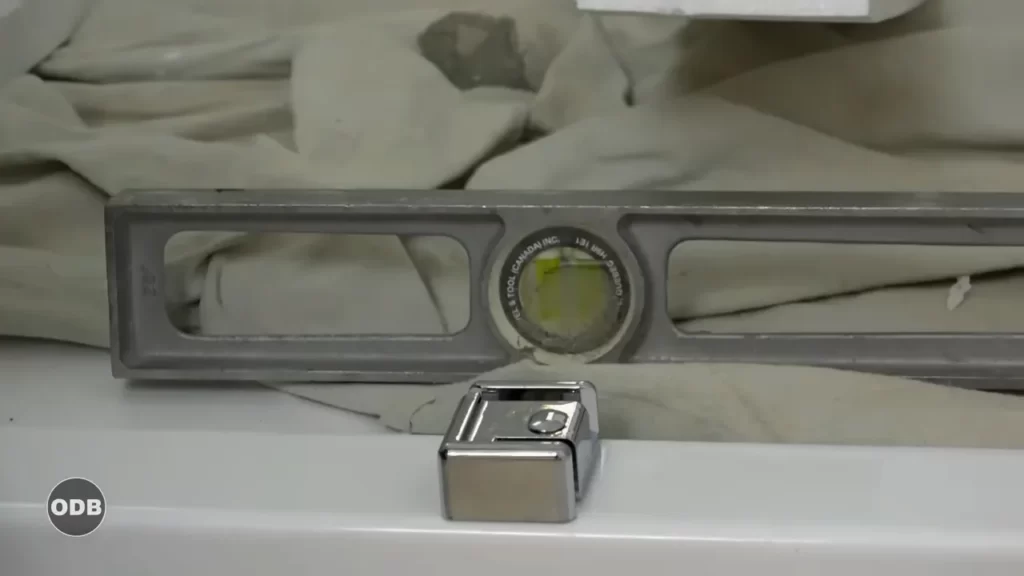
The first step in measuring the shower opening is to gather the necessary tools. You will need a measuring tape, a level, and a pencil. Once you have these items handy, follow these steps:
- Start by measuring the height of the shower opening. Place the measuring tape at the highest point of the shower threshold and extend it all the way up to the ceiling. Be sure to measure both the left and right sides of the opening, as sometimes the walls may not be perfectly vertical. Note down the measurements for each side.
- Next, measure the width of the shower opening. Place the measuring tape at one side of the opening and extend it across to the other side. Again, take measurements from both the top and bottom of the opening to account for any variations. Record the measurements for each side.
- Once you have obtained the height and width measurements, use a level to ensure that the shower opening is plumb and square. Adjustments may be necessary if the walls are not perfectly straight. A level will help you identify any discrepancies.
Determining the size of the glass door
After obtaining accurate measurements of the shower opening, it’s time to determine the size of the glass door. The dimensions you recorded earlier will guide you in selecting the appropriate size. Keep in mind that there are two main types of glass doors: framed and frameless.
If you opt for a framed glass door, you will need to account for the width of the frame. Typically, the frame adds around 1/2 inch to the overall width of the door. Take this into consideration while choosing the size.
On the other hand, frameless glass doors give a more modern and open appearance. For these doors, the measurements you took earlier should provide a good estimate of the required size. It’s crucial to ensure that the glass door will fit snugly within the shower opening, providing sufficient coverage to prevent any water leakage.
With the accurate measurements in hand, you can confidently proceed to select and install the hinged glass shower door, knowing that it will perfectly complement your bathroom and create a stunning focal point. Stay tuned for our next blog post, where we will guide you through the installation process.
Gathering The Tools And Materials
Gathering the necessary tools and materials is the first step towards successfully installing a hinged glass shower door. By ensuring you have everything you need before you begin, you can avoid interruptions and complete the installation efficiently. In this section, we will list the essential tools and materials you will need for this project.
List of tools required for installation
To install a hinged glass shower door, you will need the following tools:
- Tape measure
- Drill
- Screwdriver (flathead and Phillips head)
- Level
- Hammer
- Safety goggles
- Masking tape
- Caulking gun
- Plumber’s putty
- Tile cutter (if necessary)
Make sure to have all these tools readily available before you start the installation process. They will come in handy at different stages and help you achieve a professional-looking result.
Materials needed for a hinged glass shower door
In addition to the tools, here is a list of materials you will need to install a hinged glass shower door:
- Hinged glass shower door kit (including the glass panels, hinges, handles, and screws)
- Shower door jamb (if required for your specific installation)
- Shower door sweep
- Sealant or caulk
- Plastic spacers or shims
Take note of the specific details of your glass shower door kit and measure your shower space accordingly. This will ensure that you have the correct materials and avoid any unnecessary delays or complications during the installation process.
Removing The Frame And Door

Removing the Frame and Door When it comes to installing a hinged glass shower door, the first step is to remove the existing frame and door. This process requires careful attention to detail to ensure a clean and level surface for the new door installation. In this section, we will guide you through the steps to remove the frame and door of your old shower enclosure, allowing for a smooth transition to the installation of your new hinged glass shower door. Steps to Remove the Frame and Door 1. Prepare the workspace: Before getting started, it is essential to prepare the workspace. Protect the floor and surrounding areas with drop cloths or plastic sheets to prevent any damage during the removal process. 2. Inspect the frame and door: Begin by inspecting the frame and door for any visible screws or fasteners. Using a screwdriver or Allen wrench, carefully remove these screws to release the frame from the walls and the door from the frame. 3. Remove the door: Once you have detached the frame from the walls, you can focus on removing the shower door. Gently lift the door out of the frame, making sure to support it securely to avoid any accidents or damage. Depending on the type of hinges used, you may need to unscrew or detach them from the frame to entirely remove the door. 4. Disassemble the frame: With the door out of the way, it’s time to disassemble the frame. Carefully remove any remaining screws or fasteners that connect the frame to the walls. Pay close attention to each corner and joint, ensuring all connections are loosened or detached. 5. Remove silicone or caulking: Next, remove any silicone or caulking that was used to secure the frame to the walls. A putty knife or a scraper tool can be useful for this task. Take care not to damage the walls during the process, as you want to create a clean surface for the installation of the new door. 6. Clean and level the surface: After the frame and door have been completely removed, it’s crucial to clean and level the surface. Use a mild soap and water solution to remove any dirt or debris, ensuring a clean and smooth area for the new door installation. Additionally, check for any imperfections or inconsistencies in the walls. If necessary, make any repairs or adjustments to ensure a level surface for the new frame. By following these steps, you can effectively remove the frame and door of your old shower enclosure, providing a clean and level surface for the installation of your new hinged glass shower door. Remember to take your time and proceed with caution to avoid any unnecessary damage during this process. In the next section, we will guide you through the steps for measuring and preparing the space for your new hinged glass shower door installation.
Preparing The Shower Opening
Before you can install a hinged glass shower door, it is important to properly prepare the shower opening. This involves cleaning the shower area and removing any old caulk or residue that may be present. By following these steps, you can ensure a smooth and successful installation process.
Cleaning the Shower Area
The first step in preparing the shower opening is to thoroughly clean the shower area. Use a mild cleaner or soap and water mixture to remove any dirt, grime, or soap scum that may have accumulated. Be sure to rinse the area well and allow it to dry completely before proceeding with the installation.
Removing any Old Caulk or Residue
Next, it is important to remove any old caulk or residue that may be present in the shower opening. This can be done using a caulk removal tool or a utility knife. Carefully scrape away the old caulk, being sure not to damage the shower walls or floor.
After removing the old caulk, clean the area with a solvent or caulk remover to remove any remaining residue. This will help ensure a clean and smooth surface for the new hinged glass shower door to be installed.
Note: Wear protective gloves and eyewear when working with solvents or caulk removers.
Once the shower area is clean and free of old caulk or residue, you can proceed with the installation of the hinged glass shower door. By taking the time to properly prepare the shower opening, you can ensure a secure and aesthetically pleasing installation.
Attaching The Hinges

Attaching the hinges is a crucial step in the installation process of a hinged glass shower door. Properly securing the hinges ensures stability and functionality, guaranteeing a safe and durable shower door. In this section, we will guide you through the necessary steps for attaching the hinges, including marking the hinge locations and securing them to the wall and glass door.
Marking the Hinge Locations
Before attaching the hinges, it is essential to accurately mark the locations where they will be installed. You’ll need a measuring tape, a pencil, and a level for this task.
- Start by measuring and marking the desired height of the hinges on the wall where the door will be attached. Make sure the mark is level using a bubble level.
- Next, measure and mark the positions where the hinges will be attached to the glass door. It’s crucial to ensure that the hinge locations on the wall align perfectly with those on the door.
- When marking the hinge locations on the door, you may find it helpful to use masking tape or a self-adhesive template specifically made for hinged shower doors. This will assist in keeping the marks precise and prevent any accidental damage to the glass.
Securing the Hinges to the Wall and Glass Door
Once the hinge locations are marked, it’s time to secure the hinges to both the wall and the glass door. Ensure that you have the necessary tools and materials, such as screws, anchors, and a screwdriver, as specified in the instructions provided with your hinged shower door kit.
- Attach the hinges to the wall by aligning the pre-drilled holes of the hinges with the marked locations. Use the appropriate anchors and screws to secure the hinges firmly to the wall, ensuring they are level and plumb.
- Next, attach the hinges to the glass door. Begin by inserting the provided screws through the hinge holes and partially tightening them. Take care not to overtighten, as it may crack or damage the glass.
- After attaching the hinges to both the wall and door, check for any loose connections. Gently test the movement of the door to ensure that it properly swings and closes without any obstructions. Make any necessary adjustments to the screws or positioning of the hinges if needed.
By following these steps, you can confidently complete the process of attaching the hinges when installing a hinged glass shower door. Taking the time to properly secure the hinges will result in a functional and aesthetically pleasing shower door, enhancing the overall showering experience.
Mounting The Door Frame
Now that you have successfully positioned the threshold and marked the spot for the door frame, it’s time to move on to the next step in installing a hinged glass shower door – mounting the door frame. This crucial step ensures that the door frame is secure and stable, allowing for seamless opening and closing of the shower door. By adhering to proper installation techniques, you can ensure a long-lasting and functional shower door for years to come.
Positioning the door frame accurately
Before mounting the door frame, it is essential to double-check the positioning to ensure accuracy. Properly aligning the frame will prevent any misalignment issues that may lead to water leakage or difficulty in opening and closing the door. To position the door frame accurately, follow these steps:
- Measure precisely: Use a tape measure to measure the height and width of the opening. Write down these measurements to refer to them later.
- Align the frame: Place the door frame against the wall, ensuring that it is level and plumb. This will provide a solid foundation for the door and prevent any structural issues.
- Check the measurements: Compare the measurements you took earlier with the dimensions of the door frame. Make any necessary adjustments to ensure a proper fit.
- Secure temporarily: Once the frame is properly aligned, secure it temporarily using masking tape or clamps. This will hold the frame in place while you anchor it to the wall.
Anchoring the frame to the wall
After positioning the door frame accurately, the next step is to anchor it to the wall securely. This step is crucial as it ensures the stability and durability of the hinged glass shower door. Follow these steps to anchor the frame to the wall effectively:
- Locate the studs: Use a stud finder to locate the wall studs behind the shower enclosure. These studs will provide the necessary support for the door frame.
- Mark the spots: Mark the locations of the studs on the door frame by transferring the measurements from the wall onto the frame.
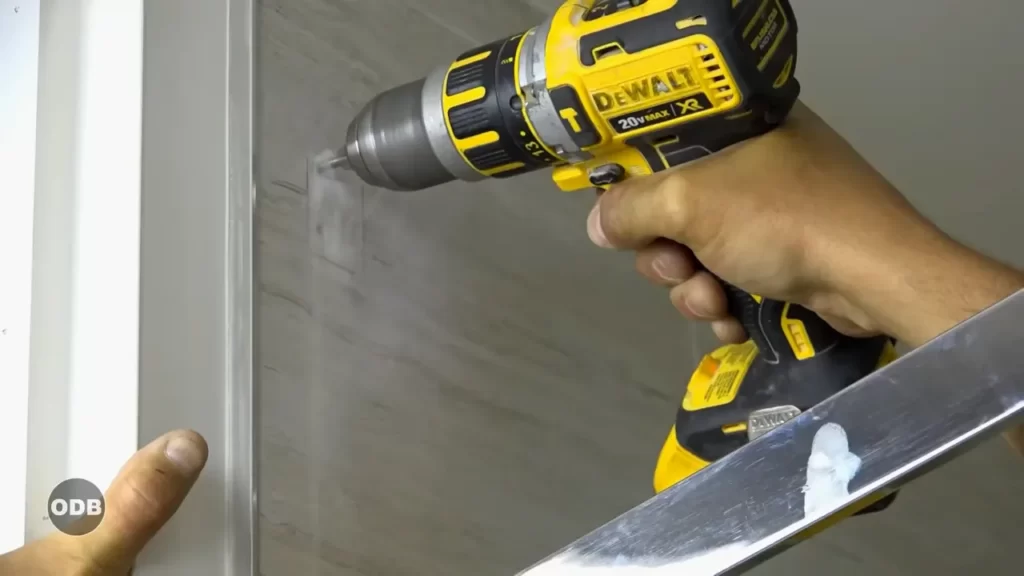
- Pre-drill holes: Using a drill and appropriate-sized drill bit, pre-drill holes into the door frame at the marked stud locations. This will make it easier to install the screws and prevent any damage to the frame.
- Attach the frame: Securely attach the door frame to the wall by using screws or anchors specifically designed for glass shower doors. Make sure to tighten them adequately to ensure a firm grip.
- Test the stability: Give the door frame a gentle shake to check for any looseness or wobbling. If it feels unstable, re-tighten the screws until the frame is secure.
With the door frame accurately positioned and securely anchored to the wall, you have completed the crucial step of mounting the hinged glass shower door. The next steps will involve attaching the door panels and making necessary adjustments for proper functionality. Stay tuned for our next blog post to learn more about installing the remaining components of your hinged glass shower door.
Hanging And Aligning The Glass Door
Hanging and Aligning the Glass Door
Installing a hinged glass shower door is a relatively simple process that can add a touch of elegance to your bathroom. Once you have prepared the opening and installed the hinges, the next step is to hang and align the glass door. This step is crucial to ensure that the door functions properly and looks seamless in your shower enclosure. In this section, we will discuss two important steps to successfully hang and align your glass shower door: Lifting the glass door onto the hinges and Adjusting the door for proper alignment.
<h3>Lifting the glass door onto the hinges</h3>
Before lifting the glass door onto the hinges, make sure you have a second person to assist you. The glass door can be heavy and delicate, so having someone help you will reduce the risk of accidents and damage to the door. Follow these steps:
- Position the glass door near the hinges, ensuring the bottom of the door is aligned with the shower threshold.
- Hold the door by the edges, using proper grip and avoiding contact with the glass surface. This will help prevent fingerprints or smudges.
- Carefully lift the door, keeping it level and parallel to the ground.
- Place the bottom edge of the door onto the lower hinge pin.
- Gently tilt the top edge of the door and align it with the upper hinge pin.
- Slowly lower the door onto the upper hinge pin, ensuring it is properly seated.
<h3>Adjusting the door for proper alignment</h3>
Once the door is hung onto the hinges, the next step is to adjust it for proper alignment. This will ensure that the door opens and closes smoothly, creating a watertight seal. Follow these steps:
- Check the gaps between the door and the shower frame. Ideally, there should be an even gap on all sides of the door.
- If the door is not properly aligned, use the adjustment screws on the hinges to make necessary adjustments.
- Loosen the screws slightly to allow for movement.
- Gently push or pull the door to adjust its position.
- Observe the gaps and make sure they are even.
- Tighten the adjustment screws once the door is properly aligned.
Applying Silicone Caulk
Choosing the Right Caulk for the Job
Selecting the correct caulk for your hinged glass shower door installation is crucial to ensure a proper and long-lasting seal. With various options available in the market, it is important to choose a caulk that is suitable for wet environments and can withstand constant water exposure. Look for a high-quality silicone caulk specifically designed for bathrooms or showers, as they have excellent water resistance and durability. Additionally, consider the color of the caulk to ensure it matches your shower’s aesthetics seamlessly.
Applying Caulk to Seal the Edges
Applying silicone caulk is a critical step after installing a hinged glass shower door, as it helps to seal the edges of the glass and prevent water leakage. To begin, gather the necessary tools including a caulk gun, utility knife, and silicone caulk. Follow these steps for a successful application:
- Prepare the area by thoroughly cleaning and drying the surface where the caulking will be applied. Remove any old caulk or residues using a utility knife or caulk remover tool.
- Load the silicone caulk tube into the caulk gun, ensuring the nozzle is cut at a 45-degree angle.
- Starting from one corner, apply a smooth and continuous bead of caulk along the edge of the glass, maintaining a steady pressure on the caulk gun.
- Use a caulk smoothing tool or your finger dipped in soapy water to gently press and smooth the caulk, creating a neat and even seal.
- Continue applying the caulk to all edges of the hinged glass shower door, ensuring consistent coverage.
- Wipe away any excess caulk using a damp cloth before it dries, leaving a clean and professional finish.
- Allow the caulk to fully cure following the manufacturer’s instructions. This typically takes around 24 hours.
By properly applying silicone caulk to seal the edges of your hinged glass shower door, you can effectively keep water from seeping out and protect your bathroom from potential water damage. A well-executed caulk application not only enhances the functionality of your shower but also adds a polished and professional look to the overall design. Take the time to choose the right caulk and follow the aforementioned steps for a successful installation.
Installing Door Handles Or Knobs
Installing door handles or knobs on your hinged glass shower door is an important step in completing the installation process. Not only do they provide functionality, but they also add a touch of style and elegance to your shower. In this section, we will discuss how to select the type of handle or knob that suits your needs and how to properly attach the hardware to the door.
Selecting the type of handle or knob
There are several factors to consider when selecting the right handle or knob for your hinged glass shower door. Firstly, think about the overall design and theme of your bathroom. Do you prefer a modern or traditional look? This will help determine whether you choose a sleek, contemporary handle or a more ornate, classic knob. Another consideration is the material of the handle or knob. Popular options include stainless steel, brass, chrome, and glass. Each material has its own unique characteristics and aesthetic appeal. For instance, stainless steel offers durability and a modern look, while brass provides a warm and traditional touch. Furthermore, think about the handle or knob’s size and shape. Determine whether you want a long handle that spans the length of the door or a smaller knob that adds a subtle touch. Consider the comfort and grip of the handle or knob as well, as you wouldn’t want it to be difficult to grasp when you want to open or close the door.
Properly attaching the hardware to the door
Once you have selected the perfect handle or knob for your hinged glass shower door, it’s crucial to attach the hardware properly. Start by measuring and marking the desired position of the handle or knob on the door. Ensure that the placement allows for easy access and comfortable use. Next, refer to the manufacturer’s instructions for any specific guidelines on installation. In most cases, you will need to use a drill to create pilot holes for the screws that will secure the handle or knob to the door. It is recommended to use a drill bit that is slightly smaller than the diameter of the screws to ensure a tight fit. After drilling the pilot holes, align the handle or knob with the holes and insert the screws. Use a screwdriver or a power drill with a screwdriver bit to tighten the screws snugly, but be careful not to overtighten as it may damage the glass. Finally, test the handle or knob to ensure it operates smoothly. Make any necessary adjustments to the tightness of the screws if needed.
In conclusion
Installing door handles or knobs on a hinged glass shower door is a relatively simple and rewarding task. By carefully selecting the right type of handle or knob and properly attaching the hardware, you can enhance the functionality and aesthetic appeal of your shower. Follow the steps outlined above to seamlessly install your chosen handle or knob and enjoy the convenience and style it brings to your daily shower routine.
Cleaning And Polishing
Wiping Down the Glass Door for a Streak-Free Finish
One of the key aspects of maintaining a clean and polished hinged glass shower door is ensuring it remains streak-free. Nobody wants to step into a shower only to be greeted by unsightly streaks and water spots on the door. Thankfully, with the right technique and tools, you can easily achieve a streak-free finish that will leave your glass door looking crystal clear.
To begin, fill a spray bottle with a mixture of equal parts vinegar and water. Vinegar is a natural and effective cleaner that helps remove any soap scum or mineral buildup on the glass. Spray the mixture onto the door, making sure to cover the entire surface. Using a lint-free cloth or a squeegee, wipe the door in a straight, overlapping motion to remove the cleaning solution and any dirt or grime. Remember to apply gentle pressure to prevent any scratches on the glass.
Once you have wiped down the entire door, inspect it for any streaks or water spots. If you notice any, repeat the process until the door is completely streak-free. Additionally, if your glass door has any intricate designs or textured patterns, pay extra attention to those areas to ensure they are thoroughly cleaned and free of streaks.
Polishing Any Metal Parts for a Shiny Appearance
In addition to keeping the glass door streak-free, it is important to give attention to the metal parts of your hinged shower door. These metal components, such as hinges and handles, can accumulate dirt, soap scum, and water spots over time, which hinders their shiny appearance. By regularly polishing these metal parts, you can restore their natural shine and enhance the overall aesthetic of your shower enclosure.
Start by using a non-abrasive cleaner specifically designed for metal surfaces. Apply a small amount of the cleaner onto a soft cloth or sponge and gently rub it onto the metal parts. Ensure that you cover all the surfaces, including the hard-to-reach areas. Use circular motions to remove any grime and buildup.
After cleaning, rinse the metal parts with warm water to remove any residue from the cleaner. Then, use a dry cloth to thoroughly dry the metal surfaces. This step is crucial to prevent water spots or streaks. Finally, apply a metal polish or stainless steel cleaner to a clean cloth and buff the metal parts in a circular motion. This will bring out the shine and leave your metal components looking like new.
By regularly wiping down the glass door and polishing the metal parts, you can maintain a hinged glass shower door that not only looks clean and streak-free but also showcases a shiny and visually appealing appearance. Incorporating these simple steps into your regular cleaning routine will help prolong the life of your glass door and enhance the overall beauty of your bathroom.
Frequently Asked Questions For How To Install A Hinged Glass Shower Door
Should A Hinged Shower Door Open Inward Or Outward?
Hinged shower doors can either open inward or outward based on personal preference and space availability. It’s recommended to consult with a professional installer to determine the best option for your specific bathroom layout.
How Are Frameless Shower Doors Attached?
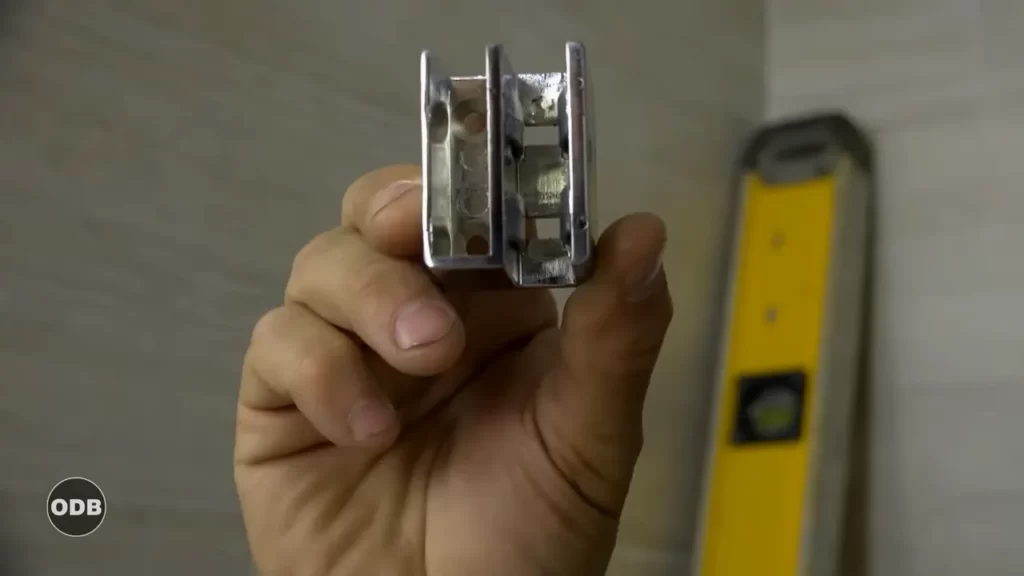
Frameless shower doors are attached using a wall-mounted hinge or a pivot hinge. These hinges are secured to the shower opening, allowing the door to swing open and close. Additionally, a glass encasement clamp can be used to secure the door to the wall.
This provides stability and a sleek, seamless appearance.
How Do You Adjust Frameless Glass Shower Door Hinges?
To adjust frameless glass shower door hinges, follow these steps: 1. Locate the hinge screws on the top and bottom of the door. 2. Use a screwdriver to tighten or loosen the screws as needed. 3. Test the door’s movement and adjust further if necessary.
4. Repeat the process for all hinges. 5. Ensure the door is aligned properly for a secure fit.
How Do You Replace A Shower Door Hinge?
To replace a shower door hinge, follow these steps: 1. Remove the old hinge by unscrewing it from the shower door and frame. 2. Measure the size and type of hinge you need. 3. Install the new hinge by attaching it with screws to the door and frame.
4. Adjust the hinge for proper alignment and smooth movement. 5. Test the door to ensure it opens and closes correctly.
Conclusion
Installing a hinged glass shower door can be a simple and rewarding DIY project. By following the steps outlined in this guide, you can transform your bathroom into a modern oasis. From measuring and leveling to securing and sealing, each step is crucial for a successful installation.
With the right tools and techniques, you’ll have a beautiful and functional hinged glass shower door that will enhance your bathing experience for years to come. So why wait? Upgrade your bathroom today!