o install a pocket door in a bathroom, begin by removing the existing door and casing. Then, install the pocket door frame according to the manufacturer’s instructions.
Step 1: Gather The Necessary Tools And Materials
Before you start installing a pocket door in your bathroom, it’s important to gather all the necessary tools and materials you’ll need for the job. Having everything prepared beforehand will save you time and ensure a smoother installation process. Here are the required tools and essential materials you’ll need:
Required Tools for Installing a Pocket Door
1. Measuring Tape: A measuring tape is essential to accurately measure the dimensions of the door frame and the opening.
2. Level: A level will help you ensure that the door is installed straight and plumb.
3. Screwdriver: A screwdriver will be needed to secure the various components of the pocket door system.
4. Power Drill: A power drill will make it easier to drive screws into the necessary locations.
5. Chisel: A chisel is necessary for creating mortises in the door frame to accommodate the pocket door hardware.
6. Hammer: A hammer is useful for gently tapping components into place.
7. Saw: Depending on the type of pocket door system you choose, you may need a saw to trim the door to fit the opening.
8. Safety Gear: To protect yourself during the installation process, make sure you have safety glasses, gloves, and a dust mask.
Essential Materials Needed for the Installation
1. Pocket Door Kit: You’ll need a pocket door kit, which typically includes the track, rollers, and other hardware necessary for the installation.
2. Pocket Door Slab: The pocket door slab is the actual door that will slide into the wall. Choose a door that fits the dimensions of your opening and matches your preferred style.
3. Door Frame Lumber: Depending on your existing door frame, you may need additional lumber to reinforce the opening and create a solid structure for the pocket door.
4. Shims: Shims will help you level and plumb the door frame during the installation process.
5. Screws: Make sure you have screws of the appropriate length and type for securing the pocket door hardware and frame.
6. Wood Glue: Wood glue may be necessary for reinforcing joints and ensuring a sturdy installation.
7. Paint or Stain: If necessary, have paint or stain ready to finish the door and frame once the installation is complete.
By gathering all these tools and materials before starting the installation, you’ll be well-prepared for the task at hand. This will ensure a smooth and efficient process, ultimately leading to a beautifully installed pocket door in your bathroom.
How To Easily Install A Pocket Door In A Bathroom
How to Easily Install a Pocket Door in a Bathroom
Installing a pocket door in a bathroom can be a great space-saving solution, as it allows you to maximize the available area in your bathroom. Additionally, pocket doors can add a touch of modernity and elegance to the overall design of the space. If you’re wondering how to install a pocket door in a bathroom, follow this step-by-step guide to ensure a smooth and successful installation process.
A step-by-step guide to installing a pocket door in a bathroom
1. Gather the necessary materials and tools
Before you start the installation process, make sure you have all the necessary materials and tools. Here’s a list of what you’ll need:
| Materials: | Tools: |
| – Pocket door kit | – Tape measure |
| – Framing lumber | – Circular saw |
| – Drywall | – Chisel |
| – Screws | – Screwdriver |
| – Door hardware | – Level |
2. Measure and mark the location
Once you have all the materials and tools ready, measure and mark the location where you want to install the pocket door. Ensure that there is enough space on the wall for the door to slide into. Use a tape measure and a level to ensure accurate measurements and levelness.
3. Prepare the opening
Using a circular saw, carefully cut out the opening for the pocket door according to your measurements. It’s important to follow the manufacturer’s instructions for the specific pocket door kit you’re using to ensure a proper fit.
4. Install the pocket door frame
Next, assemble the pocket door frame according to the manufacturer’s instructions. Make sure the frame is securely attached to the surrounding walls using screws or nails. Verify that the frame is plumb and level to ensure the door will slide smoothly.
5. Hang the door
Now it’s time to hang the pocket door onto the frame. Carefully attach the door hardware to the top of the door and then slide the door into the pocket. Ensure that the door slides smoothly and without any obstructions.
6. Install the door trim and finish
Once the door is hung and slides smoothly, install the door trim around the door opening. This will provide a polished and finished look. Finish the installation by painting or staining the door and the trim according to your preference.
By following these simple steps, you can easily install a pocket door in your bathroom, creating a sleek and functional space. Remember to measure accurately, follow the manufacturer’s instructions, and take your time to ensure a successful installation.
Step 2: Measure And Prepare The Opening
Accurate measurements for the pocket door opening
Before you start installing a pocket door in your bathroom, you need to take accurate measurements of the opening. This is a crucial step to ensure your pocket door fits perfectly and operates smoothly. Follow these steps to get accurate measurements:
- Start by measuring the width of the opening from side to side. Use a measuring tape and write down the measurement in inches or centimeters, depending on your preference.
- Next, measure the height of the opening from top to bottom. Again, use a measuring tape and note down the measurement.
- Double-check your measurements to ensure accuracy. It’s always a good idea to measure twice to avoid any mistakes.
- Take note of the wall thickness as well. This will help you determine the correct size of the pocket door kit you need to purchase.
By taking accurate measurements, you’ll be able to choose the right pocket door kit and ensure a smooth installation process.
How to prepare the existing wall for the installation
Preparing the existing wall is an essential step in installing a pocket door in your bathroom. Here’s how you can do it:
- Start by removing any trim or molding around the door opening. Use a pry bar or a putty knife to carefully remove the trim, making sure not to damage the surrounding wall.
- Next, inspect the wall for any electrical wiring or plumbing that might be in the way. If you find any, it’s important to hire a professional to relocate them before proceeding with the installation.
- Check the wall for any obstructions such as studs or pipes that might interfere with the pocket door installation. Make sure to mark their locations so you can avoid them when cutting the opening.
- Using a level and a pencil, mark the height of the pocket door on the existing wall. This will serve as a reference when cutting the opening.
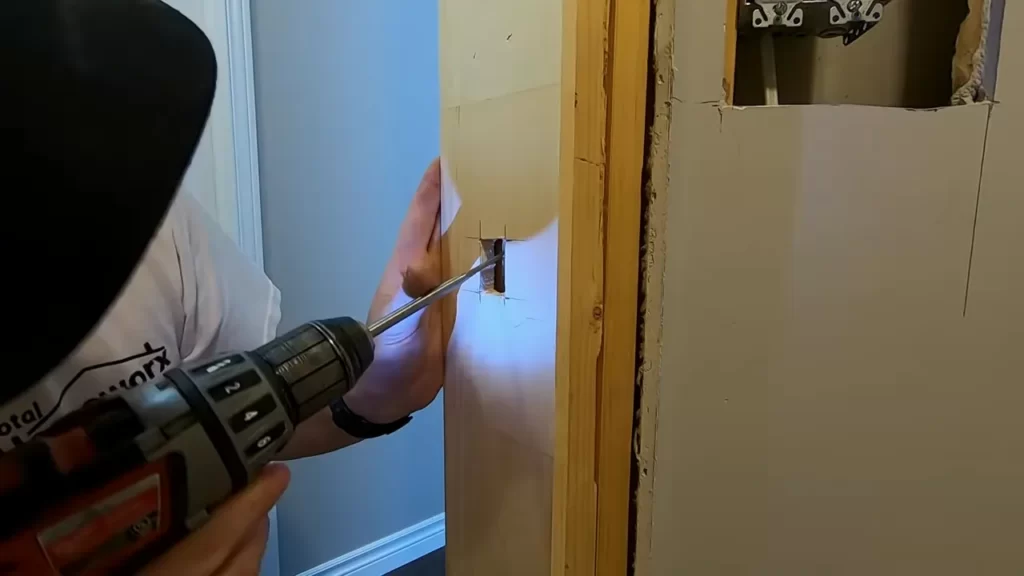
- Follow the manufacturer’s instructions to cut the opening in the wall. Use a reciprocating saw or a circular saw to carefully cut along the marked lines.
- Remove any debris or excess drywall from the opening, ensuring a clean and smooth surface for the pocket door installation.
By preparing the existing wall properly, you’ll create a solid foundation for the pocket door installation and ensure a professional-looking result.
Ensuring A Proper Fit For The Pocket Door
Tips for Ensuring the Pocket Door Fits Perfectly in the Opening
One of the key factors in successfully installing a pocket door in a bathroom is ensuring that it fits properly in the opening. A snug fit not only enhances the functionality of the door but also adds to the overall aesthetic appeal of your bathroom. Here are some tips to help you achieve a perfect fit for your pocket door.
1. Measure the Opening with Precision
Before you begin the installation process, it is crucial to measure the opening accurately. Use a tape measure to determine the height and width of the opening. Make sure to measure both the width and height at three different points – the top, middle, and bottom. This will help you identify any variations in the opening, which may need to be addressed during installation.
2. Check and Adjust the Rough Opening
Once the measurements are taken, examine the rough opening for any irregularities. Check for levelness and plumbness using a level. If you notice any inconsistencies, such as a slightly uneven floor or wall, it’s important to correct them before proceeding.
3. Consider the Door Thickness
When selecting a pocket door, take into account the thickness of the door itself. It should match the thickness of the wall, allowing it to slide smoothly into the pocket without any interference. The door thickness will also impact the size of the pocket frame that needs to be installed.
4. Install a Solid and Sturdy Pocket Frame
A strong and well-built pocket frame is essential for ensuring a proper fit. It should be securely attached to the surrounding wall studs or support structure. Use a level to ensure the frame is perfectly plumb and level before proceeding further.
5. Test the Door Fit Before Finalizing Installation
Before completing the installation process, it is advisable to test the door fit within the pocket frame. Slide the door into the pocket and ensure it moves smoothly and effortlessly along the tracks. If there are any obstructions or difficulties, make the necessary adjustments until the door glides seamlessly.
6. Use Shims for Precise Alignment
To achieve a precise fit, consider using shims to align the pocket frame and the door. Place shims behind the frame as necessary to eliminate any gaps or unevenness. This step is vital for a uniform and seamless appearance once the door is fully installed.
Conclusion
Ensuring a proper fit for a pocket door in a bathroom requires careful measurement, correct installation of the pocket frame, and consideration of the door thickness. By following these tips, you can achieve a perfect fit that enhances the functionality and aesthetic appeal of your bathroom. Take the time to measure accurately, check the rough opening, and make necessary adjustments for a smooth sliding experience every time.
Step 3: Install The Pocket Door Frame
How to Install the Frame for the Pocket Door
Once you have prepared the opening and the hardware for your pocket door installation, it’s time to move on to the next step: installing the pocket door frame. This crucial step ensures that your door operates smoothly and seamlessly within the wall cavity. In this section, we will guide you through the proper placement and alignment of the frame components.
Proper Placement and Alignment of the Frame Components
To begin the installation process, you will need a pocket door frame kit, which typically includes the vertical and horizontal frame members, track, and brackets. Follow these steps to properly place and align the frame components:
- Start by positioning the vertical frame members against the sides of the door opening. Ensure they are plumb and level before securing them to the studs using screws or nails.
- Next, measure the width of the frame opening and cut the horizontal frame members to fit. Place the top horizontal member above the door opening and secure it to the wall studs. Then, install the bottom horizontal member beneath the opening, making sure it is level.
- Once the frame members are in place, attach the track to the top horizontal member using the provided screws. Make sure the track is centered and level.
- Finally, install the brackets that will hold the door within the frame. These brackets should be positioned at the top and bottom of the door, ensuring they align with the track. Attach them securely to the frame members using screws.
By following these steps, you will ensure that the pocket door frame is properly positioned and aligned, providing a solid foundation for your door’s operation. With the frame installed, you are now ready to move on to the next step of the installation process, which will involve placing the door itself into the pocket door frame.
Securing The Pocket Door Frame
Steps to Securely Fasten the Frame in Place
When installing a pocket door in your bathroom, securing the pocket door frame is a crucial step to ensure the stability and durability of the door. By properly fastening the frame in place, you can prevent any issues such as sagging or misalignment. Here are the steps you need to follow:
Step 1: Prepare the Door Opening
Before you begin securing the pocket door frame, make sure that the door opening is clean and free from any obstructions. This will allow for a smooth installation process without any hindrances. Remove any debris or excess material that may be present in the door opening.
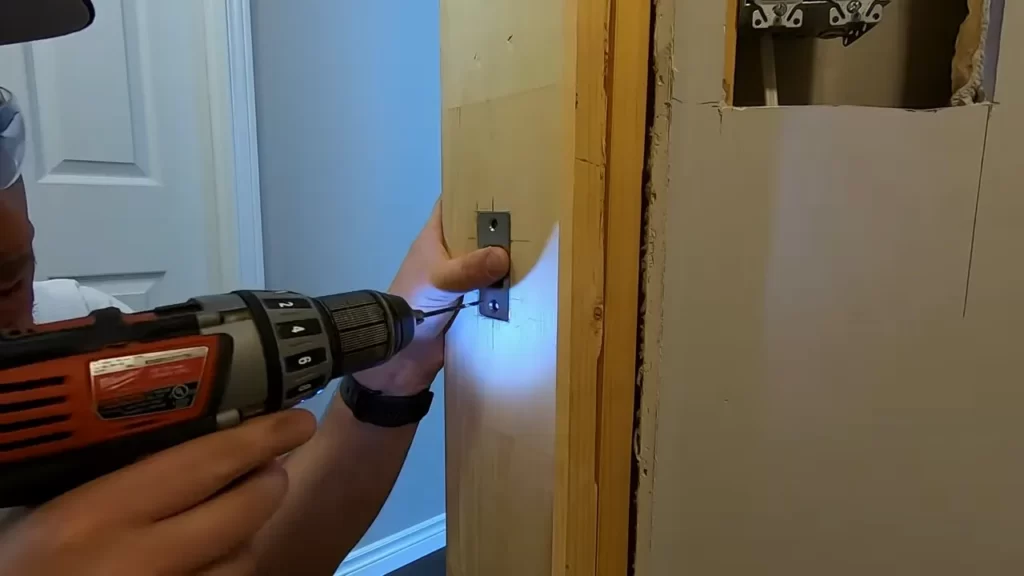
Step 2: Attach the Header Plate
Next, you will need to attach the header plate to the top of the door opening. The header plate acts as a support for the pocket door frame and helps in distributing the weight of the door evenly. Use screws or nails to securely fasten the header plate to the framing above the door opening.
Step 3: Install the Split Studs
To reinforce the pocket door frame, you will need to install split studs on both sides of the door opening. These split studs will provide additional support and stability to the frame. Position the split studs against the side of the header plate, making sure they are plumb and flush with the wall surface. Securely fasten the split studs to the wall framing using screws or nails.
Step 4: Align and Level the Frame
Now it’s time to align and level the pocket door frame. Start by placing the frame into the door opening and making sure it fits properly. Use a level to ensure that the frame is plumb and level on all sides. Make any necessary adjustments to ensure the frame is perfectly straight and aligned.
Step 5: Secure the Bottom Plates
To complete the securing process, you will need to secure the bottom plates of the pocket door frame. Attach the bottom plates to the floor using screws or nails. Ensure that they are firmly fixed to prevent any movement or instability. By following these steps, you can securely fasten the pocket door frame in your bathroom. Doing so will contribute to the smooth operation and longevity of your pocket door, providing you with a functional and aesthetically pleasing addition to your bathroom space. Remember, proper installation is key to achieving a professional-looking result.
Step 4: Mount The Pocket Door And Hardware
How to Mount the Pocket Door on the Frame
Mounting the pocket door on the frame is a crucial step in the installation process. Follow these steps to ensure a successful installation:
- Start by positioning the pocket door frame in the opening, making sure it is level and plumb. Use shims if necessary to achieve a perfect fit.
- Next, attach the door hangers to the top of the pocket door and slide the rollers into the track. This will allow the door to smoothly slide open and closed.
- Once the hangers are securely in place, lift the door and insert the bottom pivot into the floor bracket. This will provide stability and prevent the door from swinging.
- Check the door for proper alignment by sliding it back and forth a few times. If it moves smoothly and effortlessly, you are ready to move on to the next step of installing the necessary hardware.
Installing the Necessary Hardware for Smooth Operation
Properly installing the necessary hardware is essential for ensuring that your pocket door operates smoothly. Follow these guidelines:
- Door guides: Install the door guides on the floor to keep the door aligned and prevent it from swinging. They can be attached using screws or adhesive.
- Door pull: Attach the door pull to the edge of the pocket door so that you can easily open and close it. Make sure to position it at a convenient height for comfortable use.
- Magnetic door catch: Install a magnetic door catch on the pocket door frame and door to keep the door securely closed when not in use. This will prevent it from accidentally sliding open.
- Locking mechanism: Depending on your preference for privacy, you can install a lock on the pocket door for added security. Choose a lock that suits your style and follow the manufacturer’s instructions for installation.
By following these steps, you can mount the pocket door on the frame and install the necessary hardware for smooth operation. Once the hardware is in place, you will have a functional and stylish pocket door in your bathroom.
Adjusting And Testing The Pocket Door
Techniques for Adjusting the Pocket Door
Adjusting the pocket door is essential to ensure proper functionality and smooth operation. Here are some tried and tested techniques to help you achieve the desired results: 1. Inspect the rollers: Begin by examining the rollers at the top of the door. If they appear worn out or damaged, replace them with new ones. Properly functioning rollers are crucial for the smooth movement of the pocket door. 2. Check the track alignment: Assess the alignment of the track by sliding the door back and forth. If you notice any obstructions or misalignment, adjust the track accordingly. It may involve tightening or loosening the mounting screws. 3. Balance the door: Achieving proper balance is vital for the pocket door’s smooth operation. To do this, adjust the rollers on each side using a screwdriver or a wrench. Make sure both sides are evenly adjusted to prevent the door from sliding off-track. 4. Ensure proper clearance: Check the clearance between the bottom of the door and the floor. If there is too much friction, causing the door to get stuck, adjust the height of the rollers. This will help create adequate clearance for effortless movement. 5. Address the snugness: If the pocket door feels too loose or too tight when sliding, adjust the snugness by tightening or loosening the screws on the rollers. The ideal snugness allows the door to glide smoothly without being too loose or too rigid.
Testing the Pocket Door for Proper Functionality
Once you have adjusted the pocket door, it’s crucial to test its functionality before considering the installation complete. Follow these steps to ensure everything works as intended: 1. Slide the door: Slide the pocket door back and forth multiple times to check its smoothness. It should move effortlessly within the track without any hitches or jams. 2. Check for obstructions: Look out for any potential obstructions along the track that may hinder the door’s movement. Remove any debris or objects that may obstruct the door’s path to ensure unimpeded operation. 3. Inspect the door alignment: Observe the door’s alignment when fully closed. It should fit securely within the pocket without any gaps or protrusions. If necessary, adjust the alignment using the techniques mentioned earlier. 4. Test the latch: Engage the latch mechanism to ensure it securely locks the pocket door in place. Verify the latch’s effectiveness by gently pushing and pulling the door to confirm that it remains firmly shut when locked. 5. Assess noise and vibrations: Pay attention to any unusual noises or excessive vibrations during the door’s movement. Quiet and smooth operation indicates that the adjustments have been successful. By implementing these techniques and thoroughly testing the pocket door, you can ensure its proper functionality and enjoy a well-installed, efficient solution for your bathroom space.
Step 5: Finish And Trim The Pocket Door Opening
Once the pocket door is securely installed in your bathroom, it’s time to add the finishing touches and trim the opening for a polished look. This step is crucial in ensuring that your pocket door seamlessly blends into the surrounding wall and enhances the overall aesthetic of the space.
Adding finishing touches to the pocket door installation
To complete the installation of your pocket door, you’ll need to focus on the finishing touches. Here are some key steps to consider:
- Inspect the door frame: Before proceeding, carefully examine the door frame and make any necessary adjustments to ensure it is smooth and free from imperfections.
- Fill gaps and cracks: Fill any gaps or cracks around the door frame using a quality wood filler or caulking. This will not only provide a clean, finished appearance but also help with insulation and noise reduction.
- Sand and smoothen surfaces: Use a sanding block or sandpaper to smoothen any rough edges or uneven surfaces. This step is essential to achieve a professional and refined finish.
- Apply primer and paint: Apply a coat of primer to the door frame and allow it to dry. Once the primer is dry, apply your chosen paint color to match the surrounding walls. This will help the pocket door blend seamlessly into the overall design of your bathroom.
- Install door pulls and accessories: Finally, install door pulls and other accessories to add the final touches to your pocket door. Choose hardware that complements the design of your bathroom, such as sleek and modern handles or decorative knobs.
Trimming the opening for a polished look
Trimming the pocket door opening is crucial for achieving a polished and professional look. Follow these steps to ensure that your pocket door opening looks refined:
- Measure and cut trim pieces: Take precise measurements of the opening and cut your trim pieces accordingly. Use a miter saw or a handsaw with a miter box to create the desired angles for the corners.
- Align trim pieces: Attach the trim pieces around the opening, making sure they are flush with the surrounding wall. Use a level to ensure that the trim is straight and even.
- Secure the trim: Use a nail gun or finish nails to secure the trim pieces in place. Ensure that the nails are countersunk so they can be easily covered with wood putty.
- Fill nail holes and gaps: Fill the nail holes and any gaps between the trim pieces using wood putty. Smooth out the putty with a putty knife and let it dry completely.
- Sand and paint: Once the wood putty is dry, sand it down until it is flush with the trim surface. Wipe away any dust and apply a coat of paint to match the surrounding walls, giving your pocket door opening a polished and cohesive appearance.
By following these steps and taking the time to add finishing touches and trim the pocket door opening, you’ll achieve a seamless and visually appealing installation in your bathroom. This attention to detail will not only enhance the overall look and feel of your space but also ensure long-lasting durability and functionality.
Applying Paint Or Stain To The Pocket Door
Tips for Painting or Staining the Pocket Door for a Finished Appearance
Now that you have successfully installed your pocket door in the bathroom, it’s time to add the final touches and give it a beautiful finished appearance. Applying paint or stain to the pocket door can not only enhance its visual appeal but also protect it from moisture and wear over time. Whether you choose to paint the door in a vibrant color or stain it to showcase the natural beauty of the wood, here are some helpful tips to ensure a smooth and professional-looking finish.
1. Prepare the Door Surface
Before you start painting or staining, it’s important to properly prepare the surface of the pocket door. Wipe away any dust, dirt, or debris using a clean cloth or sponge. Use a fine-grit sandpaper to gently smooth any rough areas or imperfections on the door’s surface. This step will help the paint or stain to adhere better and result in a more professional finish.
2. Choose the Right Paint or Stain
Selecting the appropriate paint or stain is crucial to achieving the desired finish. If you opt for paint, choose a high-quality, water-based latex paint that is suitable for interior surfaces. This type of paint is durable, easy to clean, and dries faster than oil-based paints. On the other hand, if you prefer to stain the pocket door, opt for a stain specifically formulated for interior wood surfaces. Consider the color and transparency level that best complements your bathroom decor.
3. Apply Primer (if necessary)
Applying a primer may be necessary, especially if you are painting over a previously painted or stained door. A primer helps to create a smooth, consistent base for the paint and enhances its adhesion. Make sure to choose a primer that is compatible with your chosen paint or stain.
4. Use Proper Painting Techniques
When painting, it’s important to apply thin and even coats to prevent drips and runs. Start by using a small brush to paint along the edges and corners of the door. Then, use a foam roller or paint sprayer to cover the larger areas with long, smooth strokes. Allow each coat to dry thoroughly before applying the next one. When staining, use a brush or cloth to apply a thin, even layer of stain, following the wood grain for a natural look.
5. Seal and Protect the Finish
To protect the paint or stain and ensure its longevity, apply a clear protective finish once the layers have dried completely. A polyurethane or varnish can provide a durable, water-resistant coating that will guard against moisture and stains. Follow the manufacturer’s instructions for the specific product you choose, and apply the protective finish in thin, even coats.
By following these tips, you can achieve a professional-looking and long-lasting finish when painting or staining your pocket door. Whether you want to add a pop of color or enhance the natural beauty of the wood, applying paint or stain is the final step in completing your bathroom transformation.
Step 6: Final Touches And Maintenance
Ensuring the Pocket Door Operates Smoothly
After successfully installing a pocket door in your bathroom, the next step is to ensure that it operates smoothly. Here are a few key tips to help you achieve that:
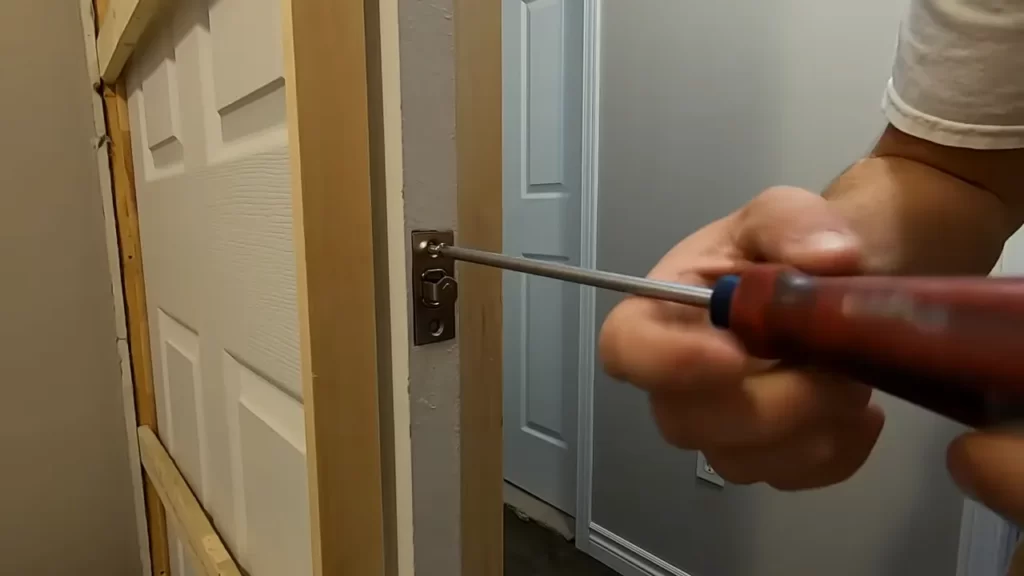
- Tighten and adjust the pocket door hardware: Begin by checking all the screws and bolts on the hardware components. Make sure they are properly tightened. If there are any loose screws, tighten them using a screwdriver. Additionally, check if the track is level and adjust it if necessary.
- Lubricate the track and rollers: Regular lubrication is essential to maintain smooth functionality of the pocket door. Apply a silicone-based lubricant to the tracks and rollers. This will help reduce friction and allow the door to glide effortlessly. Avoid using oil-based lubricants as they can attract dust and debris.
- Check for obstructions: Occasionally, small objects or debris can get lodged in the track or rollers, hindering the door’s movement. Take a moment to inspect the track and remove any obstructions. Cleaning the track with a soft brush or cloth can also help prevent debris buildup.
Regular Maintenance Tips for a Long-Lasting Pocket Door
Proper maintenance is crucial to ensure the longevity of your pocket door. By following these regular maintenance tips, you can keep your pocket door in excellent condition:
- Wipe down the door and track: Use a damp cloth to wipe down the door and track regularly. This will help remove any dirt or dust that may accumulate, preventing it from affecting the door’s operation.
- Inspect the door’s alignment: Periodically check the door’s alignment within the pocket. If you notice any misalignment or issues with the door closing properly, make the necessary adjustments to realign it. This will ensure smooth opening and closing without any hitches.
- Keep the track clean: Clean the track on a regular basis using a soft brush or cloth. This will prevent the accumulation of dirt and debris, which can impede the door’s movement.
By following these simple steps, you can ensure that your pocket door operates smoothly and lasts for years to come. Remember to regularly maintain your pocket door to prevent any potential problems in the future.
Frequently Asked Questions For How To Install A Pocket Door In A Bathroom
Can You Put A Pocket Door In A Bathroom?
Yes, it is possible to install a pocket door in a bathroom. Pocket doors are a great space-saving solution and can be a stylish addition to any room, including bathrooms. They slide into the wall, giving you more floor space and a seamless look when the door is open.
How Much Does It Cost To Put A Pocket Door In A Bathroom?
The cost of installing a pocket door in a bathroom varies. On average, it can range from $500 to $2,000, depending on factors like materials used, labor costs, and any additional modifications needed. Get a quote from a professional for an accurate estimate.
Can I Install A Pocket Door In An Existing Wall?
Yes, you can install a pocket door in an existing wall. It requires careful measurement and framing adjustments, as well as removing the existing door and associated hardware. It’s recommended to consult a professional for accurate installation and to ensure structural integrity.
Can You Install A Pocket Door Without Removing Drywall?
Yes, you can install a pocket door without removing drywall. This can be done by using a pre-existing door frame or by creating a new frame within the wall. It is important to ensure that the wall is structurally sound and that the necessary tools are used during installation.
Conclusion
Installing a pocket door in your bathroom can provide many benefits, such as saving space and adding a touch of modernity to your home. By following the step-by-step instructions outlined in this blog post, you can successfully complete this project.
Don’t forget to choose the right materials and implement proper measurements for a seamless installation. With a little patience and effort, you’ll be enjoying the convenience and aesthetics that a pocket door brings to your bathroom in no time.