To install a prehung door, remove the old door and frame, position the new door in the opening, shim it for plumb and square, then secure it with screws. This process ensures a secure and properly aligned door installation.
A new door can greatly enhance the appearance and functionality of your home. Whether you are replacing an old door or installing one for the first time, knowing how to install a prehung door can save you time and money.
This guide will walk you through the steps required to install a prehung door in your home, ensuring a professional and long-lasting result. Remember to measure carefully and take your time, ensuring the door fits properly and is aligned correctly. With the right tools and attention to detail, you can successfully install a prehung door and enjoy the benefits it brings to your space.
Gather The Necessary Tools And Materials
Gather the Necessary Tools and Materials Installing a prehung door can seem like a daunting task, but with the right tools and materials, you can complete the project with ease. Before you begin, it’s important to gather all the necessary tools and materials to ensure a smooth installation process. In this section, we’ll go over the essential tools you’ll need and the materials required for the project. Essential tools for the installation To install a prehung door, you’ll need a few essential tools to get the job done right. Here’s a list of the tools you’ll need: 1. Hammer: A hammer is necessary for driving nails into the door frame and securing it in place. Make sure to choose a hammer that is suitable for your project, such as a 16-ounce curved claw hammer. 2. Screwdriver: A screwdriver is needed for installing screws and attaching hardware to the door. It’s recommended to have both a Phillips and a flathead screwdriver on hand to accommodate different types of screws. 3. Level: A level is crucial for ensuring that the door is plumb and level during the installation process. This tool will help you achieve a professional-looking installation. 4. Tape Measure: Accurate measurements are essential when installing a prehung door. A tape measure will help you measure the door frame and determine the proper dimensions for your new door. Materials required for the project In addition to the tools mentioned above, you’ll also need several materials to complete the installation. Here’s a list of the materials you’ll need: 1. Prehung door: This is the main component of the project. Make sure to choose a prehung door that fits the size and style of your doorway. 2. Shims: Shims are used to fill in any gaps between the door frame and the rough opening. They help ensure that the door is plumb and square. 3. Screws: You’ll need screws of the appropriate length to attach the door frame to the rough opening. Make sure to choose screws that are suitable for both the door frame and the material of your rough opening. 4. Hardware: Depending on the type of prehung door you choose, you may need to purchase additional hardware, such as doorknobs, hinges, and a latch. Now that you have gathered all the necessary tools and materials, you’re ready to move on to the next step: preparing the rough opening. Stay tuned for our next section, where we’ll guide you through the process of preparing the rough opening for the prehung door installation.
Prepare The Door Opening
Measure and mark the opening
Before you can install a prehung door, you need to ensure that the opening is the right size. Start by measuring the width and height of the rough opening. Use a tape measure to get accurate measurements, and write them down so you can refer to them later.
Remove the existing door and trim
In order to prepare the door opening for a prehung door, you will need to remove the existing door and trim. Start by taking off any trim around the door frame using a pry bar. Be careful not to damage the surrounding walls or the trim itself. Once the trim is removed, you can then remove the door from its hinges. You may need a screwdriver or drill for this step, depending on the type of hinges.
Inspect the rough opening for any repairs needed
With the existing door and trim removed, it’s time to inspect the rough opening for any repairs needed. Check for any damage or rotting wood that may need to be replaced. Make sure the opening is clean and free of debris. If any repairs are necessary, make them before moving on to the next step. This will ensure that your prehung door fits properly and functions correctly.
By following these steps to prepare the door opening, you will ensure a smooth and successful installation of your prehung door. Remember to measure and mark the opening accurately, remove the existing door and trim carefully, and inspect the rough opening for any repairs needed. With these preparations in place, you’ll be ready to move on to the next step of installing your prehung door.
Install The Prehung Door Frame
Position the door frame in the opening
To start installing your prehung door, you’ll need to position the door frame in the opening. Make sure to remove any obstructions or debris from the opening before getting started. Place the door frame into the opening, ensuring that the top of the frame is level with the top of the opening. Take a moment to double-check that the frame is centered and plumb.
Check for plumb and level
Checking for plumb and level is crucial when installing a prehung door frame. First, use a level to make sure both sides are plumb, meaning they are perfectly vertical. Adjust the frame as necessary by placing shims behind the frame to ensure it is level and plumb. Take your time with this step, as it will affect the overall functionality and appearance of your door.
Secure the frame to the opening with shims
Once the frame is properly positioned and leveled, it’s time to secure it to the opening using shims. Start by inserting shims between the frame and the rough opening at the hinge and strike-side locations. Gently tap the shims in place until the frame is snug and doesn’t move. Be careful not to over-tighten, as this could cause the frame to warp or bow. Continue to add shims every 10-12 inches along the frame’s perimeter until it is securely in place.
By following these steps, you can successfully install the prehung door frame. Remember to take your time and double-check each step for accuracy. With the door frame securely in place, you’re one step closer to enjoying a functional and beautiful new door for your space.
Hang The Prehung Door
Once you have removed the door from the frame and attached the hinges to the frame, it’s time to hang the prehung door. This step is crucial in ensuring that the door functions properly and provides a secure seal. Follow these simple steps to hang the door on the hinges:
Step 1: Remove the door from the frame
Before hanging the door, you’ll need to remove any packaging materials, such as plastic wrapping or cardboard, from the door. Carefully inspect the door to ensure there are no visible defects or damage. Once you’re satisfied with the door’s condition, position it in front of the frame.
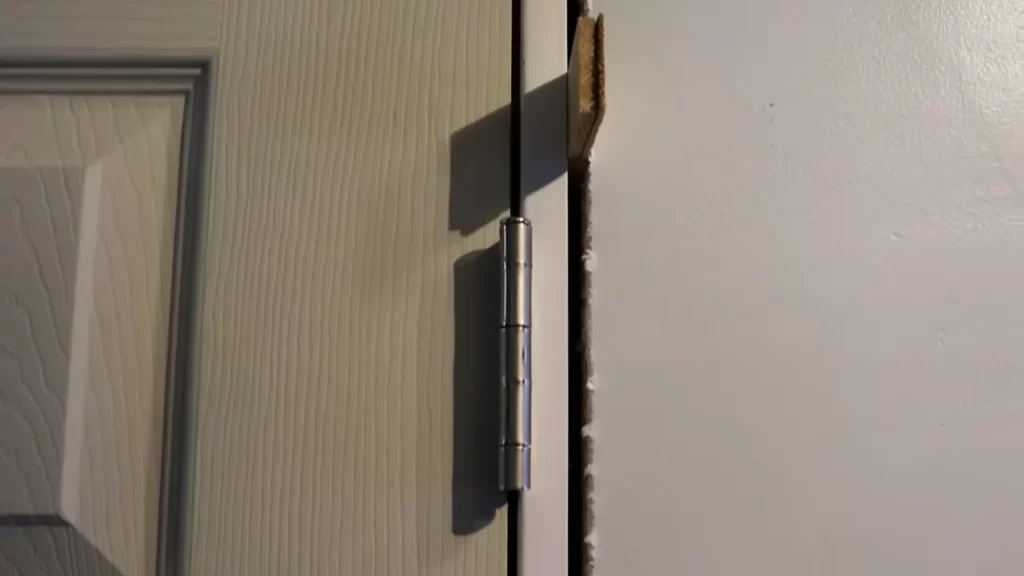
Step 2: Attach the hinges to the frame
Take note of the number of hinges on your prehung door. Most doors require three hinges, evenly spaced along the height of the door. Using a drill or screwdriver, attach the hinges to the door frame. Ensure that they are aligned properly and securely fastened. Double-check the levelness and plumbness of the hinges to avoid any misalignment later on.
Step 3: Hang the door on the hinges
With the hinges securely attached to the frame, it’s time to hang the door. Lift the door and align the hinge pins with the corresponding hinge plates on the frame. Gently slide the hinge pins into the hinge plates, ensuring that they are fully inserted. The door should now be hanging on the hinges, but it may still be loose.
Next, check the gap between the door and the frame on all sides. Ideally, there should be an even and consistent gap around the entire door. Use shims to adjust the positioning of the door and ensure an even gap.
Once the door is properly aligned and the gaps are even, insert screws through the hinge plates into the hinge pins to secure the door in place. Be sure to tighten the screws securely, but avoid over-tightening, as this can cause the door to bind and not function properly.
Finally, test the door by opening and closing it a few times. Make any necessary adjustments to ensure smooth operation and a proper seal. This will ensure that your prehung door is properly installed and functioning as intended.
Remember, a properly hung prehung door is essential for security, energy efficiency, and the overall look of your home. By following these steps, you’ll have a beautifully installed prehung door that will enhance your space for years to come.
Adjust And Secure The Door
Once you have successfully hung the prehung door in the doorway, the next step is to adjust and secure it. This crucial step ensures that the door functions properly and provides a secure barrier for your home. Here are the key steps to follow:
<h3>Check for proper alignment and clearance</h3>
Before securing the door, it’s essential to check for proper alignment and clearance. A misaligned door can lead to problems such as difficulty opening or closing it. To ensure the door is aligned correctly, follow these steps:
- Stand inside the room and check the gap between the door and the door jamb. It should be uniform on all sides.
- Use a level to ensure that the door is plumb vertically. Place the level on the hinge side of the door and adjust it as necessary.
- Check the clearance between the top of the door and the door frame. It should be consistent along the entire length.
<h3>Adjust the strike plate and latch</h3>
Once you have confirmed that the door is properly aligned, the next step is to adjust the strike plate and latch. This adjustment ensures that the door latch engages smoothly and securely. Follow these steps to adjust the strike plate and latch:
- Close the door and check if the latch aligns with the strike plate. If it doesn’t, mark the misalignment.
- Loosen the screws on the strike plate and make the necessary adjustments to align it with the latch.
- Tighten the screws once the strike plate is correctly aligned with the latch.
- Test the door by closing and opening it to ensure that the latch engages smoothly.
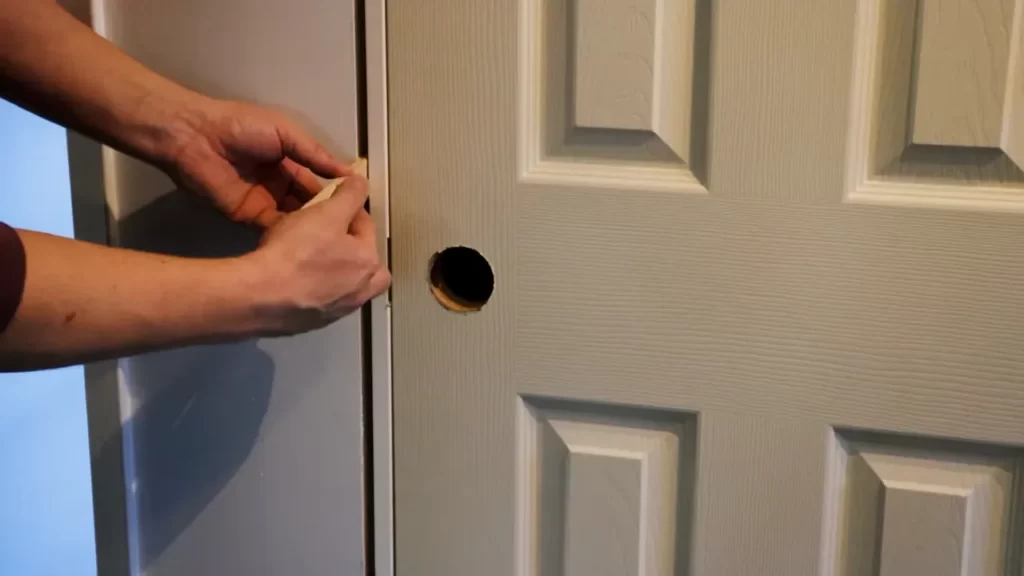
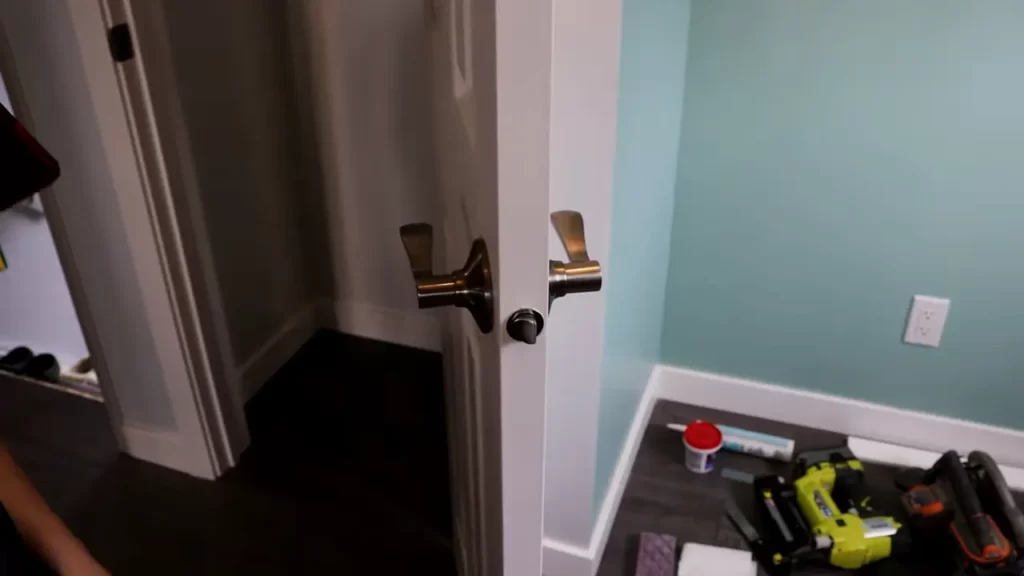
<h3>Install the door hardware</h3>
With the door properly aligned and the strike plate adjusted, it’s time to install the door hardware. The hardware includes items such as doorknobs, deadbolts, and hinges. Follow these steps to install the door hardware:
- Position the doorknob or deadbolt on the door according to the manufacturer’s instructions.
- Secure the door hardware in place using the provided screws.
- Check the functionality of the hardware by turning the doorknob or engaging the deadbolt.
- Install the hinges on the door jamb by marking their locations, chiseling the recesses, and screwing the hinges in place.
- Test the door by opening and closing it to ensure that the hardware operates smoothly.
By following these steps, you can adjust and secure the prehung door properly. Taking the time to ensure proper alignment, adjust the strike plate and latch, and install the door hardware will result in a functional and secure door for your home.
Insulate And Seal The Door
Apply insulation around the frame
To ensure energy efficiency and prevent drafts, it’s crucial to apply insulation around the frame of your prehung door. This will help maintain a comfortable temperature inside your home and reduce energy costs. Insulation acts as a barrier, preventing air leakage and improving the door’s overall performance.
Here’s how you can apply insulation:
- Start by measuring the dimensions of the door frame. This will help you determine the amount of insulation you’ll need.
- Apply weatherstripping tape to the top and sides of the door frame. This helps create a tight seal and prevents air from leaking in or out.
- Next, cut the insulation to fit the width and height of the door frame.
- Insert the insulation into the gaps around the frame, ensuring a snug fit.
- Use a putty knife or your fingers to press the insulation firmly into place.
Remember, proper insulation around the frame is essential for energy efficiency and preventing air leakage. It’s a simple step that can make a big difference in keeping your home comfortable.
Seal any gaps or cracks with caulk
Even with insulation, small gaps or cracks may still exist around the frame of the prehung door. These gaps can allow air to seep in or escape, compromising the door’s energy efficiency. To address this, it’s important to seal any gaps or cracks with caulk.
Here’s how you can seal gaps or cracks with caulk:
- Inspect the doorframe for any visible gaps or cracks. Pay close attention to the corners and edges.
- Using a caulk gun, apply a bead of caulk along the gaps or cracks.
- Smooth the caulk with your finger or a caulk smoothing tool to ensure an even and tight seal.
- Allow the caulk to dry according to the manufacturer’s instructions.
Sealing gaps and cracks with caulk is an important step in preventing air leakage and maintaining the energy efficiency of your prehung door. It helps create a barrier against drafts, ensuring a comfortable living environment.
Check for proper insulation and sealing
After applying insulation and sealing any gaps, it’s important to thoroughly check for proper insulation and sealing. This step ensures that your prehung door is effectively blocking drafts and maintaining energy efficiency.
Here’s how you can check for proper insulation and sealing:
- Feel around the door frame for any noticeable air drafts.
- Inspect the weatherstripping tape to ensure it’s securely in place and making good contact with the door.
- Check for any visible gaps or cracks that may still exist.
- If you find any issues, reapply insulation or caulk as needed to address them.
Taking the time to check for proper insulation and sealing ensures that your prehung door is performing at its best. By doing so, you can enjoy improved energy efficiency, reduced drafts, and a more comfortable living space.
Test The Door And Make Final Adjustments
Test the Door and Make Final Adjustments Once you have successfully installed the prehung door in the door frame, it’s time to test the door and make final adjustments to ensure a perfect fit and smooth operation. This crucial step will ensure that your door functions properly and provides optimal security and energy efficiency for your home. In this section, we will guide you through the necessary steps to test the door and make any necessary adjustments. Open and close the door to ensure smooth operation: Once the door is installed, the first thing you need to do is open and close it. This will help you determine if the door is aligned properly and if it smoothly operates without any resistance. It’s important to pay attention to how the door swings and if it closes tightly without any gaps. If you notice any difficulties or if the door doesn’t close properly, adjustments will be required. Check for proper weatherstripping: Weatherstripping is an essential component of any door installation as it helps prevent drafts and maintain energy efficiency. Carefully inspect the weatherstripping around the door to ensure it is in good condition and properly installed. Look for any gaps or signs of wear and tear. If you notice any issues, you may need to replace or adjust the weatherstripping to ensure a tight seal. Make any necessary adjustments for a perfect fit: If you encounter any problems during the testing process, such as the door not closing properly or gaps appearing around the frame, adjustments will be required. To make the necessary adjustments, begin by examining the hinges. If the door is not sitting correctly in the frame, you may need to remove the hinge pins and reposition the door. Additionally, you can use shims to adjust the position of the door and ensure it fits snugly in the frame. It’s essential to take your time during this step, as small adjustments can make a significant difference in the overall performance of your door. Remember to test the door after each adjustment to ensure that it operates smoothly. In conclusion, testing the door and making final adjustments are crucial steps to ensure that your prehung door is installed correctly. By checking for smooth operation, inspecting the weatherstripping, and making any necessary adjustments, you can achieve a perfect fit that provides security, energy efficiency, and peace of mind for your home. Don’t rush through this step, as the time invested in fine-tuning your door will pay off in the long run. Take the time to make these final adjustments, and you’ll be rewarded with a well-functioning, visually appealing, and secure door for your home.
Finishing Touches
Once you have successfully installed your prehung door, it’s time to add those final touches to complete the project. This includes installing the door trim and casing, painting or staining the door and frame, and cleaning up the work area.
Install Door Trim and Casing
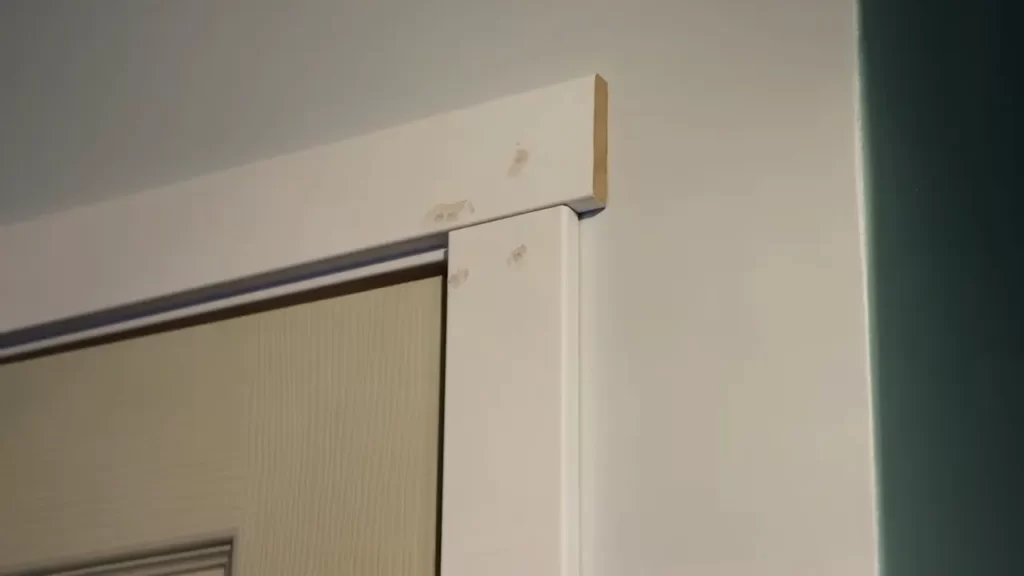
Installing door trim and casing not only enhances the appearance of the door, but it also helps to seal any gaps and provides a finished look. Follow these steps to install your door trim and casing:
- Measure and cut the door trim pieces to the appropriate size. It’s recommended to use a miter saw for accurate cuts.
- Apply construction adhesive to the back of the trim pieces.
- Position the trim pieces around the door frame, ensuring they are flush with both the door and the wall.
- Secure the trim pieces in place with finish nails, using a nail gun or hammer.
- Fill any gaps or nail holes with wood filler and sand it smooth once dry.
Paint or Stain the Door and Frame
Now that the door and frame are installed, it’s time to add your desired finish. Whether you prefer paint or stain, follow these steps to achieve a professional look:
- Start by cleaning the surface of the door and frame to remove any dust or debris.
- If you’re painting, apply a coat of primer to the entire surface to ensure proper adhesion of the paint.
- Allow the primer to dry completely and then apply your paint color of choice.
- If you’re staining, apply the stain evenly with a brush or rag, following the wood grain.
- Allow the stain to penetrate the wood for the recommended amount of time, and then wipe off any excess stain.
- Apply additional coats of paint or stain as needed, allowing sufficient drying time between each coat.
Clean up the Work Area
Once you have completed the installation and finishing touches, it’s important to clean up the work area to leave it neat and tidy. Follow these steps to ensure a clean finish:
- Remove any construction debris, such as sawdust or packaging materials, from the area.
- Vacuum or sweep the floor around the door to remove any remaining dirt or dust.
- Wipe down the door and frame with a damp cloth to remove any fingerprints or smudges.
By following these simple finishing touches, you can ensure your installed prehung door looks its best and adds value to your home.
Troubleshooting Tips
Installing a prehung door may seem like a straightforward process, but sometimes issues can arise that make the task more challenging. However, with a little patience and know-how, you can overcome these hurdles and achieve a professional-looking installation. In this section, we will explore some common issues that can occur during prehung door installation and provide solutions to help you troubleshoot and resolve them.
Common issues during prehung door installation
Despite careful preparation, there are a few common issues that you might encounter while installing a prehung door. By being aware of these potential pitfalls, you can be better prepared to handle them. Here are some common issues:
- Uneven gap between the door and the jamb
- Difficulty aligning the hinges
- Door not swinging or closing properly
- Uneven reveal (gap) between the door and the frame
- Difficulty with latch and strike plate alignment
Encountering any of these issues can be frustrating, but don’t worry! There are solutions to overcome these challenges.
Solutions to overcome challenges
To ensure a successful prehung door installation, here are some solutions to help you overcome the common challenges:
Uneven gap between the door and the jamb:
If you find that the gap between the door and the jamb is uneven, the first step is to check the door frame for any signs of warping or damage. If there are any visible issues, you may need to replace the entire door frame. Additionally, adjusting the hinge screws can often help in aligning the door.
Difficulty aligning the hinges:
Aligning the hinges can sometimes be tricky, especially if the prehung door is not properly squared in the opening. To overcome this challenge, you can use shims to adjust the position of the door frame until the hinges align perfectly. Be sure to check the level and plumb of the door as you make adjustments.
Door not swinging or closing properly:
If the door is not swinging or closing properly, the issue may lie with the strike plate and latch alignment. Making minor adjustments to the strike plate and latch can help ensure a smooth swinging and closing motion. Consider using a chisel or a file to adjust the strike plate and latch recesses to allow for a better fit.
Uneven reveal (gap) between the door and the frame:
An uneven reveal between the door and the frame can be resolved by adjusting the positioning of the shims. Carefully reposition the shims until the reveal is even on all sides. Be patient and adjust the shims gradually to avoid causing damage to the door or the frame.
Difficulty with latch and strike plate alignment:
If you are having trouble aligning the latch and strike plate, you can use a sharp utility knife or a chisel to remove excess material from the strike plate area. Test the latch several times to ensure it aligns and operates smoothly.
By following these troubleshooting tips, you can tackle common challenges that may arise during prehung door installation. Remember to take your time, measure twice, and make gradual adjustments for the best results. With a little patience and persistence, you’ll have your prehung door installed like a pro!
Safety Considerations
When it comes to installing a prehung door, it’s important to prioritize safety. Following proper safety precautions is crucial to ensure a smooth and accident-free installation process. In this section, we will discuss the essential safety precautions you should follow during the installation process and provide tips for handling heavy equipment and sharp materials.
Safety precautions to follow during the installation process
Installing a prehung door requires careful attention to safety to avoid any potential hazards. Here are some safety precautions to keep in mind:
- Wear protective gear: Before you start the installation, make sure to wear appropriate protective gear such as safety goggles, gloves, and steel-toe boots. This will help safeguard yourself from potential injuries.
- Ensure a clear working area: Clear the area around the door frame to create a safe working space. Remove any obstacles or debris that could cause accidents or impede your progress.
- Use proper tools and equipment: Invest in high-quality tools and equipment specifically designed for door installation. Using the correct tools will not only make the process easier but also minimize the risk of accidents.
- Work with a partner: Installing a prehung door can be a challenging task, especially when handling large or heavy components. Having a partner to assist you can make the process safer and more efficient.
- Follow manufacturer instructions: Every prehung door may have specific installation instructions provided by the manufacturer. Adhering to these instructions is crucial for ensuring proper installation and avoiding any safety issues.
Tips for handling heavy equipment and sharp materials
During the installation of a prehung door, you may come across heavy equipment and sharp materials. Here are some helpful tips to handle them with caution:
- Use proper lifting techniques: When lifting heavy components such as the door slab or the door frame, remember to lift with your legs, not your back. This will prevent strains and injuries.
- Secure sharp materials: If you encounter sharp materials like nails or screws, ensure they are properly stored and contained. Use a magnetic tray or container to collect these pieces and prevent any injury.
- Handle cutting tools carefully: When using cutting tools such as a saw or a utility knife, exercise caution and follow recommended safety procedures. Always cut away from your body and keep your fingers away from the blade.
- Store tools safely: After using your tools, store them in a secure and organized manner. This will not only protect your tools from damage but also reduce the risk of accidental injuries.
- Dispose of waste materials properly: Dispose of waste materials, such as discarded packaging or sharp objects, in a designated container or trash bag. This will help prevent injuries from stepping on or coming into contact with these hazardous materials.
By following these safety precautions and tips, you can ensure a safe and successful prehung door installation. Remember, safety should always be your top priority throughout the entire process.
Frequently Asked Questions On How To Install A Prehung Door
Are Prehung Doors Easy To Install?
Yes, prehung doors are easy to install. They come preassembled in their frame, making installation faster and simpler. Just follow the provided instructions for a straightforward installation process.
Should You Screw Or Nail A Prehung Door?
You should use screws instead of nails to install a prehung door. Screws provide better security and durability, ensuring the door remains properly aligned over time.
How To Install A Home Depot Prehung Door?
To install a Home Depot Prehung door, start by removing the old door and frame. Check the rough opening for level and square. Position the door into the opening, attaching it to the frame with screws. Place shims around the door to ensure proper alignment.
Check the door for proper operation and make any necessary adjustments.
What Kind Of Screws To Use On Prehung Doors?
For prehung doors, it is recommended to use 3-inch screws. These screws provide a secure and stable installation. Make sure to use screws with a flat or pan head to prevent them from interfering with the door’s operation. Using the right screws ensures the door stays in place and functions properly.
Conclusion
Installing a prehung door may seem daunting at first, but with the right tools and step-by-step instructions, it can be a manageable DIY project. By following the tips outlined in this blog post, you’ll be able to successfully install a prehung door and enhance the aesthetics and functionality of your home.
Remember to take your time, measure accurately, and seek help if needed. Happy door installation!