To install a prehung interior door, first, measure the door frame and the door to ensure they match, then remove the existing door and casing, position the prehung door in the frame, and secure it with screws and shims. Now, here’s a detailed guide on how to properly install a prehung interior door.
Understanding The Basics Of Prehung Doors
When it comes to installing interior doors, understanding the basics of prehung doors is essential. Prehung doors are a popular choice for homeowners due to their convenience and ease of installation. In this section, we will delve into what prehung doors are, the benefits of using them, and the key differences between prehung doors and slab doors.
What is a Prehung Door?
A prehung door is a complete door unit that includes both the door slab and the door frame. Unlike slab doors, which are sold as standalone slabs without a frame, prehung doors come preassembled and ready to install. The door frame is already attached to the door, and it includes hinges, jambs, and the necessary hardware.
Benefits of Using Prehung Doors
Using prehung doors offers several benefits for both DIY enthusiasts and professional installers. Here are some of the advantages:
- Efficiency: Installing a prehung door is typically faster and easier than installing a slab door. Since the door and frame are already assembled, you can save time by simply fitting it into the rough opening and securing it in place.
- Improved Functionality: Prehung doors are designed to ensure proper alignment and functionality. The frame and hinges are pre-installed at the correct angles, providing a smooth opening and closing experience.
- Enhanced Energy Efficiency: Prehung doors often come with weatherstripping and insulation options that help improve energy efficiency in your home. These features can help reduce drafts and lower your heating and cooling costs.
- Increased Durability: Since prehung doors come as complete units, the door and frame work together seamlessly, creating a stronger and sturdier installation compared to slab doors.
Differences between Prehung and Slab Doors
While prehung doors and slab doors serve the same purpose, there are a few key differences between the two:
| Prehung Doors | Slab Doors |
|---|---|
| Include both the door slab and the door frame | Consist of the standalone door slab without a frame |
| Preassembled and ready to install | Require additional framing and preparation before installation |
| Offer better insulation and energy efficiency options | May require extra weatherstripping and insulation to achieve the same level of performance |
| Provide a stronger and more secure installation | Depend on the quality of the frame and hinges chosen |
By understanding the differences between prehung doors and slab doors, you can make an informed decision based on your specific needs and preferences.
Step 1: Measuring And Preparing The Opening
Installing a prehung door interior can be a straightforward and rewarding DIY project that can instantly transform the look and feel of any room in your home. Before you dive into the installation process, however, it’s essential to properly measure and prepare the opening for the new door.
Measuring the height, width, and depth of the door opening
To ensure a perfect fit, precise measurements of the door opening are crucial. Grab your measuring tape and carefully measure the height, width, and depth of the opening.
| Measurement | Process |
|---|---|
| Height | Measure from the top of the opening to the floor. Take three measurements: at the left side, center, and right side of the opening. Record the smallest measurement. |
| Width | Measure from one side of the opening to the other, including any trim. Take three measurements: at the top, middle, and bottom of the opening. Record the smallest measurement. |
| Depth | Measure the distance from the face of the wall to the back of the door jamb. This measurement will help determine the thickness of the new door you need. |
Preparing the rough opening by removing any obstructions or debris
Before you can install the new prehung door, ensure that the rough opening is clean and free of any obstructions or debris. Follow these steps to prepare the rough opening:
- Remove any existing door and hardware, including the hinges and strike plate.
- If there is any trim or molding around the opening, carefully remove it using a pry bar or a utility knife.
- Inspect the opening for any loose or protruding nails, screws, or staples and remove them.
- Thoroughly clean the rough opening, removing any dust, dirt, or debris that may interfere with the installation.
Checking the level and plumb of the opening
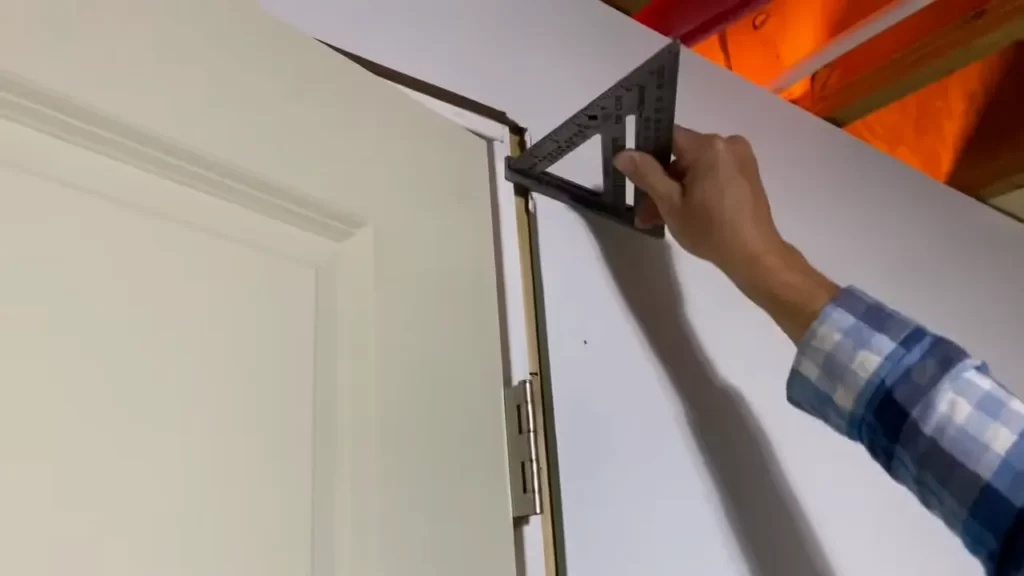
Before proceeding further, it’s important to check that the opening is level and plumb. An uneven or unlevel opening can cause issues with the installation and affect the performance of the door. Here’s how to ensure the opening is level and plumb:
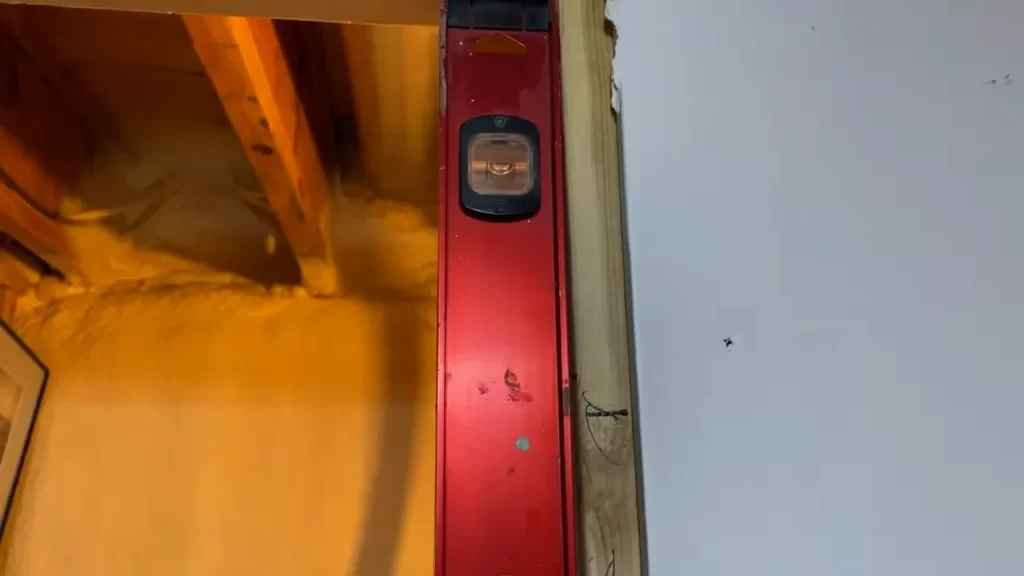
- Using a level, check both the sides and the top of the opening for plumb. Adjust if necessary by shimming or sanding down any high spots.
- Check the levelness of the floor, as it can impact the door’s operation. Use shims to level the door frame if needed.
By carefully measuring the height, width, and depth of the door opening, preparing the rough opening, and verifying that it is level and plumb, you’ll be well on your way to successfully installing a prehung door interior. Stay tuned for our next step!
Step 2: Installing The Door Frame
Installing the door frame is a crucial step in the process of installing a prehung door interior. This step ensures that the door is securely attached to the rough opening and properly aligned. By following these instructions, you’ll be able to install the door frame with ease and precision.
Positioning the prehung door in the opening
The first step in installing the door frame is to position the prehung door in the opening. Carefully lift the door and place it into the rough opening, making sure it is centered and level. It’s important to have someone assist you in holding the door steady while you work.
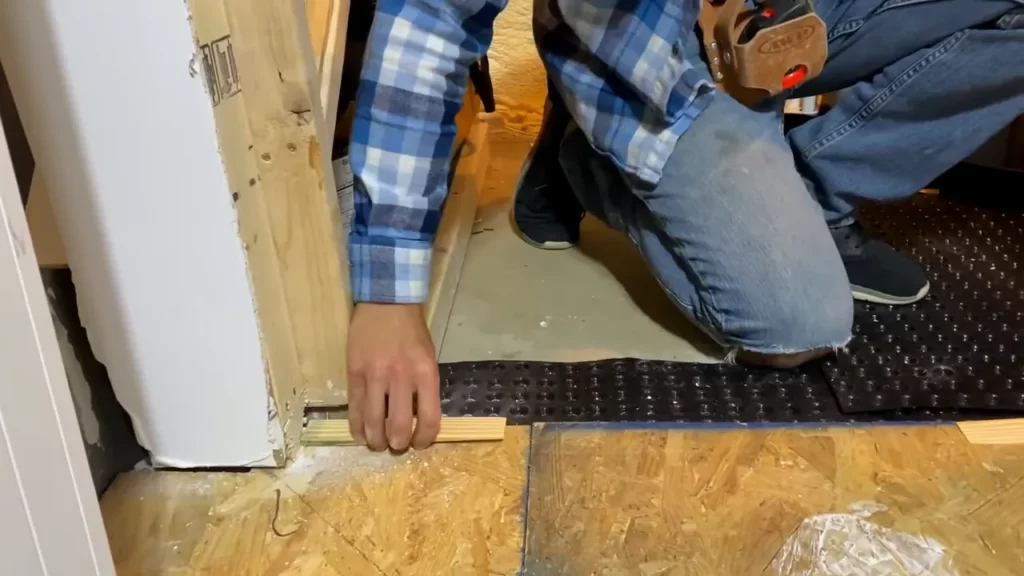
Attaching the door frame to the rough opening using shims
Once the door is positioned correctly, it’s time to attach the door frame to the rough opening using shims. Start by placing shims behind the top hinge of the door frame to ensure it is plumb and level. Insert additional shims along the sides and bottom of the frame, checking for plumb and level as you go.
Use a level to ensure that the door frame is perfectly vertical on all sides. Adjust the shims as needed to achieve a level and plumb position. It’s important to remember that the stability and functionality of the door depend on these adjustments.
Ensuring the door is level and plumb
After attaching the door frame to the rough opening, the next step is to ensure that the door itself is level and plumb. Start by closing the door and checking for any gaps or misalignments. Adjust the shims as necessary to achieve a snug fit.
Use a level to check the vertical alignment, both on the hinge side and the latch side of the door. Make any adjustments to the shims until the door is perfectly level and plumb. This will ensure that the door functions properly and provides a tight seal when closed.
Once you have confirmed that the door is level and plumb, proceed to the next step of the installation process.
Step 3: Securing The Hinges And Door
Once you have positioned the prehung door in the rough opening and shimmed it to ensure it is level and plumb, it’s time to move on to securing the hinges and door. This step is crucial in ensuring that your door functions properly and operates smoothly. In this section, we will cover how to attach the door hinges to the frame and door, how to check the swing direction, and how to secure the door to the frame.
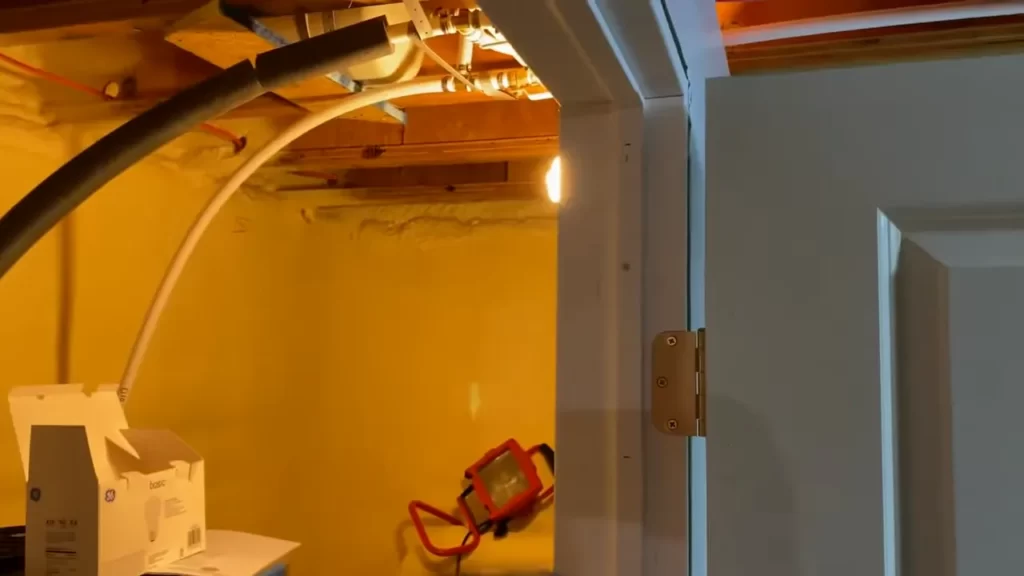
Attaching the door hinges to the frame and door
Now that the door is properly positioned, it’s time to attach the hinges to both the frame and the door itself. The number of hinges needed will depend on the size and weight of the door, but typically three hinges are used. To attach the hinges, follow these simple steps:
- Place the hinge on the edge of the door frame where it is marked.
- Align the hinge with the corresponding marks on the door frame and screw it into place using the provided screws.
- Repeat this process for the remaining hinges, ensuring they are evenly spaced and aligned with the marks on the door frame.
Attaching the hinges to the door follows a similar process:
- Position the hinges on the edge of the door where they are marked.
- Align the hinges with the corresponding marks on the door and screw them into place using the provided screws.
- Double-check that the hinges are securely attached to both the frame and the door, tightening any loose screws if necessary.
Checking the swing direction and adjusting if necessary
Before securing the door to the frame, it’s important to check the swing direction to ensure it opens and closes properly. To do this:
- Stand inside the room, facing the hinges.
- Slowly swing the door open and observe its movement.
- If the door swings in the wrong direction, you can easily adjust it by removing the hinge pins and flipping the door. Make sure to secure the hinge pins back in place after adjusting the swing direction.
Securing the door to the frame using screws or nails
Now that the hinges are attached and the swing direction is correct, it’s time to secure the door to the frame. This is typically done using screws or nails, depending on the type of door and frame you have. To secure the door:
- Starting at the top hinge, drive a screw or nail through the hinge into the door frame. Repeat this process for the middle and bottom hinges.
- Ensure that each screw or nail is driven in securely but not so tight that it alters the door’s alignment.
- Double-check that the door swings freely and smoothly, making any necessary adjustments before fully securing the screws or nails.
Once the door is securely attached to the frame, you can remove any remaining shims and test the door’s functionality by opening and closing it several times. If the door operates smoothly and without any issues, congratulations! You have successfully secured the hinges and door.
Step 4: Installing The Door Hardware
After successfully hanging the prehung door in its frame, it’s time to move on to installing the door hardware. This step involves drilling holes for the door handle and lockset, attaching them securely to the door, and finally, testing the functionality of the hardware. Let’s dive into each of these tasks in detail.
H3: Drilling holes for the door handle and lockset
The first step in installing the door hardware is drilling holes for the door handle and lockset. To do this, gather the necessary tools – a measuring tape, a pencil, and a hole saw with the appropriate diameter. Follow these steps to ensure accurate placement of the holes:
- Measure the distance from the edge of the door to the center of the bore hole for the latch. Usually, this measurement will be specified by the manufacturer, so be sure to check the instructions provided with your door hardware.
- Mark this measurement on the face of the door using a pencil. This will serve as a reference point for drilling the hole.
- Next, measure the distance from the edge of the door to the center of the bore hole for the handle. Again, consult the instructions to determine the correct measurement.
- Mark this measurement on the face of the door, ensuring that it aligns with the center mark for the latch bore hole.
- Using a hole saw of the appropriate size, carefully drill the latch bore hole, followed by the handle bore hole. Take your time and maintain a steady hand to achieve clean, precise holes.
H3: Attaching the door handle and lockset to the door
Once the holes are drilled, it’s time to attach the door handle and lockset. Retrieve the components provided with your door hardware kit, including the latch mechanism, strike plate, handle set, and any necessary screws. Follow these steps to ensure a secure installation:
- Insert the latch mechanism into the latch bore hole, ensuring that the beveled side faces the direction of door swing. Align the holes on the latch plate with the holes on the edge of the door and fasten the latch securely using the provided screws.
- Next, attach the strike plate to the door frame using the provided screws. Make sure it lines up with the latch and allows for smooth, seamless operation of the door.
- Now, it’s time to attach the door handle. Position the handle set on the front and back side of the door, aligning the screw holes with the holes on the door. Insert the screws and tighten them using a screwdriver. Ensure that the handle is secured firmly to the door.
H3: Testing the functionality of the hardware
After attaching the door handle and lockset, it’s crucial to test the functionality of the hardware. This ensures that the door operates smoothly and securely. Perform the following checks:
- Test the latch by turning the door handle and confirming that the latch retracts and extends properly. It should engage smoothly with the strike plate when the door is closed.
- Try locking and unlocking the door using the lockset. Make sure the key or turn knob operates smoothly, and the latch securely engages with the strike plate when locked.
- Test the door handle’s operation by opening and closing the door. Check for any sticking or resistance that may hinder smooth movement.
By following these steps, you can confidently install the door hardware for your prehung door interior. Take your time to ensure accurate measurements, secure attachments, and smooth functionality. With the door hardware installed, your prehung door will be complete and ready for use.
Step 5: Finishing Touches And Adjustments
With the door securely in place, it’s time to add those final touches and make any necessary adjustments to ensure a perfect fit. These last steps will ensure that your prehung door interior is not only functional but also energy-efficient and aesthetically pleasing.
Adding weatherstripping to the door frame
One of the most crucial steps in installing a prehung door interior is adding weatherstripping. This simple but effective addition helps to seal any gaps around the door, preventing drafts and improving energy efficiency in your home. Weatherstripping can be applied to the door frame using the following straightforward process:
- Cut the weatherstripping to fit the length of each side of the door frame.
- Insert the weatherstripping into the grooves on the door stop and jamb, ensuring a tight fit.
- Secure the weatherstripping in place using small nails or adhesive, depending on the type of weatherstripping you’re using.
- Repeat this process for the top and bottom of the door frame.
Applying caulk to gaps between the door frame and wall
After adding weatherstripping, it’s important to seal any remaining gaps between the door frame and the wall. This step helps to further insulate your home and enhance the overall appearance of the installation. Here’s how you can apply caulk to these gaps:
- Using a caulk gun, load it with a tube of caulk that matches the color of your door frame or wall.
- Apply a thin, even bead of caulk along the gap between the door frame and the wall.
- Smooth the caulk using a caulk finishing tool or your finger, ensuring a clean and neat finish.
- Allow the caulk to dry according to the manufacturer’s instructions before moving on to the next step.
Adjusting the strike plate for a proper fit
In order for your door to close securely and properly, it’s essential to adjust the strike plate. The strike plate is the metal piece that the door latch catches on when the door is closed. Here’s how you can make the necessary adjustments:
- Inspect the door to determine if it is hitting the strike plate too high or too low.
- Use a screwdriver to loosen the screws holding the strike plate in place.
- Gently tap the strike plate up or down, depending on the need for adjustment.
- Tighten the screws once the strike plate is in the correct position.
By following these simple steps, you can ensure that your prehung door interior is finished to perfection. These finishing touches, including adding weatherstripping, applying caulk, and adjusting the strike plate, will not only enhance the functionality and energy efficiency of your door but also add those final aesthetic touches to complete your installation.
Troubleshooting Tips And Common Mistakes
Installing a prehung door inside your home can greatly enhance its aesthetic appeal and functionality. However, like any home improvement project, it can sometimes present challenges. In this section, we’ll explore some common troubleshooting tips and mistakes to avoid when installing a prehung door interior.
Dealing with uneven floors or walls
If you encounter uneven floors or walls during the installation process, it’s essential to address the issue before proceeding. Failure to do so may result in a misaligned door that does not function properly or looks visually unpleasing.
To tackle this problem, consider the following steps:
- Measure the unevenness: Use a level to determine the extent of the unevenness. This will help you decide on the course of action.
- Shimming: Place shims, which are thin wedges, under the door jamb and behind the hinges to even out any gaps between the door and the wall. Adjust the shims as necessary until the door is level.
- Trimming the door: In case of severe unevenness, you may need to trim the bottom of the door to fit the space properly. Use a circular saw or a hand saw to carefully remove excess material.
- Recheck the level: Once you’ve made adjustments, recheck the level to ensure the door is now properly aligned.
Fixing gaps between the door and frame
Gaps between the door and frame can not only affect the door’s functionality but also compromise energy efficiency and security. To address this issue, follow these steps:
- Identify the gaps: Inspect the door and frame to locate any noticeable gaps or spaces.
- Weatherstripping: Install weatherstripping around the door frame to minimize air leakage and increase insulation. This can help to fill smaller gaps and create a better seal.
- Trim the frame: In some cases, you may need to trim the door frame slightly to eliminate larger gaps. Use a utility knife or a chisel to carefully remove excess material.
- Sealant or caulk: Apply a bead of sealant or caulk along the edges of the door frame to seal any remaining gaps and improve the overall appearance.
Handling issues with the door latch or hardware
If you’re experiencing problems with the door latch or hardware, it’s important to address them promptly to ensure the door functions properly and securely. Follow these troubleshooting tips:
- Check the alignment: Ensure that the latch aligns properly with the strike plate on the door frame. Adjust the placement of the strike plate if necessary.
- Tighten loose screws: If the latch or hardware feels loose, tighten any screws or bolts that may have come loose during installation.
- Lubrication: Apply lubricant, such as graphite or silicone-based spray, to the moving parts of the latch and hinges to improve their operation.
- Replace faulty hardware: If the latch or hardware is damaged or not functioning correctly, consider replacing it with new ones to ensure smooth operation.
By addressing these troubleshooting tips and avoiding common mistakes, you can successfully install a prehung door interior while ensuring it operates smoothly and looks visually appealing in your home.
Maintaining And Caring For Your Prehung Door
Proper maintenance and care are essential for keeping your prehung door in top condition and extending its lifespan. By following these regular cleaning and maintenance tips, addressing common wear and tear issues, and implementing smart practices, you can ensure that your prehung door remains functional and attractive for years to come.
Regular Cleaning and Maintenance Tips
Regular cleaning and maintenance of your prehung door not only keeps it looking good but also prevents dirt, dust, and grime from impacting its performance. Here are some steps you can follow to maintain your prehung door:
- Use a mild detergent mixed with water to clean the door surface, wiping it down with a soft cloth or sponge. Avoid using abrasive cleaners or rough materials that could scratch the surface.
- Pay special attention to the door edges and corners, as dirt and debris can accumulate in these areas.
- Inspect the door hinges and hardware for any loose screws or damage. Tighten any loose screws and replace damaged hardware promptly.
- Check the weatherstripping around the door for wear or damage. If necessary, replace the weatherstripping to ensure a proper seal and improved energy efficiency.
- Regularly clean and lubricate any moving parts, such as hinges and locks, with a silicone-based lubricant to keep them operating smoothly.
Addressing Common Wear and Tear Issues
Even with proper maintenance, wear and tear can occur over time. By promptly addressing common issues, you can prevent further damage and maintain the performance of your prehung door:
- If you notice any cracks or chips in the door surface, patch them up with wood putty and sand the area smooth.
- Inspect the door jambs for any signs of rot or water damage. If necessary, replace the affected sections to prevent further deterioration.
- If the door starts to stick or doesn’t close properly, check for any obstructions or debris in the hinges or strike plate. Clean and lubricate these areas as needed.
- Address squeaky hinges by applying a few drops of oil or using a graphite lubricant to reduce friction and noise.
Extending the Lifespan of Your Prehung Door
With proper care, you can significantly extend the lifespan of your prehung door. Here are some additional tips to help you maintain its functionality and appearance:
- Regularly apply a protective finish to the door, such as varnish or paint, to safeguard it from moisture and UV rays.
- Avoid slamming the door or leaning against it, as this can cause damage to the hinges, frame, or door itself.
- Keep the area around the door clean and uncluttered to prevent any accidental bumps or scratches.
- Consider installing a door sweep to reduce drafts and protect the bottom of the door from moisture and debris.
By following these maintenance tips and taking proactive measures, you can enjoy the benefits of your prehung door for many years while ensuring its optimal performance and aesthetics.
Frequently Asked Questions Of How To Install A Prehung Door Interior
Are Prehung Doors Easy To Install?
Yes, prehung doors are easy to install. They come preassembled with the door frame and hinges, making installation simpler. Just level and shim the frame, secure it with screws, and attach the door. It’s a convenient option for DIYers and saves time and effort.
Should You Screw Or Nail A Prehung Door?
Use screws instead of nails to install a Prehung door. Screws offer better stability, preventing the door from sagging or becoming loose over time.
How Long Does It Take To Install A Prehung Interior Door?
A Prehung interior door can typically be installed in about 1-2 hours.
What Screws To Use To Install A Prehung Door?
To install a Prehung door, use screws that are at least 2 ½ inches long. Use three screws for each hinge: one at the top, one at the bottom, and one in the middle. Additionally, use shorter screws to secure the door jamb to the wall framing.
Ensure the screws are secure but avoid overtightening.
How Do You Install A Prehung Interior Door?
To install a prehung interior door, start by removing the old door and frame, then position the new door in the opening and shim to make it plumb. Finally, secure the door in place with screws and install the trim around it.
What Tools Will I Need To Install A Prehung Interior Door?
To install a prehung interior door, you will need a hammer, screwdriver, level, tape measure, shims, and a saw to trim the door if necessary.
Conclusion
Installing a prehung interior door may seem daunting, but with the right tools and steps, it can be a straightforward process. From measuring and leveling to attaching hinges and trim, you can achieve a professional-looking result. Remember to follow the manufacturer’s instructions and take your time to ensure accuracy.
By mastering this skill, you can enhance the functionality and aesthetics of your home. Get ready to enjoy the satisfaction of a job well done!