To install a Ring Doorbell on brick, you need to drill holes in the brick using a masonry bit, insert anchors, and fasten the doorbell using screws. This process ensures a secure attachment to the brick surface.
Welcome to our guide on installing a Ring Doorbell on brick! If you’re looking to enhance the security of your home and enjoy the convenience of a video doorbell, you’ve come to the right place. Installing a Ring Doorbell on brick requires a few simple steps, and we’ll walk you through the process.
By following our instructions, you’ll have your Ring Doorbell securely attached to your brick surface in no time. Let’s get started!
Choosing The Right Location
Selecting the Perfect Spot for Your Ring Doorbell
Choosing the right location is crucial when it comes to installing your Ring Doorbell on a brick surface. The placement of your doorbell can have a significant impact on its performance and effectiveness. To help you make the best choice, consider the factors mentioned below and follow the tips provided to maximize security and convenience.
Factors to Consider
When selecting the ideal location for your Ring Doorbell on a brick wall, there are a few factors to keep in mind:
- Accessibility: Ensure that the doorbell is easily accessible for visitors. Select a spot that is visible and within reach to make it convenient for anyone to use.
- Wi-Fi Signal Strength: Find an area on the brick wall that allows for a strong Wi-Fi signal. This is crucial for the Ring Doorbell’s connection and its ability to transmit notifications, video feeds, and other important data.
- Optimal Field of View: Consider the field of view you desire for your Ring Doorbell. Look for a location that provides a clear line of sight to your entryway, allowing for maximum coverage and visibility.
- Power Source: Ensure that the chosen spot is close to a power source or easily accessible for wiring. This is essential for the functioning of your Ring Doorbell and avoiding any potential installation challenges.
Ensuring Optimal Coverage and Visibility
To guarantee maximum coverage and visibility, follow these steps:
- Position it at Eye Level: Mount your Ring Doorbell at eye level or between 48-60 inches from the ground. This ensures that visitors’ faces are captured clearly, making it easier to identify them.
- Avoid Obstructions: Make sure there are no obstacles, such as tree branches or exterior lighting fixtures, blocking the camera’s view. A clear line of sight is essential for optimal coverage and visibility.
- Consider the Lighting: Take into account the lighting conditions in the chosen location. Avoid installing the doorbell in areas with direct sunlight or excessive shadows, as extreme lighting can affect the camera’s performance.
- Test the View: Before finalizing the placement, consider testing the view of the camera. Use the Ring app to check for any blind spots or areas that may need adjustment. This ensures that you have a comprehensive view of your entryway.
Tips for Maximizing Security and Convenience
In addition to choosing the perfect location, here are a few tips to enhance the security and convenience offered by your Ring Doorbell:
- Secure Mounting: Mount your Ring Doorbell securely using the provided hardware. A sturdy installation prevents tampering and ensures reliable performance.
- Activate Motion Detection: Enable motion detection in the Ring app to receive alerts whenever activity is detected near your doorbell. This feature enhances security by providing real-time notifications, allowing you to diligently monitor your property.
- Utilize Additional Features: Explore other features offered by the Ring Doorbell, such as two-way audio and night vision, to optimize convenience and security.
- Maintain Wi-Fi Connectivity: Ensure a stable Wi-Fi connection to ensure seamless communication between your Ring Doorbell and the Ring app. Regularly check your Wi-Fi signal strength and troubleshoot any connectivity issues promptly.
By carefully selecting the right location and following these tips, you can ensure that your Ring Doorbell is optimally placed on your brick wall, providing excellent coverage, visibility, and security for your home.
Preparing For Installation
Before you start installing your Ring Doorbell on brick, there are a few essential steps you need to take to ensure a smooth and successful installation. This section will guide you through the process of gathering the necessary tools and equipment, preparing the doorbell for mounting, and checking power and Wi-Fi connectivity.
Gathering the Necessary Tools and Equipment
To install your Ring Doorbell on brick, you’ll need a few tools and equipment to get the job done right. Here’s a list of the items you should have on hand:
- Electric drill with masonry drill bit
- Screwdriver
- Level
- Tape measure
- Pencil
- Anchors and screws suitable for brick installation
Accessories for Brick Installation
In addition to the basic tools, there are a few accessories you might need specifically for brick installation. These include:
- Anchors suited for brick
- A masonry bit to drill into the brick
- A masonry chisel for any necessary modifications to the brick
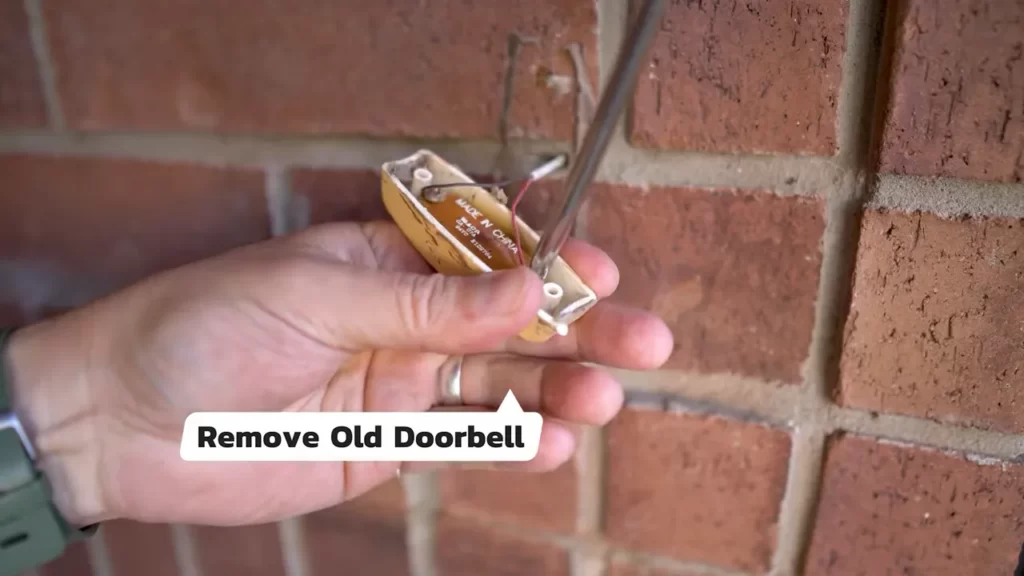
Preparing the Doorbell for Mounting
Before mounting your Ring Doorbell on brick, take a few moments to prepare it for installation. Remove the faceplate to reveal the mounting holes and ensure that all necessary components are included in the package. If any parts are missing or damaged, contact Ring customer support for assistance.
Checking Power and Wi-Fi Connectivity
Before proceeding with the installation, it’s crucial to check that you have a stable power source and reliable Wi-Fi connectivity:
- Verify Electrical Wiring: Check if your current doorbell system meets the minimum voltage requirements for the Ring Doorbell. This will ensure that your doorbell has a reliable power source. If needed, consult an electrician to make any necessary modifications to your home’s electrical wiring.
- Ensuring Stable Internet Connection: Since the Ring Doorbell relies on an internet connection, make sure your Wi-Fi network is stable and within range of the doorbell’s location. You can test the Wi-Fi connectivity by bringing your phone near the intended installation spot and checking the signal strength.
Troubleshooting Tips if Power or Wi-Fi is Unavailable
In the event that your current doorbell system does not have the required power or your Wi-Fi connection is unstable, there are a few troubleshooting tips you can try:
- For Power Issues:
- Check if your existing doorbell transformer can be upgraded to meet the Ring Doorbell’s voltage requirements.
- Consider using a plug-in adapter or a battery pack specifically designed for the Ring Doorbell.
- For Wi-Fi Connectivity Issues:
- Improve your Wi-Fi signal by adding a Wi-Fi range extender near the Ring Doorbell installation spot.
- Reposition your Wi-Fi router to improve the signal strength in that area of your home.
By following these steps, you’ll be well-prepared for the installation of your Ring Doorbell on brick. From gathering the necessary tools to ensuring a stable power and internet connection, being prepared will help you complete the installation successfully and enjoy all the benefits provided by your Ring Doorbell.
Mounting The Ring Doorbell On Brick

Mounting a Ring Doorbell on a brick surface requires careful preparation and attention to detail. Brick can be a challenging material to work with, but with the right tools and techniques, you can successfully install your Ring Doorbell to enhance the security of your home. In this guide, we will walk you through each step of the process, from marking drill holes on the brick to attaching the Ring Doorbell securely.
Step 1: Marking Drill Holes on the Brick
To begin, you’ll need to measure and mark the optimal position for your Ring Doorbell on the brick. This step is crucial to ensure that your doorbell is properly aligned and securely mounted. Use a pencil or chalk to mark the drill points on the brick surface, making sure to position them according to the mounting bracket’s dimensions.
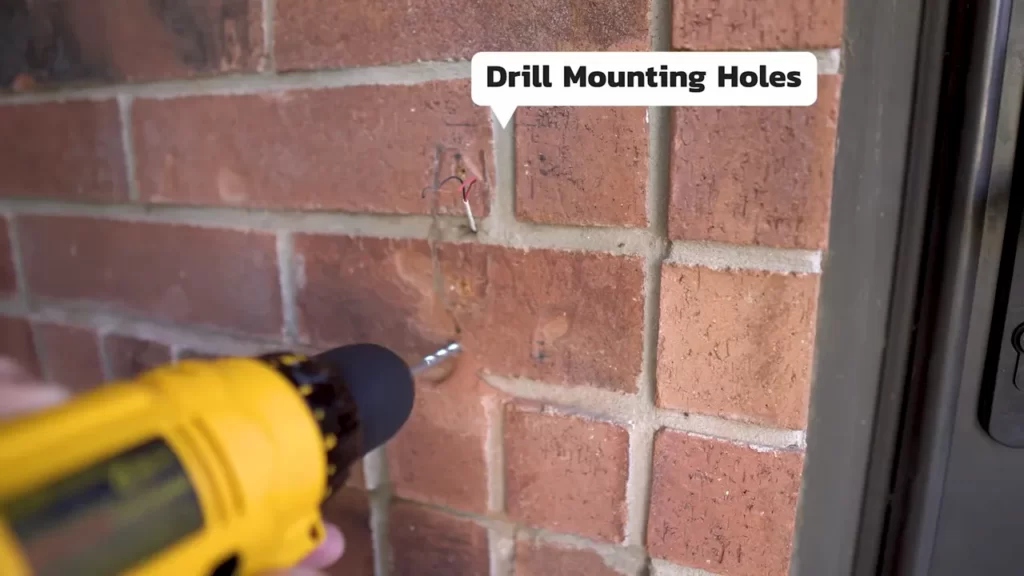
Step 2: Drilling Holes in the Brick
Choosing the right drill bit is essential for drilling holes in brick. Select a masonry bit that matches the size of the anchors provided with your Ring Doorbell. When drilling into brick, it’s important to adopt the right drilling strategy. Start with a slow speed and apply gentle pressure to prevent cracks or damage to the brick surface. Take breaks during drilling to allow the bit and drill motor to cool down and prevent overheating.
Here are some tips to prevent cracks or damage while drilling into brick:
- Use a hammer drill for added power and effectiveness
- Apply steady pressure while drilling, letting the drill do the work
- Keep the drill perpendicular to the wall to ensure straight holes
- Use a vacuum or brush to remove dust and debris from the drilled holes
Step 3: Anchoring the Mounting Bracket
Once the holes are drilled, carefully insert anchors into each hole. These anchors will provide stability and support for the mounting bracket. Make sure the anchors are flush with the surface of the brick. Next, attach the mounting bracket securely to the brick using suitable screws or bolts. Tighten them firmly but avoid over-tightening to prevent damage.
Step 4: Connecting the Wiring
After anchoring the mounting bracket, it’s time to connect the wiring for your Ring Doorbell. Follow the instructions provided by Ring to properly connect the wires. Ensure that the connections are secure and well-insulated. Once the connection is made, secure the wires and hide any excess length using clips or adhesive cable organizers.
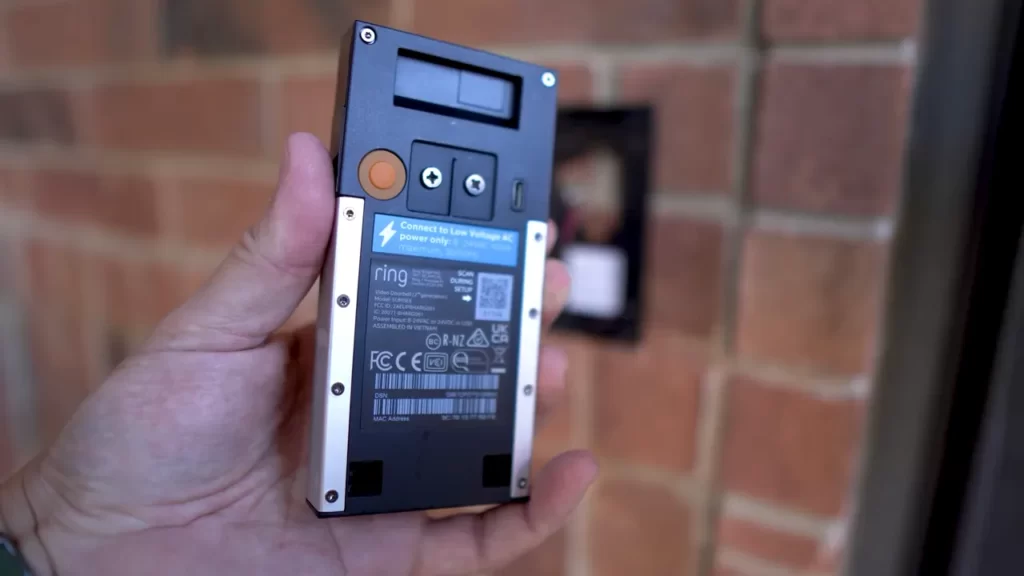
Step 5: Attaching the Ring Doorbell
Align the Ring Doorbell with the mounting bracket, making sure the connectors are properly aligned. Once aligned, install the doorbell using the provided security screws. Ensure that the doorbell is firmly attached and does not wobble. Finally, test the doorbell to confirm it is working correctly and adjust any settings as needed.
By following these steps, you can successfully mount your Ring Doorbell on a brick surface. Remember to take your time, use the proper tools and techniques, and pay attention to detail to ensure a secure and reliable installation.
Finalizing The Installation
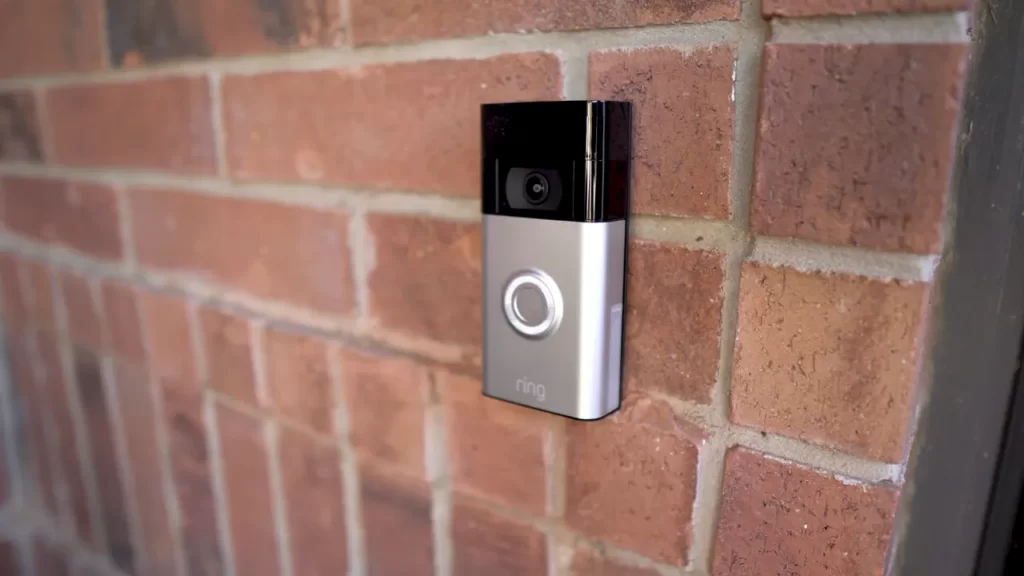
Checking the Doorbell Placement and Alignment
Once you have securely attached the Ring Doorbell to your brick wall, it’s important to check the placement and alignment to ensure optimal performance. Make sure the doorbell is positioned at a height that allows for clear visibility of your front porch area. Use a level to ensure that the doorbell is straight and not tilted to one side. This will help avoid any distortions in the camera view and ensure accurate motion detection.
Verifying Camera Angle and Field of View
After confirming the placement and alignment of the Ring Doorbell, it’s time to verify the camera angle and field of view. Stand in the intended viewing area and make sure the camera captures the full area you want to monitor. Adjust the doorbell if necessary to include any blind spots or areas of interest that may have been missed. It’s important to have a broad and clear field of view to ensure optimal security and coverage.
Making Adjustments if Necessary
If you find that the placement, alignment, camera angle, or field of view is not ideal, don’t worry. You can easily make adjustments as needed. Loosen the screws that hold the doorbell in place and carefully reposition it to achieve the desired positioning. Once you have made the necessary adjustments, retighten the screws to secure the doorbell in its new position. Take your time during this step to get everything just right for optimal performance.
Connecting the Ring Doorbell to the Ring App
Now that you have finalized the physical installation of the Ring Doorbell on your brick wall, it’s time to connect it to the Ring App on your phone or tablet. This will allow you to easily monitor and control the doorbell’s settings from the convenience of your device. Follow these steps to connect the doorbell to the app:
- Download and install the Ring App from the App Store or Google Play Store, depending on your device’s operating system.
- Open the app and create an account if you don’t already have one. Enter your email address and choose a secure password.
- Agree to the terms and conditions of the app and follow the on-screen instructions to complete the account creation process.
- Once you have logged into the app, select the option to add a new device. Choose the Ring Doorbell from the list of available devices.
- Follow the prompts to connect the doorbell to your Wi-Fi network. Make sure you have your Wi-Fi network name (SSID) and password handy.
Activating and Pairing the Doorbell with Your Account
After connecting the Ring Doorbell to the Ring App, you need to activate and pair the doorbell with your account. This step ensures that you have full control and access to all the features and functionality of your Ring Doorbell. Follow these steps to activate and pair the doorbell with your account:
- On the Ring App home screen, select the doorbell’s name from the list of devices.
- Enter the activation code or scan the QR code provided with your Ring Doorbell packaging.
- Once the doorbell is activated, follow the prompts to pair it with your account. This step may involve entering your account credentials or verifying your email address.
Testing the Doorbell and Adjusting Settings
With the Ring Doorbell successfully connected, activated, and paired with your account, it’s time to test its functionality and make any necessary adjustments to the settings. Follow these steps to ensure everything is working as expected:
- Perform a test ring of the doorbell to make sure the alert sounds and the camera captures a live video feed.
- Use the Ring App to adjust motion detection sensitivity, notification settings, and any other preferences according to your needs.
Performing a Test Ring
Once you have adjusted the settings, it’s important to perform a test ring to ensure that the doorbell functions as desired. Press the doorbell button or use the Ring App to initiate a test ring from your phone or tablet. Check if the alert sounds, the camera captures a clear video feed, and you receive notifications on your device. If any issues arise, refer to the troubleshooting guide provided by Ring or contact their customer support for assistance.
Adjusting Motion Detection and Notification Settings
After performing the test ring and evaluating the doorbell’s performance, you may want to fine-tune the motion detection and notification settings. Using the Ring App, adjust the sensitivity level to minimize false alerts without compromising the security of your home. You can also customize the notification settings to receive alerts via push notifications, email, or both, depending on your preference.
Exploring Additional Features and Options
With the Ring Doorbell successfully installed, connected, and set up, take some time to explore the additional features and options available to enhance your home security. The Ring App provides access to various settings, such as two-way audio communication, video recording options, and integrations with other smart home devices. Familiarize yourself with these features and customize them to suit your specific needs.
Frequently Asked Questions For How To Install A Ring Doorbell On Brick
How Do You Install A Ring Doorbell On Brick Without Drilling?
To install a ring doorbell on brick without drilling, use strong adhesive or mounting tape specifically designed for outdoor use. Clean the surface of the brick thoroughly before applying the adhesive. Follow the instructions provided by the adhesive manufacturer for best results.
How Do You Install A Ring Camera On A Brick Wall?
To install a Ring camera on a brick wall, start by finding a suitable location. Mark the drill holes on the wall and use a masonry bit to drill them. Attach the camera bracket using provided screws. Connect the camera and secure it onto the bracket.
Adjust the angle as needed.
Is There A Way To Install Ring Doorbell Without Drilling?
Yes, it is possible to install a Ring doorbell without drilling. You can use adhesive tape or mounting brackets to attach it securely to your door.
How Do You Install A Ring Doorbell On A Block Wall?
To install a Ring doorbell on a block wall, start by assessing the location and ensuring a stable surface. Use a masonry drill bit to create pilot holes for the screws. Attach the mounting bracket securely with appropriate anchors, align the doorbell, and tighten the screws.
Finally, connect the doorbell to your Wi-Fi network and customize the settings. Enjoy enhanced security and convenience!
How Do You Install A Ring Doorbell On Brick?
To install a Ring doorbell on brick, you will need a hammer drill and masonry bit to create holes for the mounting screws. Once the holes are drilled, use wall anchors to secure the bracket, then attach the doorbell to the bracket using the provided screws.
Conclusion
Installing a Ring Doorbell on a brick wall may seem daunting, but with the right steps, it can be a breeze. By using the appropriate tools and following our guide, you can ensure a successful installation. Remember to drill carefully, use anchors for stability, and secure the device firmly.
Now you can enjoy the convenience and security that a Ring Doorbell provides for your home.