To install a Schlage door handle, begin by removing the old handle, align the new handle, insert screws, and tighten using a screwdriver. A Schlage door handle is a popular choice for homeowners due to its durability and security features.
Whether you’re replacing an old handle or installing a new one, the process is relatively straightforward. In this guide, we will walk you through step-by-step instructions on how to install a Schlage door handle. By following these simple steps, you’ll have your new handle securely in place in no time.
Preparing For Installation
When it comes to installing a Schlage door handle, proper preparation is key to ensuring a successful installation. By gathering the necessary tools and understanding the components of a Schlage door handle, you can streamline the installation process and avoid any unnecessary hiccups along the way. In this section, we will take a closer look at each of these steps under the subheading: Preparing for Installation.
Gathering the Necessary Tools
Before you begin installing your Schlage door handle, it is important to gather all the necessary tools. Having these tools readily available will save you time and prevent any interruptions during the installation process. Here is a list of the essential tools you will need:
| Screwdriver (Phillips head and flathead) | Drill (if necessary) |
| Tape measure | Pencil |
| Chisel | Hammer |
| Level | Masking tape |
Understanding the Components of a Schlage Door Handle
Before diving into the installation process, it is important to familiarize yourself with the components of a Schlage door handle. This will help you understand how each component works together to create a secure and functional door handle. The main components of a Schlage door handle include:
- Exterior handle
- Interior handle
- Latch
- Strike plate
- Screws and fasteners
It is crucial to ensure that you have all the necessary components before starting the installation process. This will avoid any delays or complications down the line.
Removing The Old Door Handle
Before you can install a new Schlage door handle, you’ll need to remove the old one. This process may seem daunting, but with the right tools and a little know-how, you’ll have that old handle off in no time. Follow these simple steps to remove the old door handle and get ready for a fresh new look.
Removing the screws or bolts from the old door handle
The first step in removing the old door handle is to locate and remove the screws or bolts holding it in place. These screws or bolts are typically located on the interior side of the door. To find them, examine the handle and look for any visible screws or bolts. You may need to use a screwdriver or a wrench to remove them.
Detaching the faceplate and latch assembly
Once you have removed the screws or bolts, you can move on to detaching the faceplate and latch assembly. The faceplate is the metal plate that surrounds the door handle on the exterior side of the door. To detach it, locate the small tab or lever on the side of the door handle and push or lift it to release the faceplate. Once the faceplate is loose, you can then pull it away from the door, exposing the latch assembly.
Note: Some doors may have additional screws or bolts securing the faceplate and latch assembly. If this is the case, be sure to remove them before attempting to detach the faceplate.
If you encounter any difficulties during the removal process, refer to the manufacturer’s instructions or seek professional assistance to ensure a smooth removal.
Now that you have successfully removed the old door handle, it’s time to move on to the next step of the installation process. Stay tuned for our upcoming blog post on how to install a Schlage door handle!
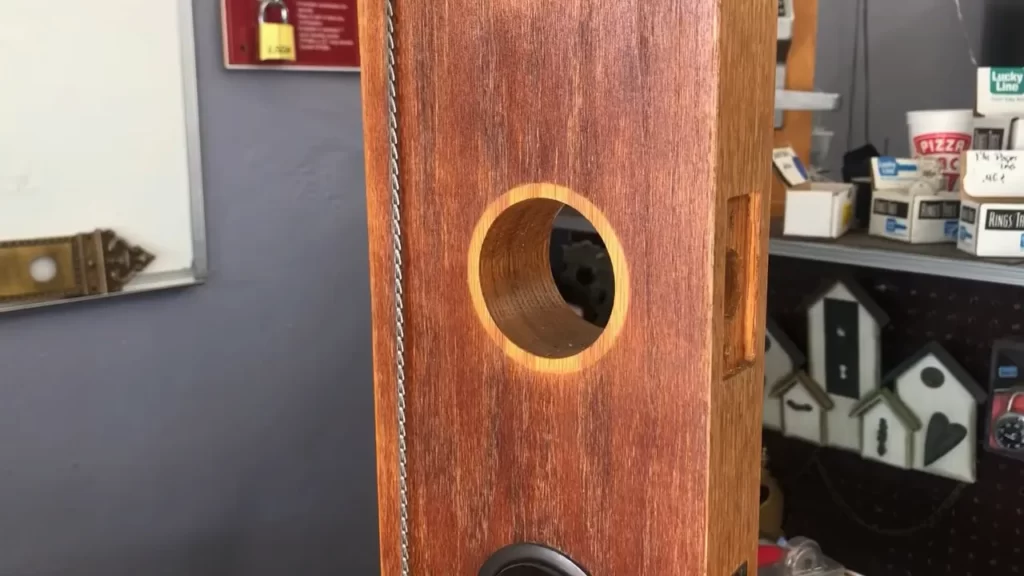
Installing The New Schlage Door Handle
When it comes to enhancing the security and appearance of your home, installing a new Schlage door handle is a smart choice. With its sleek design and advanced features, a Schlage door handle not only adds a touch of elegance to your entryway but also ensures the utmost protection for your loved ones and belongings. However, the installation process may seem daunting if you’re unfamiliar with it. In this guide, we’ll walk you through the steps of installing a new Schlage door handle, specifically focusing on aligning the new faceplate, securing it using screws or bolts, and attaching the latch assembly in the right position.
Aligning the new faceplate with the existing holes
To begin the installation process, you need to align the new faceplate of the Schlage door handle with the existing holes on the door. This ensures a proper fit and makes the installation easier. Follow these simple steps:
- Remove the old faceplate from the door by unscrewing it.
- Hold the new faceplate against the door, ensuring that the screw holes match up with the existing holes.
- If necessary, use a chisel or other tools to make minor adjustments to the holes, so they align perfectly with the new faceplate.
- Make sure the faceplate sits flush against the door surface and that there are no gaps.
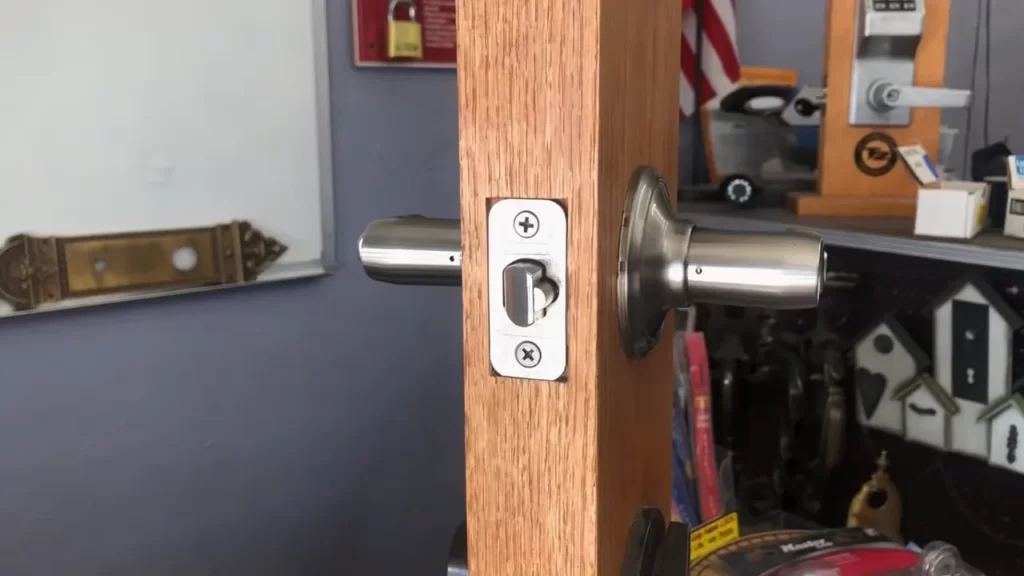
Securing the faceplate using screws or bolts
Once you have aligned the new faceplate, it’s time to secure it in place using screws or bolts. Follow these steps:
- Insert the screws or bolts through the holes in the faceplate and into the corresponding holes in the door.
- Tighten the screws or bolts using a screwdriver or an appropriate wrench, ensuring that the faceplate is firmly attached to the door.
- Check for any movement or looseness in the faceplate. If necessary, tighten the screws or bolts further for added security.
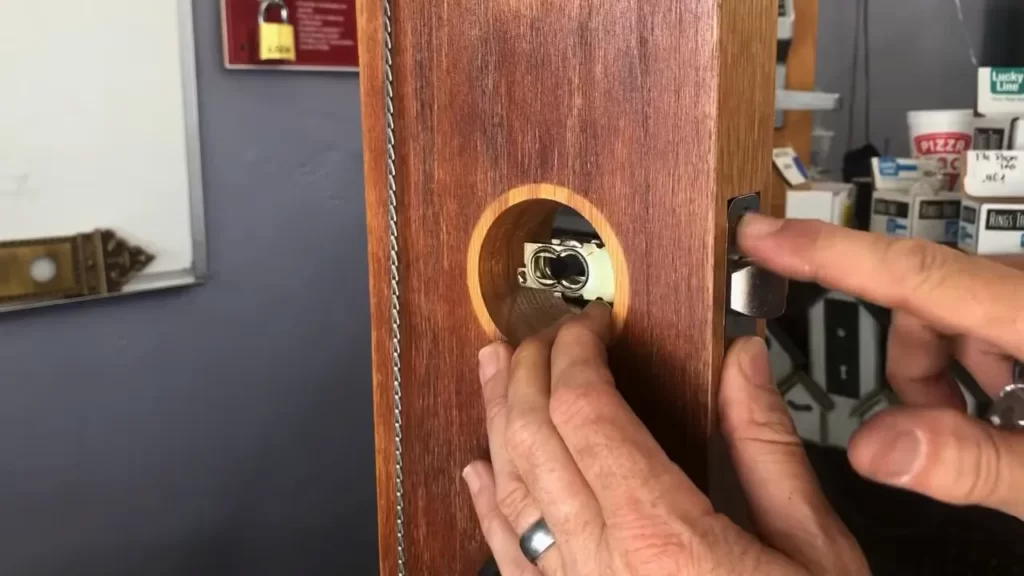
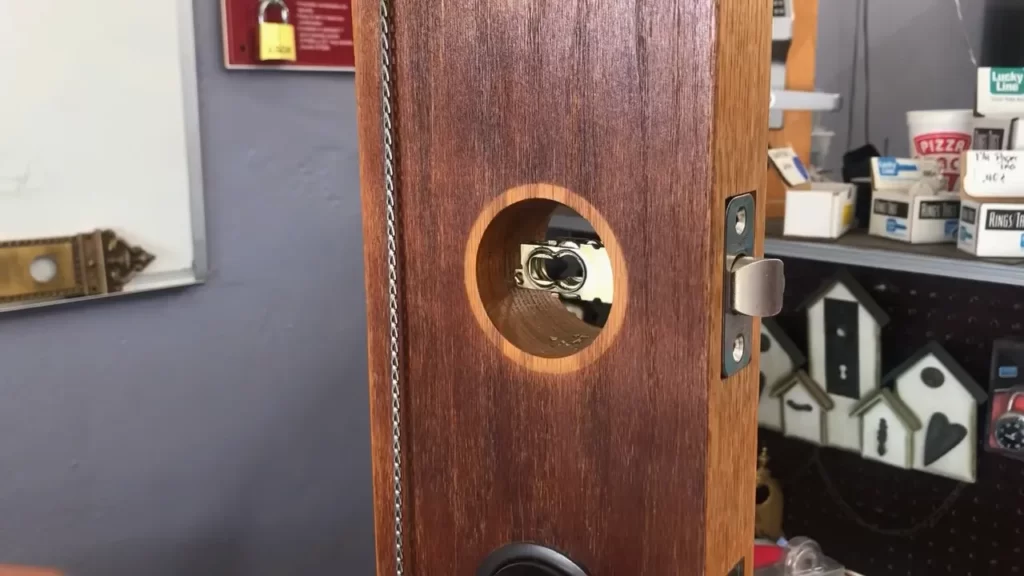
Attaching the latch assembly and ensuring proper alignment
With the faceplate securely in place, it’s time to attach the latch assembly to complete the installation of the Schlage door handle. Follow these steps:
- Insert the latch assembly into the opening on the edge of the door.
- Ensure that the latch plate is properly aligned with the faceplate and that the latch bolt fits smoothly into the strike plate when the door is closed.
- Test the door handle by turning it and checking if the latch retracts and extends smoothly.
- If necessary, make any adjustments to the latch assembly to ensure proper alignment and smooth operation.
Congratulations! You have successfully installed your new Schlage door handle. Now you can enjoy the enhanced security and aesthetic appeal it brings to your home.
Installing The Exterior Door Handle
Installing a Schlage door handle is a relatively simple process that can greatly enhance the security and appearance of your exterior door. The exterior door handle is the first thing that visitors and passersby will see, so it’s important to install it correctly to ensure a professional and polished look. In this section, we will guide you through the steps to install the exterior door handle, from placing it on the door to checking its proper functioning.
Placing the exterior door handle on the door
Before you begin, gather all the necessary tools and components, including the door handle assembly, screws, and a screwdriver. Start by placing the exterior handle on the outside of the door, making sure that the handle is facing the correct direction. The lever or knob should be positioned on the appropriate side for your door, whether it swings inwards or outwards. Take your time to align the handle perfectly, ensuring a seamless fit.
Aligning the screws with the pre-drilled holes and tightening
Once the handle is properly positioned, it’s time to secure it in place. Carefully insert the screws into the pre-drilled holes on both sides of the door handle. Use your screwdriver to tighten the screws, ensuring a snug fit. Avoid overtightening, as this may cause damage to the components. If necessary, refer to the manufacturer’s instructions for the recommended torque for your specific door handle model.
Checking the handle for proper functioning
With the door handle securely installed, it’s important to test its functionality before considering the job complete. Open and close the door several times, making sure that the handle moves smoothly and effortlessly. Check for any resistance or sticking points that may indicate a need for readjustment. Additionally, ensure that the latch mechanism extends fully and retracts smoothly when turning the knob or lever. Taking the time to test the handle now will save you from inconvenient problems in the future.
By following these simple steps, you can successfully install a Schlage door handle and achieve a flawless look for your exterior door. Remember that proper installation not only enhances the aesthetics of your home but also contributes to its overall security. Take pride in your work and enjoy the satisfaction of knowing that your door handle is installed correctly.
Installing The Interior Door Handle
Once you have successfully installed the exterior door handle, it’s time to move on to the interior side of the door. The interior door handle is not only an essential part of your home security but also a reflection of your style and taste. In this section, we will guide you on how to properly install the interior door handle, ensuring a smooth and hassle-free operation.
Positioning the interior door handle on the interior side of the door
Before you begin installing the interior door handle, make sure you have all the necessary tools ready. These include a screwdriver, tape measure, pencil, and the door handle set. Start by positioning the interior door handle on the interior side of the door. Hold it in place and mark the position of the screw holes using a pencil.

Aligning the screws with the pre-drilled holes and tightening
Once you have marked the position of the screw holes, use a tape measure to ensure that the interior door handle is centered and at the appropriate height. This will not only ensure a visually pleasing appearance but also provide optimal functionality. Once you’re satisfied with the positioning, grab your screwdriver and align the screws with the pre-drilled holes on the door. Gently tighten the screws until the interior door handle is securely attached to the door.
Testing the handle for smooth operation
After securing the interior door handle in place, it’s time to test its operation. Give the handle a few turns to ensure it moves smoothly and effortlessly. If you encounter any resistance or stiffness, double-check the alignment of the screws and adjust as necessary. Additionally, make sure the latch mechanism operates properly by engaging and disengaging it a few times. A smooth and reliable operation is essential for the overall functionality of the door handle.
Congratulations! You have successfully installed the interior door handle. Take a step back and admire your handiwork. Not only have you enhanced the security of your home, but you have also added a touch of style. Now, go ahead and enjoy the seamless operation of your new Schlage door handle.
Testing And Adjustments
Once you have successfully installed your Schlage door handle, it’s important to ensure that it functions smoothly and efficiently. A thorough testing and adjustment process will guarantee optimal performance and long-lasting durability. In this section, we will guide you through the essential steps to check the latch’s functionality, verify the handle’s smooth operation, and make necessary adjustments for optimal performance.
Checking the latch’s functionality
The first step in testing your newly installed Schlage door handle is to check the functionality of the latch. Follow these simple steps:
- Turn the door handle to the closed position and attempt to open the door without turning the handle. The latch should prevent the door from opening.
- With the door closed, grip the handle and try to turn it. The latch should release and allow the door to open smoothly.
- If the latch does not engage properly or the door does not open smoothly, adjustments may be required, which will be discussed later in this section.
Verifying the handle’s smooth operation
Next, you need to ensure that the door handle operates smoothly. Here’s how you can do it:
- Gently turn the handle in both directions to see if it moves freely without any resistance.
- If there is excessive friction or the handle feels stiff, check for any obstructions or misalignments that may be causing the issue.
- Apply a small amount of lubricant to the moving parts if necessary, following the manufacturer’s instructions.
Making necessary adjustments for optimal performance
If you encounter any issues during the testing process, adjustments might be necessary to ensure the optimal performance of your Schlage door handle. Consider the following:
- If the latch doesn’t align properly with the strike plate, you may need to adjust the position of the strike plate.
- If the handle feels loose or wobbly, tighten the screws that secure it to the door.
- Inspect the latch and strike plate for any signs of wear or damage, and replace them if necessary.
By following these simple testing and adjustment steps, you can ensure that your Schlage door handle functions flawlessly and provides the security and convenience you expect from a high-quality door hardware brand.
Frequently Asked Questions For How To Install A Schlage Door Handle
How Do You Replace A Schlage Door Lever?
To replace a Schlage door lever, follow these steps: 1. Remove the old lever by unscrewing it from the door. 2. Place the new lever in the same position and secure it with the screws provided. 3. Test the lever to ensure it functions properly.
4. Make any necessary adjustments for a perfect fit. 5. Enjoy your newly replaced Schlage door lever.
How Do You Install A Door Lock Handle?
Installing a door lock handle involves these steps: First, remove the old handle. Then, insert the new handle and align it properly. Use the provided screws to secure the handle in place. Finally, test the lock to ensure smooth functioning.
Are Schlage Handles Interchangeable?
Yes, Schlage handles are interchangeable. They can be easily replaced without having to change the whole lock. Simply remove the existing handle and install the new one in its place.
How Do You Remove A Schlage Lever Door Handle?
To remove a Schlage lever door handle, follow these steps: Use a screwdriver to remove the screws on the plate located on the inside of the door. Once the plate is off, slide the lever handle to detach it from the spindle.
Pull the handle away from the door, and voila!
How Do I Choose The Right Schlage Door Handle?
To choose the right Schlage door handle, consider the style, color, finish, and security features that match your needs.
What Tools Do I Need To Install A Schlage Door Handle?
To install a Schlage door handle, you will need a screwdriver, measuring tape, drill, chisel, and a pencil.
Conclusion
Installing a Schlage door handle doesn’t have to be a daunting task. By following the step-by-step instructions provided in this blog post, you can successfully install your door handle with ease. Remember to gather all the necessary tools and materials before starting the process.
With a little patience and attention to detail, you’ll have a beautiful and secure door handle in no time. Happy installing!