o install a screen door closer, attach the closer to the door and frame using the provided screws and brackets, adjusting the tension to ensure proper closing. If you’re looking to make your home more energy-efficient and keep out pests while still enjoying a fresh breeze, installing a screen door closer is a simple and effective solution.
With just a few basic tools and following these easy steps, you can have a functional and reliable screen door closer in no time. We’ll guide you through the process of installing a screen door closer, so you can enjoy all the benefits it brings.
We’ll explain the necessary materials, provide clear instructions, and offer tips for ensuring a secure installation. So, let’s get started on upgrading your screen door with a closer that enhances convenience and functionality.
Factors To Consider When Selecting A Screen Door Closer
Installing a screen door closer is an important step in ensuring the functionality and durability of your screen door. By selecting the right screen door closer, you can enhance the ease of use and prolong the lifespan of your door. There are several factors that you need to consider when choosing a screen door closer. These factors include the weight of the screen door, the location and climate, as well as your style and design preferences. Let’s take a closer look at each of these factors to help you make an informed decision.
Weight of the Screen Door
The weight of the screen door plays a crucial role in determining the type of door closer you should select. A door closer that is too weak for the weight of your door may not be able to close it properly, while a door closer that is too strong may cause the door to slam shut too forcefully. To find the right door closer for your screen door, measure the weight of the door and consult the manufacturer’s specifications for the door closer. This will ensure that the door closer can effectively and safely close your screen door without causing any damage.
Location and Climate
The location and climate in which your screen door is installed also play a significant role in the selection of a door closer. If your screen door is exposed to harsh weather conditions such as high winds or extreme temperatures, you may need a door closer that is specifically designed to withstand these conditions. Additionally, if your screen door is located in an area with high foot traffic or heavy use, you may want to consider a door closer that is durable and capable of handling frequent opening and closing. Taking into account the location and climate will ensure that your screen door closer is suitable for the environment in which it will be used.
Style and Design Preference
While the functionality and durability of the screen door closer are important, you shouldn’t overlook the style and design aspect. The right door closer should complement the overall aesthetic of your screen door and blend seamlessly with its design. Whether you prefer a traditional or modern look, there are a variety of door closers available in different finishes and styles, including concealed or surface-mounted options. Consider your personal style and the design of your screen door when selecting a door closer to ensure that it enhances the overall appearance of your entryway.
Essential Tools
Screwdriver
One of the essential tools you’ll need for installing a screen door closer is a screwdriver. A screwdriver is used to tighten or loosen screws, allowing you to attach the closer to your door securely. It is crucial to choose the right type and size of a screwdriver that matches the screws provided with your screen door closer. Using the wrong screwdriver can damage the screws and make the installation process difficult.
Tape Measure
Another crucial tool for installing a screen door closer is a tape measure. Before installing the closer, you need to ensure that it is positioned correctly to ensure optimal performance. Using a tape measure, you can accurately measure the distance between the top and bottom of your door, as well as the distance between the door jamb and the closer bracket. These measurements will help you align the closer correctly, ensuring a smooth and effective installation.
Pencil
In addition to a screwdriver and a tape measure, you will also need a pencil. A pencil is useful for marking measurements and making reference points on your door and door jamb. It allows you to create guidelines for drilling holes, attaching brackets, and ensuring proper alignment. By using a pencil, you can make temporary marks that can be easily erased or updated throughout the installation process, making it easier to keep track of your progress and ensure accurate placement of the screen door closer.
Locating The Ideal Spots For Mounting The Closer
Installing a screen door closer can greatly enhance the functionality and convenience of your screen door. However, in order to ensure smooth operation, it is crucial to identify the ideal spots for mounting the closer. By strategically placing the closer, you can maximize its effectiveness and prolong the lifespan of the door. This section will guide you through the process of locating the perfect positions for mounting your screen door closer.
Top of the Screen Door
The top of the screen door is the most common and recommended location for mounting a screen door closer. This placement allows for a balanced swing, ensuring that the door closes smoothly without any resistance or sagging. To install the closer at the top of the screen door:
- Open the screen door to a 90-degree angle and position yourself on the outside of the door.
- Hold the closer against the top rail of the screen door, aligning it with the center. Make sure the arm of the closer extends horizontally.
- Using a pencil or marker, mark the screw holes on the top rail of the screen door.
- Remove the closer and pre-drill pilot holes at the marked spots.
- Secure the closer in place by attaching it with the provided screws. Make sure it is tightly fastened.
Making sure the closer is installed securely at the top of the screen door will enable it to function effectively and maintain the door’s overall stability.
Jamb of the Door Frame
Another option for mounting a screen door closer is on the jamb of the door frame. While less common, this placement can be advantageous in certain situations, such as when the top rail of the screen door is not suitable for mounting. To install the closer on the jamb of the door frame:
- Close the screen door completely and position yourself on the outside of the door.
- Hold the closer against the jamb of the door frame, aligning it with the center. Ensure that the arm of the closer extends horizontally towards the screen door.
- Using a pencil or marker, mark the screw holes on the jamb of the door frame.
- Remove the closer and pre-drill pilot holes at the marked spots.
- Secure the closer in place by attaching it with the provided screws. Ensure a tight fit to prevent any movement.
Mounting the closer on the jamb of the door frame provides an alternative solution for situations where the top rail is unsuitable, allowing for seamless functionality of the screen door.
By following these guidelines, you can accurately locate and mount your screen door closer, ensuring optimal performance and prolonged durability. Remember to always refer to the specific instructions provided by the manufacturer for your particular closer model, as installation steps may vary.
Attaching The Brackets To The Door And Door Frame
Once you have gathered all the necessary tools and materials for installing a screen door closer, the next step is to attach the brackets to the door and door frame. This crucial step ensures the proper functioning and stability of the screen door closer. Here’s a step-by-step guide to help you through the process:
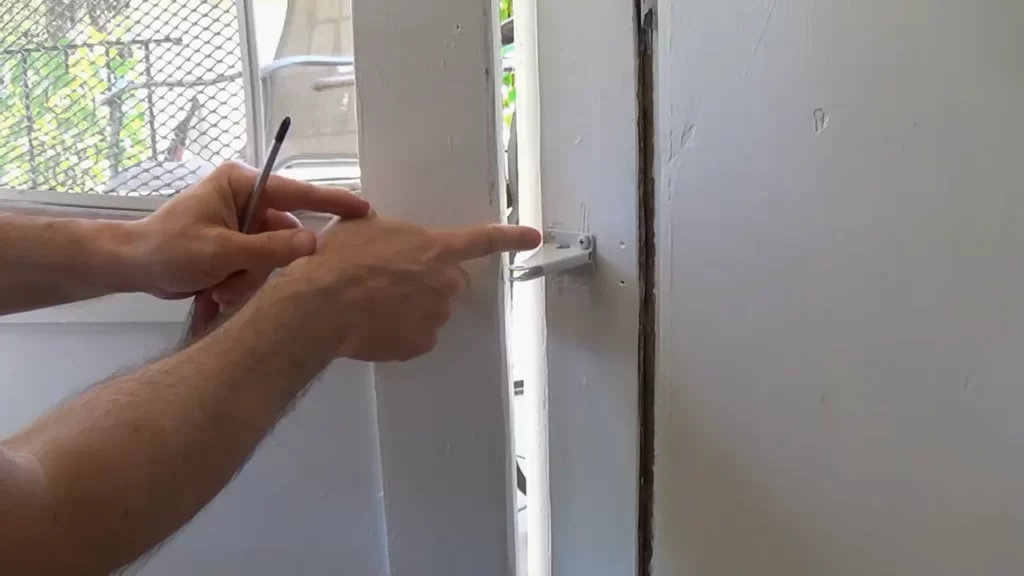
Positioning and Marking Holes
Before attaching the brackets, you need to properly position and mark the holes on both the door and the door frame. Follow these steps:
- Hold the bracket against the desired position on the door, ensuring that the closer arm aligns with the edge of the door.
- Using a pencil or marker, carefully mark the positions of the screw holes on the door.
- Repeat the same process for the door frame, making sure the closer arm aligns properly with the door jamb.
- Mark the positions of the screw holes on the door frame using a pencil or marker.
Screwing the Brackets in Place
Once you have marked the hole positions, it’s time to secure the brackets in place. Follow these steps:
- Using a power drill with the appropriate size drill bit, create pilot holes at the marked positions on the door and door frame. Ensure the drill bit size matches the screws provided with the screen door closer.
- Align the brackets with the pilot holes on the door and door frame, ensuring they are level.
- Insert the provided screws into the pilot holes and use a screwdriver or drill to tighten them securely. Be careful not to overtighten, as it may damage the door or door frame.
- Double-check that the brackets are firmly attached and aligned correctly.
By following these steps, you have successfully attached the brackets to both the door and door frame. This marks a significant milestone in the installation process of a screen door closer. Next, you will move on to connecting the closer arm to the brackets and adjusting the tension.
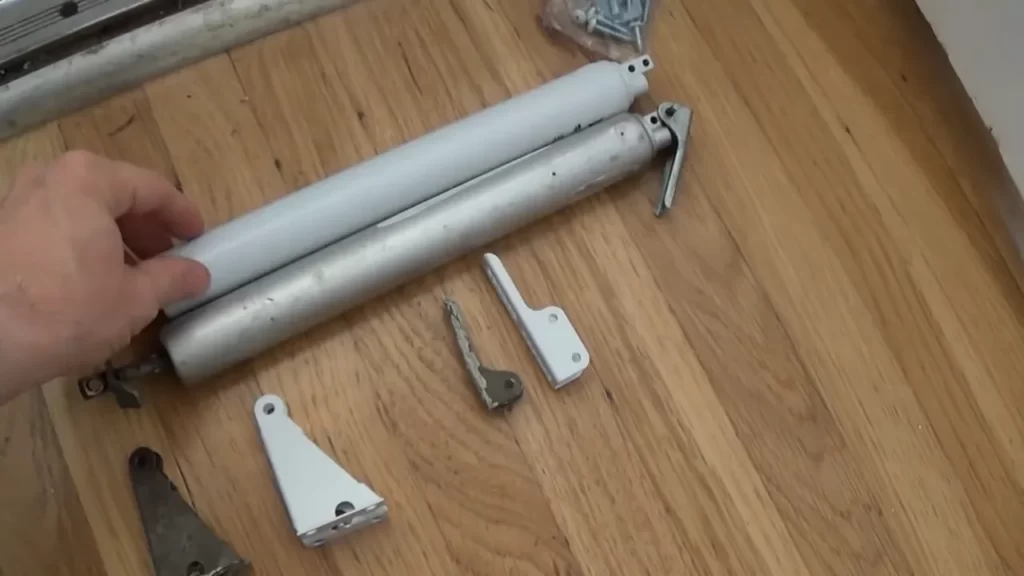
Connecting The Tube To Ensure Smooth Closing Action
One of the crucial steps in installing a screen door closer is connecting the tube to ensure a smooth closing action. This step ensures that the screen door will close gently and securely without any abrupt movements. In this section, we will discuss two key substeps: inserting the tube into the brackets and securing the tube with hardware.
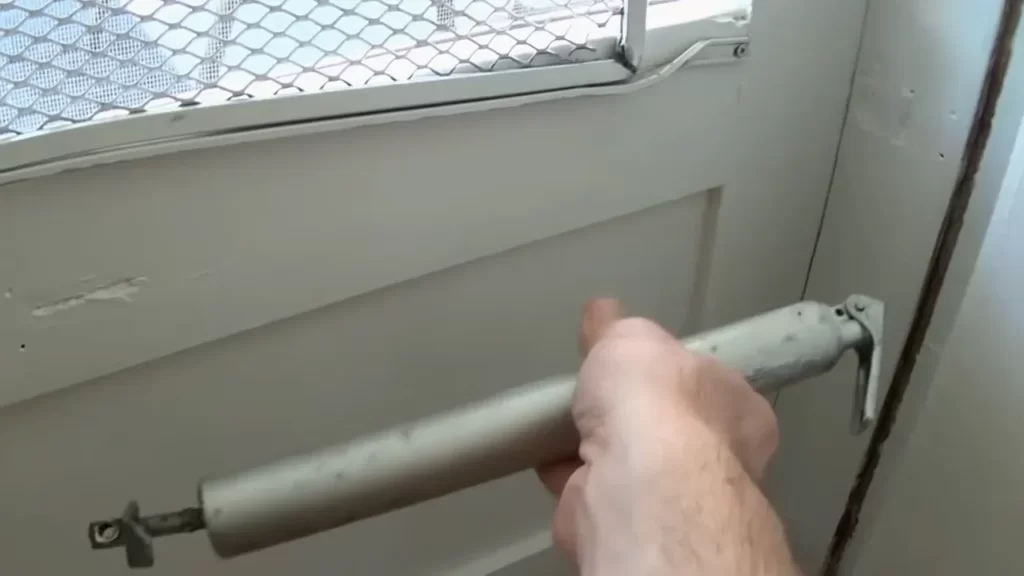
Inserting the Tube into the Brackets
The first substep in connecting the tube is inserting it into the brackets. The tube usually comes with pre-drilled holes that align with the brackets on the screen door frame. Here’s how you can do it:
- Start by holding the tube and aligning it with the brackets on the door frame.
- Carefully insert the tube into the brackets, making sure it fits securely.
- Ensure that the tube is centered within the brackets for optimal performance.
- Double-check that the tube is properly inserted and aligned before moving to the next substep.
Securing the Tube with Hardware
Once the tube is inserted into the brackets, the next substep is to secure it with appropriate hardware. This hardware ensures that the tube remains in place and allows for smooth operation. Follow these steps:
- Use the included screws or fasteners to secure the brackets tightly to the tube.
- Make sure to tighten the screws evenly to prevent any imbalance in the closing action.
- Check the manufacturer’s instructions for specific hardware requirements and torque specifications.
- Ensure that the hardware is secure but not overly tightened to avoid damaging the tube or brackets.
By following these steps, you can connect the tube of your screen door closer effectively, ensuring a smooth closing action. Taking the time to properly insert the tube into the brackets and secure it with hardware will result in a screen door that operates smoothly and offers optimal functionality.
Customizing The Closer For Optimal Functionality
Installing a screen door closer is an essential step in ensuring the smooth operation of your screen door. However, simply installing the closer may not provide the optimal functionality you desire. To truly customize your screen door closer for optimal functionality, follow these steps to test and assess the initial speed, as well as make necessary adjustments to the closer’s settings. By taking these extra measures, you can ensure that your screen door operates smoothly and efficiently.
Testing and Assessing the Initial Speed
Before making any adjustments, it’s important to test and assess the initial speed of your screen door closer. This will help you determine if it is opening and closing at the right pace. To do this, follow these simple steps:
- Open the screen door fully and release it gently.
- Observe the speed at which the door closes.
- If the door closes too slowly, it may not be providing adequate protection against drafts and insects. If it closes too quickly, it can create a slamming effect, potentially causing damage to the door or door frame.
After testing and assessing the initial speed, you can make adjustments to the closer to ensure it operates at the desired pace.
Making Adjustments to the Closer’s Settings
To customize your screen door closer for optimal functionality, you need to make adjustments to its settings. Here’s how:
- Locate the adjustment screw on the closer. It is usually positioned at the end of the closer or on the side.
- Using a screwdriver, turn the adjustment screw clockwise to increase the closing speed or counterclockwise to decrease it.
- Make small adjustments at a time, testing the speed after each adjustment, until you achieve the desired closing speed.
Keep in mind that the optimal closing speed may vary depending on factors such as the weight of your screen door and the weather conditions in your area. It may take some trial and error to find the perfect setting.
When making adjustments, it’s important to remember that tightening the adjustment screw too much can lead to a slamming door, while loosening it excessively may result in the door not closing properly. Therefore, it’s best to make small, gradual adjustments to find the right balance.
By testing and assessing the initial speed and making necessary adjustments to the closer’s settings, you can customize your screen door closer for optimal functionality. Take the time to fine-tune your closer, and you’ll enjoy a screen door that operates smoothly and efficiently, providing protection against the elements while being a convenient addition to your home.
Ensuring A Properly Functioning Screen Door Closer
Ensuring a properly functioning screen door closer is essential for the smooth operation and longevity of your screen door. A screen door closer helps in maintaining the security of your home while allowing easy access to the outdoors. To ensure your screen door closer is performing optimally, you need to follow a few simple steps and perform regular maintenance checks. In this section, we will guide you through the process of checking for smooth operation and balancing the closing speed and resistance of your screen door closer.
Checking for Smooth Operation
A properly functioning screen door closer should open and close smoothly without any resistance or jerking movements. To check for smooth operation, follow these steps:
- Open and close the screen door multiple times to assess the movement. Observe if there are any sticking points or areas of resistance.
- Inspect the door closer mechanism for any signs of damage, such as rust or worn-out parts. Replace any damaged components as needed.
- Ensure that the hinges are properly lubricated. Apply a silicone-based lubricant to the hinges to ensure smooth movement.
By regularly checking for smooth operation and addressing any issues promptly, you can prevent further damage and extend the lifespan of your screen door closer.
Balancing the Closing Speed and Resistance
Properly balancing the closing speed and resistance of your screen door closer is essential for its effectiveness. An incorrectly adjusted closer can lead to a door that slams shut too quickly or fails to close securely. Here’s how you can achieve the right balance:
- Identify the adjustment screws on your screen door closer. These screws are typically located on the closer body or arm.
- Start by adjusting the closing speed. Gradually turn the speed adjustment screw in small increments to increase or decrease the door’s closing speed. Test the door after each adjustment until you find the desired speed.
- Next, adjust the resistance. This determines how much force is required to open the door. Turning the resistance adjustment screw clockwise increases resistance, while turning it counterclockwise decreases resistance. Find the right balance where the door closes securely without excessive force or slamming shut.
- After making adjustments, open and close the door several times to ensure it operates smoothly and efficiently.
Remember to check the manufacturer’s instructions for your specific door closer model, as the adjustment process may vary.
By regularly checking for smooth operation and balancing the closing speed and resistance, you can ensure a properly functioning screen door closer that enhances the convenience and security of your home.
Verifying The Performance Of The Screen Door Closer
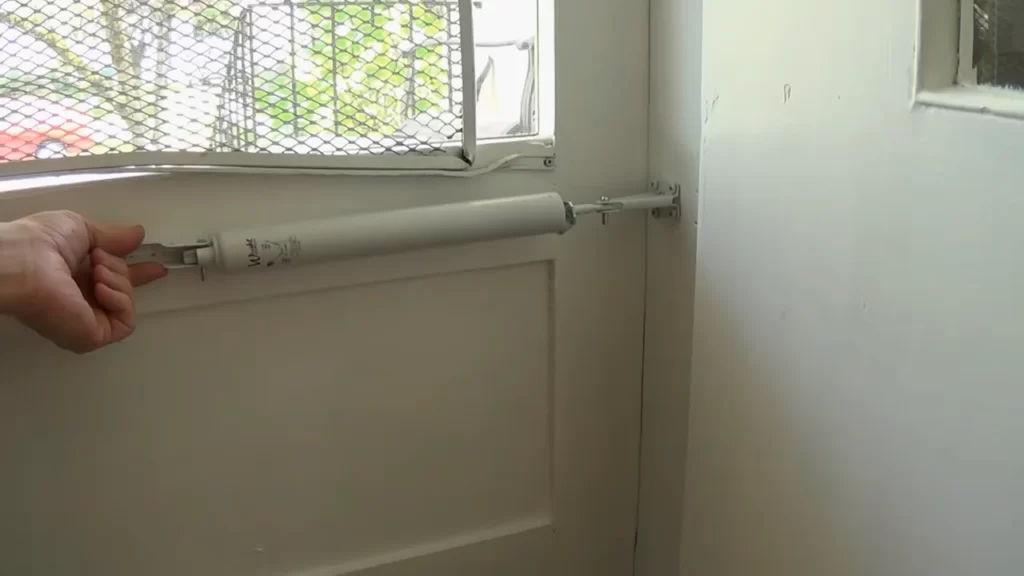
Once you have successfully installed a screen door closer, it is important to verify its performance to ensure smooth operation and maximum functionality. This involves opening and closing the door, as well as inspecting for any issues that may affect its performance. In this section, we will guide you through the steps to verify the performance of your screen door closer.
Opening and Closing the Door
The first step in verifying the performance of your screen door closer is to test the opening and closing of the door. Open the door fully and release it gently to see if the closer functions properly. The door should close smoothly and latch securely without any forceful slamming or resistance. Observe the speed and control of the closing action as well. If the door closes too quickly or slowly, it may indicate an issue with the adjustment settings of the closer.
Next, test the door’s ability to open and stay open at various positions. The screen door closer should have adjustable features that allow you to control the amount of force required to keep the door open. Ensure that the door stays open at the desired position without swinging closed or slamming shut unexpectedly. Proper adjustment of the screen door closer should help maintain the open position without any issues.
Inspecting for Any Issues
After testing the opening and closing of the door, it is vital to inspect the screen door closer for any issues that may affect its performance. Carefully examine the closer mechanism, including the spring, piston, and brackets, for any signs of damage or wear. Look out for loose screws or bolts that may need tightening.
Additionally, inspect the hinges, frame, and other components of the door to ensure they are in good condition. Any misalignment or damage to these parts may affect the performance of the screen door closer. Lubricate the moving parts of the closer to ensure smooth operation and prevent any unnecessary friction that may hinder its functionality.
If you notice any issues or abnormalities during your inspection, address them promptly. Consult the manufacturer’s instructions or seek professional assistance if necessary. Proper maintenance and regular inspections will help prolong the lifespan and performance of your screen door closer.
Keeping Your Closer In Good Condition
Regular Lubrication

Regular lubrication is essential to keep your screen door closer working smoothly and efficiently. A well-lubricated closer reduces friction, preventing wear and tear on the components, and prolonging its lifespan. To lubricate your screen door closer:
- Clean the closer: Use a soft cloth to wipe away any dust, dirt, or debris from the closer.
- Apply lubricant: Use a suitable lubricant, such as silicone spray or a lightweight machine oil, and apply it to the moving parts of the closer. Focus on areas where metal parts rub against each other.
- Operate the closer: Open and close the screen door several times to distribute the lubricant throughout the closer.
Regular lubrication, ideally every six months, will ensure that your screen door closer remains in optimal condition.
Tightening Loose Components
Over time, the constant usage and exposure to various elements can cause certain components of your screen door closer to become loose. Loose screws and bolts can affect the performance of the closer and may even lead to further damage. To tighten loose components:
- Inspect the closer: Examine the closer for any visible signs of loose screws or bolts.
- Use appropriate tools: With the help of a screwdriver or a wrench, tighten any loose screws or bolts. Ensure not to overtighten as it may damage the components.
- Check for alignment: Make sure that all the components are aligned properly and adjust if necessary.
Tightening loose components regularly, particularly during routine maintenance checks, will prevent any potential issues and ensure the smooth functioning of your screen door closer.
Addressing Common Issues
Despite regular maintenance, screen door closers can sometimes encounter common issues. Here are a few common problems and their possible solutions:
| Issue | Solution |
|---|---|
| The door slams shut too quickly | Adjust the hydraulic speed valve on the closer to slow down the closing speed. |
| The door doesn’t close fully | Check for any obstructions and remove them if present. Adjust the closing force adjustment screw to increase the force on the door. |
| The closer makes squeaking noises | Lubricate the moving parts of the closer with silicone spray or lightweight machine oil. |
Frequently Asked Questions For How To Install A Screen Door Closer
How Do You Install A New Door Closer?
To install a new door closer, follow these steps: 1. Begin by removing the old door closer and any leftover hardware. 2. Position the new closer on the door and mark the holes for drilling. 3. Drill the holes and secure the closer using the provided screws.
4. Adjust the tension of the closer according to your preference. 5. Test the door to ensure it closes smoothly and securely.
How To Install A Larson Door Closer?
To install a Larson door closer, follow these steps: 1. Begin by positioning the closer on the door’s header jamb. 2. Use a pencil to mark the screw holes. 3. Drill pilot holes into the jamb. 4. Attach the closer with the provided screws.
5. Adjust the closer tension using the adjustment screw.
How Do You Install A Touch And Hold Door Closer?
To install a touch and hold door closer, follow these steps: 1. Begin by positioning the door closer on the top jamb of the door frame. 2. Secure the closer using screws, ensuring it is level. 3. Attach the arm assembly to the door and closer, making sure it aligns properly.
4. Adjust the tension of the closer to suit your preference. 5. Test the door to ensure it opens and closes smoothly.
Which Way Do You Turn A Screw On A Screen Door Closer?
Turn the screw on a screen door closer clockwise to increase the tension and counter-clockwise to decrease it.
How Do You Install A Screen Door Closer?
To install a screen door closer, start by positioning the closer on the door jamb and marking the screw holes. Then, attach the closer using screws and adjust the tension to ensure smooth operation.
What Tools Do I Need To Install A Screen Door Closer?
To install a screen door closer, you will need a power drill, screwdriver, tape measure, pencil, and a level for accurate installation.
Conclusion
Installing a screen door closer may sound like a daunting task, but with the right guide, it can be achieved effortlessly. By following the step-by-step instructions provided in this blog post, you can ensure a hassle-free installation process. Remember to prioritize safety measures and take your time to carefully execute each step.
With a properly installed screen door closer, you can enjoy the convenience of a self-closing door while keeping bugs and unwanted debris out. So, go ahead and give it a try—it’s easier than you think!