To install a wireless doorbell, follow these simple steps.
Understanding The Benefits Of A Wireless Doorbell
A wireless doorbell can revolutionize the way you interact with your home. With its seamless installation process and convenient features, it is no wonder that more and more homeowners are opting for this modern upgrade. In this section, we will explore the various benefits that come with installing a wireless doorbell, ranging from enhanced security features to increased accessibility for those with hearing impairments.
Convenience and flexibility of installation
One of the major advantages of a wireless doorbell is its convenience and flexibility of installation. Unlike traditional doorbells that require complex wiring and drilling, a wireless doorbell can be easily installed without any hassle. Simply attach the transmitter unit near your front door and plug in the receiver unit inside your home. With this simple setup, you can say goodbye to the tedious wiring process and enjoy your new doorbell in no time.
Enhanced security features
Besides the convenience factor, a wireless doorbell also provides enhanced security features. Many wireless doorbells come equipped with built-in cameras or motion sensors, allowing you to monitor your front door even when you are away. These cameras can capture live footage or take snapshots, providing you with peace of mind and enabling you to keep track of any suspicious activities. Additionally, some wireless doorbells offer two-way audio communication, enabling you to talk to visitors from the comfort and safety of your home.
Accessibility for those with hearing impairments
Another tremendous benefit of wireless doorbells is their accessibility for those with hearing impairments. Traditional doorbells may pose challenges for individuals who have difficulty hearing or are completely deaf. However, with the advent of wireless doorbells, this issue becomes a thing of the past. Wireless doorbells can be equipped with visual indicators, such as flashing lights or LED displays, to alert individuals when someone is at the door. This ensures that everyone in your household, regardless of their hearing abilities, can be aware of visitors and respond promptly.
In conclusion, a wireless doorbell offers numerous benefits that make it a worthwhile investment for any homeowner. Its convenience and flexibility of installation, enhanced security features, and accessibility for those with hearing impairments set it apart from traditional doorbells. Upgrade your home with this modern innovation and experience the convenience and peace of mind it brings.
Choosing The Right Wireless Doorbell For Your Needs
When it comes to upgrading your home’s security and convenience, installing a wireless doorbell is a smart choice. Unlike traditional wired doorbells, wireless doorbells offer flexibility, ease of installation, and a wide range of features to enhance your doorstep experience. However, with so many options available in the market, it can be overwhelming to choose the right wireless doorbell for your specific needs. In this guide, we will explore three key factors to consider when selecting a wireless doorbell: range and coverage, chime options, and compatibility with existing doorbell wiring.
Considerations for range and coverage
Before making a purchasing decision, it is essential to evaluate the range and coverage capabilities of a wireless doorbell to ensure optimal functionality in your home. The range determines the maximum distance between the doorbell button and the chime unit, while coverage refers to the doorbell’s ability to transmit the signal through walls and other obstacles.
When evaluating range, consider factors such as the size of your home and the distance between your front door and the area where you plan to install the chime unit. A doorbell with a longer range may be necessary if you have a large property or anticipate installing the chime unit in a space that is far away from the front entrance. Alternatively, if you live in a smaller home or apartment, a doorbell with a shorter range may be sufficient.
Similarly, coverage is crucial if you have thick walls or multiple floors in your home. Look for a wireless doorbell that offers strong signal penetration capabilities, ensuring that you can hear the doorbell chime no matter where you are in the house.
Evaluating different chime options
The doorbell chime is not only a functional component but also adds a touch of personality to your home. Wireless doorbells come with various chime options, allowing you to customize the sound according to your preferences. Some models offer a selection of pre-programmed melodies, while others allow you to upload your own tunes or melodies.
Consider your personal taste and the ambiance you want to create in your home when choosing a chime option. Classic melodies may be ideal for more traditional settings, while modern tunes can add a contemporary flair. Additionally, ensure that the chime volume is adjustable, especially if you have family members with hearing impairments or if you prefer a softer or louder doorbell sound.
Checking compatibility with existing doorbell wiring
If you currently have a wired doorbell system, it is worth checking if the wireless doorbell you are considering is compatible with your existing doorbell wiring. This compatibility will allow you to utilize the existing power source, avoiding the need for frequent battery replacements in the wireless doorbell button or chime unit.
To determine compatibility, consult the product specifications for each wireless doorbell and look for information regarding compatibility with wired systems. Some wireless doorbells are specifically designed to work with existing wired doorbell infrastructure, making the installation process even more straightforward.
By carefully considering the range and coverage, evaluating different chime options, and checking compatibility with existing doorbell wiring, you can select the perfect wireless doorbell that meets your specific needs and preferences. Enhance the security and convenience of your home with a wireless doorbell that suits your style and ensures you never miss a visitor.
Gathering The Necessary Tools And Equipment
Before you begin the installation process of a wireless doorbell, it is important to gather all the necessary tools and equipment. This will ensure a smooth and efficient installation, saving you time and frustration. In this section, we will discuss the various components of a wireless doorbell kit as well as the basic tools required for the installation process.
Wireless doorbell kit components
A wireless doorbell kit typically comes with several components to facilitate the installation process. These components may vary depending on the brand and model of the doorbell you have purchased. However, some common components you will find in a doorbell kit include:
| Component | Description |
|---|---|
| Doorbell receiver | The main unit that receives the wireless signal and produces the audible sound or visual alert. |
| Doorbell transmitter | The component that is installed near your front door, usually in the form of a button or sensor, which sends a signal to the receiver when activated. |
| Batteries | The power source for both the doorbell receiver and transmitter. Ensure you have the required batteries as specified by the manufacturer. |
| Mounting hardware | Includes screws and anchors to secure the transmitter and receiver to the wall or doorframe. |
| Instruction manual | A detailed guide outlining the installation steps and troubleshooting instructions. |
Basic tools required for installation process
In addition to the components provided in the wireless doorbell kit, you will need a few basic tools to ensure a successful installation. Here are the tools you should have on hand:
- Cordless drill
- Drill bits
- Screwdriver
- Pencil or marker
- Level
- Tape measure
Having these tools readily available will make the installation process easier and more efficient. Make sure to check that your drill bits and screwdriver are compatible with the screws and anchors provided in the kit. A pencil or marker will help you mark the placement of the transmitter and receiver, while a level and tape measure will ensure precise positioning.
Now that you are familiar with the components of a wireless doorbell kit and have gathered the necessary tools, you are ready to move on to the next step: Installing a Wireless Doorbell.
Preparing For Installation
Installing a wireless doorbell is a convenient way to enhance the security and functionality of your home. Before diving into the installation process, it’s important to take some time to prepare and assess the location for optimal signal reception. This will ensure that your wireless doorbell works flawlessly without any signal interruptions. Additionally, you should also check the power source availability if you opt for a doorbell model that doesn’t operate on batteries. Let’s delve into these two crucial aspects in detail.
Assessing the Location for Optimal Signal Reception
Choosing the right location for your wireless doorbell plays a critical role in ensuring reliable signal reception. Here are some factors to consider:
- Distance: Locate the doorbell button within the suggested range provided by the manufacturer. This will prevent the signal from weakening over greater distances.
- Obstacles: Avoid placing the doorbell button near obstructions such as thick walls, metal surfaces, or large electronics as they can interfere with the wireless signal.
- Height: Ideally, mount the doorbell button at a height that is easily reachable but still out of the reach of potential tampering.
By taking these considerations into account, you can ensure that your wireless doorbell has optimal signal strength, allowing you to hear the chime wherever you are in your home.
Ensuring Power Source Availability if Batteries are Not Used
If you prefer not to rely on batteries for your wireless doorbell, it’s essential to ensure that a power source is available for the doorbell’s operation. Here’s how you can do this:
- Existing Wiring: Check if your home has existing doorbell wiring. If so, you can easily connect your wireless doorbell to this power source. Simply follow the manufacturer’s instructions for connecting the wires.
- AC/DC Adapter: Alternatively, if there is no existing wiring, you can use an AC/DC adapter to power your wireless doorbell. Make sure the adapter has the right voltage and connector type compatible with your doorbell device.
- Professional Assistance: If you are unsure about electrical wiring or find it challenging to install the power source yourself, it’s always wise to seek professional assistance to avoid any potential safety hazards.
By ensuring you have a reliable power source, you can ensure that your wireless doorbell functions smoothly and continuously, providing you with maximum convenience and security.
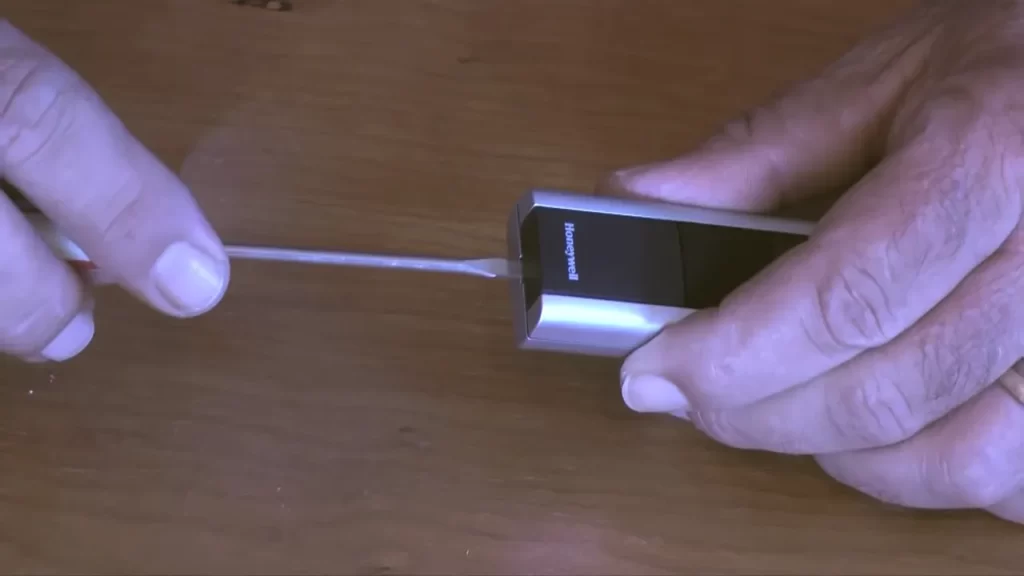
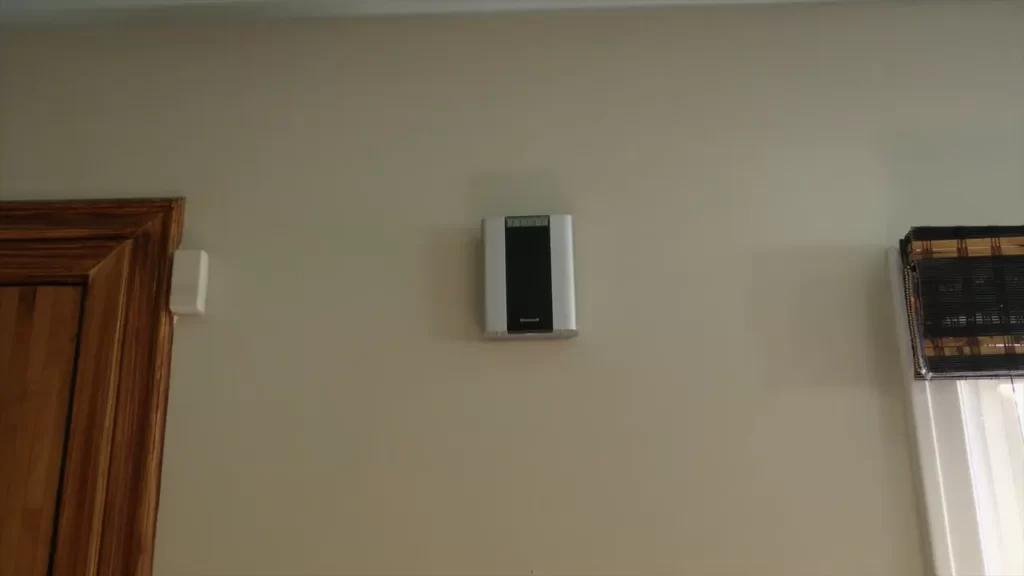
Installing The Doorbell Receiver
Now that you have successfully installed the wireless doorbell button on your front door, it’s time to move on to the next step – installing the doorbell receiver inside your home. The receiver is the device that emits the sound or chimes when someone presses the doorbell button. By following a few simple steps, you can have your wireless doorbell system up and running in no time.
Connecting the receiver to power
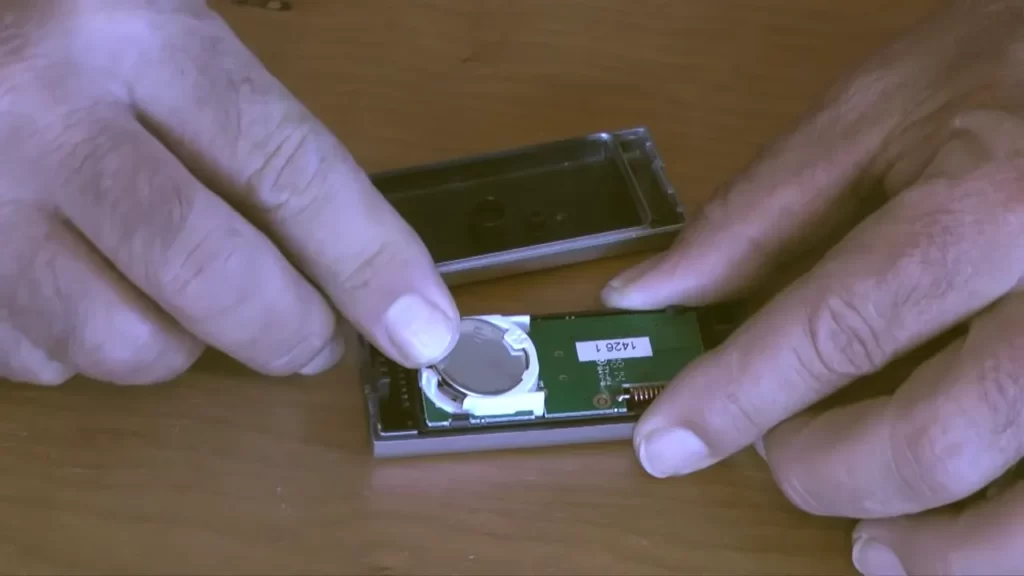
The first step in installing the doorbell receiver is to connect it to a power source. Most wireless doorbell receivers come with a power adapter that needs to be plugged into a standard electrical outlet. Locate a nearby outlet that is easily accessible and ensure it is switched on.
If you prefer a clutter-free look and don’t want to deal with wires, some wireless doorbell receivers also come with a rechargeable battery option. In this case, make sure to charge the battery fully before proceeding with the installation process. Once the battery is charged, insert it into the receiver according to the manufacturer’s instructions.
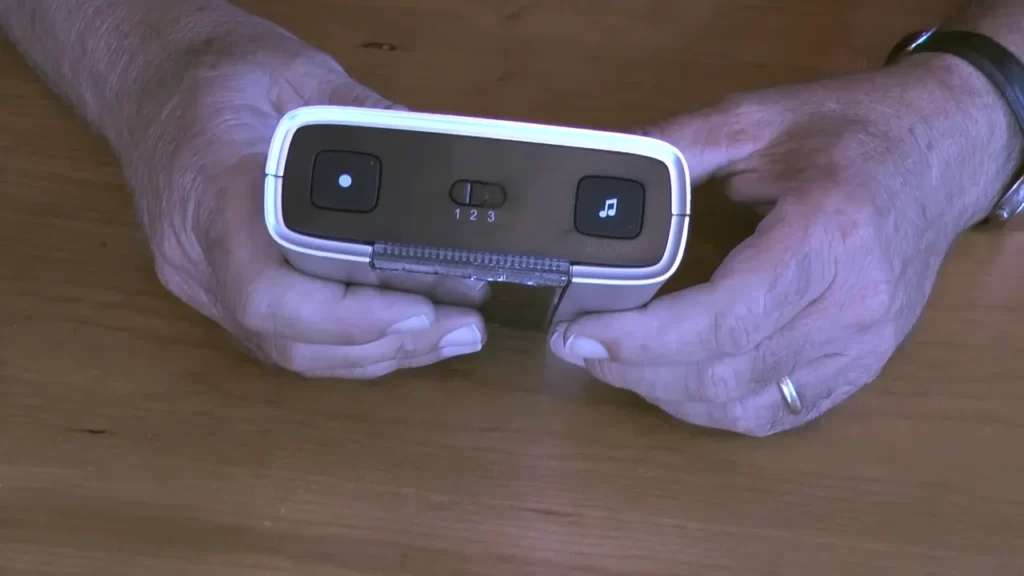
Syncing the receiver with the doorbell button
After connecting the doorbell receiver to power, it’s time to sync it with the doorbell button. This step ensures that the receiver and the button are communicating with each other effectively. To sync the two devices, follow these steps:
- Refer to the instruction manual provided with your wireless doorbell system to identify the sync button on both the receiver and the button.
- Press and hold the sync button on the receiver until the LED light starts flashing. This indicates that the receiver is in sync mode.
- Next, press and hold the sync button on the doorbell button until the LED light on the button starts flashing. This indicates that the button is also in sync mode.
- Wait for a few seconds until the LED lights on both devices stop flashing and remain solid. This indicates that the sync process is complete and the receiver and button are successfully paired.
Testing the functionality of the receiver
Now that the receiver is connected to power and synced with the doorbell button, it’s time to test its functionality. Stand near the receiver and press the doorbell button to check if the receiver emits the sound or chimes effectively. Make sure to check the volume settings on the receiver to ensure it is set to an audible level.
If you don’t hear any sound or chimes, double-check the connections and ensure that the receiver is at an appropriate distance from the button for a strong wireless signal.
Congratulations! You have successfully installed and synced the doorbell receiver for your wireless doorbell system. Enjoy the convenience of knowing when someone is at your front door with just a simple press of a button.
Installing The Doorbell Button
Determining the Ideal Mounting Location

Before starting the installation process, you need to determine the ideal location for your wireless doorbell button. This is crucial as it will ensure that the button is easily accessible for visitors while blending seamlessly with the exterior of your home. To determine the perfect spot, consider the following factors:
- Visibility: Choose a location that is clearly visible and easily noticeable for anyone approaching your door. This will ensure that your guests can find the doorbell button effortlessly.
- Accessibility: Ensure that the location you select is within easy reach for visitors. A typical height for doorbell buttons is approximately 4-5 feet off the ground, but adjust based on the needs of your household.
- Protection: Select a spot that offers some protection from the elements, such as rain or direct sunlight. This will help prolong the lifespan of the doorbell button and prevent unnecessary damage.
Now that you’ve determined the ideal location for your wireless doorbell button, let’s move on to the next step.
Mounting the Button Securely
Once you’ve identified the perfect location for your doorbell button, it’s time to mount it securely. Follow these steps to ensure a safe and stable installation:
- Prepare the Surface: Start by cleaning the desired mounting area to remove any dust, dirt, or debris. This will help create a strong bond between the surface and the adhesive or screws you use.
- Using Adhesive: If your wireless doorbell button comes with adhesive backing, simply peel off the protective cover and firmly press the button onto the cleaned surface. Make sure to apply steady pressure for a few seconds to ensure a secure hold.
- Using Screws: If your doorbell button requires screws for mounting, use a screwdriver to attach it securely. Align the screw holes with the predetermined location, insert the screws, and tighten them firmly.
- Double-Check Stability: Once you’ve mounted the button, gently tug on it to ensure it is securely attached. You don’t want it to become loose or fall off over time.
With the doorbell button securely mounted, it’s time to make sure it’s functioning properly before completing the installation.
Testing the Functionality of the Doorbell Button
Before finalizing the installation of your wireless doorbell, it’s important to test the functionality of the doorbell button. Follow these steps to ensure everything is working as it should:
- Press the Button: Stand outside your door and press the doorbell button. Listen for the chime or check if the notification is received on your smartphone or wireless receiver. This will confirm if the button is functioning properly and sending signals to the receiver.
- Check for Range: Walk around your property, testing the range at different distances from the doorbell button. If the signal doesn’t reach certain areas, consider repositioning the wireless receiver for better coverage.
- Battery Functionality: If your wireless doorbell button is battery-powered, ensure that the batteries are properly installed and have sufficient power. Replace them if needed to avoid any interruptions in functionality.
By following these simple steps, you can easily install a wireless doorbell button and ensure it is fully functional, providing convenience and security for your home.
Troubleshooting And Maintenance
Once you have successfully installed your wireless doorbell, it’s important to be familiar with troubleshooting techniques and maintenance practices to ensure smooth operation. In this section, we will discuss common issues that may arise and how to solve them, tips for extending the battery life of your doorbell, and regular maintenance practices to keep it in optimal condition.
Common issues and their solutions
Even with a properly installed wireless doorbell, you may encounter some common issues. Here are a few troubleshooting tips:
- No sound or weak sound: This issue may occur if the volume is set too low or the speaker is not functioning properly. Check the volume settings on your doorbell receiver and make sure it’s turned up. If the sound is still weak, try replacing the batteries in the receiver.
- Interference: If your wireless doorbell is frequently affected by interference, it may lead to inconsistent operation. Interference can be caused by other wireless devices, thick walls, or metal objects. To minimize interference, try relocating the receiver and transmitter to different positions.
- Range issues: If the range of your wireless doorbell is limited, it may be due to obstacles or distance from the receiver. Adjust the positioning of the transmitter and receiver to ensure a clear and direct line of sight between them. You can also try placing the receiver closer to the transmitter or adding a signal booster if needed.
Tips for extending the battery life
To prolong the battery life of your wireless doorbell, consider the following tips:
- Choose quality batteries: Opt for high-quality batteries that are compatible with your wireless doorbell. These batteries tend to last longer and provide consistent power.
- Adjust the volume: Lowering the volume of your doorbell receiver can help conserve battery power. Experiment with different volume settings to find a balance between audibility and battery life.
- Minimize motion detection: If your doorbell has motion detection features, reducing the detection area or sensitivity can help preserve battery life. This way, the doorbell won’t be constantly activated by unnecessary movements.
Regular maintenance practices to keep the doorbell in optimal condition
Regular maintenance is essential to ensure your wireless doorbell functions optimally. Consider the following maintenance practices:
- Clean the transmitter and receiver: Over time, dust, dirt, and other pollutants may accumulate on the surface of the transmitter and receiver. Regularly clean them using a soft cloth or brush to maintain clear signal transmission.
- Check and replace batteries: Monitor the battery level of your wireless doorbell regularly. Replace the batteries when they are running low to prevent interruptions in operation. It’s also a good idea to clean the battery contacts to ensure proper connection.
- Test the doorbell periodically: Test the doorbell system at regular intervals to make sure it’s working correctly. Press the doorbell button to check if the receiver produces a sound. If any issues are detected, refer back to the troubleshooting tips mentioned earlier.
By following these troubleshooting techniques and maintenance practices, you can ensure that your wireless doorbell functions smoothly and reliably, providing convenience and security to your home or office.
Frequently Asked Questions Of How To Install A Wireless Doorbell
Can I Install A Wireless Doorbell Myself?
Yes, you can install a wireless doorbell by yourself. It’s a simple process that doesn’t require professional assistance. Just follow the manufacturer’s instructions, which usually involve mounting the doorbell button and plugging the receiver into an electrical outlet. Enjoy the convenience of a wireless doorbell!
How Are Wireless Doorbells Attached?
Wireless doorbells are attached by mounting the transmitter unit near the door and the receiver unit inside the house. They operate using radio frequencies to transmit the signal, eliminating the need for physical wiring. Installation is simple and hassle-free.
Do Wireless Doorbells Need To Be Plugged In?
No, wireless doorbells do not need to be plugged in. They operate on batteries or rechargeable power sources, providing convenience and flexibility for installation.
How Do You Install A Ring Doorbell Without Wiring?
To install a Ring doorbell without wiring, you can use the battery-powered option. Simply mount the doorbell, connect it to your Wi-Fi, and use the Ring app to set it up. The battery can be easily recharged when needed.
Conclusion
Installing a wireless doorbell is a simple and convenient way to enhance home security and improve your lifestyle. By following the step-by-step guide provided in this blog post, you can easily set up your wireless doorbell and enjoy the benefits it brings.
From increased peace of mind to added convenience, a wireless doorbell is a must-have for any modern home. So why wait? Get started today and experience the convenience and security of a wireless doorbell for yourself.