o install a wooden gate, measure the opening, choose a gate style, dig post holes, set the posts, attach the gate hardware, and hang the gate. Installing a wooden gate is a straightforward process that can add both functionality and beauty to your property.
Whether you need a gate for privacy, security, or simply to enhance the aesthetic appeal of your home, this guide will walk you through the steps to successfully install a wooden gate. By following these instructions, you can ensure that your gate is installed securely and will provide years of reliable service.
So let’s get started on installing your wooden gate!
Essential Tools And Materials
When it comes to installing a wooden gate, having the right tools and materials is crucial. With the right equipment at hand, you can ensure a smooth and successful installation process, saving you time and effort. In this section, we will outline the essential tools and materials you will need to install a wooden gate effectively. Let’s get started!
List of necessary tools for installation
Before you begin installing your wooden gate, make sure you have the following tools readily available:
| Tools | Description |
|---|---|
| Measuring tape | A tool used to measure the dimensions accurately. |
| Level | Helps ensure that the gate is installed horizontally. |
| Drill | Used to make holes and screw the components together. |
| Screwdriver | Needed for tightening screws and fastening. |
| Saw | Allows you to cut the wooden components to the required size. |
| Pencil | Used for marking the spots where you need to make cuts or drill holes. |
| Clamps | Hold the gate components in place during the installation process. |
Required materials for the gate
Now that you have the necessary tools, it’s time to gather the materials required for the gate installation. Here’s a list of the essential materials:
- Wooden gate panels
- Gateposts
- Hinges
- Screws
- Latch or lock
- Wood glue
- Wood preservative or paint
Ensure that the wooden gate panels and gateposts are made of high-quality materials to ensure durability and longevity.
If you have all the required tools and materials at your disposal, you’re well-equipped to begin the installation process of your wooden gate. In the next section, we will discuss the step-by-step process of installing a wooden gate, providing you with a detailed guide to follow. Stay tuned!
Site Preparation
Before installing a wooden gate, proper site preparation is crucial to ensure a smooth and successful installation process. This stage involves assessing the location for gate installation, clearing the area, and making necessary adjustments to ensure a stable and secure foundation for your gate.
Assessing the location for gate installation
Start by carefully assessing the location where you plan to install your wooden gate. This involves considering factors such as the terrain, existing structures, and the gate’s intended purpose. Here are a few key points to keep in mind:
- Identify the slope of the terrain: Note if the ground is flat or if it slopes upward or downward. Understanding the slope will help determine how the gate will swing and if any adjustments are needed.
- Check for any underground utilities: Before digging any holes, it’s crucial to locate and mark any underground utilities such as gas lines, water pipes, or electrical cables. This prevents accidental damage and ensures a safe installation process.
- Consider nearby obstructions: Take note of any nearby trees, rocks, or structures that might obstruct the gate’s path when fully opened or closed. This will help you plan the positioning of the gate accordingly.
Clearing the area and making necessary adjustments
Once you have assessed the location, the next step is to clear the area and make any necessary adjustments to ensure a proper gate installation. Follow these steps to prepare the site:
- Remove any existing obstructions: Clear away any bushes, plants, or debris that could hinder the gate’s installation. Make sure the area is clean and free from any potential obstacles.
- Level the ground: If the terrain is uneven, you may need to level the ground. Use a shovel, rake, or other suitable tools to remove excess dirt or build up areas of low ground. A flat and level surface is essential for proper gate operation.
- Dig holes for the gate posts: Using a post hole digger, dig holes of appropriate depth and width for the gate posts. The size of the holes will depend on the size and weight of your wooden gate. Refer to the gate manufacturer’s instructions for specific measurements.
- Pour concrete for stability: To provide a stable foundation, pour concrete into the post holes after placing the gate posts. Make sure the posts are vertical and aligned correctly. Allow adequate time for the concrete to dry and cure before proceeding with the installation.
By carefully assessing the location for gate installation, clearing the area, and making necessary adjustments, you are laying the groundwork for a successful wooden gate installation project. The next step is to focus on assembling and installing the gate itself, which we’ll cover in our next section.
Determining Gate Size And Location
When it comes to installing a wooden gate, one of the first steps is determining the appropriate size and location. Getting these aspects right is crucial to ensuring that your gate not only functions properly but also enhances the overall aesthetic appeal of your property. In this section, we will discuss the factors to consider when determining gate dimensions and choosing the ideal location for your wooden gate installation.
Factors to consider when determining gate dimensions
Choosing the right dimensions for your wooden gate involves taking several factors into consideration:
- Width: Measure the opening where you intend to install the gate. This will determine the width of the gate itself. Consider whether you will need a single gate or a double gate for larger openings.
- Height: Determine how high you want your gate to be. Keep in mind both the functional and aesthetic aspects. For garden gates, a shorter height might suffice, while for driveway gates, a taller height may be necessary for security and privacy.
- Style: Different gate styles have different dimensions. If you have a specific gate design in mind, make sure to account for any additional width or height requirements related to that particular style.
- Material: The type of wood you use will also impact the gate dimensions. Some woods may expand or contract with weather changes, requiring additional spacing for movement.
- Functionality: Consider the primary purpose of the gate. Will it be used for pedestrian access or vehicular entry? This will determine the width needed for easy passage for people or vehicles.
- Local regulations: Check with local authorities and homeowner associations to ensure your gate adheres to any specific regulations or guidelines regarding size restrictions or setbacks.
- Budget: Finally, your budget plays a role in determining gate dimensions as well. Larger gates or gates made from more expensive materials may come with a higher price tag.
Choosing the ideal location for the gate
Deciding where to install your wooden gate is just as important as determining its dimensions. Here are some key considerations:
- Functionality: Locate the gate where it will be most convenient and functional for its intended use. For a garden gate, it should provide easy access to the desired area. Driveway gates should be positioned to allow for smooth entry and exit.
- Security: Strategically place your gate to enhance security measures. Consider visibility from the road, lighting, and neighboring properties when choosing the location.
- Terrain: Take note of the landscape and any obstacles that may impact gate installation. Ensure that the terrain is level or plan accordingly for any adjustments needed.
- Aesthetic appeal: Your gate should complement the overall look of your property. Consider the architectural style and existing fencing or landscaping when choosing the location.
- Accessories and automation: If you plan to include accessories like an intercom system or gate opener, choose a location that allows for easy installation and functionality.
By carefully considering factors such as gate dimensions and location, you can ensure that your wooden gate installation is a success, combining both functionality and visual appeal.
Measuring And Leveling
Before you start the installation process for your wooden gate, it’s crucial to measure the gate opening accurately and ensure proper alignment with the use of a level. This step is essential to ensure a seamless and functional gate. In this section, we will guide you through the process of measuring the gate opening and using a level to guarantee the gate is installed correctly.
Measuring the gate opening for accurate dimensions
Measuring the gate opening is the first step in ensuring that your wooden gate fits perfectly. Accurate measurements are essential, as they determine the dimensions of the gate you need to purchase or construct. To measure the gate opening, follow these steps:
- Use a measuring tape to determine the width of the gate opening. Start from one side of the opening and measure across to the other side, noting down the measurement in inches or centimeters.
- Next, measure the height of the gate opening. Place the tape measure vertically from the ground to the top of the opening, and record the measurement.
- Measure the depth of the gate opening. This measurement will determine how deep the gate posts should be installed. Measure from the front to the back of the opening, making a note of the measurement.
Once you have obtained these measurements, you will have accurate dimensions for your wooden gate. Remember to double-check the measurements to ensure their accuracy.
Using a level to ensure proper alignment
Proper alignment is vital for a functional gate that opens and closes smoothly. A level will help you achieve this alignment. Here’s how you can use a level to ensure that your gate is installed correctly:
- Position one gate post at the desired location, making sure it is completely plumb. Plumb refers to perfectly vertical alignment.
- Place the level against the side of the post and adjust the position until the bubble in the level is centered. This indicates that the post is plumb.
- Secure the post in place with temporary supports to keep it upright while you install the gate.
- Repeat the same process with the other gate post, ensuring it is aligned and plumb as well. Use the level to guarantee accuracy.
- After verifying that both gate posts are properly aligned, you can proceed with installing the gate itself.
Using a level during the installation process is crucial for maintaining balance and stability, preventing any unevenness that could cause the gate to malfunction.
Remember, accurate measurements and proper alignment are key factors in installing a wooden gate that functions seamlessly. Taking the time to measure the gate opening precisely and using a level to ensure alignment will result in a well-fitted and stable gate.
Marking The Hinge And Latch Positions
Marking the Hinge and Latch Positions on the Gate and Fence Posts
Installing a wooden gate involves careful planning and precision, and marking the hinge and latch positions is a crucial step in ensuring a proper installation. By following these steps, you can ensure that your gate operates smoothly and securely. Let’s take a look at how to mark the hinge and latch positions on both the gate and fence posts.
Marking the Hinge Positions on the Gate and Fence Posts
To begin, gather the necessary tools: a tape measure, pencil, level, and a hinge set. Start by determining where you want your gate to be positioned, keeping in mind any clearance requirements for opening and closing. Once you have determined the ideal location, mark the top and bottom hinge positions on the gate using a pencil. Next, place the gate against the corresponding fence post, ensuring it is level. Use a level to check the gate’s alignment and adjust as needed. Once the gate is level, mark the hinge positions on the fence post using a pencil. Repeat this process for each hinge on the gate, ensuring proper alignment and clearance.
Marking the Latch Position on the Gate and Fence Posts
When marking the latch position, consider the height at which the latch should be installed for easy access and security. Measure and mark this position on the gate using a pencil. Now, close the gate and align it with the corresponding fence post. Ensure that the gate is level and positioned correctly. With the gate closed, mark the latch position on the fence post using a pencil. This will ensure that the latch engages properly when the gate is closed.
Ensuring Proper Alignment and Clearance
Proper alignment and clearance are essential for the smooth operation of your wooden gate. Ensure that the gate is aligned with the fence posts and that both the top and bottom hinges are level. This will prevent any unnecessary friction or strain on the hinges and ensure that the gate swings open and closed effortlessly. Additionally, check for proper clearance between the gate and the ground. A small gap of about 1-2 inches is recommended to prevent the gate from dragging on the ground and causing damage. By carefully marking the hinge and latch positions on both the gate and fence posts, and ensuring proper alignment and clearance, you can install a wooden gate that not only adds beauty but also functions smoothly and securely. Take your time during this step to ensure accuracy and precision, as it will greatly impact the overall performance of your gate.
Digging Post Holes
Digging post holes is an essential part of installing a wooden gate. This step determines the foundation and stability of your gate, so it’s important to get it right. In this section, we will discuss how to determine the depth and width of the post holes and provide tips for digging the holes with proper spacing.
Determining the depth and width of the post holes
The depth and width of the post holes play a critical role in ensuring the durability and strength of your wooden gate. To determine the depth, consider the height of your gate and the type of soil you have. A general rule of thumb is to dig the post holes about one-third of the total height of the gate. For example, if your gate is six feet high, dig the post holes around two feet deep.
When determining the width of the post holes, the size and material of the gateposts should be taken into account. Typically, for a standard wooden gate, the width of the post holes should be at least three times the diameter of the gateposts. This provides ample space for the posts and allows for stability and proper fitting.
Digging the post holes with proper spacing
Once you have determined the depth and width of the post holes, it’s time to start digging. Begin by marking the locations of the post holes using stakes and string. This will ensure that the spacing between the posts is even and that the gate will be properly aligned.
To dig the post holes, use a post hole digger or an auger. Make sure to dig vertically, as this will prevent any slant or instability. Start by removing the top layer of soil and continue digging until you reach the desired depth. Throughout the process, check the depth regularly to ensure consistency.
To achieve proper spacing between the post holes, it’s important to measure the distance accurately using a tape measure. It’s recommended to leave a minimum of six feet between each post. However, if you have a wider gate or are installing additional elements such as a fence, consider increasing the spacing accordingly.
Remember to clear any debris or excess soil from the holes before proceeding to the next step of installing the gate. This will ensure a clean and secure foundation for your wooden gate.
Setting The Gate Posts
Installing a wooden gate can not only enhance the security and privacy of your property but also add a touch of elegance to your outdoor space. One of the most crucial steps in this process is setting the gate posts. Properly installed gate posts provide the necessary support to ensure your gate functions smoothly and stands the test of time. In this article, we will guide you through the process of setting the gate posts, including preparing them for installation and securing them in the ground.
Preparing the posts for installation
Before you start digging holes for your gate posts, it’s essential to prepare them properly. This will help ensure a stable and secure foundation for your gate. Here are the steps to follow:
- Choose the right type of wood: Select a durable and rot-resistant wood species, such as cedar or redwood, for your gate posts. This will help prolong the lifespan of your gate and reduce the risk of damage.
- Cut the posts to the desired length: Measure the height of your gate and add a few inches to account for potential sinking or adjustments. Use a saw to cut the posts to the appropriate length.
- Seal the posts: To protect the wood from moisture and extend its lifespan, apply a high-quality wood sealer or preservative to all sides of the posts. Allow the sealer to dry completely before proceeding.
Securing the gate posts in the ground
Once your gate posts are prepared, it’s time to secure them in the ground. This step is crucial as it determines the stability and alignment of your gate. Follow these steps for a successful installation:
- Mark the post locations: Using a measuring tape and marking paint, mark the exact locations where you want to install your gate posts. Ensure the marks are level and aligned correctly.
- Dig the holes: Using a post hole digger or an auger, dig holes that are deep enough to support the height of your gate posts and wide enough to allow for concrete or gravel backfill. Remove any rocks or debris from the holes.
- Add gravel or concrete: Place a layer of gravel at the bottom of each hole to improve drainage and prevent rot. Alternatively, mix concrete according to the manufacturer’s instructions and pour it into the holes. Use a level to ensure the posts will be perfectly vertical.
- Set the posts: Carefully place the prepared gate posts into the holes, ensuring they are aligned with the markings you made earlier. Fill the remaining space around the posts with either concrete or gravel, leaving a slight mound to encourage rainwater runoff.
- Secure the posts: To prevent shifting or leaning while the concrete or gravel sets, brace the posts with temporary supports such as wooden stakes or clamps. Check and adjust the alignment using a level. Allow the posts to set and cure for the recommended time provided by the concrete or gravel manufacturer.
Setting the gate posts correctly is a crucial step in the installation process that ensures the stability and functionality of your wooden gate. Following these steps and taking the time to properly prepare and secure the posts will help ensure a successful installation and a gate that will stand strong for years to come.
Attaching Hinges And Latch
When it comes to installing a wooden gate, attaching hinges and a latch are crucial steps that ensure proper functionality and security. The hinges allow the gate to swing open and closed smoothly, while the latch mechanism provides a secure closure. In this section, we will guide you through the process of installing hinges on both the gate and fence posts, as well as attaching the latch mechanism for a secure closure.
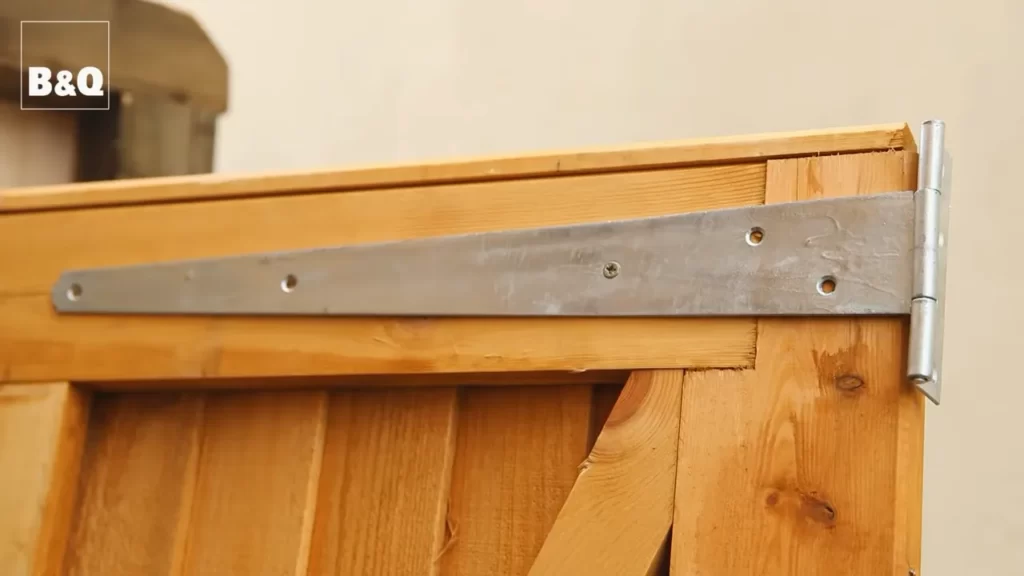
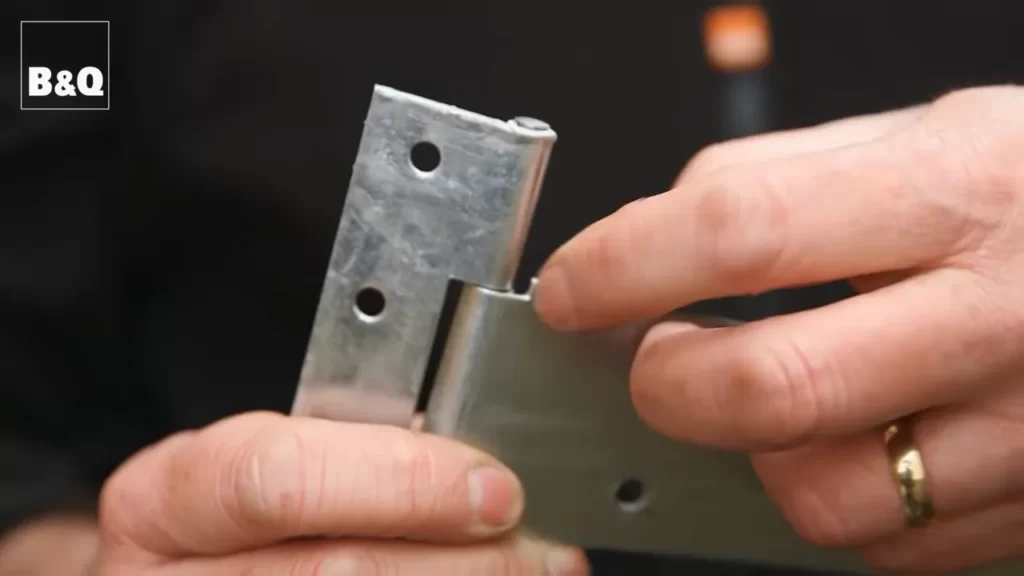
Installing hinges on the gate and fence posts
To start, you’ll need to gather the necessary materials for attaching hinges to your gate and fence posts. This typically includes the hinges themselves, screws, a level, and a power drill. Make sure you choose hinges that are sturdy and suitable for outdoor use, as they will bear the weight of your gate.
First, you’ll want to determine the placement of the hinges on your gate. It’s essential to ensure they are evenly spaced and level to prevent any alignment issues. Once you’ve chosen the desired location, mark the spots where the screws will go using a pencil or marking pen.
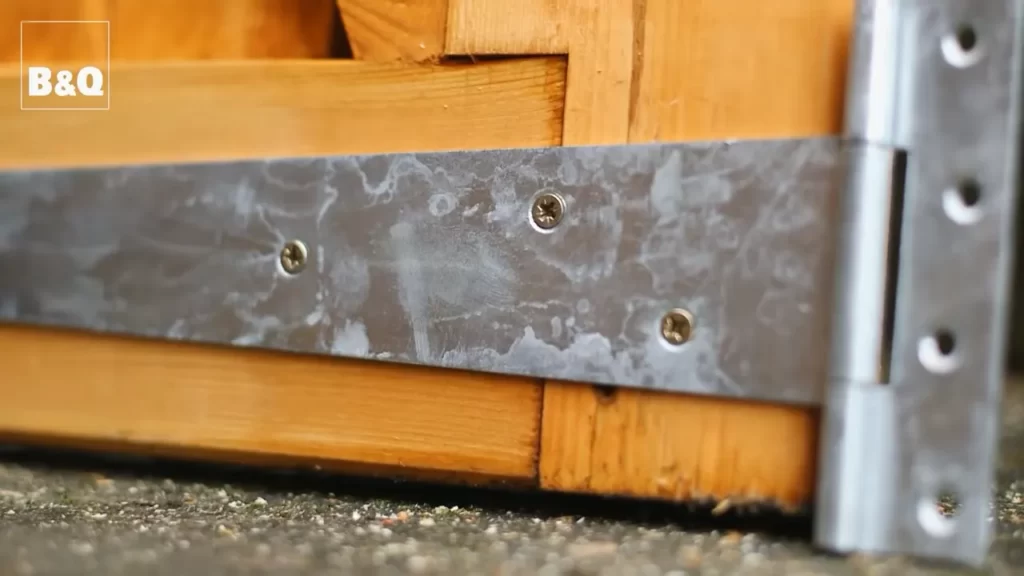
Next, using your power drill, carefully screw the hinges onto the gate. Be sure to firmly fasten them, but avoid overtightening as it may cause the wood to split. Double-check the alignment and ensure that the gate swings freely before proceeding.
Now that the hinges are attached to the gate, it’s time to position them on the fence posts. The process is similar to attaching them to the gate, but this time, you’ll need to hold the gate in place while securing the hinges onto the posts. It may be helpful to have someone assist you during this step, as it can be challenging to do on your own.
Using your level, ensure that the gate is properly aligned and that the hinges are placed at the desired height. Once aligned, mark the screw locations on the fence posts. Carefully drill pilot holes to prevent any splitting, then attach the hinges using the provided screws.
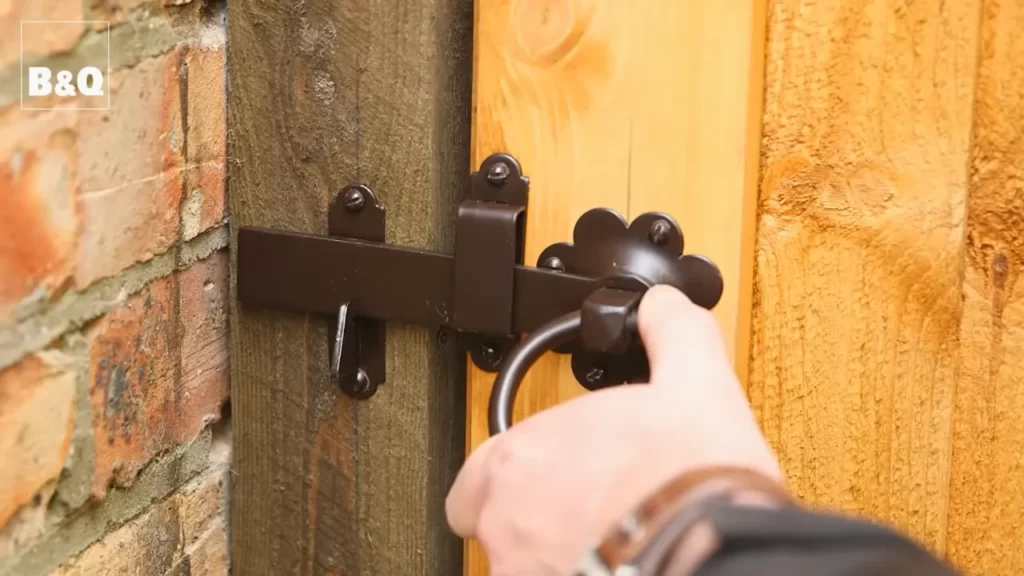
Attaching the latch mechanism for secure closure
Now that the hinges are securely in place, it’s time to attach the latch mechanism for a secure gate closure. The latch will keep your gate closed when not in use, providing an additional level of security.
Start by positioning the latch on the gate and fence posts, ensuring that it aligns properly and allows for easy opening and closing. Similar to the hinge installation, mark the screw locations with a pencil or marking pen.
Using your power drill, create pilot holes at the marked spots to prevent any wood splitting. Then, secure the latch mechanism in place using the provided screws. Make sure it is firmly attached but allows for smooth operation.
Finally, test the latch to ensure it functions properly. Open and close the gate, checking that the latch securely engages and releases without any obstructions. If necessary, make any adjustments to ensure a tight and secure fit.
With the hinges and latch properly installed, your wooden gate is now ready for use. Remember, regular maintenance, such as lubricating hinges and checking the latch mechanism, will help prolong the lifespan and usability of your gate.
Hanging The Gate
Aligning the gate with the hinges
Once you have successfully installed the gate hinges, the next step is to align the gate with the hinges. Proper alignment is crucial to ensure that the gate opens and closes smoothly without any obstructions. Follow these steps to align your wooden gate with the hinges:
- Position the gate in the opening, making sure it is centered and level. You can use a spirit level to ensure that the gate is straight.
- Check the gaps on both sides of the gate to ensure they are even. Adjust the gate if needed to maintain an equal gap on both sides.
- Ensure that the gate is parallel with the adjoining fence or wall. This will not only enhance the aesthetic appeal but also prevent any unwanted scraping or rubbing.
Attaching the gate to the hinges securely
Once the gate is properly aligned with the hinges, it’s time to securely attach the gate to the hinges. The gate should be fastened in a way that ensures its stability and longevity. Follow these steps to securely attach your wooden gate to the hinges:
- First, obtain the appropriate size of screws or bolts that are suitable for your gate and hinges. Using screws that are too short or too long can lead to instability.
- Starting from the top hinge, insert the screws or bolts through the pre-drilled holes in the hinge and into the gate. Make sure the screws or bolts are snug but not overtightened, as this could cause damage to the wood.
- Repeat the same process for the middle and bottom hinges. Ensure that all screws or bolts are properly fastened to provide maximum support and security.

By aligning the gate with the hinges and securely attaching it, you have successfully hung your wooden gate. Take a moment to double-check the gate’s functionality by opening and closing it multiple times. If the gate operates smoothly without any sticking or rubbing, then congratulations! You have completed the installation process and can now enjoy the convenience and security of your newly installed gate.
Testing And Adjusting The Gate
Once you have successfully installed your wooden gate, it’s crucial to test and make any necessary adjustments to ensure its smooth operation. Testing and adjusting the gate will not only ensure its proper fit and function but also guarantee that it provides the desired security and aesthetic appeal for your property. In this section, we will cover the essential steps for checking the gate for smooth operation and making any necessary adjustments.
Checking the gate for smooth operation
Before making any adjustments, it’s essential to check the gate’s operation to identify any potential issues. Here are a few steps to follow when checking the gate for smooth operation:
- Open the gate gently and observe if it moves smoothly along the hinges without any resistance.
- Close the gate and ensure it aligns with the latch or lock mechanism without any obstructions or misalignment.
- Test the gate’s swing by gently pushing or pulling it in both directions. It should move freely without catching on the ground or any surrounding structures.
- Check for excessive gaps between the gate and the supporting posts. This may indicate misalignment or an inadequate fit, requiring adjustments.
Making any necessary adjustments for proper fit and function
If you encounter any issues during the gate operation, adjustments may be required. Here are some common adjustments you can make to ensure a proper fit and function:
- Tighten or loosen the hinges: Use a wrench or screwdriver to adjust the tension on the gate hinges. This can help align the gate and reduce friction.
- Trimming excess material: If the gate is rubbing against the ground or scraping against nearby structures, consider trimming or sanding down any excess material.
- Repositioning the gate latch: If the gate latch is misaligned, it may not secure properly. Adjust the latch or the hole in the gatepost to ensure a secure fit.
- Balancing the gate: If one side of the gate sags or hangs lower than the other, adjust the hinges or add shims to balance the gate’s weight distribution.
- Leveling the gate: Use a level to ensure the gate is straight and plumb. Adjust the gate’s position or the supporting posts if needed.
Making these adjustments will help improve the gate’s fit and function, ensuring it opens, closes, and locks smoothly. Remember to periodically test the gate’s operation and make any necessary adjustments to maintain its smooth functionality.
Adding Gate Hardware
Installing Additional Hardware like Handles or Locks
Once you have successfully installed your wooden gate, it is time to add the necessary gate hardware that will not only enhance its functionality but also add to its visual appeal. Installing additional hardware, such as handles or locks, can make your wooden gate more secure and user-friendly. This section will guide you through the process of adding gate hardware efficiently.
Enhancing the Gate’s Functionality and Appearance
Enhancing the functionality and appearance of your wooden gate is crucial to ensure that it serves its purpose effectively while complementing the overall aesthetic of your property. By carefully selecting and installing the right gate hardware, you can take your gate to the next level. This section will provide you with valuable insights on how to achieve the perfect balance between functionality and visual appeal.
Ensuring Each H3 Heading Adheres to HTML Syntax
In order to maintain an organized and optimized blog post, it is essential to adhere to HTML syntax guidelines. Since H3 headings play a crucial role in breaking the content into meaningful sections, it is important to ensure that the syntax is correct. By structuring the headings using <h3>…</h3> tags, you can create a well-structured and visually appealing blog post. Remember to use these tags consistently throughout the content to maintain a cohesive reading experience.
Applying A Protective Finish
One important step in installing a wooden gate is applying a protective finish. This helps to safeguard the gate against weathering and extends its lifespan. By choosing the appropriate finish and applying it correctly, you can ensure that your wooden gate remains durable and beautiful for years to come.
Choosing the appropriate finish for the wooden gate
When it comes to choosing the right finish for your wooden gate, there are several options to consider. Each type of finish offers different benefits and aesthetics. Here are a few factors to think about when selecting the appropriate finish:
- Weather resistance: Look for a finish that provides protection against the elements, such as rain, sunlight, and extreme temperatures.
- Enhanced durability: Consider finishes that offer resistance to scratches, stains, and other types of damage.
- Desired appearance: Think about the color and sheen you want for your gate. Some finishes may enhance the natural wood grain, while others may provide a glossy or matte finish.
- Eco-friendliness: If you have environmental concerns, opt for finishes that are labeled as low-VOC or water-based.
Common options for finishes include oil-based stains, polyurethane, varnish, and lacquer. Research each type and choose the one that best fits your preferences and requirements.
Applying the finish to protect against weathering
Once you have chosen the appropriate finish for your wooden gate, it’s time to apply it. Follow these steps to ensure you protect your gate against weathering:
- Clean the gate: Before applying the finish, clean the gate thoroughly to remove any dirt, dust, or debris. This ensures that the finish adheres properly.
- Sand the surface: Use sandpaper to smooth the surface of the gate. This step helps the finish to penetrate the wood and creates a smooth, even surface.
- Apply the primer (if necessary): Depending on the type of finish you selected, you may need to apply a primer first. Follow the manufacturer’s instructions for the specific primer you are using.
- Apply the finish: Use a brush, roller, or sprayer to apply the finish evenly onto the gate surface. Make sure to cover all areas, including edges and corners.
- Allow drying and curing time: After applying the finish, allow it to dry and cure according to the manufacturer’s instructions. This may involve waiting for a specified amount of time or applying multiple coats with drying intervals in between.
Remember to work in a well-ventilated area and avoid applying the finish in extreme weather conditions, such as high humidity or extreme heat. Properly applied, a protective finish can greatly contribute to the longevity and appearance of your wooden gate.
Regular Maintenance And Care
Regular maintenance is crucial for prolonging the lifespan of your wooden gate. By implementing a few essential maintenance tasks and following some helpful tips, you can keep your gate in good condition for years to come.
Essential maintenance tasks to prolong the gate’s lifespan
Performing these essential maintenance tasks will help extend the lifespan of your wooden gate:
- Inspect regularly: Take the time to visually inspect your wooden gate, looking for any signs of damage, such as cracks, warping, or loose parts. This will allow you to address issues early before they worsen.
- Clean and remove debris: Keep your wooden gate clean by regularly removing dirt, dust, and debris. Use a soft brush or cloth to gently wipe the surface, and be sure to clean both the front and back of the gate.
- Apply protective coatings: Applying protective coatings, such as paint, stain, or sealant, can help shield your wooden gate from the elements. Be sure to choose a high-quality product that is suitable for outdoor use and follow the manufacturer’s instructions for application.
- Check and tighten hardware: Regularly check the hinges, latches, and other hardware for any signs of wear or looseness. If necessary, tighten or replace any damaged or worn-out hardware to maintain the gate’s functionality.
Tips for keeping the wooden gate in good condition
Follow these tips to ensure your wooden gate stays in good condition:
- Keep the gate clear: Avoid placing objects or plants directly against the gate, as this can trap moisture and lead to rotting or warping. Leave sufficient space for air circulation around the gate.
- Protect from excessive sunlight: Direct exposure to intense sunlight can cause the wood to fade, dry out, and crack. Consider adding shade or applying a UV protectant to shield your gate from prolonged sun exposure.
- Address pest issues promptly: Wood-boring insects, such as termites or carpenter bees, can wreak havoc on your wooden gate. If you notice any signs of pests, take immediate action by consulting a professional and implementing appropriate pest control measures.
- Regularly repaint or reseal: Over time, the protective coatings on your gate may wear off or become damaged. To maintain the gate’s appearance and protection, schedule regular repainting or resealing as recommended by the manufacturer.
- Keep the gate well-maintained during seasonal changes: Wood is susceptible to changes in humidity and temperature. During extreme weather conditions, such as heavy rain or intense heat, take extra precautions to safeguard your gate. Ensure proper drainage and consider applying additional protective layers to shield against the elements.
Frequently Asked Questions On How To Install A Wooden Gate
How Do You Install Wooden Gate Posts?
To install wooden gate posts, follow these steps: 1. Dig holes at least 1/3 the height of the post. 2. Place the posts in the holes and ensure they are level. 3. Secure the posts with concrete, allowing it to set.
4. Attach the gate hardware, hinges, and latch to the posts. 5. Adjust and tighten as necessary for stability.
Should A Wood Gate Open In Or Out?
A wood gate can open either inwards or outwards, depending on personal preference and space availability.
How Far Apart Should Gate Posts Be?
Gate posts should be placed approximately 6-8 feet apart.
Can You Attach A Gate Directly To A Wall?
Yes, you can attach a gate directly to a wall.
How Much Does It Cost To Install A Wooden Gate?
The cost of installing a wooden gate varies depending on factors like size, type of wood, and complexity, with an average range of $500 to $3000.
What Materials Are Needed To Install A Wooden Gate?
To install a wooden gate, you’ll need essential materials like wooden boards, gate hinges, latch hardware, posts, concrete mix, screws, and a level.
Conclusion
Installing a wooden gate can be a straightforward process if you follow the right steps. By carefully measuring and preparing the area, choosing the right materials and tools, and following the installation instructions, you can have a sturdy and beautiful gate that enhances the security and aesthetics of your property.
Remember to regularly maintain your gate to ensure its longevity. Enjoy the satisfaction of a job well done as you admire your newly installed wooden gate. Happy gate installation!