To install an Anderson storm door, start by measuring the opening and mounting height, aligning the door, attaching the hinges, installing the handle and lockset, and adjusting the closer mechanism. Adding an Anderson storm door to your home can provide added security and protection from the elements.
It also allows for ventilation while keeping insects out. Installing a storm door is a relatively simple process that can be done by following a few straightforward steps. By taking accurate measurements, aligning the door properly, and securing the hinges, handle, and lockset, you can have your new storm door installed in no time.
In this guide, we will walk you through the steps for installing an Anderson storm door, providing you with a clear and concise overview of the process.
Before You Begin: Gathering Tools And Materials
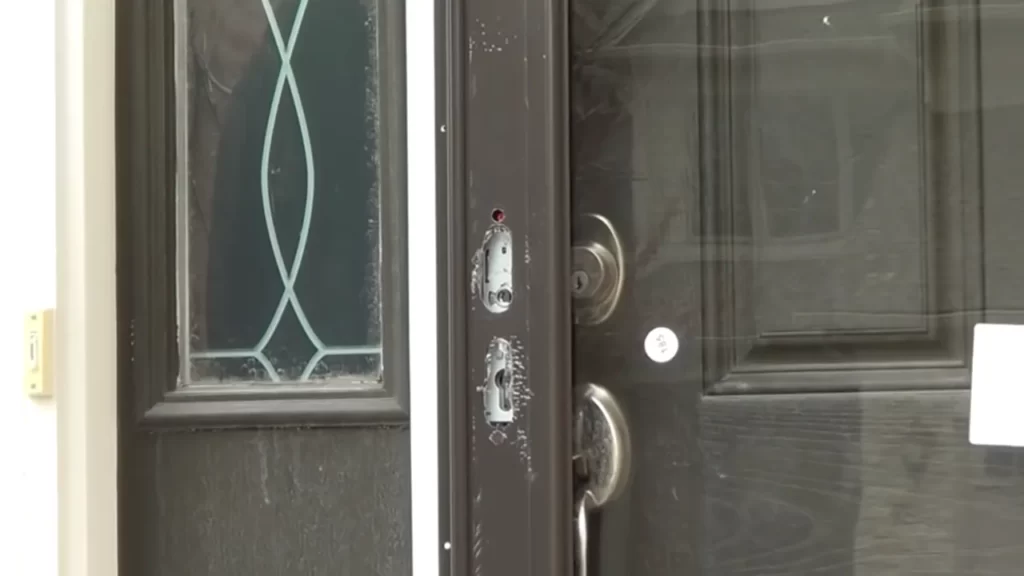
Preparing to install an Anderson storm door requires gathering the necessary tools and materials to ensure a smooth and hassle-free installation process. By having everything you need in advance, you can save time and prevent any unnecessary interruptions. In this section, we will discuss the essential tools and materials for installing an Anderson storm door, how to choose the right size and style, as well as how to measure and prepare the door frame for installation.
Essential Tools and Materials for Installing an Anderson Storm Door
Before you start installing your Anderson storm door, it is important to gather all the tools and materials necessary for the job. Having these items readily available will allow you to work efficiently and minimize any frustration throughout the installation process. Here is a list of the essential tools and materials:
| Tools | Materials |
|---|---|
| Tape measureScrewdriverDrillPencilLevelHacksawChiselHammerSafety glasses | Anderson storm doorMounting screwsWeatherstrippingDoor hardwareExpansion stripsCorner bracketsThresholdRetainer stripsTrim |
Choosing the Right Size and Style of Anderson Storm Door
Selecting the appropriate size and style of your Anderson storm door is crucial to ensure a proper fit and complement the aesthetics of your home. Follow these steps:
- Measure the height and width of your existing door frame to determine the appropriate size for your Anderson storm door.
- Consider the architectural style of your home and choose a door design that harmonizes with the overall look and feel.
- Take into account the climate conditions in your area and select a storm door that offers the desired level of insulation and weather resistance.
- Consult the manufacturer’s guidelines and recommendations to ensure compatibility with your specific door frame and installation requirements.
Measuring and Preparing the Door Frame for Installation
Once you have chosen the right size and style for your Anderson storm door, the next step is to accurately measure and prepare the door frame for installation. Follow these steps:
- Measure the height and width of the door opening to confirm it matches the size of your chosen storm door.
- Ensure that the door frame is level and plumb using a level.
- Remove any obstructions or debris from the door frame, such as old weatherstripping or trim.
- If necessary, use a chisel, hacksaw, or other appropriate tools to modify the door frame to accommodate the storm door.
- Apply weatherstripping to the door frame to seal any gaps and prevent drafts.
By gathering the essential tools and materials, selecting the right size and style of Anderson storm door, and properly measuring and preparing the door frame, you are now ready to begin the installation process. Stay tuned for our next section on the step-by-step guide to installing an Anderson storm door.
Step 1: Removing The Existing Door And Frame
Before you can install your brand-new Anderson storm door, you’ll need to remove the old door and frame. This crucial first step ensures a smooth and secure installation process. Below, we’ll guide you through the process of removing the old door and frame safely and efficiently.
Removing the old door and frame safely and efficiently
To get started, follow these steps:
- Begin by carefully removing the screws or nails that hold the door in place. Ensure the door is fully closed during this process to prevent unexpected movements.
- Once you’ve removed the fasteners, gently tap a pry bar or utility knife between the door frame and the wall to break the seal. Gradually work your way around the frame to loosen it from the wall.
- Use caution as you remove the frame to avoid any injuries. If needed, recruit someone to assist you in carrying and maneuvering the frame out of the doorway.
Tips for handling and disposing of the old materials
Proper handling and disposal of your old materials are essential for the safety of both yourself and the environment. Here are some tips to keep in mind:
- Wear protective gloves and eyewear while handling the old door and frame to avoid splinters and sharp edges.
- Consider donating the old door and frame if they are in good condition. Local charities and recycling centers may accept these materials for reuse.
- If the materials are no longer usable, contact your local waste management facility to inquire about proper disposal methods. They can provide guidance on recycling or bulk waste pick-up.
Checking the condition of the door frame for any repairs needed
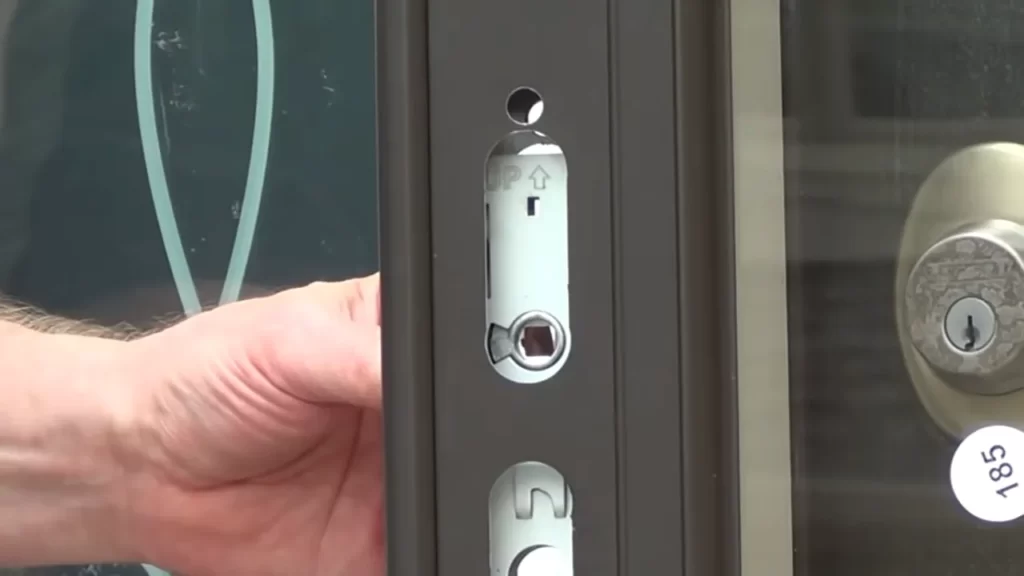
Before proceeding with the installation of your Anderson storm door, take a moment to assess the condition of the door frame. Look for any signs of damage or rot that could hinder proper installation or compromise the stability of the new door.
If you notice any issues, it’s best to address them before continuing. Repairing or replacing the damaged sections of the frame ensures a solid foundation for your new storm door.
Now that you’ve successfully removed the old door and frame, properly handled and disposed of the materials, and checked the condition of the door frame, you’re ready to move on to the next step: preparing the doorway for installation.
Step 2: Preparing The Door Opening
Once you have gathered all the necessary tools and materials, it’s time to move on to step 2 of installing your Anderson storm door. This crucial step involves preparing the door opening to ensure a smooth and secure installation.
Cleaning the opening and ensuring a smooth surface for installation
Before you begin installing the storm door, it’s essential to clean the opening thoroughly. This will help remove any dirt, dust, or debris that may hinder the installation process. A clean surface not only ensures a better fit but also enhances the longevity of your storm door.
To clean the opening, simply follow these steps:
- Remove any objects or obstructions in the way.
- Use a broom or vacuum to remove loose dirt and debris.
- Wipe down the opening with a damp cloth or sponge to remove any remaining residue.
- Allow the area to dry completely before moving on to the next step.
Measuring and marking the location of the door hinges
Accurate measurements and proper alignment are crucial for a successful storm door installation. Before installing the hinges, you need to measure and mark their location on the door opening. Follow these steps to ensure precision:
- Using a tape measure, measure the height of the door opening.
- Divide the height measurement in half to find the center point.
- Make a small mark or pencil line at the center point of the opening’s top and bottom.
- Measure and mark the location for the hinges, ensuring they are equidistant from the center point.
- Double-check your measurements to ensure accuracy before proceeding to the next step.
Trimming any excess material from the frame if necessary
In some cases, the frame of the door opening may have excess materials that could interfere with the installation process. Trimming any excess material allows for a smooth and seamless installation. Here’s how:
- Carefully examine the frame of the door opening for any excess material protruding outwards.
- If you notice any excess material, use a saw, file, or utility knife to trim it down.
- Be cautious during this process to avoid damaging the surrounding area or the remaining frame.
- Once the excess material is trimmed, ensure that the surface is smooth and even.
By following these steps, you are now one step closer to installing your Anderson storm door. Preparing the door opening sets the foundation for a successful installation and guarantees a secure and functional storm door for years to come.
Step 3: Assembling The Anderson Storm Door
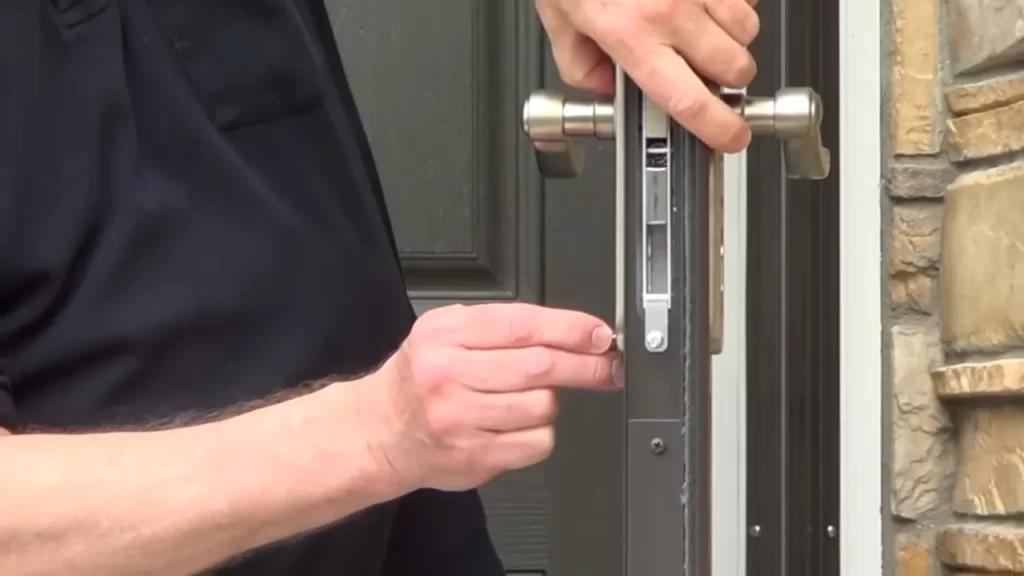
Now that you’ve successfully unboxed and inspected the components of your Anderson Storm Door, it’s time to move on to the next crucial step – assembling the door. Following the manufacturer’s instructions closely will ensure a smooth and hassle-free installation process. In this step, you will learn how to attach the hinges and handle to the door, bringing your storm door one step closer to completion.
Unboxing and Inspecting the Components of the Anderson Storm Door
Before you begin assembling your Anderson Storm Door, carefully unbox and inspect all the components to ensure that everything is in perfect condition. This step is essential to identify any missing or damaged parts before starting the assembly process.
Some key components you can expect to find in the box include:
| Component | Quantity |
|---|---|
| Door panels | 2 |
| Hinges | 3 |
| Handle | 1 |
| Screws and fasteners | Various |
| Installation manual | 1 |
Make sure you have all the necessary components and that they are in good condition. If anything is missing or damaged, contact the manufacturer for assistance before proceeding.
Following the Manufacturer’s Instructions for Assembly
Once you have confirmed that all the components are present and undamaged, it’s time to consult the installation manual provided by Anderson. This manual contains step-by-step instructions specific to your storm door model.
As you begin the assembly process, adhere closely to the instructions provided. Each Anderson Storm Door model may have slight variations, so it’s crucial to follow the manufacturer’s recommendations to ensure a proper and secure installation.
Attaching the Hinges and Handle to the Door
With the instructions in hand, it’s time to attach the hinges and handle to the door. Properly installing the hinges and handle is essential for the smooth operation and security of your Anderson Storm Door.
- Begin by positioning the first hinge onto the door panel as instructed in the manual.
- Using the provided screws, secure the hinge firmly in place, ensuring it is aligned properly.
- Repeat this process for the remaining hinges.
- Next, it’s time to attach the handle. Follow the manufacturer’s instructions on how to position the handle on the door panel.
- Secure the handle using the provided screws, making sure it is tightly fastened.
- Double-check that all hinges and the handle are securely attached and aligned. This will prevent any issues when operating the door.
Once you have successfully attached the hinges and handle to the door, you have completed step 3 in the installation process. Your Anderson Storm Door is now one step closer to being fully assembled and ready for installation.
Step 4: Installing The Anderson Storm Door
Attaching the door to the frame with screws or clips
After properly preparing the storm door frame and ensuring it is level, it’s time to attach the Anderson storm door to the frame. This step involves securely fastening the door using screws or clips. To attach the door using screws, start by positioning the door in the desired location within the frame. Check that it opens and closes smoothly without any obstructions. Once satisfied with the positioning, use a drill to create pilot holes on the hinge side of the door frame. Now, align the hinges on the door with the pilot holes and insert the screws. Tighten them just enough to hold the door in place, but don’t fully tighten them just yet. This will allow for adjustments later in the process. If using clips to attach the door, follow the manufacturer’s instructions for proper placement and installation. Typically, these clips are attached to the frame first and then the door is aligned and inserted into the clips. Once in position, secure the door by tightening the clips.
Adjusting the door for proper alignment and smooth operation
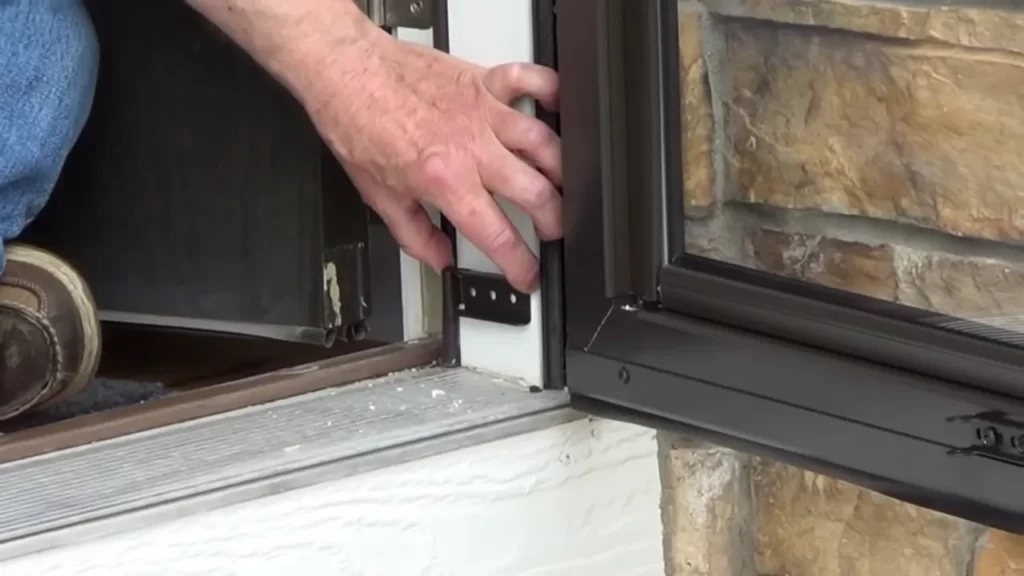
After attaching the door to the frame, it’s important to ensure proper alignment and smooth operation for an optimal installation. To adjust the door’s alignment, open the door to the desired angle and check the gaps between the door and frame. Make sure the gaps are consistent along the sides and top of the door. If adjustments are needed, loosen the screws on the hinges and move the door slightly until the gaps are even. Once the desired alignment is achieved, tighten the screws. For smooth operation of the door, check that it opens and closes without any resistance or sticking. If the door is not operating smoothly, it may need additional adjustments. Loosen the screws on the hinges slightly and make small adjustments until the door operates smoothly. Once adjusted, tighten the screws to secure the door in place.
Installing and adjusting the door closer mechanism
A crucial component of any storm door is the door closer mechanism, which controls the speed at which the door closes and provides a smooth and controlled closing motion. To install the door closer, start by attaching the mounting bracket to the storm door frame. Take care to align it properly to ensure the door closer operates smoothly. Once the bracket is securely attached, connect the door closer arm to the bracket, following the manufacturer’s instructions. Before finalizing the installation, test the door closer by opening and closing the door. Make any necessary adjustments to the speed and closing action per the manufacturer’s instructions. This will ensure the door closes smoothly and securely behind you. Overall, correctly installing an Anderson storm door involves attaching the door to the frame with screws or clips, adjusting its alignment for smooth operation, and installing and adjusting the door closer mechanism. By following these steps, you can enjoy the added security and convenience that an Anderson storm door provides.
Step 5: Sealing And Insulating The Door
When it comes to installing an Anderson storm door, one of the most crucial steps is sealing and insulating the door to ensure maximum energy efficiency and protection against drafts. In this step, we will guide you through the process of applying weatherstripping and sealant around the door frame, checking for gaps and drafts, and addressing them with insulation. Let’s dive in!
Applying weatherstripping and sealant around the door frame
To keep out unwanted drafts and moisture, it’s essential to properly apply weatherstripping and sealant around the door frame. Follow these steps to ensure a tight seal:
- Clean the door frame thoroughly to remove any dirt or debris that could prevent proper adhesion of the weatherstripping and sealant.
- Measure the length of each side of the door frame and cut the weatherstripping accordingly. Be sure to leave a bit of extra length to cover the corners.
- Apply a thin bead of sealant along the inner perimeter of the door frame, focusing on the areas where the weatherstripping will be attached.
- Press the weatherstripping firmly into place, following the contours of the door frame.
- Repeat the process for all sides of the door frame, ensuring a complete seal.
This simple yet important step will help prevent air leakage and improve the insulation properties of your Anderson storm door.
Checking for gaps and drafts and addressing them with insulation
After applying weatherstripping and sealant, it’s crucial to inspect the door frame for any remaining gaps or drafts. Here’s how you can identify and address them:
- Close the storm door and stand inside your home, observing the door frame from various angles.
- Look for any visible light coming through the cracks or gaps around the door frame.
- Using an insulation material such as foam strips or caulk, fill in any gaps or cracks you find. Make sure to follow the manufacturer’s instructions for proper application.
- Check the door frame again to ensure a tight seal and make any necessary adjustments.
By addressing these gaps and drafts, you can significantly enhance the energy efficiency and comfort of your home.
Tips for enhancing the energy efficiency of the Anderson
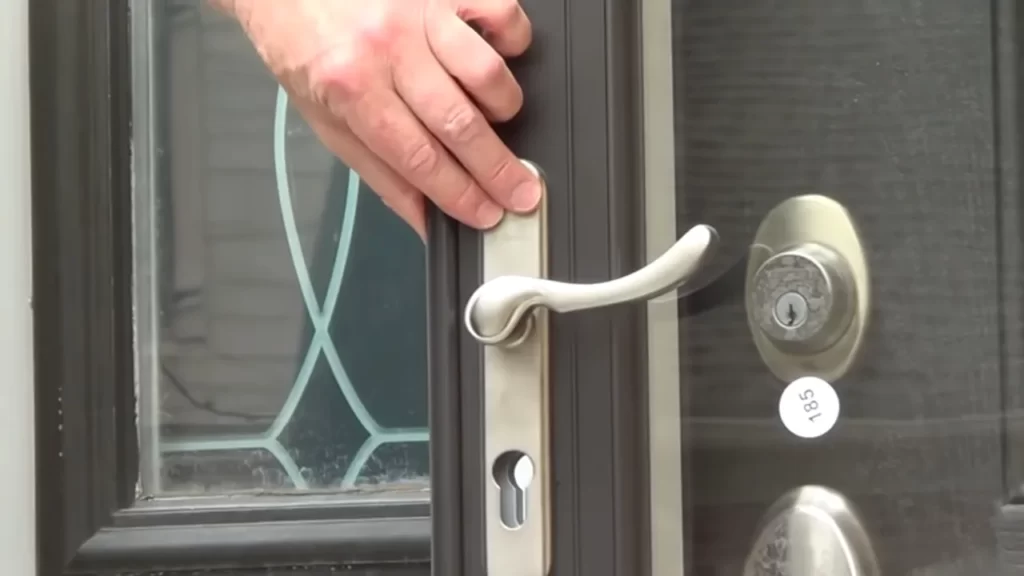
storm door
In addition to sealing and insulating the door frame, here are some additional tips to increase the energy efficiency of your Anderson storm door:
- Consider installing a door sweep at the bottom of the door to prevent drafts from entering your home. Make sure it seals tightly against the threshold.
- Apply window film to the storm door’s glass panels to minimize heat transfer and improve insulation.
- Regularly clean and maintain the door’s weatherstripping to ensure it remains in optimal condition.
- Use curtains or blinds on the interior of your home to further insulate against cold or hot air.
By following these tips, you can maximize the energy efficiency of your Anderson storm door, providing you with a comfortable and well-insulated living space.
Step 6: Testing And Finalizing The Installation
After successfully installing your Anderson Storm Door, it is important to test and finalize the installation to ensure smooth operation, proper locking, and long-lasting performance. This step will help you make any necessary adjustments and provide guidance on how to clean and maintain your storm door.
Testing the door for smooth opening and closing, and proper locking
Before finalizing the installation, it is essential to test the door for smooth opening and closing, as well as proper locking. This will ensure that your storm door functions optimally, providing security and convenience.
To test the smooth opening and closing of the door, slowly open and close it a few times. Pay attention to any resistance or sticking points. If you encounter any issues, you may need to adjust the door’s positioning, hinges, or latch mechanism.
Next, check the locking mechanism to ensure it is working correctly. Test the handle and lock, making sure they engage and disengage smoothly. It is crucial to verify that the door locks securely and stays locked when closed.
Making any necessary adjustments to ensure a secure fit
If you encounter any issues during the testing phase, adjustments may be required to achieve a secure fit for your Anderson storm door. Here are a few troubleshooting steps:
- Check the alignment of the door frame. If it appears misaligned, loosen the screws, carefully adjust the frame, and retighten the screws. This should help the door fit snugly into the frame.
- Inspect the hinges for any misalignment or loose screws. Tighten any loose screws and make adjustments if necessary.
- Ensure that all weatherstripping is properly installed and sealed. This will help prevent drafts and improve insulation.
- If the door is not closing smoothly, you might need to adjust the latch mechanism. Follow the manufacturer’s instructions to make the necessary adjustments.
By addressing these potential issues, you can ensure that your Anderson storm door fits perfectly and provides the desired security and functionality.
Cleaning and maintaining the Anderson storm door for long-lasting performance
To keep your Anderson storm door looking and performing its best for years to come, regular cleaning and maintenance are essential. Follow these steps to maintain its long-lasting performance:
- Use a mild soap and water solution to clean the door’s surface. Avoid using harsh chemicals or abrasive materials as they may damage the finish.
- Gently scrub any dirt or debris using a soft brush or sponge. Pay attention to hard-to-reach areas such as hinges and crevices.
- Rinse the door thoroughly with clean water and dry it using a soft, lint-free cloth.
- Inspect the door’s hardware, such as hinges and latch, for any signs of wear or damage. Tighten loose screws or replace faulty hardware as needed.
- Apply a silicone-based lubricant to the hinges and moving parts to ensure smooth operation.
By following these cleaning and maintenance tips, you can extend the lifespan of your Anderson storm door and maintain its aesthetic appeal.
Frequently Asked Questions On How To Install An Anderson Storm Door
Can I Install A Storm Door By Myself?
Yes, you can install a storm door by yourself. Just follow the manufacturer’s instructions carefully and ensure you have the necessary tools. A step-by-step approach will help you successfully complete the installation process.
How Do You Install An Andersen 3000 Storm Door?
To install an Andersen 3000 storm door, start by measuring the door opening to ensure a proper fit. Next, assemble the door based on the instructions provided. Position the hinge rail and attach it to the door jamb. Install the door handle and closer according to the manufacturer’s guidelines, and make necessary adjustments for proper alignment.
Should A Storm Door Handle Be On The Same Side As The Main Door?
Yes, a storm door handle should be on the same side as the main door for convenient access and functionality. Having the handle on the same side allows for seamless entry and exit without the need to reach across the door.
How Do You Attach A Storm Door To An Existing Door Frame?
To attach a storm door to an existing door frame, follow these steps: 1. Measure and mark the desired location for the storm door. 2. Place the door into the frame and secure it using screws or nails. 3. Install the door handle and latch according to the manufacturer’s instructions.
4. Adjust the door’s closers and sweeps to ensure a proper fit. 5. Test the door to ensure it opens, closes, and locks correctly.
Conclusion
Installing an Anderson Storm Door is a straightforward process that can enhance the security and aesthetic appeal of your home. By following the step-by-step instructions provided in this guide, you can easily achieve professional results. Take the time to gather the necessary tools and materials and carefully follow each step.
Remember, a well-installed storm door can provide numerous benefits, such as improved energy efficiency and protection against the elements. So don’t hesitate to give it a try and enjoy the benefits it brings.
