To install an Andersen 3000 Storm Door, measure the door opening and follow the instructions provided with the door for step-by-step installation. Welcome to the ultimate guide on how to install the Andersen 3000 Storm Door.
A storm door is a popular addition to many homes, offering protection against the elements while allowing for natural light and ventilation. The Andersen 3000 Storm Door is not only sturdy and reliable, but also easy to install. Whether you’re a seasoned DIY enthusiast or a first-time installer, this installation guide will walk you through the process, ensuring a successful installation.
By following the step-by-step instructions provided with the door and having a few basic tools on hand, you’ll have your Andersen 3000 Storm Door installed in no time. Let’s get started!
Gather The Necessary Tools And Materials
Before you start installing your Andersen 3000 Storm Door, it’s important to gather all the necessary tools and materials to ensure a smooth and hassle-free installation process. Having everything you need at your fingertips will save you time and frustration along the way. Here’s a list of the tools and materials you will require:
List of tools required:
- Drill
- Screwdriver (Phillips and Flathead)
- Tape measure
- Level
- Pry bar
- Hammer
- Pencil or marker
- Safety glasses
List of materials needed:
- Andersen 3000 Storm Door
- Mounting screws
- Shim shingles (if needed)
- Weatherstripping
- Expanding foam insulation
Having the right tools will make the installation process much easier. Ensure your drill is charged and your screwdriver has the appropriate bits for the job. A tape measure will help you accurately measure the opening for the storm door, while a level will ensure the door is installed evenly.
Keep a pry bar and hammer nearby in case you need to make any adjustments or remove any existing hardware. One of the most important tools you’ll need is a pencil or marker to mark your measurements and guide your installation process. Lastly, don’t forget to put on safety glasses to protect your eyes during the installation.
Now, let’s move on to the materials you’ll need. The star of the show is the Andersen 3000 Storm Door itself. Make sure you have the correct model and size for your specific needs. You’ll also need mounting screws to secure the door in place.
If your door opening requires it, you may need shim shingles to level the door properly. Weatherstripping is essential to prevent drafts and ensure a tight seal, while expanding foam insulation will help fill any gaps for added insulation.
Having gathered all the necessary tools and materials, you’re now ready to move on to the next step of the installation process: Prepping the Door Opening. Stay tuned for the next installment of our guide!
Measure And Prepare The Opening
Installing an Andersen 3000 Storm Door can enhance the security and aesthetics of your home. Before you begin the installation process, it’s important to accurately measure and prepare the opening. This will ensure a proper fit and make the installation process smoother. In this section, we’ll guide you through the steps of measuring the door opening and preparing it for installation.
Measure the door opening
Measuring the door opening is the first crucial step to ensure a proper fit of your Andersen 3000 Storm Door. With accurate measurements, you can avoid issues like drafts or gaps in the installation. Follow these steps to measure the door opening:
- Start by measuring the width of the door opening. Use a tape measure to measure the distance between the inside edges of the door frame. Record this measurement.
- Next, measure the height of the door opening. Measure from the top of the door frame to the bottom, and record this measurement as well.
- Take note of any irregularities in the opening, such as uneven or sloping surfaces. These may require additional adjustments during installation.
Prepare the opening for installation
Once you have accurate measurements of the door opening, it’s time to prepare it for the Andersen 3000 Storm Door installation. Proper preparation ensures a secure and seamless installation. Follow these steps to prepare the opening:
- Clear the area around the door opening. Remove any obstacles, such as furniture or decorations.
- Inspect the door frame for any damages or rot. If you notice any issues, it’s essential to address them before proceeding with the installation.
- Clean the door frame thoroughly. Remove any debris, dust, or peeling paint to create a smooth surface for installation.
- Check the door opening for levelness and plumbness. Use a level to ensure that the top and sides are straight and vertical. If adjustments are needed, use shims or other appropriate tools to make the necessary corrections.
- Verify that the door opening meets the specifications provided by Andersen for the installation of the 3000 Storm Door. This includes checking the width, height, and any other requirements specified by the manufacturer.
By accurately measuring and properly preparing the opening for installation, you are setting the foundation for a successful Andersen 3000 Storm Door installation. Taking the time to ensure a precise fit will result in a secure and functional storm door that enhances the overall look and performance of your home.
Install The Hinge Rail
When installing an Andersen 3000 Storm Door, one of the crucial steps is to properly install the hinge rail. The hinge rail ensures the smooth operation of the door and ensures its stability. By following a few simple steps, you can successfully attach and secure the hinge rail to the door frame, ensuring its proper alignment.
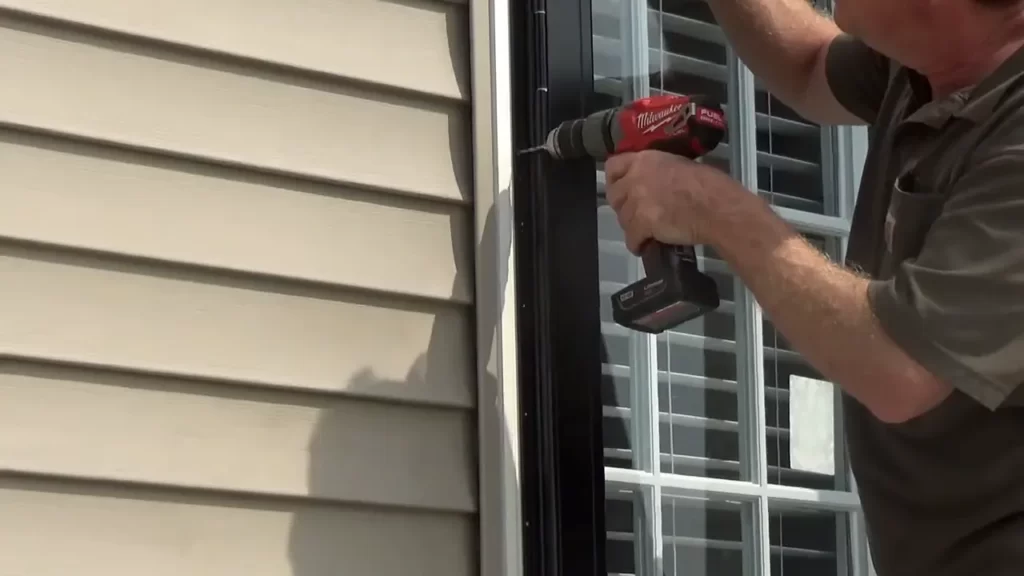
Attach the Hinge Rail to the Door Frame
The first step in installing the hinge rail is to attach it to the door frame. To do this, follow these steps:
- Carefully position the hinge rail against the door frame, ensuring that it aligns perfectly with the edges.
- Using a drill, create pilot holes through the pre-drilled holes in the hinge rail and into the door frame. This will make it easier to insert the screws later on.
- With the pilot holes in place, use a screwdriver or a drill to insert the provided screws into the holes. Make sure to tighten the screws firmly, but not too tight to avoid damaging the door frame.
By following these steps, you will securely attach the hinge rail to the door frame.
Ensure Proper Alignment and Secure the Rail
Proper alignment and securing of the hinge rail are crucial to ensure the optimal functioning of the Andersen 3000 Storm Door. To ensure the alignment and secure the rail, follow these steps:
- Check the alignment of the hinge rail by opening and closing the door. Make sure it moves smoothly without any obstructions or misalignment.
- If the hinge rail is not properly aligned, adjust its position by loosening the screws slightly and shifting it. Once in the correct position, tighten the screws again.
- Once the hinge rail is properly aligned, secure it further by installing the provided screws into the remaining holes along the rail. Make sure to tighten all the screws firmly but not excessively.
By ensuring proper alignment and securing the hinge rail, you will have successfully completed the installation of the Andersen 3000 Storm Door.
Installing the hinge rail of the Andersen 3000 Storm Door is a critical step that ensures the door’s stability and smooth operation. By properly attaching and aligning the hinge rail, you can be confident in the door’s performance and longevity. Follow the steps outlined above, and you will have successfully installed the hinge rail, bringing you one step closer to enjoying the benefits of the Andersen 3000 Storm Door.
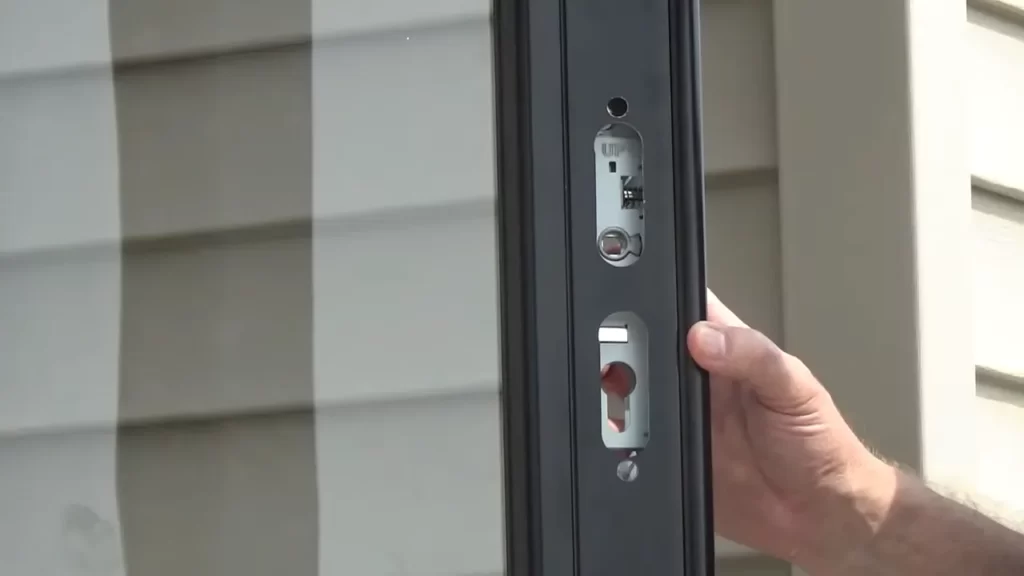
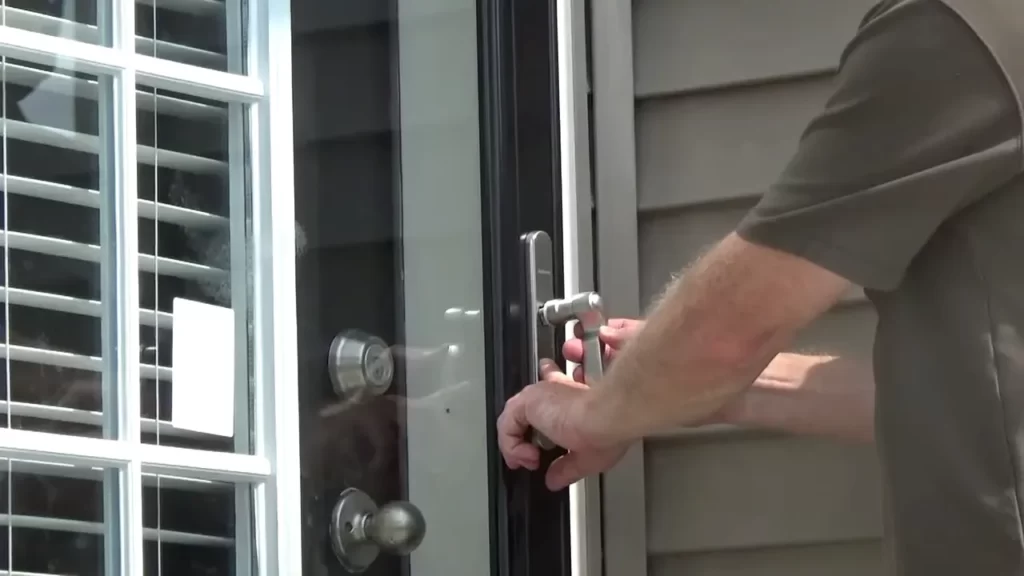
Attach The Door Latch And Handle
After successfully installing the Andersen 3000 Storm Door, the next step is to attach the door latch and handle. The latch and handle are crucial components that not only provide security but also enable easy access in and out of your home. In this section, we will guide you through the process of positioning and securely attaching the latch and handle to the door.
Position the latch and handle on the door
To begin, position the latch and handle on the door according to the manufacturer’s instructions. Ensure that the latch is aligned properly with the corresponding striker plate on the door frame. Take your time to carefully examine the positioning to ensure a smooth operation of the latch and handle.
To assist you in understanding the proper placement, refer to the following table:
| Step | Description |
|---|---|
| Step 1 | Hold the latch against the inside face of the door, making sure it lines up with the striker plate. |
| Step 2 | Position the handle on the outside face of the door, aligning it with the latch. |
Securely attach the latch and handle to the door
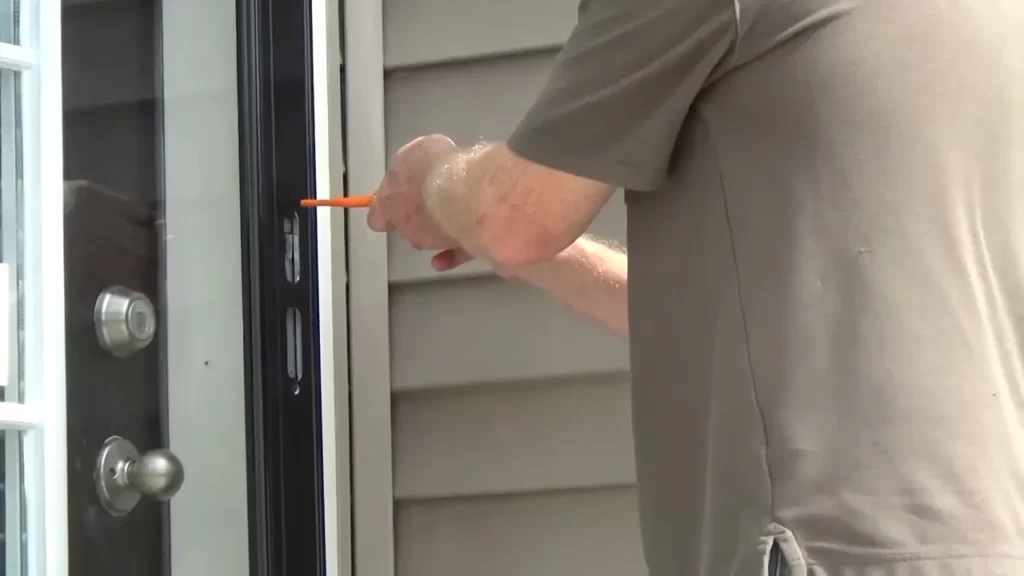
Once the latch and handle are correctly positioned, it’s time to securely attach them to the door. Follow these steps:
- Step 1: Using an appropriately sized screwdriver, secure the latch assembly to the door by tightening the provided screws. Make sure to not overtighten, as it may cause damage to the latch or door.
- Step 2: Next, attach the handle to the door using the screws provided. Align the holes on the handle with those on the door, and then tighten the screws until the handle feels secure and sturdy.
Take a moment to check that the latch and handle are functioning correctly. Firmly press the handle down and ensure that the latch engages smoothly with the striker plate. Test the handle by turning it, ensuring it operates smoothly without any resistance or sticking. If any issues arise, double-check the installation and make any necessary adjustments.
By properly attaching the door latch and handle, you can ensure the long-term functionality and security of your Andersen 3000 Storm Door. Take your time during this step to ensure a successful installation of these essential components.
Align And Attach The Door
Once you have successfully prepped your opening and installed the hinge rail, it’s time to align and attach the Andersen 3000 Storm Door to complete the installation process. Proper alignment and secure attachment are critical to ensuring the door operates smoothly and effectively. Follow these steps to align and attach your storm door:
Align the storm door with the hinge rail
Start by placing the storm door at the bottom of the opening, ensuring that it is aligned with the hinge rail. To achieve proper alignment, take the following steps:
- Check the gap between the door and the jamb on both sides. Make sure the gap is consistent and even. You can use shims to adjust the gap if needed.
- Verify that the top of the storm door is level with the top of the opening. Use a level to ensure accuracy.
- Next, check the reveal on the latch side of the door. The reveal refers to the gap between the door and the jamb. It should be consistent and even from top to bottom.
- Adjust the door as necessary to achieve proper alignment. This may involve slight repositioning and shim adjustments.
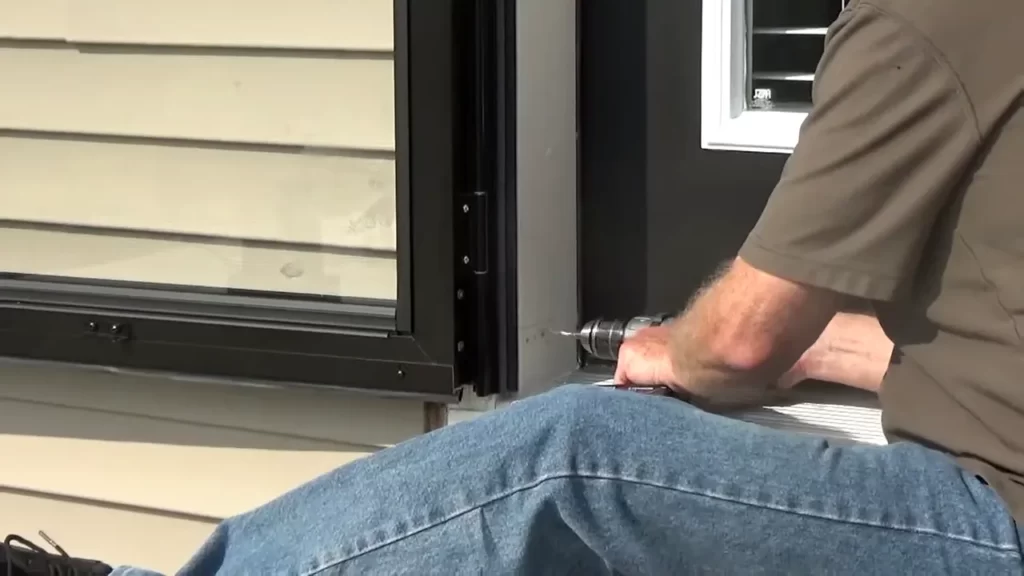
Securely attach the storm door to the hinge rail
Once the storm door is aligned with the hinge rail, it’s time to securely attach it. Follow these steps to ensure a strong and reliable attachment:
- Starting at the top hinge, insert the provided screws through the hinge leaf and into the pre-drilled holes in the hinge rail. Tighten the screws snugly, but avoid over-tightening, as it may lead to misalignment.
- Move to the middle and bottom hinges, repeating the process of inserting screws and tightening them securely.
- Double-check the alignment as you attach each hinge to ensure it remains consistent throughout the installation process.
With the storm door securely attached to the hinge rail, you’ve successfully completed the alignment and attachment phase of installing the Andersen 3000 Storm Door. Next, you can move on to the final steps of the installation process to ensure a fully functional and aesthetically pleasing storm door.
Install The Door Closer
Installing the door closer is a crucial step in ensuring the functionality and security of your Andersen 3000 Storm Door. The door closer mechanism is responsible for smoothly closing the door, preventing it from slamming shut and potentially causing damage. In this section, we will guide you through the process of attaching the door closer mechanism to the storm door and adjusting its tension and speed.
Attach the door closer mechanism to the storm door
The first step in installing the door closer is attaching the mechanism to the storm door. Follow the steps below:
- Locate the pre-drilled holes on the top of the storm door for attaching the door closer mechanism. These holes are specifically designed for this purpose.
- Take the door closer and position it over the pre-drilled holes, ensuring that the arm of the closer is facing towards the hinge side of the door.
- Align the holes on the door closer with the pre-drilled holes on the door, making sure they are properly aligned.
- Insert the screws provided with the door closer into the holes, and using a screwdriver, tighten them securely to attach the door closer to the storm door.
Adjust the tension and speed of the door closer
Once you have attached the door closer mechanism to the storm door, it is important to adjust its tension and speed to ensure optimal performance. Here’s how you can do it:
- Locate the adjustment screw on the door closer. This screw is usually located at the end of the cylinder or on the side.
- Using a screwdriver, turn the adjustment screw clockwise to increase the tension and speed of the door closer, or counterclockwise to decrease them.
- Open and close the door several times to test the tension and speed. Adjust the screw as needed until you achieve the desired results.
- Ensure that the door closes smoothly and latches securely without excessive force or slamming.
By following these simple steps, you will be able to install the door closer for your Andersen 3000 Storm Door and ensure that it operates smoothly and securely. Take your time to adjust the tension and speed to suit your preferences, and enjoy the convenience and protection provided by your storm door.
Adjust The Door Alignment
After successfully installing your Andersen 3000 Storm Door, it’s crucial to ensure that the door is properly aligned. This step is essential for a perfect fit and to avoid any potential issues down the line. In this section, we will guide you through the process of checking the alignment and making any necessary adjustments.
Check the alignment of the storm door
To begin, carefully examine the newly installed Andersen 3000 Storm Door to assess its alignment. Start by opening and closing the door several times, paying close attention to any irregularities, resistance, or misalignment.
Next, check the gaps around the door. Ideally, there should be a consistent gap between the door and the frame, ensuring smooth operation and preventing any gaps which may let in drafts or debris.
Make any necessary adjustments to ensure proper fit
If you notice any misalignment or inconsistencies during your assessment, it’s time to make the necessary adjustments. Here are a few guidelines to help you achieve a proper fit:
- Tighten or loosen screws: Inspect the hinges and other relevant components to ensure they are securely fastened. Loose screws can cause misalignment and hinder the door’s functionality. With an appropriate screwdriver, tighten any loose screws that you find. However, exercise caution not to overtighten and risk damaging the door or frame.
- Adjust the strike plate: The strike plate is the metal plate on the door frame that the latch engages with when the door is closed. If the door is misaligned, it may not latch correctly. To fix this, carefully unscrew the strike plate and reposition it, aligning it with the latch to ensure a proper fit. Once aligned, securely tighten the screws.
- Check for weatherstripping gaps: Examine the weatherstripping around the door to identify any gaps or inconsistencies. Gaps can compromise the door’s energy efficiency and allow drafts into your home. Depending on the severity of the gaps, you may need to replace or adjust the weatherstripping to ensure a tight seal.
Remember, adjusting the door alignment is a crucial step in the installation process, ensuring the longevity and functionality of your Andersen 3000 Storm Door. By following these steps and making any necessary adjustments, you can enjoy a perfectly aligned storm door that enhances both the aesthetics and efficiency of your home.
Install The Door Sweep
One of the key steps in installing the Andersen 3000 Storm Door is attaching the door sweep to the bottom of the storm door. This important component plays a crucial role in ensuring a tight seal against drafts and insects, providing added comfort and peace of mind. In this section, we will guide you through the process of attaching the door sweep and maximizing its effectiveness.
Attach the door sweep to the bottom of the storm door
Attaching the door sweep is a simple yet vital step that requires careful attention. Start by locating the pre-drilled holes at the bottom of the storm door where the door sweep will be attached. These holes are strategically placed to ensure a perfect fit and optimal performance.
Next, take the door sweep and align it with the pre-drilled holes. Secure it by inserting the provided screws through the holes and tightening them using a screwdriver or drill. Ensure that the screws are fastened firmly but not overly tight to avoid damaging the sweep or the door itself.
Once the door sweep is securely attached, double-check for any gaps or loose areas. Gently push and pull the door sweep to see if it remains in place without any wobbling or movement. If there are any issues, adjust the screws as necessary to achieve a secure fit.
Ensure a tight seal against drafts and insects
A properly installed door sweep is essential for a tight seal against drafts and insects that may try to find their way inside your home. To ensure maximum effectiveness, inspect the entire length of the door sweep for any gaps or openings that could compromise its sealing abilities.
- Verify that the door sweep fully extends to the edges of the storm door, leaving no exposed areas where drafts or insects could penetrate.
- Check that the sweep makes consistent contact with the threshold or floor, creating a seamless barrier that prevents any unwanted intrusion.
If you notice any gaps or areas where the seal could be improved, consider adjusting the door sweep’s position or contacting Andersen for further assistance. It is important to address these issues promptly to maintain the storm door’s efficiency and protect your home from external elements.
By properly attaching the door sweep and ensuring a tight seal, you can enjoy the benefits of an Andersen 3000 Storm Door that effectively protects against drafts and insects. Follow the steps outlined above to complete this crucial part of the installation process and enjoy a more comfortable and secure home.
Test And Verify Operation
Test the functionality of the door latch, handle, and closer
Once the Andersen 3000 Storm Door is installed, the next step is to test the functionality of the door latch, handle, and closer. This ensures that the door operates smoothly and securely. Let’s take a closer look at how to perform these tests:
Door latch
The door latch is responsible for keeping the storm door securely closed. To test the functionality of the latch, simply close the door and attempt to open it from the outside. If the latch engages and holds the door firmly in place, then it is functioning properly. On the other hand, if the door can be easily opened without engaging the latch, you may need to adjust the strike plate or latch mechanism.
Handle
The handle of the storm door allows you to open and close it with ease. To ensure that the handle is working properly, simply grasp it and try to open the door. If the handle operates smoothly and the door opens without any issues, then it is functioning correctly. If you encounter any difficulties, such as a stiff handle or difficulty turning the knob, you may need to lubricate the moving parts or adjust the handle mechanism.
Closer
The closer is responsible for the controlled closing of the storm door. To test the functionality of the closer, open the storm door fully and release it. The closer should engage and close the door smoothly and without slamming. If the door closes too quickly or does not close all the way, you may need to adjust the tension or position of the closer. Additionally, check if the storm door locks properly when closing.
Verify that the storm door opens, closes, and locks smoothly
After testing the individual components, it’s important to verify that the storm door as a whole opens, closes, and locks smoothly. Here are the steps to follow:
- Open the storm door fully and observe if it moves smoothly along its track.
- Close the storm door and ensure that it aligns properly with the frame and closes tightly.
- Engage the latch and attempt to open the door from both inside and outside to verify its security.
- Check if the lock engages properly and keeps the storm door locked when closed.
If you encounter any issues during this verification process, such as sticking, misalignment, or difficulty with the lock, you may need to make further adjustments to ensure smooth operation. It’s important to note that smooth and secure operation of the storm door is vital for its functionality and longevity.
Frequently Asked Questions For How To Install Andersen 3000 Storm Door
How To Install Andersen 3000 Storm Door Handle?
To install the Andersen 3000 storm door handle, follow these steps: 1. Begin by removing the existing handle. 2. Align the new handle with the pre-drilled holes on the door. 3. Insert the screws provided and tightly secure the handle. 4.
Test the handle to ensure it functions properly. 5. Enjoy your newly installed Andersen 3000 storm door handle.
What Is The Difference Between Andersen 3000 And 4000 Storm Doors?
Andersen 3000 and 4000 storm doors differ in their features and design. The Andersen 3000 has a full-view glass panel and a retractable insect screen, while the Andersen 4000 has a top and bottom glass panel with a built-in ventilation system.
Both doors offer durability and protection against harsh weather conditions.
How To Install Andersen Easy Install Storm Door?
To install an Andersen easy install storm door, follow these steps: 1) Measure the door opening to ensure proper fit. 2) Attach the door frame to the opening using screws. 3) Secure the door panel onto the frame. 4) Install the door handle and lockset.
5) Adjust the door for proper closing and sealing.
How Do You Adjust An Andersen 3000 Storm Door?
To adjust an Andersen 3000 storm door, follow these simple steps: 1. Ensure the door is closed. 2. Loosen the hinge screws. 3. Adjust the door by either raising or lowering it. 4. Tighten the hinge screws. 5. Test the door’s operation.
Remember to make small adjustments for better results.
How Do You Install An Andersen 3000 Storm Door?
To install an Andersen 3000 Storm Door, start by measuring and preparing the doorway, then attach the hinges and handle. Finally, secure the door in place using the provided hardware.
What Tools Do I Need To Install An Andersen 3000 Storm Door?
To install an Andersen 3000 Storm Door, you will need a measuring tape, drill, screwdriver, level, and a saw for trimming if necessary.
Conclusion
To sum it up, installing the Andersen 3000 Storm Door is a straightforward process that can greatly improve the functionality and aesthetics of your home. With the right tools and following the steps outlined in this guide, you’ll be able to enjoy the benefits of a secure and well-ventilated entrance.
Don’t hesitate to give it a try and enhance the comfort and curb appeal of your home today.