To install a back-up camera, connect it to your vehicle’s power supply and mount the camera. Here are the steps to install a back-up camera in your vehicle.
Installing a back-up camera in your vehicle can greatly enhance safety by providing a clear view of what’s behind you when you’re backing up. In this guide, we’ll walk you through the steps to install a back-up camera, including connecting it to your vehicle’s power supply, mounting the camera, and troubleshooting common issues.
Whether you’re installing a wired or wireless camera, this guide will help you get your back-up camera up and running in no time. So, let’s get started!
Assessing Your Vehicle’S Compatibility
Assessing Your Vehicle’s Compatibility
Before diving into the process of installing a backup camera, it is essential to assess your vehicle’s compatibility. Not all vehicles are equipped to support a backup camera, and it’s crucial to determine if your vehicle can accommodate this valuable safety feature. In this article, we’ll guide you through the steps to assess your vehicle’s compatibility for a backup camera installation.
Determining if your vehicle is compatible with a backup camera
The first step in assessing your vehicle’s compatibility is to determine if it can support a backup camera. While most modern vehicles are compatible, it’s always a good idea to double-check to avoid any disappointment or wasted effort. Here are a few ways to determine if your vehicle can be equipped with a backup camera:
- Consult your vehicle’s owner manual: The owner’s manual is an invaluable resource that provides detailed information about your vehicle’s features and specifications. Look for any mention of the backup camera or rearview display system. If it’s listed as a feature or an option, your vehicle should be compatible.
- Check the rear exterior of your vehicle: Some vehicles come pre-wired or have a built-in module for a backup camera. Take a close look at the rear exterior of your vehicle, near the license plate or tailgate area. If you spot any connectors or small openings specifically designed for a backup camera installation, it’s a positive sign that your vehicle is camera-compatible.
- Research your vehicle’s make and model: If the above methods aren’t conclusive, conducting an online search using your vehicle’s make and model can provide valuable information. There are numerous online forums, blogs, and resources dedicated to vehicle modifications and upgrades. You can often find fellow vehicle owners who have successfully installed a backup camera on the same make and model as yours.
Checking if your vehicle already has a display screen
In addition to determining compatibility, it’s essential to check if your vehicle already has a display screen. A display screen simplifies the installation process as it eliminates the need to purchase and install additional components. Here’s how you can check if your vehicle already has a display screen:
- Inspect the center console: Take a closer look at your vehicle’s center console. Look for a screen, usually located in the dashboard or near the radio unit. If you see a screen that’s not your infotainment system, it might be the display screen for your backup camera.
- Examine your rearview mirror: Some vehicles have integrated display screens within the rearview mirror. These screens can serve as a backup camera display, allowing you to view the rear camera feed while looking through the mirror.
- Review your infotainment system: If your vehicle has an infotainment system with a screen, check its features or settings menu. Many modern infotainment systems have the capability to display the backup camera feed as part of their functionalities.
Assessing your vehicle’s compatibility and checking for an existing display screen are crucial steps before proceeding with a backup camera installation. By doing so, you can ensure a smoother and more successful installation process, saving both time and effort in the long run.
Gathering The Necessary Tools And Equipment
Installing a backup camera is a relatively straightforward process that can greatly enhance the safety and convenience of your vehicle. However, before you begin the installation, it is crucial to gather all the necessary tools and equipment. This will ensure a smooth and efficient installation process without any unnecessary delays or interruptions. In this section, we will discuss the steps involved in researching and purchasing the right backup camera kit, as well as additional tools and equipment required for installation.
Researching and purchasing the right backup camera kit
Before you jump into the installation process, it is important to spend some time researching and purchasing the right backup camera kit for your vehicle. A backup camera kit typically includes a camera, a monitor, and all the necessary wiring and connectors. Here are a few key points to consider:
- Camera quality: Look for a backup camera with a high-resolution image sensor and good low-light performance. This will ensure clear and vivid image quality, even in challenging lighting conditions.
- Monitor size and type: Consider the size and type of monitor that will best suit your needs and preferences. Options range from small screens attached to your rearview mirror to larger, standalone displays.
- Wiring and connectors: Check if the kit includes all the required wiring and connectors for a complete installation. It is essential to ensure compatibility with your vehicle’s existing electrical system.
- Additional features: Some backup camera kits offer additional features like night vision, parking guidelines, and wireless transmission. Assess whether these features are important to you and if they align with your budget.
Once you have done your research and identified the backup camera kit that meets your requirements, proceed with the purchase. Look for reliable online retailers or visit local automotive stores to find the best deal. Make sure to read customer reviews and ratings to gauge the quality and performance of the kit before making a final decision.
Additional tools and equipment required for installation
In addition to the backup camera kit, there are a few tools and equipment you will need to successfully install your new camera. These tools are generally inexpensive and can be easily found at most hardware or automotive stores. Here is a list of the essential items:
| Tools and Equipment | Description |
|---|---|
| Wire strippers | Used to remove the insulation from the wires for proper connections. |
| Wire connectors | Used to join or splice wires together securely. |
| Electrical tape | Used to insulate and protect electrical connections from moisture and damage. |
| Trim removal tool | Helps safely remove any interior trim panels without causing damage. |
| Drill and bits | Required for creating holes to mount the camera and run the wiring. |
| Screwdriver set | Used to tighten or loosen screws during installation. |
It is essential to have all these tools readily available before you begin the installation process. This will ensure a smooth and hassle-free experience, helping you complete the installation efficiently.
Now that you have gathered the necessary tools and equipment, you are ready to move on to the next step of the installation process: preparing your vehicle for installation. Stay tuned for the upcoming section, where we will guide you through this important phase.
Preparing Your Vehicle For Installation
Before you start the installation process for your back-up camera, it’s important to prepare your vehicle to ensure a smooth and successful installation. This involves gathering relevant information from your vehicle’s manual and identifying the best location for the camera and wiring. By following these steps, you can ensure that your back-up camera is installed properly and provides you with the best possible view of what’s happening behind your vehicle.
Gathering relevant information from your vehicle’s manual
Before you dive into installing the back-up camera, it’s crucial to gather all the necessary information from your vehicle’s manual. This information will help you understand your vehicle’s electrical system, wiring diagrams, and any specific requirements or recommendations for installing aftermarket components like a back-up camera.
To find the relevant information, refer to the electrical section or the accessories section of your vehicle’s manual. Look for details on the electrical connections, fuse box locations, and wiring diagrams. This information will be invaluable during the installation process and will guide you in making the right connections and avoiding any potential pitfalls.
Identifying the best location for the camera and wiring
Next, you need to identify the best location for both the back-up camera and the wiring. For the camera, choose a spot that provides an unobstructed view of the area behind your vehicle. Ideally, it should be mounted at the center of the rear, just above the license plate. This location provides a balanced view and ensures optimal visibility.
When it comes to the wiring, you want to ensure that it is hidden and protected, avoiding any interference with other components or moving parts. It’s a good idea to route the wiring along existing wiring harnesses or channels to keep it organized and free from potential damage. Additionally, consider using wire loom or conduit to protect the wires from the elements and any wear and tear.
Moreover, it’s important to check for any existing holes or access points on your vehicle’s body that you can use to route the wiring. If such options aren’t available, you may need to drill a small hole to pass the wires through, ensuring a neat and tidy installation.
To summarize, gathering relevant information from your vehicle’s manual and identifying the best location for the camera and wiring are crucial steps in preparing your vehicle for back-up camera installation. By doing your due diligence and following the manufacturer’s guidelines, you can ensure a successful installation that enhances your driving experience and improves safety.
Installing The Backup Camera
Installing a backup camera is a practical and easy way to enhance your driving experience. With a backup camera installed, you can say goodbye to the stress of parallel parking or maneuvering in tight spaces. In this guide, we will walk you through the step-by-step process of installing a backup camera onto your vehicle, ensuring a hassle-free installation. Let’s get started!
Mounting the camera onto your vehicle
The first step in installing a backup camera is to mount it onto your vehicle. Here’s how you can do it:
- Choose the ideal location for the camera on the back of your vehicle. It’s important to select a spot that provides a clear view of the area behind your vehicle.
- Make sure the mounting surface is clean and free from any dust or debris. This will ensure a secure and stable attachment.
- Use the provided mounting bracket or adhesive to attach the camera to the selected spot. Make sure the camera is firmly secured in place.
- Double-check the alignment and angle of the camera to ensure optimal visibility. You may need to make slight adjustments to achieve the desired view.
By following these steps, you can successfully mount the backup camera onto your vehicle without any hassle.
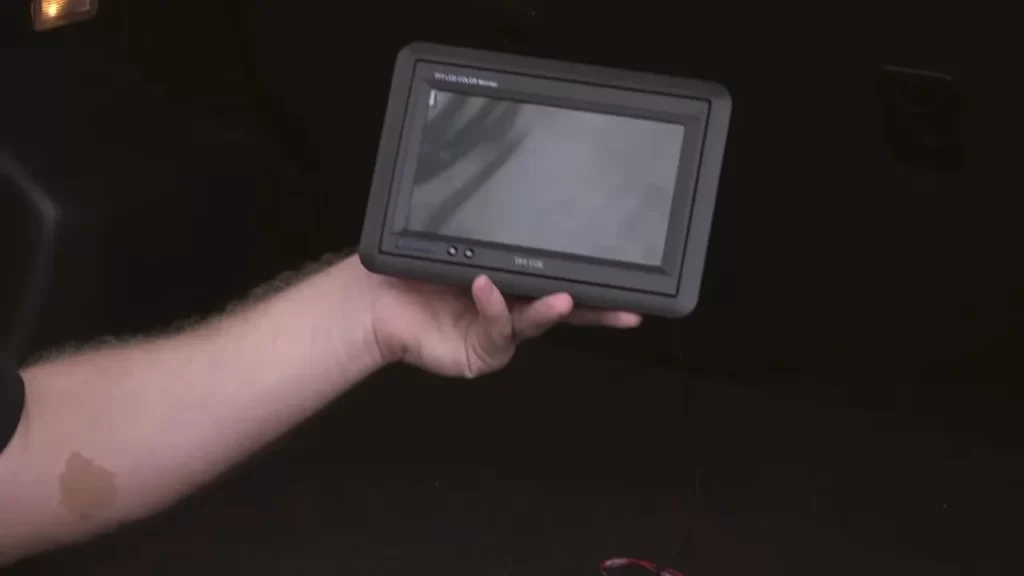
Connecting the camera to the power source and display screen
Once you have mounted the camera, the next step is to connect it to the power source and the display screen inside your vehicle. Here’s what you need to do:
- Locate a suitable power source near the camera. This can be your vehicle’s reverse light wiring or any other power source recommended by the camera manufacturer.
- Carefully connect the camera’s power cable to the chosen power source. Make sure to follow the manufacturer’s instructions to ensure a safe and proper connection.
- Route the camera’s video cable from the back of your vehicle to the display screen inside. You may need to remove some interior panels or trim to properly hide and secure the cable.
- Connect the camera’s video cable to the designated input on the display screen. Again, refer to the manufacturer’s instructions for the specific connection method.
- Test the camera and the display screen to ensure they are working correctly. Engage your vehicle in reverse and check if the camera’s feed is displayed on the screen.
By following these steps, you will successfully connect the backup camera to the power source and display screen, enabling you to enjoy a clear and reliable view while reversing your vehicle.
Installing a backup camera is a worthwhile investment that enhances your safety and makes parking a breeze. By following this guide, you can easily mount the camera onto your vehicle and connect it to the power source and display screen. Say goodbye to parking anxiety and enjoy the convenience and peace of mind that a backup camera brings to your driving experience!
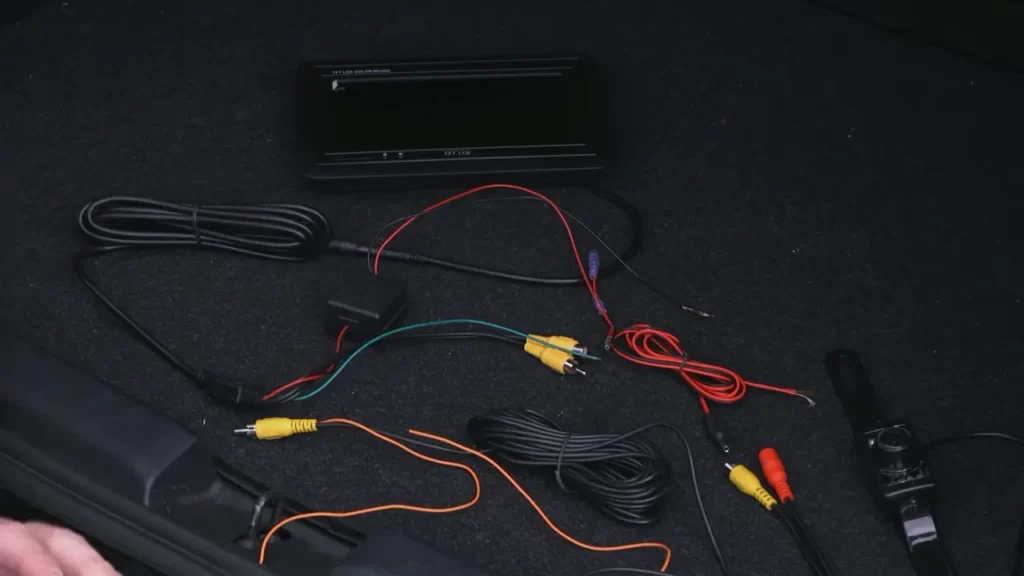
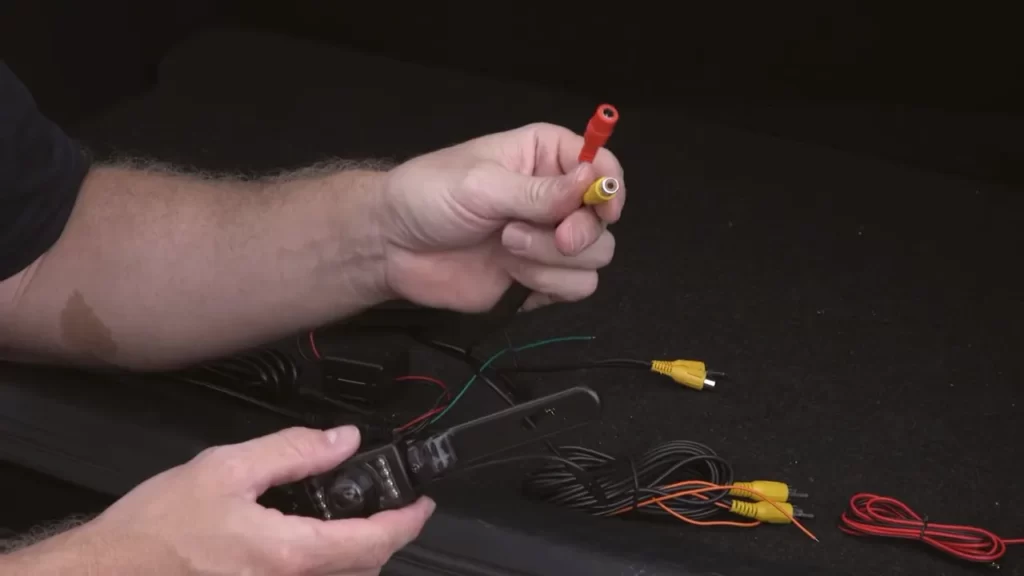
Wiring And Connections
Running the necessary wires from the camera to the display screen
Whether you’re a seasoned DIY enthusiast or a beginner, installing a backup camera can seem like a daunting task. But fear not! With a little patience and some basic knowledge of wiring and connections, you can have that camera up and running in no time. One of the most critical aspects of the installation process is running the necessary wires from the camera to the display screen. Here’s how you can get it done smoothly:
1. Plan your route:
Before you start running any wires, it’s crucial to plan the route you’ll take from the camera to the display screen. Consider the layout of your vehicle and look for existing pathways where you can discreetly hide the wires. This will help ensure a clean and professional-looking installation.
2. Gather the necessary tools and materials:
To tackle this part of the installation, you’ll need a few tools and materials, such as electrical tape, wire strippers, crimp connectors, and zip ties. Having these items on hand will make the process much smoother and efficient.
3. Find a suitable entry point:
Identify a suitable entry point for the wires to go from the exterior to the interior of your vehicle. Look for existing openings like holes or grommets that won’t interfere with any movable parts. If necessary, you may have to drill a small hole and use a rubber grommet for a secure and weather-proof passageway.
4. Hide the wires:
Once you’ve entered the vehicle’s interior, the next step is to hide the wires along the vehicle’s existing wiring harnesses, panels, or under the carpet. This will not only protect the wires from potential damage but also keep them out of sight, maintaining a cleaner aesthetic.
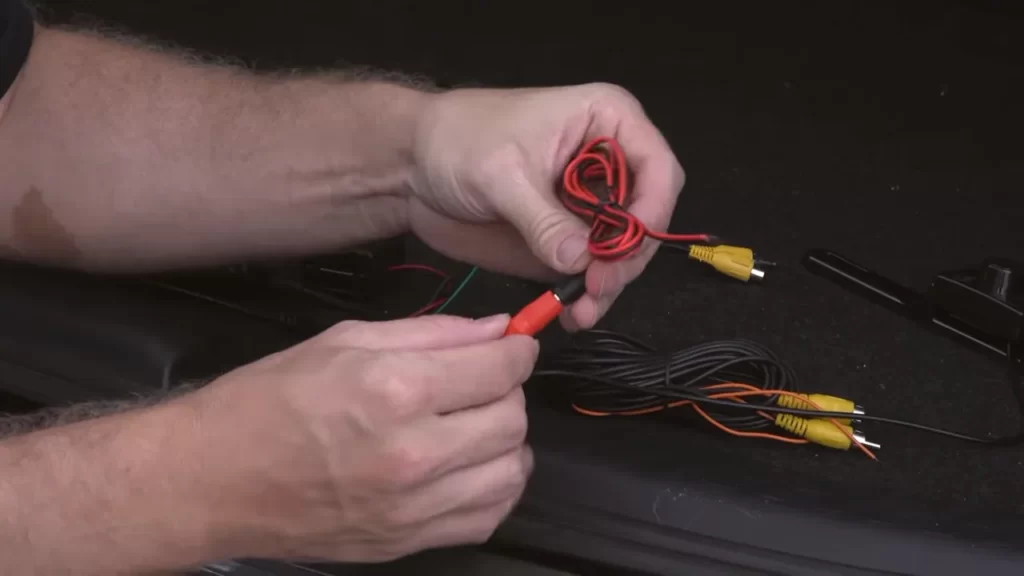
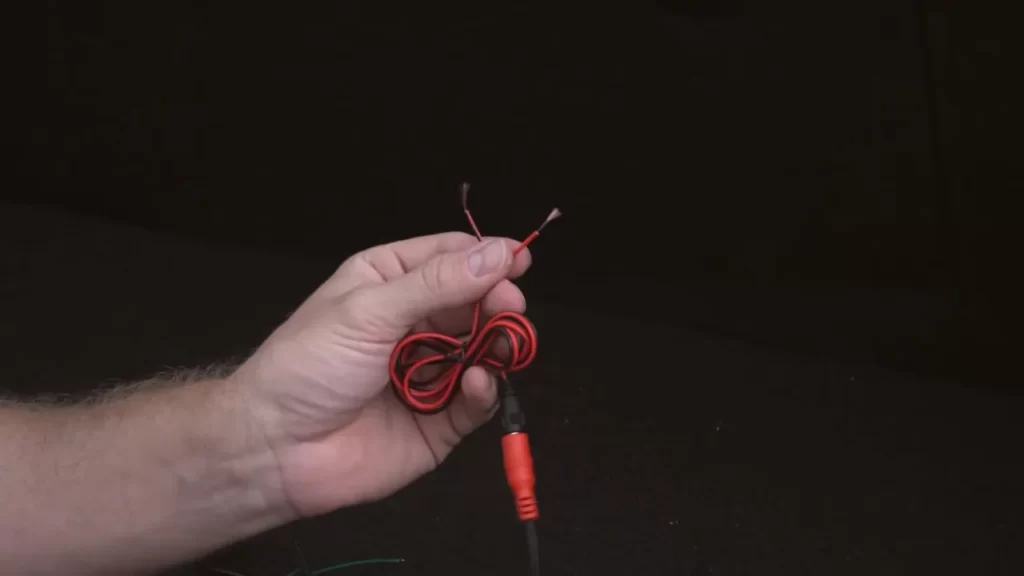
5. Connect the wires:
After running the wires to the desired location of your display screen, it’s time to make the necessary connections. Strip the wire ends using wire strippers and connect them to their corresponding terminals. Be sure to follow the manufacturer’s instructions on which wires go where to ensure proper functionality.
6. Secure the connections:
To ensure secure and proper connections, use crimp connectors or solder the wires together. This will prevent any accidental disconnections and guarantee a reliable connection that stands up to vibrations and vehicle movement.
7. Test it out:
Before tidying up the wires and finishing the installation, it’s essential to test the camera and display screen to ensure everything is functioning as expected. Turn on your vehicle, engage the reverse gear, and observe the live feed from the camera on the display screen. If the image is clear and there are no issues, you’re good to go! Running the necessary wires from the camera to the display screen is a crucial step in installing a backup camera successfully. By following these steps and using the appropriate tools and materials, you’ll be well on your way to enjoying the added convenience and safety of a backup camera system.
Adjusting And Testing The Backup Camera
Adjusting and Testing the Backup Camera Once you have successfully installed your backup camera, the next step is to adjust and test the camera to ensure optimal visibility and functionality. Proper adjustment of the camera’s angle is essential to get a clear view of your surroundings, while testing its functionality will help you identify any issues and troubleshoot them immediately. In this section, we will guide you through adjusting the camera’s angle for optimal visibility and testing the functionality of the camera and screen. ### Adjusting the Camera’s Angle for Optimal Visibility To ensure that your backup camera provides the best possible view, it is crucial to adjust its angle correctly. Here’s how you can do it: 1. Position the vehicle: Park your vehicle on a level surface, preferably in a well-lit area. This will allow you to see the camera’s view more clearly. 2. Locate the adjustment screws: Most backup cameras come with adjustable mounting brackets equipped with screws or knobs. These screws allow you to tilt and swivel the camera until you achieve the desired angle. 3. Adjust the camera angle: Use a screwdriver or your fingers (depending on the type of screws or knobs used) to adjust the camera’s angle. As a general rule, you want the camera to be positioned in such a way that it captures a wide-angle view of what’s behind your vehicle, without obstructing the view of the road. 4. Test the camera’s view: Sit inside your vehicle and turn on the ignition. Put the vehicle in reverse and monitor the camera’s view on the screen. Make sure you can see obstacles and objects clearly, and there are no blind spots in the camera’s coverage. If necessary, make further adjustments to the camera’s angle until you are satisfied with the view. ### Testing the Functionality of the Camera and Screen After adjusting the camera’s angle, it’s time to test its functionality. Follow these steps to ensure that both the camera and the screen are working properly: 1. Check the camera display: Turn on your vehicle’s ignition and shift into reverse. The backup camera’s display should automatically turn on, showing you the view from the camera. Confirm that the camera display is clear, without any distortion or flickering. 2. Test the screen’s brightness and contrast: Adjust the brightness and contrast settings on the screen to ensure optimal visibility. You should be able to see the camera’s view clearly, even in different lighting conditions. 3. Check for any wiring issues: While testing the camera and screen, make sure to inspect the wiring connections for any loose or damaged wires. Faulty wiring can hinder the camera’s performance, so secure any loose connections and replace any damaged wiring if necessary. 4. Evaluate the camera’s functionality: Carefully observe the camera’s view on the screen. Check if the camera captures the entire rear area and if the image quality is clear. Also, test any additional features of the camera, such as parking guidelines or night vision, if applicable. By adjusting the camera’s angle appropriately and thoroughly testing its functionality, you can ensure that your backup camera provides you with a reliable and clear view of what’s behind your vehicle. In the next section, we will discuss some common troubleshooting tips to address any issues you may encounter during the installation or setup process.
Troubleshooting Common Installation Issues
Installing a backup camera in your vehicle can greatly improve your visibility and prevent accidents. However, sometimes installation issues can arise, leading to problems with the camera feed. If you find that your camera feed is not working or displays a poor-quality image, there are a few steps you can take to diagnose and fix the issue.
- Inspect the camera connection: Start by checking the connection between the camera and the wiring harness. Ensure that the connection is secure and free from any dirt or debris that may be interrupting the signal.
- Check the camera power source: Confirm that the camera is receiving power. If the camera is not receiving power, check the fuse associated with the camera or the wiring connections to the power source.
- Examine the camera lens: Sometimes, the camera lens can become dirty or obstructed, resulting in a blurry or distorted image. Gently clean the lens using a soft cloth or lens cleaning solution to improve the clarity of the camera feed.
- Adjust the camera angle: In some cases, the camera angle may need to be adjusted to provide a better view. Experiment with different angles and positions to optimize the camera feed.
- Consider the location of the camera: The placement of the camera can impact the quality of the feed. Ensure that the camera is positioned in a way that provides a clear view without any obstructions or glare.
If you’re experiencing issues with the wiring or display screen of your backup camera system, follow these troubleshooting steps to resolve the problem:
- Inspect the wiring connections: Check all the wiring connections between the camera, display screen, and power source. Ensure that all connections are securely plugged in and free from damage. If you notice any frayed wires or loose connections, repair or replace them as necessary.
- Test the display screen power source: Verify that the display screen is receiving power. If it is not, check the fuse associated with the screen or the wiring connections to the power source.
- Check for wiring polarity issues: Incorrect wiring polarity can cause issues with the camera feed or display screen. Make sure that the positive and negative wires are properly connected to their respective terminals.
- Use a multimeter to test the wiring continuity: A multimeter can help you determine if there are any breaks or interruptions in the wiring. Check the continuity of each wire to ensure they are properly connected.
- Reset the system: If all else fails, try resetting the backup camera system. This can be done by disconnecting the power source for a few minutes and then reconnecting it.
By following these troubleshooting steps, you should be able to diagnose and resolve common installation issues with your backup camera. Remember to refer to the manufacturer’s instructions and seek professional assistance if needed.
Reassembling And Securing Your Vehicle
Now that you’ve successfully installed your back-up camera, it’s time to reassemble and secure your vehicle. This final step is crucial to ensure that everything is in its proper place and that your newly installed camera operates seamlessly. In this section, we’ll cover two essential aspects: securing all loose wires and cables, and putting back any panels or components that were disassembled.
Securing All Loose Wires and Cables
Before you reassemble your vehicle, it’s essential to secure all the loose wires and cables that were connected during the installation process. This step is crucial to prevent any damage or interference with other vehicle components. Here’s how to do it:
- Inspect all the wires and cables for any signs of wear or damage.
- Using zip ties or cable clamps, neatly bundle the wires together. This will help organize them and prevent any tangling or entanglement.
- Secure the bundled wires to existing clips or brackets within your vehicle. This will keep them in place and prevent them from getting tangled or caught on any moving parts.
- Ensure that all connections are tight and properly insulated. Use electrical tape or heat shrink tubing to protect any exposed wires.
Putting Back Any Panels or Components That Were Disassembled
Now that the wires are secured, it’s time to put back any panels or components that were previously removed. This step is crucial to restore the aesthetics and functionality of your vehicle. Follow these steps to ensure a proper reassembly:
- Refer to the notes or documentation you made during the disassembly process. This will help you remember the exact order in which the panels or components were removed.
- Carefully align each panel or component, ensuring that they slot back into their respective places.
- Apply mild pressure to securely position the panel or component, but be cautious not to force it. If it doesn’t fit, double-check the alignment and try again.
- Repeat the process for each panel or component until everything is back in place.
- Inspect the reassembled sections for any gaps or misalignments. Make any necessary adjustments to ensure a snug fit.
- Test any buttons, switches, or functionalities associated with the reassembled panels or components to ensure everything is in proper working order.
By following these steps, you can confidently reassemble and secure your vehicle after installing a back-up camera. Remember, attention to detail and patience are essential during this process to ensure optimal functionality and appearance. Good luck!
Frequently Asked Questions Of How To Install Back Up Camera
Can You Install A Backup Camera Yourself?
Yes, you can install a backup camera yourself. It is a do-it-yourself task that can be easily accomplished.
How Easy Is It To Install A Reverse Camera?
Installing a reverse camera is easy, requiring just a few simple steps. First, choose a suitable camera and mount it on the rear of your vehicle. Next, connect the camera to the power source and route the wiring to the display unit.
Finally, install the display unit in your car’s dashboard.
How Do You Wire Up A Backup Camera?
To wire up a backup camera, first locate the appropriate power source and ground wire in the vehicle. Connect the camera’s power wire to the power source and the ground wire to the ground wire. Then, connect the camera’s video wire to the display screen in the vehicle.
Finally, test the camera to ensure proper functionality.
What Do You Need To Install A Backup Camera?
To install a backup camera, you’ll need a few things: a backup camera kit, a compatible display screen, and the necessary mounting and wiring equipment. Make sure you have the right tools and follow the instructions carefully for a successful installation.
How Do You Install A Back-Up Camera?
To install a back-up camera, first, locate the appropriate spot on your car’s rear. Then, mount the camera and connect it to the power source and display unit inside your car.
Conclusion
Installing a back-up camera can greatly enhance your driving experience and safety on the road. By following these simple steps outlined in this guide, you’ll be able to confidently and easily install a back-up camera in your vehicle. Remember to carefully review the instructions provided by the manufacturer of your specific camera model to ensure proper installation.
Having a back-up camera can provide you with peace of mind and improved visibility, allowing you to navigate tight parking spaces and reverse with ease. Start enjoying the benefits of a back-up camera today!