To install barn door hardware, first, measure and mark the desired height, then attach the track and spacers to the wall. Next, install the hangers on the door and hang it on the track.
Mounting The Track On The Wall
Once you have determined the height and spacing of your barn door track, it’s time to mount it on the wall. This step is crucial as it will ensure stability and smooth operation of your barn door. In this section, we will guide you through the process of securing the track using wall anchors or screws.
Determining the Height and Spacing of the Track
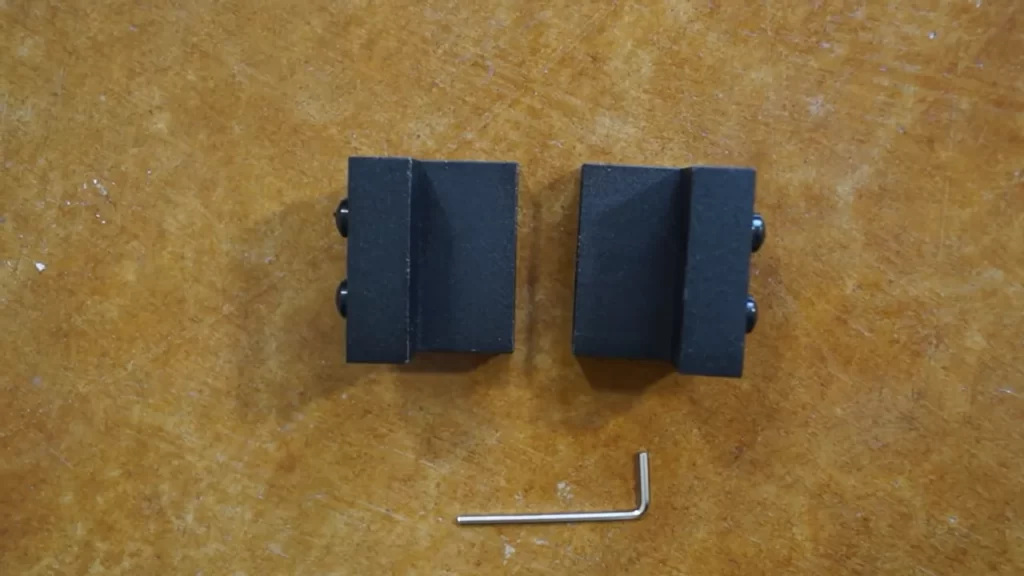
Before you begin mounting the track, take some time to determine the ideal height and spacing. The height of the track should be measured based on the size of your barn door and the clearance needed from the floor. A good rule of thumb is to place the bottom of the track at least 1 inch above the finished floor. This will allow the door to glide freely without any obstructions.
Next, consider the spacing of the track. The track should be positioned in a way that allows the door to slide smoothly without any interference from surrounding objects or furniture. A general guideline is to install the track so that it extends at least 6 inches past the width of the opening on each side. This will provide enough room for the door to fully open.
Securing the Track with Wall Anchors or Screws
Once you have determined the height and spacing, it’s time to secure the track to the wall. Depending on the type of wall surface, you may need to use wall anchors or screws.
For drywall or plaster walls, it is recommended to use wall anchors. Wall anchors provide extra support and prevent the track from pulling away from the wall over time. To install the wall anchors, follow these steps:
- Using a drill bit slightly smaller than the diameter of the wall anchor, drill a hole into the wall at the marked locations.
- Gently tap the wall anchors into the drilled holes until they are flush with the wall surface.
- Align the track holes with the wall anchors and insert the screws provided with the hardware kit.
- Tighten the screws until the track is securely fastened to the wall.
If you have solid wood or masonry walls, you can use screws directly. However, it is important to ensure that the screws are long enough to penetrate into the wall studs or masonry surface. This will provide the necessary strength and stability for your barn door track.
Now that you know how to mount the track on the wall, you are one step closer to enjoying the beauty and functionality of a barn door in your space. Remember to follow the manufacturer’s instructions and take your time to carefully measure and install the track for optimal results.
Attaching The Hangers To The Door
Once you have properly measured and prepared your barn door for installation, it’s time to attach the hangers. These hangers are a crucial component of your barn door hardware, as they will support the weight of the door and allow it to slide smoothly along the track. Follow these steps to ensure a secure and stable attachment:
Aligning the hangers with the pre-drilled holes on the door
Before you can attach the hangers, it’s important to align them with the pre-drilled holes on your barn door. This will provide a secure fit and prevent any unnecessary movement or wobbling. To align the hangers:
- Carefully hold the hangers against the door, ensuring that they are positioned at the desired height.
- Use a level to check that the hangers are perfectly horizontal. This step is essential to ensure smooth sliding of the door along the track.
- Once you’re satisfied with the alignment, mark the locations of the pre-drilled holes using a pencil or marker. These marks will serve as a guide for attaching the hangers.
Installing the hanger bolts or screws
With the hanger locations marked, it’s time to install the hanger bolts or screws. These will securely attach the hangers to the barn door. Follow these steps for a proper installation:
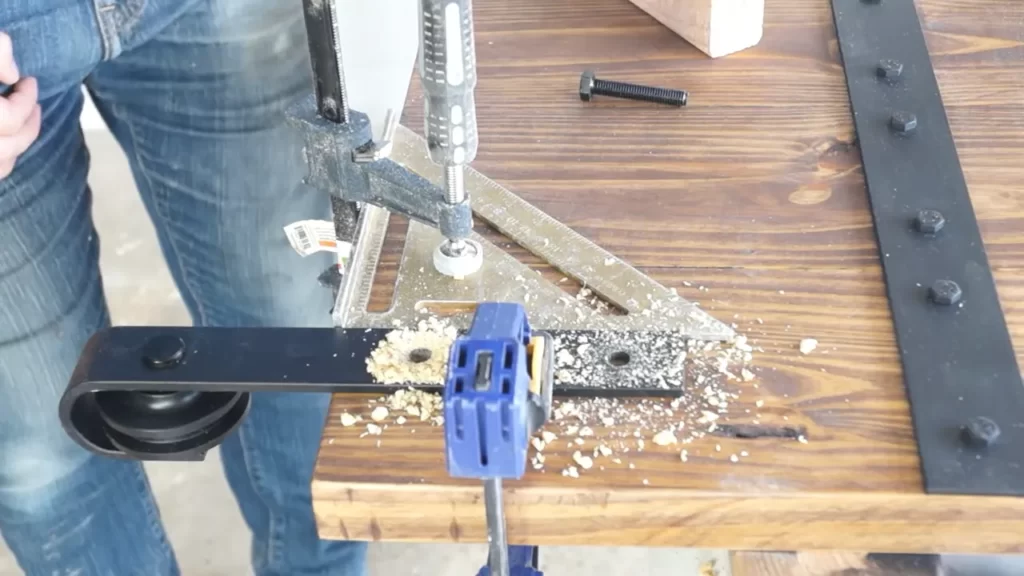
- Begin by drilling pilot holes at the marked locations. The pilot holes will help prevent the wood from splitting when you insert the bolts or screws.
- If you’re using hanger bolts, insert them into the pilot holes and use a wrench or pliers to tighten them securely. Make sure the bolts are tightened enough to provide a stable attachment, but be careful not to overtighten and damage the door.
- If you’re using hanger screws, select an appropriate length for your door’s thickness and screw them into the pilot holes using a screwdriver or drill. Ensure that the screws are tightened securely.
- Repeat the process for each hanger, ensuring that they are aligned and properly attached to the door.
By following these steps to align the hangers with the pre-drilled holes and properly install the hanger bolts or screws, you’ll ensure a secure and durable attachment for your barn door. With the hangers securely in place, you’re now ready to proceed with the next steps of installing your barn door hardware.
Hanging The Door On The Track
Now that you have installed the barn door hardware and prepared the track, it’s time to hang the door itself. This is the exciting part where you see your hard work come together and your barn door starts to take shape. Follow these steps to ensure a smooth installation of the door on the track.
Lifting the Door onto the Track
The first step is to carefully lift the barn door onto the track. This can be a bit challenging as barn doors tend to be heavy and awkward to handle. It is recommended to have someone assist you with this step.
Start by positioning yourself on the side of the door where the handle or pull is installed. Stand facing the door and place your hands near the bottom of the door. With the help of your partner, lift the door slightly off the ground, ensuring a firm grip on both sides.
Next, carefully tilt the door so that it is at an angle, with the bottom of the door closer to the track. Make sure to align the wheels or rollers on the bottom of the door with the track, so they can slide smoothly along it.
Once the door is at the appropriate angle, guide the wheels onto the track. Slowly and steadily, lower the door onto the track, ensuring that the wheels are securely in place.
Double-check that the door is properly aligned and level on the track. The door should move smoothly along the track without any obstructions or resistance. If there is any difficulty in sliding the door, you may need to adjust the position of the wheels or make sure they are properly aligned with the track.
Checking for Smooth Movement
After you have hung the door on the track, it’s important to check for smooth movement to ensure that the door operates properly. Open and close the door several times, testing its movement along the track.
Pay attention to any irregularities in the door’s movement, such as sticking, scraping, or jerking. These issues could indicate that the door is not properly aligned or that there is a problem with the track or hardware. Adjustments may be necessary to ensure optimal functionality.
Make sure to tighten any loose screws or bolts on the track or hardware if you notice any during the testing process. This will prevent any further complications and ensure the barn door operates smoothly.
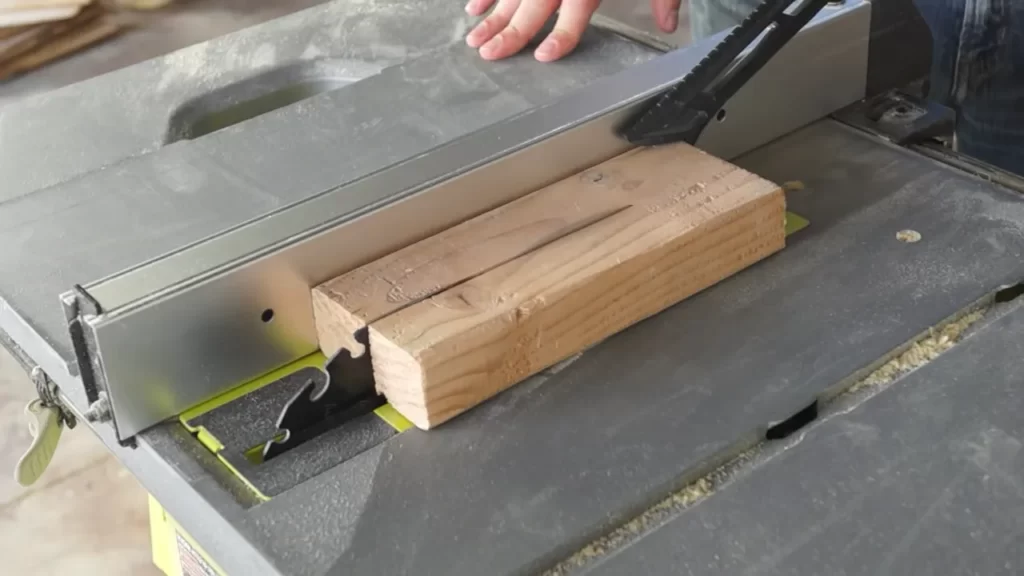
By following these steps, you can successfully hang your barn door on the track and enjoy the aesthetic appeal and functionality it adds to your space. Now that the door is in place, you can move on to the finishing touches and admire your newly installed barn door hardware.
Installing Additional Hardware Components
Once the barn door hardware is securely mounted on the wall, it’s time to move on to the next step: installing additional hardware components. These components not only add functionality but also enhance the overall aesthetic appeal of your barn door. In this section, we will walk you through the installation process of a floor guide and a door handle or pull.
Installing a floor guide
A floor guide is an essential component that helps keep the barn door aligned and prevents it from swinging back and forth. Installing a floor guide is a relatively straightforward process. Follow these steps to ensure it is properly installed:
- Measure the distance between the bottom of the barn door and the floor. This will determine the ideal position for the floor guide.
- Use a pencil to mark the spot where the floor guide will be installed.
- Drill pilot holes into the floor at the marked spots.
- Align the floor guide with the pilot holes and secure it in place using screws.
- Ensure that the floor guide is level and perpendicular to the barn door.
- Test the barn door by sliding it back and forth to make sure it glides smoothly along the floor guide.
Adding a door handle or pull
A door handle or pull not only provides a convenient grip to open and close the barn door but also adds a touch of style. Here’s how you can add a door handle or pull to your barn door:
- Decide on the desired height and placement of the door handle or pull. This will largely depend on your personal preference and the design of your barn door.
- Hold the door handle or pull against the door to determine the best position.
- Mark the screw holes with a pencil.
- Using a drill, create pilot holes at the marked spots.
- Align the door handle or pull with the pilot holes and attach it to the door using screws.
- Check that the door handle or pull is securely attached and test its functionality by opening and closing the barn door.
Installing additional hardware components such as a floor guide and a door handle or pull completes the installation of your barn door. These components not only enhance the functionality but also contribute to the overall aesthetics of your barn door. With these easy-to-follow steps, you can confidently complete the installation process and enjoy the beauty and functionality of your barn door for years to come.
Ensuring The Door Stays Level And Straight
When installing barn door hardware, it is crucial to ensure that the door stays level and straight. This is essential not only for the door to operate smoothly but also for aesthetic reasons, as a crooked door can be visually unappealing. In this section, we will discuss two important aspects of achieving a level and straight barn door: adjusting the track if necessary and checking for any obstructions. Let’s dive in!
Adjusting the track if necessary
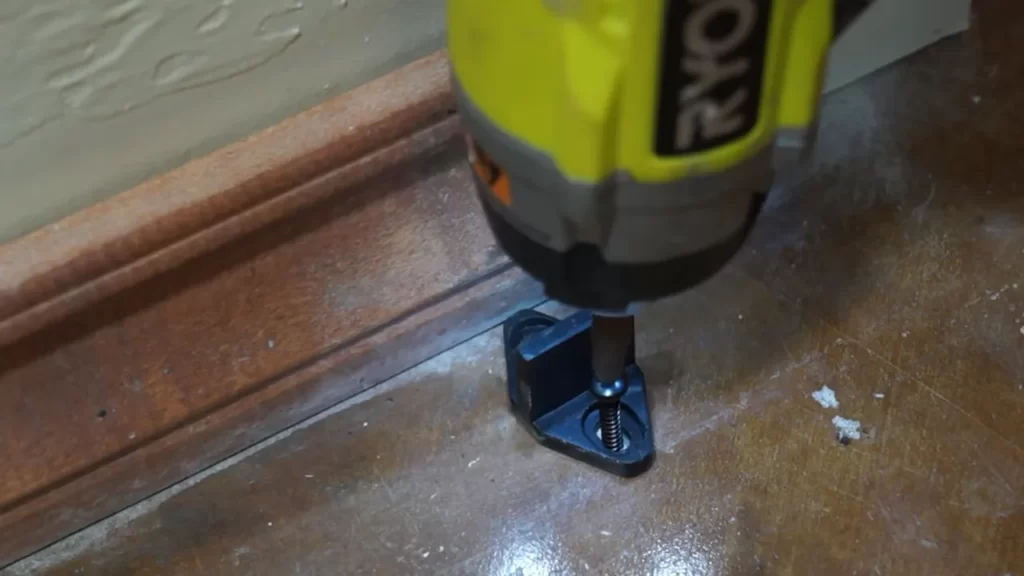
Aim to adjust the barn door track in such a way that it allows the door to slide open and close without any hitches. Here’s a step-by-step guide on how to accomplish this:
- Start by carefully positioning the track on the wall or ceiling, making sure it is level. Use a spirit level to ensure accuracy. If the track is not perfectly level, adjust it by loosening the screws and making minor corrections.
- Next, examine the rollers on the door. If they are too tight or too loose, it could result in an uneven door. To fix this, locate the adjustment screws on the rollers and make the necessary adjustments until the door glides smoothly along the track.
- Once the rollers are adjusted, slide the door along the track to test its movement. If you notice any sticking or resistance, readjust the track or rollers accordingly until the door operates seamlessly from end to end.
Checking for any obstructions
Before attaching the barn door to the track, take a moment to inspect the surrounding area for any potential obstacles that may hinder the door’s movement. Here are some crucial steps to follow:
- Clear the track of any dirt, debris, or obstructions that may obstruct the door’s path. Use a soft brush or cloth to gently remove any particles.
- Ensure that the door has adequate clearance from nearby walls, furniture, or other objects. If there is not enough space, it may cause the door to rub or scrape against these obstructions, affecting its alignment and stability.
- Inspect the floor for any unevenness or irregularities that may cause the door to wobble or become misaligned. If necessary, consider using shims or floor guides to level the door.
By following these steps and ensuring the door remains level and straight, you can achieve a visually pleasing and smoothly operating barn door. Now that you have successfully tackled this crucial aspect of the installation process, it’s time to move on to the next steps. Stay tuned!
Maintaining And Caring For Barn Door Hardware
Maintaining and caring for barn door hardware is essential to ensure its long-lasting functionality and aesthetic appeal. Regular cleaning, checking for loose screws or bolts, and addressing any issues promptly are some key steps to keep your barn door hardware in optimal condition. In this section, we will discuss these maintenance practices in detail.
Cleaning the hardware regularly
Regular cleaning is crucial to remove dust, dirt, and debris that can accumulate on your barn door hardware over time. Here are some steps to clean your hardware:
- Wipe down the hardware with a soft cloth or sponge, dampened with a mild detergent solution.
- Pay special attention to the track and rollers, ensuring they are free from any obstructions or buildup.
- Rinse the hardware with clean water and dry it thoroughly using a clean cloth or towel.
Checking for loose screws or bolts
Regularly inspecting your barn door hardware for any loose screws or bolts is essential to prevent potential issues or accidents. Follow these steps to check for loose hardware:
- First, visually inspect all the screws and bolts to identify any visible loosening.
- Tighten any loose screws or bolts using an appropriate screwdriver or wrench.
- If any screws or bolts are damaged or missing, replace them with new ones of the same specifications.
By ensuring that your barn door hardware is securely fastened at all times, you can avoid any potential disruptions to its smooth operation.
Troubleshooting Common Installation Issues
Even though installing barn door hardware may seem like a straightforward task, certain issues can arise during the process that may hinder the smooth operation of the door. Don’t worry! We’ve got you covered. In this section, we will discuss some common installation issues and provide practical solutions for each one.
Door not sliding smoothly
If your barn door is not sliding smoothly along the track, there are a few potential causes for this problem:
- The track may be dirty or obstructed with dust and debris, hindering the door’s movement. To resolve this, you can clean the track using a soft cloth or brush to remove any accumulated dirt.
- The rollers or wheels attached to the door may be damaged or misaligned. Check the rollers, and if any are loose, tighten them using a wrench. If a roller is damaged, consider replacing it with a new one.
- The door may be too heavy for the hardware. Make sure that the weight of the door does not exceed the recommended limit for the hardware kit you purchased. If it does, you may need to install additional support brackets or upgrade to a stronger hardware kit.
- The door may be rubbing against the wall or the floor. If this is the case, you can adjust the door’s height or use a floor guide to ensure it remains properly aligned.
Door not properly aligned
If your barn door is not properly aligned, it may not close properly or may scrape against the wall. Here are a few steps you can take to resolve this issue:
- Check if the track is level. Use a bubble level to ensure the track is installed evenly and adjust it if necessary.
- Inspect the door for any warping or bending. If the door is not straight, you may need to repair or replace it.
- Verify that the track and the door are parallel to each other. Use a measuring tape to check the distance between the door and the track at different points. If there are discrepancies, you can adjust the track or reinstall it to align properly.
- Ensure that all the screws and fasteners used for installation are tightly secured. Loose screws can cause misalignment and affect the smooth operation of the door.
By troubleshooting these common installation issues, you can ensure that your barn door hardware operates smoothly and efficiently. Remember, a properly installed barn door not only adds a touch of rustic charm to your space but also enhances its functionality. Happy installation!
Frequently Asked Questions For How To Install Barn Door Hardware
How Do You Install Hardware On A Barn Door?
To install hardware on a barn door, follow these steps: 1. Measure and mark the placement of the hardware. 2. Attach the track to the wall using screws and a level to ensure it’s straight. 3. Install the door hangers on the top of the door.
4. Hang the door on the track and test its movement. 5. Lastly, install a door guide at the bottom to prevent swinging.
How High To Hang Barn Door Hardware?
Hang barn door hardware at a height of approximately 8-12 inches above the top of the door frame. This provides enough clearance for the door to slide smoothly and allows for easy installation of the hardware.
How Far From Wall Does Barn Door Stick Out?
The barn door typically sticks out from the wall by about 2-3 inches.
How Far Off The Floor Should A Barn Door Be?
A barn door should be installed about 1 inch off the floor to allow for proper clearance.
Conclusion
To sum up, installing barn door hardware is a straightforward DIY project that can transform the look and functionality of your space. By following the steps outlined in this guide, you can easily achieve a professional and stylish result. Remember to choose the right hardware, measure carefully, and follow the manufacturer’s instructions for a smooth installation process.
With barn door hardware, you can add a touch of charm and practicality to any room in your home. Happy installing!
