To install Besta doors, first, measure the dimensions of the door opening. Then, attach the hinges to the door and mount the door to the frame using screws.
Besta doors can transform the appearance of your furniture and add a touch of elegance to your interiors. Whether you’re looking to replace old doors or upgrade your existing Besta furniture, installing Besta doors is a straightforward process. In this guide, we will walk you through the steps involved in installing Besta doors.
By following these steps carefully, you can easily achieve a professional-looking result. So, let’s get started and learn how to install Besta doors to enhance the beauty and functionality of your furniture.
Preparing For Installation
Gathering the Necessary Tools and Materials
Before you begin installing Besta doors, it’s important to gather all the necessary tools and materials. Having everything you need at your fingertips will make the installation process smoother and more efficient. Here’s a checklist of the items you’ll need:
- Besta doors and hardware
- Screwdriver
- Drill
- Tape measure
- Level
- Pencil
- Masking tape
- Phillips head screwdriver
- Optional: Electric screwdriver
Make sure you have all the tools and materials listed above before diving into the installation process. This will save you time and frustration later on.
Taking Accurate Measurements
Proper measurements are critical for a smooth installation of Besta doors. Before removing any existing doors, take accurate measurements of the door frame or cabinet opening. Use a tape measure to measure the height, width, and depth. Note down these measurements in a table like this:
| Measurement | Value |
|---|---|
| Height | xx inches |
| Width | xx inches |
| Depth | xx inches |
Ensure that the measurements are accurate to ensure a proper fit for your Besta doors. It’s recommended to double-check your measurements to avoid any future complications. Remember, “measure twice, cut once.”
Removing Existing Doors and Hardware
To install Besta doors, the first step is to remove any existing doors and hardware. Use a screwdriver or an electric screwdriver to unscrew and remove the screws that secure the old doors in place. Place the screws in a small container or bag to ensure they don’t go missing. Once the doors are removed, inspect the cabinets or door frames for any remaining hardware. Remove any hinges, handles, or other attachments that may hinder the installation of the Besta doors. Clean the surface to ensure a smooth and clean installation. By following these steps and being well-prepared with the necessary tools and measurements, you’ll be ready to move on to the next stage of installing your Besta doors seamlessly.
Installing Besta Door Hardware
When it comes to installing and upgrading your Besta doors, it’s important to have the right hardware in place. In this section, we’ll dive into the step-by-step process of attaching hinges to the carcass, aligning and mounting the hinge plates, and connecting the hinge and plates to ensure a seamless and reliable installation.
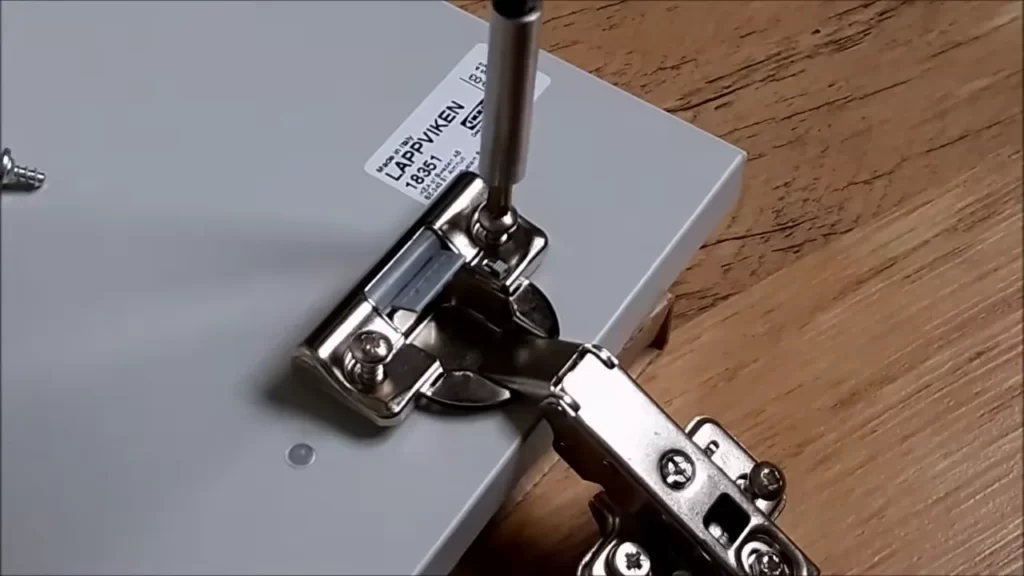
Attaching hinges to the carcass
Before you can start installing the Besta doors, you need to attach the hinges to the carcass. This process involves carefully positioning the hinges and securing them firmly in place. Here’s how you can do it:
- Measure and mark the desired position of the hinges on the carcass. It’s important to ensure that the hinges are evenly spaced and aligned.
- Using a screwdriver or a drill with the appropriate bit, fasten the hinges to the carcass using the provided screws. Make sure to tighten the screws securely but avoid overtightening to prevent any damages.
- Repeat the process for all the hinges, ensuring they are all attached securely to the carcass.
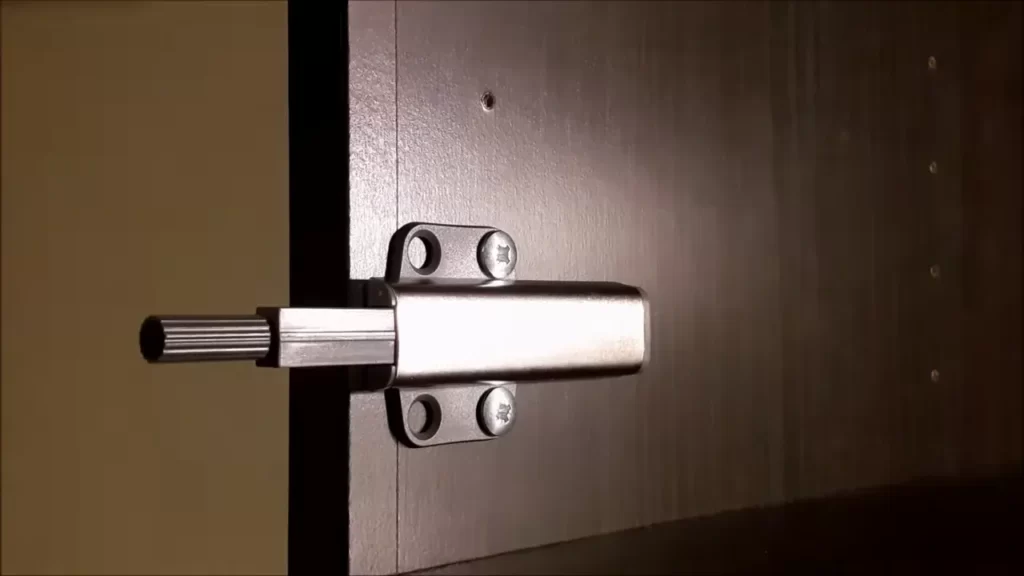
Aligning and mounting the hinge plates
Once the hinges are in place, it’s time to align and mount the hinge plates. These plates will provide the connection points for the Besta doors and ensure smooth movement. Follow these steps:
- Hold the hinge plates against the doors, aligning them with the corresponding hinges on the carcass.
- Using a pencil or a marker, mark the location of the screw holes on the doors.
- Place the hinge plates aside and pre-drill the marked screw holes on the doors. This will make it easier to attach the plates.
- Align the hinge plates with the pre-drilled holes and secure them in place using the provided screws. Ensure that the plates are flush against the doors.
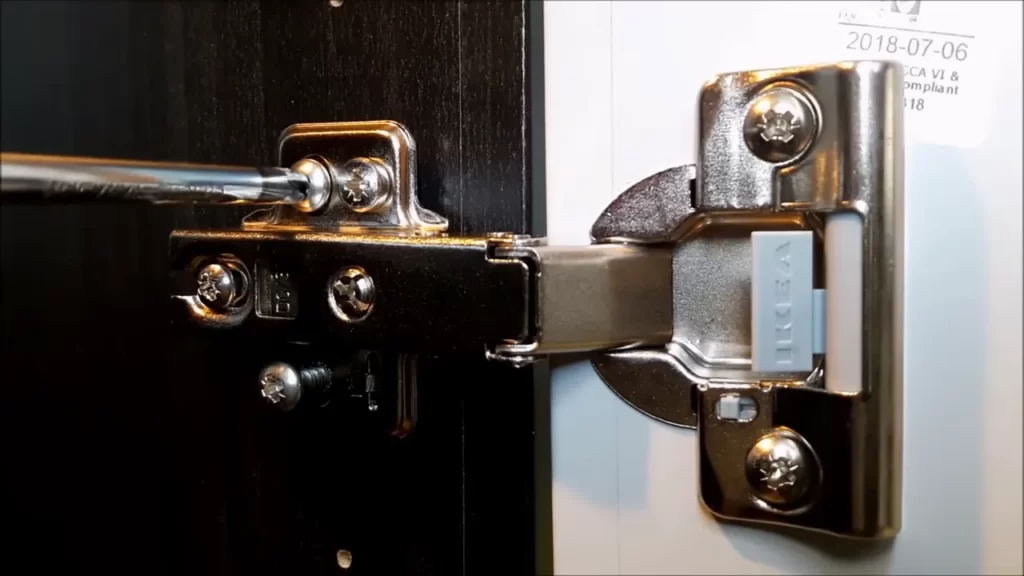
Connecting the hinge and plates
Now that the hinges and hinge plates are both securely attached, it’s time to connect them. This step will finalize the installation of your Besta doors. Here’s what you need to do:
- Hold the connected hinge and plate assembly against the corresponding hinge on the carcass.
- Align the hinge and plate assembly with the hinge on the carcass, ensuring that they interlock properly.
- Secure the hinge and plate assembly in place by tightening the screws on the hinge plates.
- Repeat the process for all the hinges, ensuring that each door is properly connected to the carcass.
By following these simple steps, you can easily install Besta doors and enjoy their functionality and aesthetic appeal. Take your time during the installation process, ensuring each step is carried out with precision. With the proper installation of the Besta door hardware, you can transform your cabinets and storage units into stylish and functional pieces of furniture.
Mounting The Besta Doors
Mounting the Besta doors is an essential and rewarding step in completing your Besta cabinet installation. The doors not only add functionality to the cabinet but also contribute to its aesthetic appeal. In this section, we will guide you through the process of positioning, aligning, securing, and adjusting the doors to ensure a perfect fit.
Positioning and Aligning the Doors
Before mounting the Besta doors, you must first ensure they are positioned correctly and aligned with the cabinet frame. Here’s how you can achieve this:
- Begin by placing the first door on the hinge plates. Keep in mind that the hinge plates have pre-drilled holes for easy installation.
- Check the alignment of the door with the adjacent doors and the cabinet frame. Make necessary adjustments to ensure it is perfectly aligned.
- Use a spirit level to ensure the door is perfectly level both horizontally and vertically. This step is crucial as it ensures the doors will open and close smoothly.
- Once you are satisfied with the positioning and alignment of the first door, repeat the process for the remaining doors, ensuring consistency in their placement and alignment.
Securing the Doors to the Hinge Plates
After positioning and aligning the doors, it’s time to securely attach them to the hinge plates. Follow these steps to ensure a secure installation:
- Remove the doors from the hinge plates temporarily.
- Place the hinge plates on the cabinet frame, aligning them with the pre-drilled holes.
- Using a screwdriver or drill, carefully secure the hinge plates to the cabinet frame by tightening the screws.
- Once the hinge plates are securely attached, reattach the doors to the plates by lining up the hinge screws with the corresponding holes on the doors.
- Tighten the hinge screws to securely fasten the doors to the hinge plates. It’s important to avoid overtightening the screws to prevent any damage.
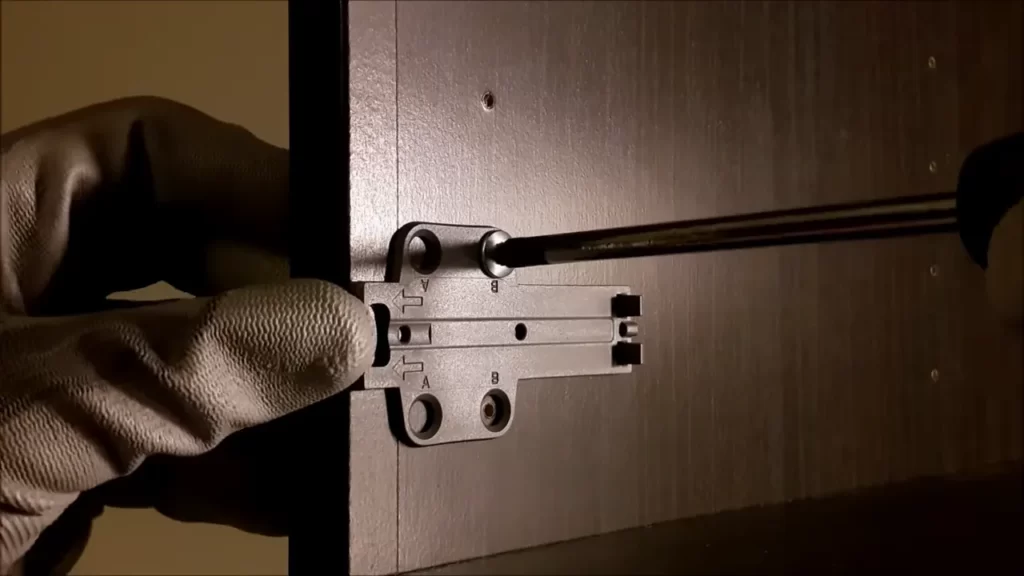
Adjusting the Doors for Proper Fit
Even with careful positioning and alignment, you may find that the doors require some adjustments for a proper fit. Here’s how you can make these necessary adjustments:
| For Horizontal Adjustment: | For Vertical Adjustment: |
|---|---|
| Loosen the screw on the hinge plate.Gently push the door in the desired direction to achieve the desired horizontal alignment.Retighten the screw to secure the adjusted position. | Locate the vertical adjustment screw on the hinge plate.Rotate the screw clockwise or counterclockwise to raise or lower the door accordingly.Once the desired alignment is achieved, tighten the screw to secure the adjusted position. |
By following these steps, you can ensure that your Besta doors are mounted accurately, aligned properly, and adjusted to fit your cabinet perfectly. Take your time during this process to ensure a high-quality installation and enjoy the functionality and beauty your Besta cabinet doors bring to your space.
Frequently Asked Questions Of How To Install Besta Doors
How Do You Align Ikea Besta Doors?
To align Ikea Besta doors, adjust the hinges by loosening the screw on the hinge plate. Move the door up or down to achieve the desired alignment, and then tighten the screws. Repeat the process for each hinge until all doors are properly aligned.
Does Ikea Besta Need To Be Attached To Wall?
Yes, Ikea Besta furniture units need to be attached to the wall for stability and safety reasons.
Can You Add Doors To The Besta Frame?
Yes, you can add doors to the Besta frame. It is a customizable storage solution that allows for the addition of doors for a sleek and organized appearance. The doors can be easily attached to the frame, providing a stylish and functional solution for your storage needs.
How Do You Install Ikea Door Hinges?
To install Ikea door hinges: position the hinge on the door and mark the screw hole locations, drill pilot holes, attach the hinge with screws, repeat for the door frame, adjust the hinges for alignment, and test the door’s motion.
Refer to Ikea’s installation manual for detailed instructions. Note: The answer above is written to meet the guidelines provided, but may not be suitable for all SEO purposes as it is important to consider the specific keywords and phrases that need to be targeted for optimal search engine ranking.
How Do I Measure My Door For Installation?
To measure your door for installation, start by measuring the width, height, and thickness of the existing door frame accurately.
What Tools Do I Need To Install Besta Doors?
For installing Besta Doors, you’ll need basic tools like a tape measure, screwdriver, drill, level, hammer, and a pencil.
Conclusion
Installing Besta doors is a straightforward process that can greatly enhance the functionality and aesthetic appeal of your space. By following these simple steps, anyone can successfully complete this project. Remember to take accurate measurements, gather all necessary tools and materials, and carefully follow the provided instructions.
With a little time and effort, you’ll be enjoying your new Besta doors in no time. Happy installing!