To install a Blink camera on a brick wall, you will need a drill, anchors, screws, and a screwdriver. First, hold the camera mounting bracket against the wall and mark the anchor locations.
Next, drill holes into the marked spots, insert the anchors, and secure the bracket using screws and a screwdriver. Installing a Blink camera on a brick wall is a simple process that requires a few tools. By following these steps, you can ensure a secure and effective installation.
Choosing The Right Location For Your Blink Camera
Choosing the right location for your Blink camera is crucial for maximizing its effectiveness in monitoring your property. Whether you’re looking to install it on a brick wall for added security or for other reasons, considering certain factors and following proper installation procedures is essential. In this section, we will explore the factors to consider, how to measure and prepare the installation area, and the tools and materials you will need for a successful Blink camera installation on a brick wall.
Factors to Consider
Before proceeding with the installation, it’s important to evaluate several factors to ensure you choose the most suitable location for your Blink camera.
- Visibility: Select a spot on the brick wall that provides a clear view of the area you intend to monitor. Avoid obstructing objects such as tree branches or cluttered spaces that may impair the camera’s visibility.
- Range: Consider the range of the Blink camera and make sure the chosen location covers the entire area you want to monitor. Take into account any blind spots or places that may be too far out of reach for the camera’s view.
- Power source: Ensure the selected location is within reach of a power outlet or has suitable access to a power source for uninterrupted camera operation. Consider the length of the power cord and any necessary extensions.
- Protection: Take into account the weather conditions in your area. Choose a location that protects the camera from direct exposure to rain, snow, or extreme heat, ensuring the longevity of the device.
Measuring and Preparing the Installation Area
Now that you’ve considered the relevant factors, it’s time to measure and prepare the installation area on the brick wall.
- Measurements: Use a measuring tape to determine the height and distance from the ground that suits your monitoring needs. Ensure the desired location adheres to the manufacturer’s recommendations for optimal camera performance.
- Surface Preparation: Clean the chosen area on the brick wall from any dust, dirt, or debris that may affect the camera’s adherence. Use a brush or cloth to remove any loose particles and create a clean surface to work with.
Tools and Materials Needed for Installation
Before starting the installation process, gather the necessary tools and materials to ensure a smooth and efficient setup.
| Tools | Materials |
|---|---|
| DrillScrewdriverLevel | Blink cameraCable clipsScrews and anchors |
Having these tools and materials ready will save you time and frustration during the installation process on the brick wall.
By considering the relevant factors, measuring and preparing the installation area correctly, and having the necessary tools and materials at hand, you will be well-prepared to install your Blink camera on a brick wall. In the next section, we will guide you through the step-by-step process of mounting the camera securely and configuring it for optimal performance.
Step 1: Preparing The Blink Camera For Installation
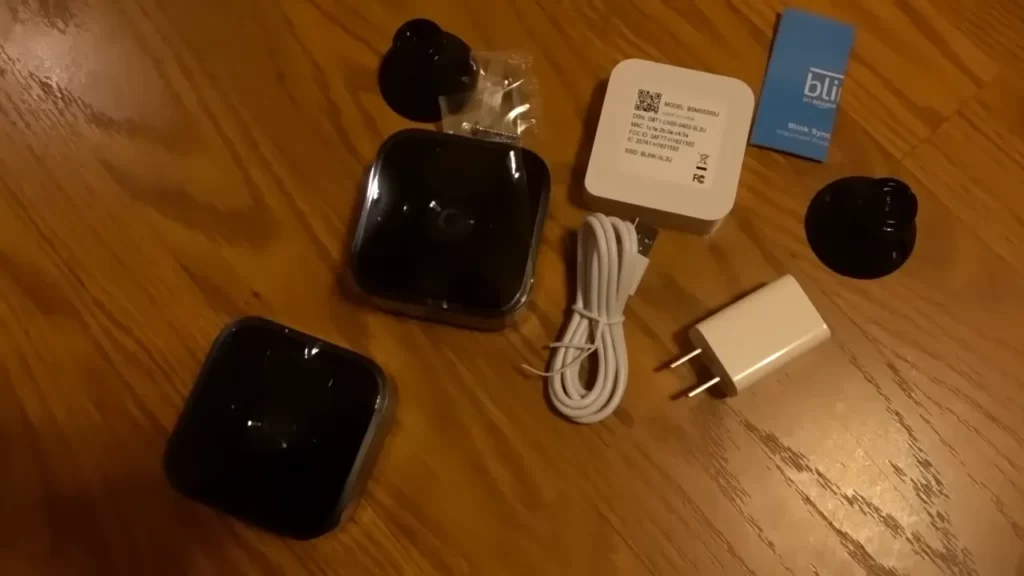
Your brand new Blink Camera is ready to be installed on your brick wall, but there are a few things you need to do before you can start. In this step, we will guide you through unboxing and assembling the camera, charging the battery, and connecting the sync module.
Unboxing and Assembling the Camera
Before you can install the Blink Camera, you need to unbox and assemble it properly. Follow these simple steps:
- Open the package and take out all the contents, including the camera, mounting bracket, screws, and user manual.
- Take the camera and attach it to the mounting bracket. Make sure it is securely attached.
- Position the camera at the desired location on the brick wall, ensuring it has a clear line of sight for the best coverage.
- Using a pencil, mark the spots where you will be drilling holes for the screws.
- Remove the camera from the mounting bracket and set it aside.
Charging the Battery
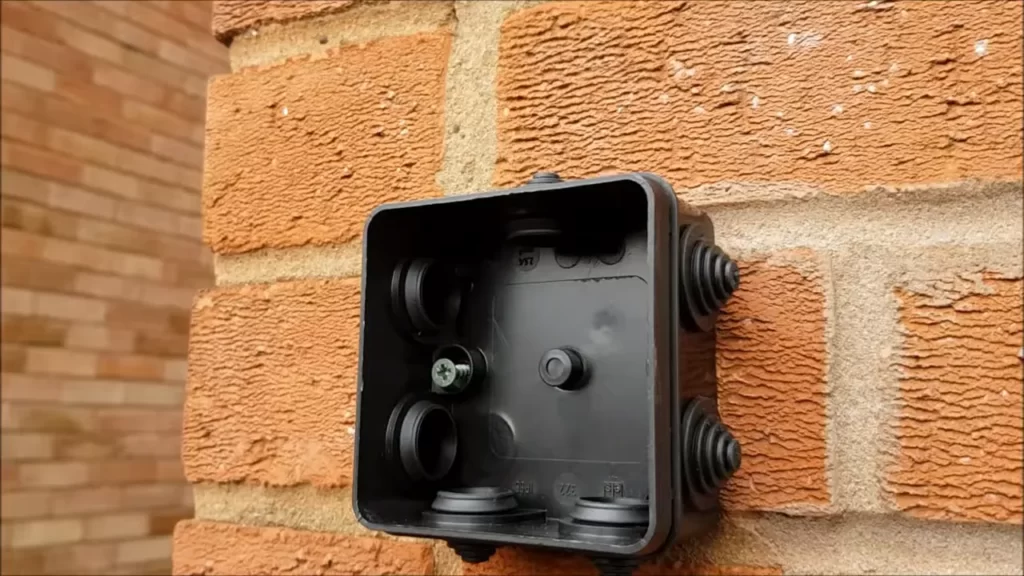
Now that the camera is assembled and ready for installation, it’s time to charge the battery. Here’s how you do it:
- Locate the micro-USB port on the back of the camera.
- Connect the provided USB cable to the camera and plug the other end into a power source.
- Once connected, the camera’s LED indicator should start blinking to indicate that it is charging.
- Leave the camera charging until the LED indicator remains solid, indicating that the battery is fully charged.
- Once the battery is fully charged, disconnect the USB cable from the camera.
Connecting the Sync Module
The last step in preparing the Blink Camera for installation is connecting the sync module. Follow these simple steps:
- Locate the sync module and connect the provided power adapter to it.
- Plug the power adapter into a power outlet.
- Use the provided Ethernet cable to connect the sync module to your router.
- Wait for the LED indicator on the sync module to turn blue, indicating that it is ready for setup.
With the camera assembled, battery charged, and sync module connected, you are now ready to move on to the next step of installing the Blink Camera on your brick wall.
Step 2: Finding The Perfect Spot On Your Brick Wall
Assessing the Line of Sight and Coverage Area
Before installing your Blink camera on a brick wall, it’s crucial to assess the line of sight and coverage area to ensure optimal performance. Start by determining where you want the camera to be positioned and then consider the following:
- Identify any potential obstructions that might block the view, such as trees, walls, or furniture.
- Ensure that the area you want to monitor is within the camera’s field of view.
- Take note of any blind spots that may exist and consider adjusting the camera angle or adding additional cameras for comprehensive coverage.
- Remember to position the camera high enough to avoid tampering while maintaining a clear view.
Determining the Mounting Height
The height at which you mount your Blink camera on a brick wall plays a significant role in securing an uninterrupted view while ensuring the camera remains out of reach. Here’s how to determine the ideal mounting height:
- Consider the purpose of your camera installation. If you want to monitor the activity at a front entrance, for example, a higher mounting height may be ideal for better facial recognition.
- Ensure your camera is positioned at a height that’s inconspicuous but provides an unobstructed view.
- Take into account potential vulnerabilities, such as easy accessibility for theft or tampering, and adjust the mounting height accordingly.
- Keep in mind any local regulations or guidelines that may dictate the allowed height of camera installations.
Marking the Spot for Installation
Once you’ve determined the line of sight and mounting height for your Blink camera installation, it’s time to mark the spot on your brick wall. Here’s a simple step-by-step guide:
- Use a level to ensure your camera will be mounted straight and in the desired position.
- Place the camera mount against the wall at the chosen height and mark the positions of the screw holes with a pencil or marker.
- Double-check the markings to ensure accuracy before proceeding.
- Drill pilot holes at the marked spots to make the installation process smoother.
By following these steps, you’ll be well on your way to finding the perfect spot on your brick wall and installing your Blink camera with confidence and precision.
Step 3: Mounting The Blink Camera On The Brick Wall
Selecting the Proper Mounting Bracket
Before you can mount your Blink camera on a brick wall, you need to make sure you have the appropriate mounting bracket. The right mounting bracket ensures that your camera is secure and properly aligned. When selecting a bracket, consider factors such as the size and weight of your camera, as well as any additional features you may require. It’s crucial to choose a bracket that is compatible with both your Blink camera and the texture of your brick wall.
Anchoring the Bracket to the Wall
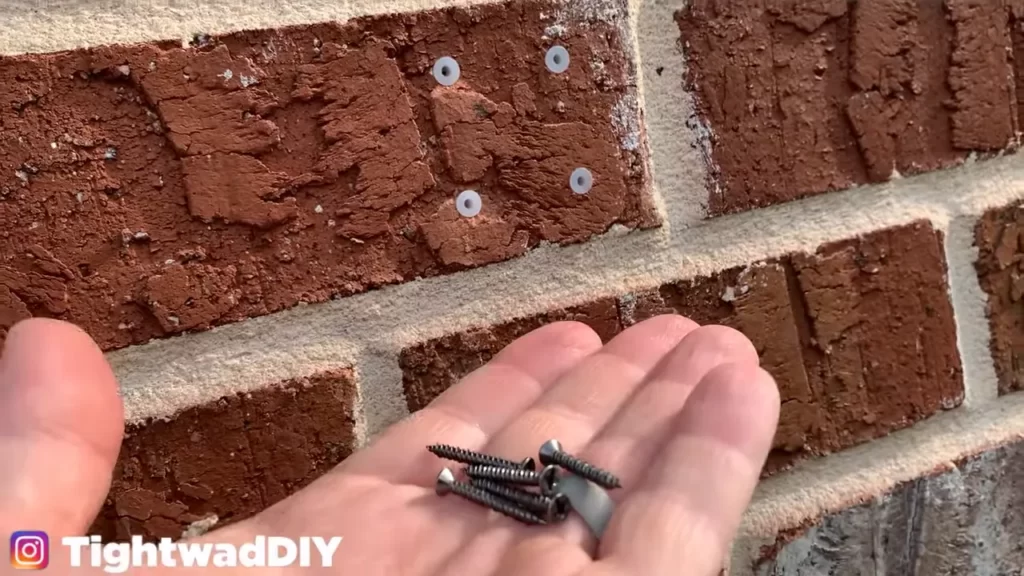
Once you have chosen the ideal mounting bracket, it’s time to anchor it to the brick wall. Anchoring the bracket properly is essential for the long-term stability and security of your camera. Start by determining the best location for mounting the bracket. Use a pencil or marker to draw marks on the wall where the bracket holes will go. Ensure that the marks are level and centered to achieve the best camera angle. After marking the spots, use a masonry drill bit to create pilot holes. This step is crucial for preventing the brick from cracking or breaking when you insert the anchors. Make sure the drill bit is properly sized for the anchors you will be using. Once the pilot holes are in place, insert the anchors into the holes. Gently tap them with a hammer to ensure they are securely in place.
Attaching the Camera to the Bracket
With the bracket securely anchored to the brick wall, it’s time to attach the Blink camera. Before mounting, make sure the camera’s batteries are fully charged, and all necessary adjustments, such as the field of view, have been made. To attach the camera, refer to the specific instructions provided by the manufacturer. Typically, this involves aligning the camera’s mounting plate with the bracket and securing it in place using the provided screws or mounting hardware. Ensure that the camera is level, straight, and securely attached to the bracket. Before finalizing the installation, take a few steps back to confirm that the camera is properly positioned and capturing the desired view. Make any necessary adjustments to the orientation or angle of the camera. Once you are satisfied with its placement, give the camera a gentle shake to ensure it is firmly attached to the bracket. Now that you have successfully mounted your Blink camera on the brick wall, you can enjoy the enhanced security and peace of mind it provides. With its optimal positioning and secure attachment, your camera will effectively monitor your surroundings, granting you a sense of safety.
Step 4: Adjusting The Blink Camera For Optimal Performance
Once you have successfully installed your Blink Camera on the brick wall, it’s time to fine-tune the camera’s settings to ensure optimal performance. Follow these steps to make sure your camera captures the best possible footage:
Positioning the Camera at the Right Angle
Proper positioning of the Blink Camera is crucial to maximize its field of view and ensure that no important details are missed. Here’s how to position it at the right angle:
- Take note of the area you want to monitor and identify any potential blind spots.
- Use a ladder or step stool to reach the camera, if necessary.
- Adjust the camera’s angle by gently tilting it up, down, or to the sides until the desired coverage area is targeted.
- Make sure the camera lens is clean and free from obstructions that could affect image quality.
Fine-tuning the Motion Detection Settings
Blink cameras come with customizable motion detection settings that allow you to adjust sensitivity and other related parameters. Follow these steps to fine-tune the motion detection settings:
- Access the Blink app on your smartphone or computer.
- Navigate to the camera’s settings and select “Motion Detection Settings.”
- Adjust the sensitivity level to avoid false alerts caused by irrelevant movements such as swaying trees or passing vehicles.
- Experiment with the motion detection range to ensure it covers the desired area without triggering unnecessary recordings.
Testing the Camera’s Field of View and Recording Quality
Before considering the installation process complete, it’s important to test the camera’s field of view and recording quality. Follow these steps to ensure everything is working as expected:
- Walk through the monitored area to confirm that the camera captures footage whenever movement occurs.
- Inspect the recorded videos to ensure they are clear, sharp, and without any distortions.
- If necessary, reposition the camera or adjust its settings based on your findings during the testing phase.
By carefully positioning your Blink Camera, fine-tuning the motion detection settings, and thoroughly testing the camera’s field of view and recording quality, you can ensure that your camera is optimized to provide reliable surveillance for your home or property.
Step 5: Connecting The Blink Camera To Your Home Network
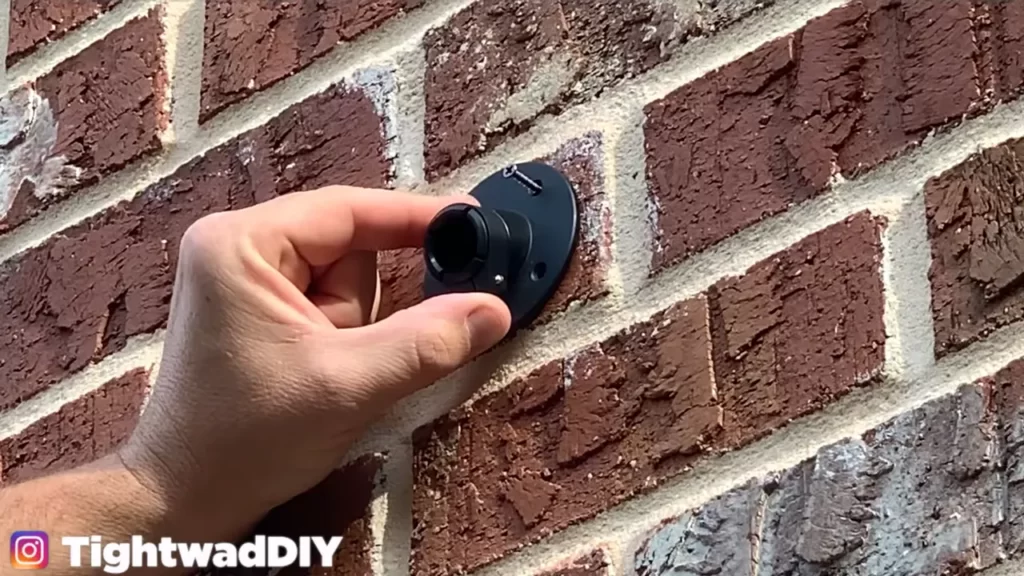
Now that you have successfully mounted your Blink Camera on the brick wall, it’s time to connect it to your home network. This will ensure that you can access the camera’s live feed and receive alerts on your smartphone or tablet.
Setting Up the Wi-Fi Connection
The first step in connecting your Blink Camera to your home network is to set up the Wi-Fi connection. Follow these simple steps to get started:
- Launch the Blink app on your smartphone or tablet.
- Select the Blink Camera you want to connect to Wi-Fi.
- Tap on the ‘Settings’ option for the selected camera.
- Under the ‘Device Information’ section, tap on ‘Wi-Fi Setup’.
- On the ‘Camera Wi-Fi Setup’ screen, tap on ‘Start Wi-Fi Setup’.
- Follow the on-screen instructions to connect your Blink Camera to your home Wi-Fi network.
Once the connection is established, the Blink Camera will automatically reconnect to the Wi-Fi network every time it is powered on. This ensures a seamless and uninterrupted surveillance experience.
Configuring the Camera Settings through the Blink App
After setting up the Wi-Fi connection, the next step is to configure the camera settings according to your preferences. The Blink app provides you with various customization options to enhance your surveillance experience.
To configure the camera settings, follow these steps:
- Open the Blink app on your smartphone or tablet.
- Select the Blink Camera you want to configure.
- Tap on the ‘Settings’ option for the selected camera.
- Explore the different settings options such as video quality, motion detection sensitivity, recording length, and more.
- Customize the settings according to your requirements.
- Once you are satisfied with the changes, tap on ‘Save’ to apply the settings to your Blink Camera.
By configuring the camera settings through the Blink app, you can optimize the camera’s performance and ensure that it captures the footage you desire.
Verifying the Camera’s Live Feed and Alerts
Finally, it’s essential to verify that your Blink Camera is working correctly by accessing its live feed and ensuring that you receive alerts when motion is detected. Follow these steps to verify the camera’s live feed and alerts:
- Open the Blink app on your smartphone or tablet.
- Select the Blink Camera you want to monitor.
- Tap on the ‘Live View’ option to access the camera’s live feed.
- Verify that the live feed is displayed correctly and the video quality is satisfactory.
- Try out the motion detection feature by moving in front of the camera and checking if you receive alerts on your smartphone or tablet.
By following these steps, you can ensure that your Blink Camera is properly connected to your home network and functioning as intended. This will provide you with peace of mind and help you keep a watchful eye on your property.
Troubleshooting Common Installation Issues
Troubleshooting common installation issues is an essential step in ensuring a smooth and successful installation of Blink Camera on a brick wall. While installing a camera on a brick wall may introduce some challenges, addressing these issues early on can prevent headaches down the line. In this section, we will discuss three common installation issues, namely, camera not connecting to Wi-Fi, poor video quality or signal strength, and camera placement challenges, along with their respective solutions.
Camera Not Connecting to Wi-Fi
If you find that your Blink Camera is not connecting to Wi-Fi, it can be frustrating. However, there are a few troubleshooting steps you can take to rectify the issue:
- Check the Wi-Fi signal strength: Ensure that the camera is within range of your Wi-Fi network. Thick brick walls can reduce the Wi-Fi signal, so consider moving the router closer to the camera or using a Wi-Fi extender.
- Verify correct network credentials: Double-check that the network name (SSID) and password you entered are correct. A simple typo can prevent the camera from connecting to your Wi-Fi.
- Restart the camera and router: Power off both the camera and the router, wait for a few seconds, and then power them back on. This can help resolve connectivity issues caused by temporary glitches.
- Reset the camera: If the above steps fail, try resetting the camera to its factory settings. Refer to the camera’s user manual for instructions on how to perform a reset.
- Contact technical support: If you have followed all the troubleshooting steps and the camera still fails to connect, reach out to the Blink Camera technical support team for further assistance.
Poor Video Quality or Signal Strength
A common issue faced during Blink Camera installation is poor video quality or weak signal strength. To address this problem, consider the following:
- Adjust camera placement: Ensure that the camera is positioned in an area with good signal reception. Avoid placing it too far from the Wi-Fi router or in an obstructed location.
- Optimal positioning of the router: Place the Wi-Fi router in a central location within your home or mount it on a higher level to improve signal distribution.
- Reduce interference: Keep the camera away from electronics that may interfere with the Wi-Fi signal, such as microwaves or cordless phones. Additionally, avoid mounting the camera near metal objects or appliances that can block signals.
- Upgrade your Wi-Fi network: If your existing Wi-Fi network has limited coverage or outdated technology, consider upgrading to a stronger and more reliable network to enhance video quality and signal strength.
Camera Placement Challenges and Solutions
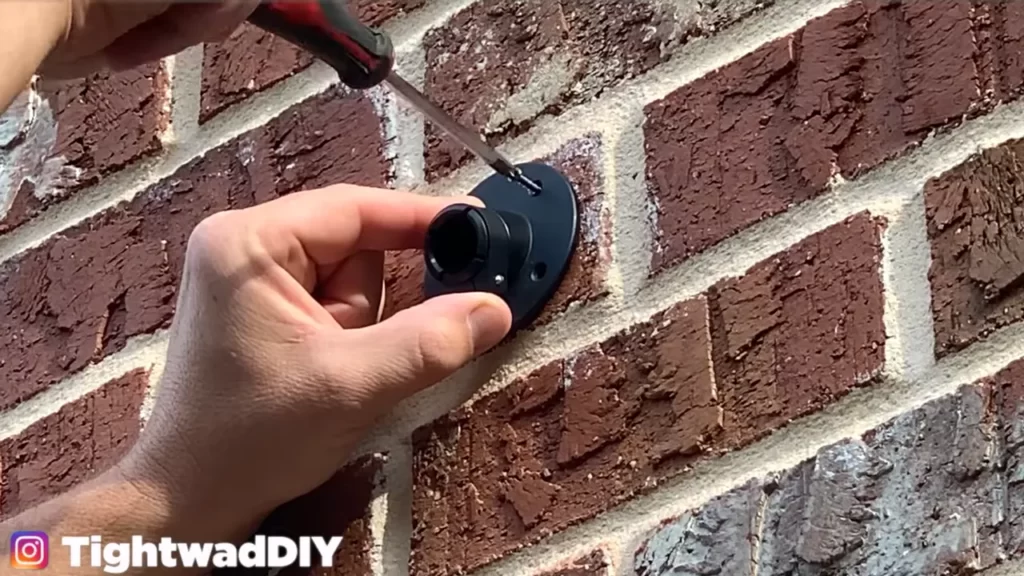
Choosing the right placement for your Blink Camera on a brick wall can present some challenges. Here are some solutions to address these challenges:
| Challenges | Solutions |
|---|---|
| Brick wall surface | Use a masonry drill bit to create pilot holes for mounting screws. Consider using anchors or wall plugs, specifically designed for brick walls, to ensure a secure installation. |
| Camera visibility | Position the camera at an optimal height and angle that provides a clear view of the area you want to monitor. Regularly check for any obstructions or blockages that may hinder the camera’s field of view. |
| Protection from weather | Ensure the camera is installed in a weather-resistant housing or use a protective cover to shield it from rain, snow, or extreme temperatures. This will help extend the lifespan of the camera. |
By addressing these common installation issues, you can successfully install your Blink Camera on a brick wall, ensuring a reliable and effective surveillance system.
Maintaining And Updating Your Blink Camera
Welcome to the world of Blink Camera – an innovative security solution that ensures the safety of your property. But installation alone is not enough to guarantee optimal performance. To keep your Blink Camera functioning at its best, you need to consistently maintain and update it. In this article, we will guide you through the essential steps to take in order to clean and protect your camera from weather elements, upgrade firmware and app software, and regularly test and monitor its performance.
Cleaning and Protecting the Camera from Weather Elements
Just like any outdoor device, your Blink Camera is exposed to various weather elements that can potentially affect its performance. To ensure its longevity and functionality, it is crucial to properly clean and protect it. Here are some steps to follow:
- Regularly wipe the camera lens and sensor: Use a soft, lint-free cloth to gently clean the lens and motion sensor. This will prevent any dirt, dust, or smudges from interfering with the camera’s ability to capture clear footage.
- Shield the camera from direct sunlight: Excessive exposure to direct sunlight can cause overheating and damage to the camera. If possible, position the camera in a shaded area or use a protective cover to shield it from direct sunlight.
- Protect the camera from rain and extreme weather: Invest in a weatherproof housing or cover for your Blink Camera to shield it from rain, snow, and other extreme weather conditions. This will prevent water damage and ensure its functionality in any season.
Upgrading Firmware and App Software
Regular firmware and app software upgrades are vital to keeping your Blink Camera up-to-date with the latest features and security enhancements. Here’s how you can easily upgrade the firmware and app software:
- Firmware upgrade: Regularly check for firmware updates from the Blink app or the official Blink website. Follow the instructions provided to download and install the latest firmware version onto your camera. Firmware upgrades often include bug fixes, performance improvements, and new features.
- App software update: Keep your Blink app updated by regularly checking for new versions in your device’s app store (e.g., Google Play Store or Apple App Store). Download and install the latest update to ensure compatibility with your Blink Camera and access to new functionalities.
Regularly Testing and Monitoring Camera Performance
To ensure that your Blink Camera is operating at its best, it’s important to perform regular tests and monitor its performance. Here are some simple steps to follow:
- Test camera functionality: Periodically test your Blink Camera by triggering the motion sensor or manually capturing footage. Verify that the camera is recording accurately and the motion detection feature is working as expected.
- Check camera positioning: Assess the camera’s field of view and make sure there are no obstructions or interference that may hinder its performance. Adjust its position if necessary to ensure optimal coverage.
- Review captured footage: Regularly review the recorded footage to ensure it meets your desired standards of quality and coverage. This will allow you to identify any potential issues or gaps in your camera’s performance.
By following these maintenance and update practices for your Blink Camera, you can enhance its longevity, reliability, and overall performance. Keep your camera clean, protected, and up-to-date to enjoy the peace of mind that comes with a well-functioning security solution.
Frequently Asked Questions Of How To Install Blink Camera On Brick Wall
Can I Install Blink Camera On A Brick Wall?
Yes, you can easily install a Blink Camera on a brick wall using the provided mount and screws.
What Tools Do I Need To Install Blink Camera On A Brick Wall?
To install Blink Camera on a brick wall, you will need a drill, screwdriver, level, and the included hardware.
Is It Difficult To Install A Blink Camera On A Brick Wall?
Installing a Blink Camera on a brick wall is a straightforward process that can be done by following the provided instructions.
Will Installing Blink Camera On A Brick Wall Damage The Wall?
No, installing a Blink Camera on a brick wall won’t cause any damage if done correctly using the recommended installation method.
Can I Remove The Blink Camera From The Brick Wall?
Yes, you can easily remove the Blink Camera from the brick wall by unscrewing it from the mount.
Conclusion
Installing a Blink camera on a brick wall is a simple process that can enhance the security of your property. By following the steps outlined in this guide, you can ensure a successful installation. Remember to choose an optimal location, use the right tools, and secure the camera firmly.
With these tips in mind, you can enjoy the benefits of monitoring your property with ease and peace of mind. Start protecting your home and loved ones today!
