To install a Blink camera on vinyl siding, follow these steps for a quick and easy installation. When it comes to installing a Blink camera on vinyl siding, the process can be simple and hassle-free.
By following a few easy steps, you can ensure a secure and effective installation. We will guide you through the installation process, providing you with everything you need to know to get started. Whether you’re a tech-savvy individual or a novice at DIY projects, you’ll find these steps simple and straightforward.
So let’s dive in and get your Blink camera installed on your vinyl siding.
Preparing For Installation
Installing a Blink Camera on vinyl siding is a great way to enhance the security of your home. Before delving into the installation process, it’s essential to adequately prepare for a smooth and successful setup. This involves choosing a suitable location on your vinyl siding, gathering the necessary tools and equipment, and assessing the exterior surface for stability. By following these steps, you’ll ensure that your Blink Camera is installed securely and effectively.
Choosing a Suitable Location on Vinyl Siding
When it comes to selecting a location for your Blink Camera on vinyl siding, there are a few factors to consider. First and foremost, you’ll want to choose a spot that provides optimal coverage of the desired area, whether it’s your front yard, driveway, or entrance. This will help ensure that the camera captures any movement within the designated area, enabling you to monitor your property effectively.
Additionally, it’s crucial to choose a location that offers a clear view without any obstructions. Avoid mounting the camera near trees, shrubs, or any other objects that may obstruct the camera’s line of sight. Furthermore, consider the camera’s field of view and the angle at which it needs to be positioned for optimal coverage. This will help you determine the perfect location for mounting your Blink Camera on vinyl siding.
Gathering the Necessary Tools and Equipment
Before beginning the installation process, make sure you have all the necessary tools and equipment at hand. This will save you time and hassle while ensuring a smooth installation. Here’s a checklist of the items you’ll need:
| Tools and Equipment |
|---|
| Drill |
| Screws |
| Mounting bracket |
| Screwdriver |
| Level |
Assessing the Exterior Surface for Stability
Before mounting your Blink Camera on vinyl siding, it’s crucial to ensure that the exterior surface is stable and secure. Vinyl siding, like any other material, may have variations in its stability, so it’s vital to assess the area where you plan to install the camera.
Start by examining the vinyl siding for any signs of damage, such as cracks or loose panels. If you encounter any issues, it’s advisable to fix or replace the damaged siding before proceeding with the installation. This will provide a stable surface to mount the Blink Camera and prevent any potential damage to your siding.
Moreover, check if the vinyl siding is level. Uneven surfaces can affect the positioning and stability of your camera. Use a level to ensure that the area is straight and level before moving forward with the installation.
By carefully evaluating the exterior surface and making any necessary repairs, you’ll create a solid foundation for your Blink Camera installation on vinyl siding.
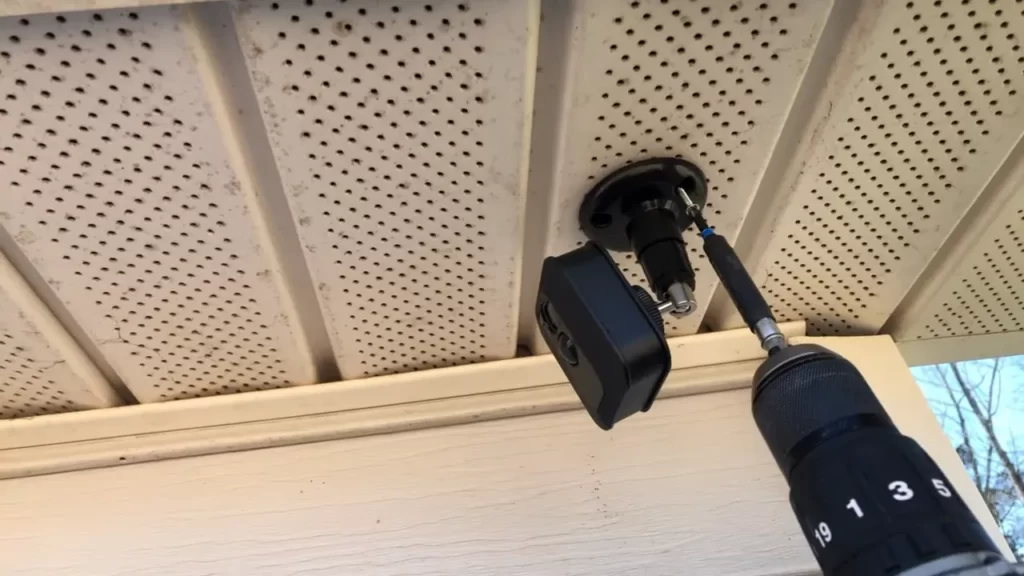
Mounting The Blink Camera Bracket
Mounting the Blink Camera Bracket
Installing a Blink camera on vinyl siding can provide an extra layer of security and peace of mind for homeowners. To ensure the camera is securely mounted and positioned correctly, it is crucial to follow the proper installation steps. In this guide, we will walk you through the process of mounting the Blink camera bracket on vinyl siding, ensuring your camera is positioned at the desired angle for optimal coverage.
Positioning the mounting bracket on the siding
Step 1: Before positioning the mounting bracket on the vinyl siding, choose an ideal location to ensure maximum visibility and coverage. Consider factors such as the camera’s field of view, nearby power source, and Wi-Fi signal strength. Once you’ve determined the perfect spot, proceed to the next step.
Step 2: Use a level to align the mounting bracket horizontally on the vinyl siding. This will ensure the camera captures a balanced and level image. Ensure the bracket is positioned firmly against the siding, allowing for a secure and stable mounting point.
Aligning the bracket with the desired camera angle
Step 3: Determine the desired camera angle and adjust the mounting bracket accordingly. This step is crucial for capturing the area you want to monitor effectively. [Optional: Create a table to illustrate different camera angles and their respective bracket adjustments].
Step 4: Once you’ve decided on the optimal angle, secure the mounting bracket in place. Make sure it is tightly fastened to prevent any movement or misalignment once the camera is attached. Proper alignment will ensure the camera captures a clear and unobstructed view of the designated area.
Securing the bracket to the siding effectively
Method 1: Using screws:
- Drill pilot holes through the holes in the mounting bracket, ensuring to align with the vinyl siding studs for maximum stability.
- Insert the screws into the pilot holes and tighten them until the bracket feels secure against the siding.
Method 2: Using adhesive strips:
- Clean the mounting area of the siding with a mild detergent and water to remove any dirt or debris.
- Peel off the backing from the adhesive strips and firmly press the bracket onto the siding.
- Hold the bracket in place for a few seconds to allow the adhesive to adhere properly.
Note: The chosen method for securing the bracket will depend on personal preference and the type of vinyl siding. It’s important to ensure each method provides a secure and reliable attachment that can withstand various weather conditions.
By following these steps, you can successfully mount the Blink camera bracket on vinyl siding, allowing for optimal positioning and visibility. With your camera securely in place, you can now enjoy enhanced security and peace of mind knowing you have an extra set of eyes monitoring your home.
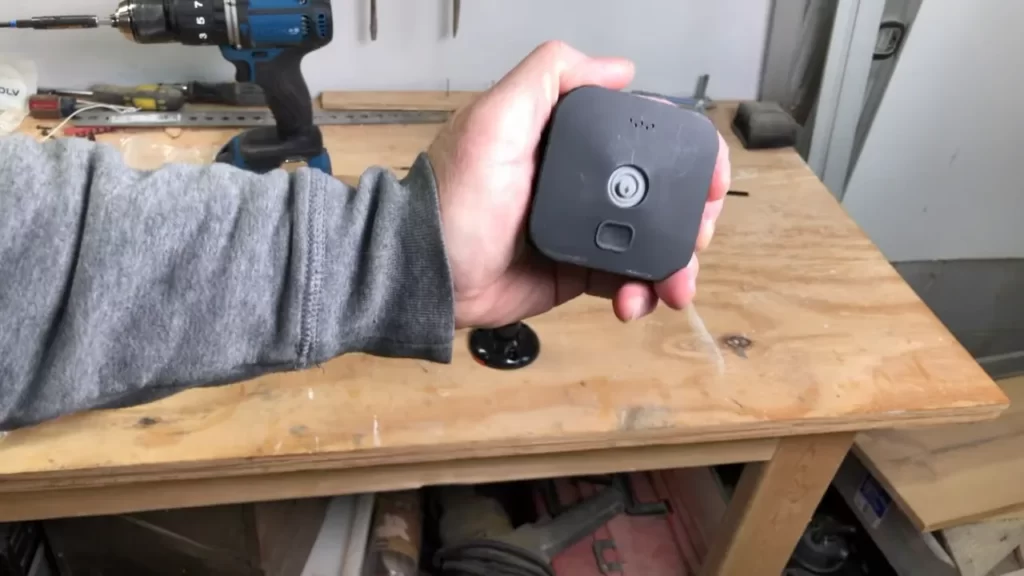
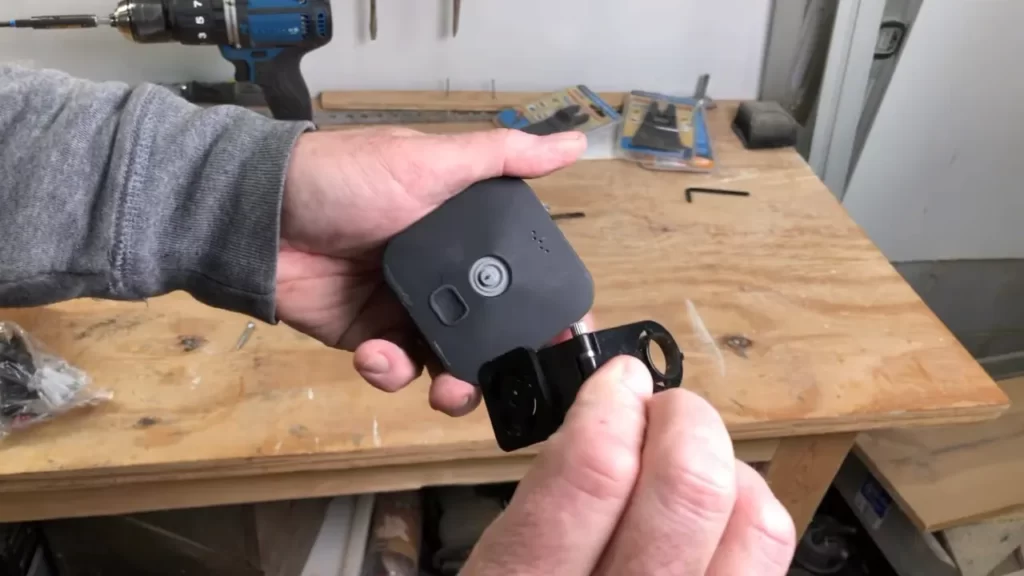
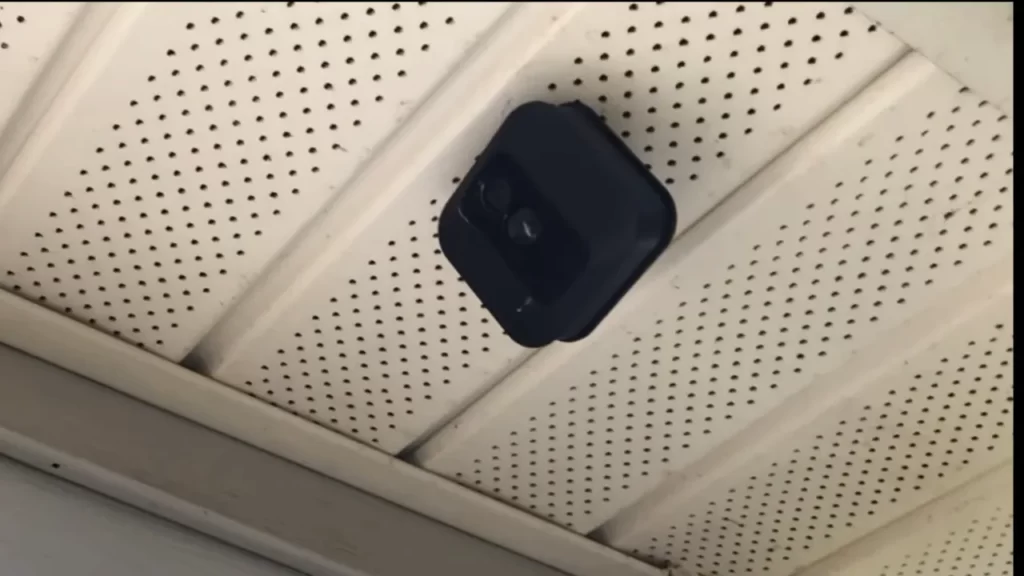
Attaching The Blink Camera To The Bracket
Attaching the Blink Camera to the Bracket is a crucial step in setting up your security system. Ensuring that the camera is securely connected to the bracket will not only provide stability but also allow for optimal viewing angles. In this section, we will guide you through the process of connecting the camera to the bracket securely, adjusting the camera angle for optimal viewing, and testing the stability and functionality of the setup.
Connecting the camera to the bracket securely
To attach the Blink Camera to the bracket, follow these simple steps:
- Start by aligning the back of the camera with the corresponding holes on the bracket.
- Insert the screws provided with the Blink Camera kit into the holes, ensuring they are properly tightened.
- Check that the camera is securely attached to the bracket by gently tugging on it. If there is any movement, tighten the screws further.
Adjusting the camera angle for optimal viewing
Once the camera is securely attached to the bracket, it’s time to adjust the angle for optimal viewing:
- Loosen the camera’s tilt adjustment screw located on the bottom of the camera.
- Gently tilt the camera up or down to achieve your desired viewing angle.
- Tighten the tilt adjustment screw to lock the camera in place.
Testing the stability and functionality of the setup
After attaching the camera and adjusting the angle, it’s essential to test the stability and functionality of the setup:
- Ensure that the camera remains securely attached to the bracket by giving it a gentle shake.
- Check the camera’s video feed on your smartphone or computer to verify that it is capturing the desired field of view.
- Activate the motion detection feature on the Blink Camera to ensure it is working correctly.
By following these steps and checking for stability and functionality, you can have peace of mind knowing that your Blink Camera is securely attached to the bracket and capturing the view you desire.
Concealing And Protecting Wires
When installing your Blink camera on vinyl siding, it is important to consider not only the camera’s placement but also the concealment and protection of its wires. By taking the necessary steps to hide and weatherproof the wires, you can ensure a clean and professional-looking installation that will stand up to the elements. In this section, we will guide you through the process of concealing the camera wires along the vinyl siding and using cable clips to secure and protect them.
Concealing the camera wires along the vinyl siding
Concealing the camera wires is essential for achieving a seamless and unobtrusive look. Follow these steps to effectively hide the wires along your vinyl siding:
- Identify a discreet path for the wires to follow along the siding. Look for natural gaps or seams that can discreetly conceal the wires.
- Start at the location where the camera will be mounted and carefully feed the wires along the chosen path, ensuring they are tucked neatly against the siding.
- For added protection and concealment, you can use adhesive cable clips to secure the wires in place. Attach the clips at regular intervals along the path, making sure they are affixed firmly to the siding.
- Once the wires have been secured, take a moment to step back and inspect the installation. Make any necessary adjustments to ensure the wires are well-hidden and blend seamlessly with the vinyl siding.
Using cable clips to secure and protect the wires
Cable clips are an indispensable tool for securing and protecting your Blink camera wires. Here’s how you can use them effectively:
- Choose high-quality cable clips that are designed to withstand outdoor conditions and are compatible with vinyl siding.
- Position the cable clip on the siding, ensuring it is aligned with the wire path. Use a screwdriver to carefully fasten the clip to the siding, being cautious not to overtighten and damage the vinyl.
- Gently insert the wire into the clip, ensuring a snug fit. This will keep the wire securely in place, protecting it from external forces such as wind or accidental tugs.
- Continue using cable clips at regular intervals along the wire path until you have secured the entire length.
Ensuring the wires are well-hidden and weatherproofed
In addition to concealing the wires and using cable clips, you should also take steps to weatherproof your installation. Here are some tips to ensure your wires are well-hidden and protected:
- Inspect the wire path to identify any potential areas where the wires may be exposed to harsh weather conditions, such as rain or direct sunlight.
- Consider using weatherproof tape, such as electrical or vinyl tape, to wrap around any exposed sections of the wires. This will provide an extra layer of protection against moisture and UV rays.
- Finally, regularly check on the wire installation to ensure that the concealment and weatherproofing measures are holding up well over time. Make any necessary adjustments or repairs as needed.
By following these steps, you can successfully conceal and protect the wires of your Blink camera on vinyl siding. Not only will this enhance the overall aesthetics of your installation, but it will also ensure the longevity and performance of your camera system. Enjoy peace of mind knowing that your Blink camera is securely and discreetly positioned, ready to capture every important moment.
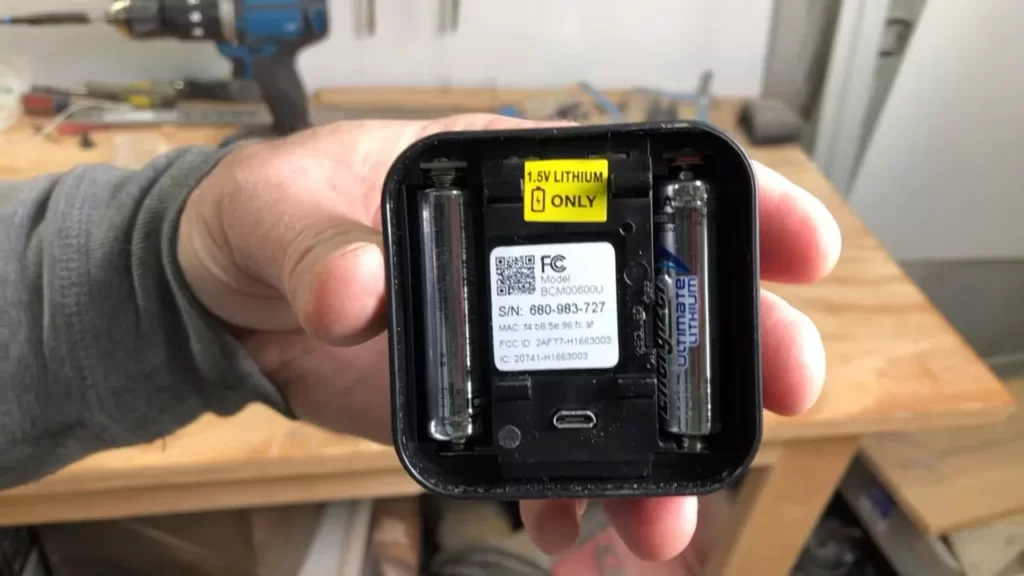
Powering The Blink Camera
Connecting the camera to a power source
Once you have successfully installed your Blink Camera on vinyl siding, the next step is to ensure a reliable power source for uninterrupted surveillance. Connecting the camera to a power source may seem like a daunting task, but with the right approach, it can be done easily. Here’s how you can power your Blink Camera:
- Directly plugging into an electrical outlet: The simplest and most common method is to connect your Blink Camera directly to an electrical outlet using the provided power adapter. This option is ideal if you have an outlet in close proximity to the camera’s location. Plug one end of the power adapter into the camera’s power input and the other end into an electrical outlet.
- Utilizing an extension cord: In cases where the camera’s location is far from a power source, you can employ an extension cord to bridge the gap. Make sure the extension cord is rated for outdoor use and can handle the power requirements of your Blink Camera. Connect the power adapter to the extension cord and plug it into a nearby electrical outlet.
Exploring different power options for remote locations
If you want to install your Blink Camera in a remote location without access to electricity, don’t worry! There are alternative power options available:
- Solar power: Installing a solar panel near your Blink Camera can provide a sustainable power source. The solar panel converts sunlight into electricity, which can then be used to charge a battery. Ensure that the solar panel is positioned to receive sufficient sunlight throughout the day, allowing the battery to charge effectively.
- Battery power: Another option is to use batteries to power your Blink Camera. This is especially useful for temporary installations or situations where it’s impractical to have a continuous power supply. Choose high-capacity rechargeable batteries or invest in a battery pack specifically designed for outdoor surveillance cameras.
Verifying the camera’s power supply for continuous operation
It’s crucial to verify your Blink Camera’s power supply to ensure uninterrupted operation. Here are some steps you can take:
- Checking battery levels: If you’re using batteries, regularly monitor their levels to ensure they are sufficiently charged. Replace or recharge them as needed, keeping in mind the manufacturer’s recommendations.
- Monitoring solar panel function: For solar-powered setups, periodically inspect the solar panel to ensure it is clean and free from obstructions. Dust, debris, or shade can affect the panel’s efficiency and may result in insufficient power generation. Clean the panel gently with a soft cloth if necessary.
By taking these steps, you can ensure that your Blink Camera remains powered at all times, providing you with the peace of mind and security you need.
Setting Up And Configuring The Blink Camera
Installing a Blink camera on your vinyl siding can add an extra layer of security and peace of mind. But before you start monitoring your home, you need to properly set up and configure your Blink camera. In this guide, we will walk you through the process step by step, ensuring a seamless installation and optimum performance.
1. Downloading and Installing the Blink Mobile App
The first step in setting up your Blink camera is to download and install the Blink mobile app. The app is available for both iOS and Android devices and can be found on the respective app stores. Simply search for “Blink Home Monitor” and download the app to your smartphone or tablet.
Once the app is installed, open it and create a Blink account.
2. Creating a Blink Account and Adding the Camera
Creating a Blink account is quick and easy. Simply follow the on-screen instructions within the Blink mobile app, providing the required information such as your email address and desired password. Once your account is created, you can proceed to add your Blink camera.
To add a camera, tap on the “Add a System” option in the app’s main menu. Follow the prompts and select the appropriate camera model, usually identified by its serial number. Ensure that your Blink camera is in pairing mode and within range of your Wi-Fi network. Once the camera is successfully paired, give it a name to easily identify its location.
3. Customizing Camera Settings and Monitoring Options
Once your Blink camera is added to your Blink account, you can customize its settings and monitoring options to suit your specific needs.
To customize the camera settings, navigate to the camera’s menu within the Blink mobile app. Here, you can adjust various settings such as motion detection sensitivity, camera recording length, and camera status LED. Additionally, you can enable features like instant notifications and video quality optimization to tailor the camera’s behavior according to your preferences.
Furthermore, the Blink mobile app allows you to define monitoring options for your camera. You can create zones to specify areas where motion detection will be active, set up schedules for when the camera should be armed or disarmed, and configure the duration for which clips are recorded when motion is detected.
By customizing these settings and monitoring options, you can ensure that your Blink camera provides the level of security and monitoring that best suits your needs and preferences.
With the Blink camera successfully set up and configured, you can now enjoy the benefits of reliable home security and surveillance, all from the convenience of your mobile device.
Troubleshooting And Maintenance Tips
Proper troubleshooting and maintenance are essential for a seamless experience with your Blink camera system installed on vinyl siding. By addressing common installation issues, cleaning and maintaining the camera and bracket regularly, and extending the lifespan of the system, you can ensure optimal performance and reliable security. Here are some tips for effectively troubleshooting and maintaining your Blink camera on vinyl siding:
Fixing common installation issues
If you encounter any challenges during the installation process of your Blink camera on vinyl siding, there are a few common issues you can troubleshoot:
- Loose or unstable mounting: Ensure that the mounting bracket is securely attached to your vinyl siding. If it feels loose, use compatible screws or anchors to reinforce the installation.
- Poor camera positioning: Position your camera in an area that provides a clear line of sight and covers the desired surveillance area. Adjusting the camera angle might be necessary to achieve the best view.
- Inadequate Wi-Fi signal: If your camera’s signal strength is weak, try bringing the camera closer to your Wi-Fi router or installing a Wi-Fi range extender to improve connectivity.
Regularly cleaning and maintaining the camera and bracket
To ensure the longevity and optimal performance of your Blink camera on vinyl siding, regular cleaning and maintenance are essential. Follow these steps:
- Inspect for dirt or debris: Regularly check for any dirt, dust, or debris that may accumulate on the camera lens or mounting bracket. Use a soft, lint-free cloth to gently wipe away any particles.
- Monitor for moisture: Keep an eye out for moisture build-up on or near the camera. If moisture is detected, dry the area thoroughly and consider sealing any gaps or cracks in the vinyl siding to prevent water infiltration.
- Check for loose connections: Periodically inspect the connections between the camera, bracket, and power source to ensure they are secure and free from corrosion. Tighten any loose connections and clean them with a contact cleaner if necessary.
Extending the lifespan of the Blink camera system
By adopting a few practices, you can significantly extend the lifespan of your Blink camera system, maximizing its value and performance:
- Regular software updates: Ensure that your Blink camera’s firmware is up to date. Regularly check for and install any available updates to benefit from performance improvements and new features.
- Protect from extreme weather: Although designed to be weather-resistant, extreme temperatures or direct exposure to sunlight can affect the camera’s lifespan. Consider installing your Blink camera in a shaded area or using a weatherproof housing for added protection.
- Monitor battery life: Keep an eye on your camera’s battery life to ensure it doesn’t degrade. Replace the batteries when needed to prevent power-related issues.
- Ensure proper storage: If you need to store your Blink camera for an extended period, remove the batteries and store it in a cool and dry place to minimize potential damage.
Following these troubleshooting and maintenance tips will help you overcome installation issues, keep your Blink camera and bracket in top condition, and extend the lifespan of your camera system. By maintaining the ideal functioning of your Blink camera on vinyl siding, you can enjoy enhanced security and reliable surveillance for years to come.
Enhancing Security Features
Installing a Blink camera on your vinyl siding is a great step towards improving the security of your home. However, to truly maximize its effectiveness, it is important to integrate additional security measures with your Blink camera. By utilizing motion sensors, alarms, and remote monitoring, and exploring advanced features and third-party integrations, you can create a comprehensive security system that gives you peace of mind.
Integrating additional security measures with Blink camera
Enhancing the security features of your Blink camera involves integrating it with other security devices. By combining your camera with motion sensors, you can ensure that it captures any movement detected outside your home. This integration enables your Blink camera to start recording as soon as the sensors are triggered, providing you with valuable footage.
Furthermore, integrating Blink camera with an alarm system adds an extra layer of security. In the event of an intrusion, the camera can be programmed to trigger the alarm, alerting you and scaring off potential intruders. This combination of visual and audible deterrence is highly effective in preventing break-ins.
Utilizing motion sensors, alarms, and remote monitoring
Motion sensors are a crucial component of a Blink camera’s security system. These sensors detect any movement within their range and activate the camera. By strategically placing motion sensors around your property, you can ensure that your Blink camera captures every angle of potential activity.
In addition to motion sensors, integrating an alarm system with your Blink camera provides enhanced security. The alarm system can be set to sound loudly when the camera detects any suspicious movement, alerting you and your neighbors to the potential threat.
Remote monitoring is another invaluable feature. By connecting your Blink camera to your smartphone or computer, you can monitor your property from anywhere in the world. This real-time access allows you to promptly respond to any suspicious activity, increasing the effectiveness of your security system.
Exploring advanced features and third-party integrations
Blink cameras offer a range of advanced features that can further enhance your home security. These include two-way audio, allowing you to communicate with visitors or potential intruders, and night vision, ensuring clear footage even in low-light conditions.
Furthermore, third-party integrations can greatly expand the capabilities of your Blink camera. By linking it with smart home devices such as door locks or outdoor lighting systems, you can create a synchronized security system that responds intelligently to any potential threats.
It is important to note that when exploring advanced features and third-party integrations, it is crucial to ensure compatibility and security. Always choose reputable brands and follow the recommended guidelines to safeguard your home’s security.
In conclusion, by integrating additional security measures, utilizing motion sensors, alarms, and remote monitoring, and exploring advanced features and third-party integrations, you can enhance the effectiveness of your Blink camera and create a comprehensive security system for your home.
Frequently Asked Questions On How To Install Blink Camera On Vinyl Siding
Can You Install A Blink Camera On Vinyl Siding?
Yes, you can install a blink camera on vinyl siding. It is a suitable surface for mounting the camera, providing a stable and secure placement option. Ensure proper installation to maximize performance and effectiveness.
How Do You Install A Camera On Vinyl Siding?
To install a camera on vinyl siding: 1. Choose a suitable camera and mounting bracket. 2. Mark the desired location on the siding. 3. Drill pilot holes for the bracket. 4. Attach the bracket securely. 5. Mount the camera onto the bracket.
How To Install Blink Outdoor Camera Without Screws?
To install the Blink outdoor camera without screws, use the adhesive mount included in the package. Simply adhere it to a flat, clean surface and attach the camera to the mount. Ensure the camera is securely installed and that the viewing angle is optimized for surveillance.
How Do You Attach A Camera To Siding Without Drilling?
Attach a camera to siding without drilling by using adhesive mounting tape specifically designed for outdoor use. Clean the siding surface before attaching the tape and press firmly to ensure a secure bond. This method allows for easy installation and removal without damaging the siding.
How Do You Install A Blink Camera On Vinyl Siding?
Installing a Blink camera on vinyl siding is simple. Start by attaching the mounting bracket to the desired location on the siding. Then, align the camera with the bracket and secure it in place using the provided screws.
Conclusion
To conclude, installing a Blink camera on vinyl siding can be done easily with the right tools and techniques. By following the step-by-step guide provided in this blog post, anyone can ensure proper placement and functionality of the camera. Remember to choose a suitable location, prepare the surface, use adhesive mounts, and test the camera before finalizing the installation.
With these tips, you can enhance your home security system without damaging your vinyl siding.