To install the Blink Doorbell, simply follow these steps: 1. Download and install the Blink Home Monitor app on your smartphone.
2. Create an account and log in to the app. 3. Add the Blink Doorbell device within the app. 4. Connect the doorbell to your home Wi-Fi network. 5. Mount the doorbell in your desired location using the provided mounting bracket and screws.
Preparing For Installation
Before you begin the installation of your Blink Doorbell, there are a few important steps you need to take to ensure a successful setup. By gathering all the necessary tools and equipment, reading the user manual, and choosing the suitable installation location, you can ensure a smooth and hassle-free installation process.
Gather all the necessary tools and equipment
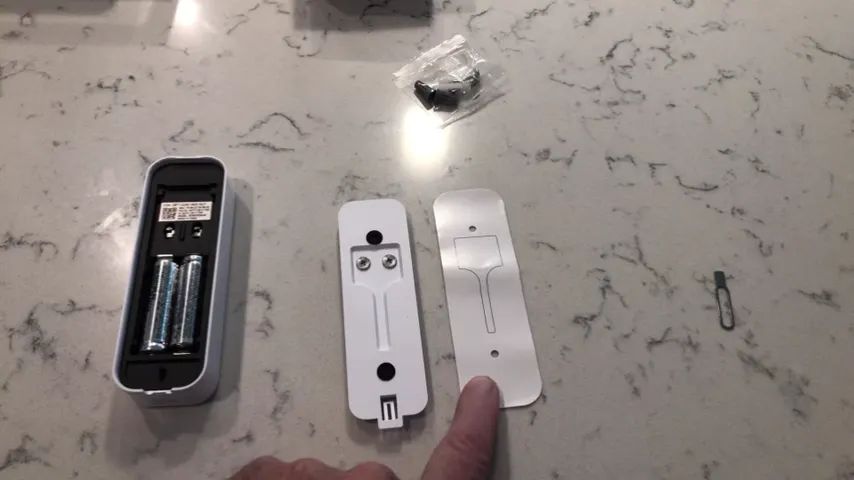
Before installing your Blink Doorbell, it’s important to gather all the necessary tools and equipment. This will help you avoid disruption during the installation process and ensure that you have everything you need at hand. Here’s a list of tools and equipment you’ll need:
| Tools | Equipment |
|---|---|
| ScrewdriverTape measureDrillLevelWire stripperWire connectors | Blink DoorbellMounting bracketScrews and anchorsChimePower adapterWire |
Read the user manual and familiarize yourself with the doorbell features
Reading the user manual is crucial in understanding the features and functions of your Blink Doorbell. The user manual provides step-by-step instructions on how to install the doorbell and troubleshoot any potential issues. Take the time to thoroughly read and understand the manual, as it will ensure a successful installation and help you make the most of your doorbell’s features.
Choose the suitable installation location
Choosing the right installation location is key to maximizing the effectiveness of your Blink Doorbell. Before finalizing the installation spot, consider the following factors:
- Optimal viewing angle: Ensure that the doorbell’s camera covers the desired area, such as your front porch or driveway.
- Accessibility: Make sure the doorbell is easily accessible for maintenance and battery replacement.
- Wi-Fi signal strength: Check the Wi-Fi signal strength at the installation location to ensure a stable connection.
- Existing door chime compatibility: If you have an existing door chime, ensure its compatibility with the Blink Doorbell and consider its proximity to the chosen installation location.
- Power source availability: Determine if there is a power source near the chosen installation location or if you need to use a provided power adapter.
By considering these factors and selecting the most suitable installation location, you can optimize the performance of your Blink Doorbell and enjoy the added security and convenience it provides.
Installing The Doorbell
Attaching the mounting bracket to your door frame
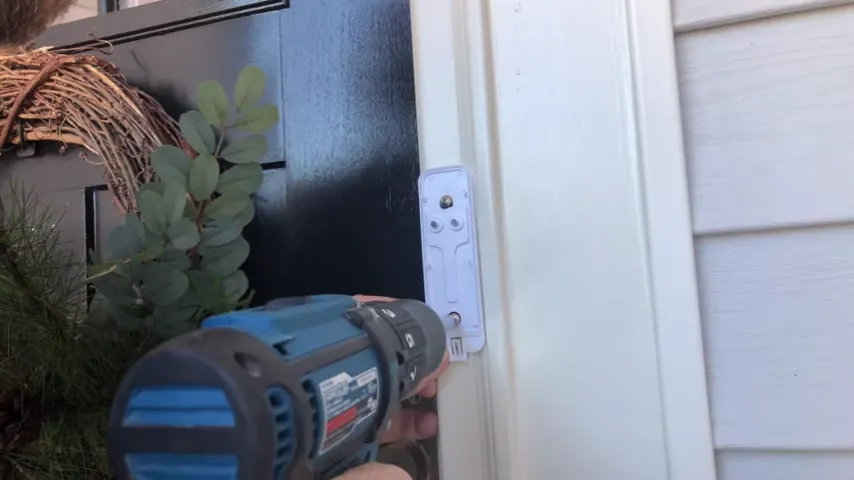
To begin the installation process of your Blink Doorbell, you need to attach the mounting bracket to your door frame securely. This bracket will serve as the foundation for your doorbell, so it’s important to ensure it is positioned correctly. Here’s a step-by-step guide on how to attach the mounting bracket:
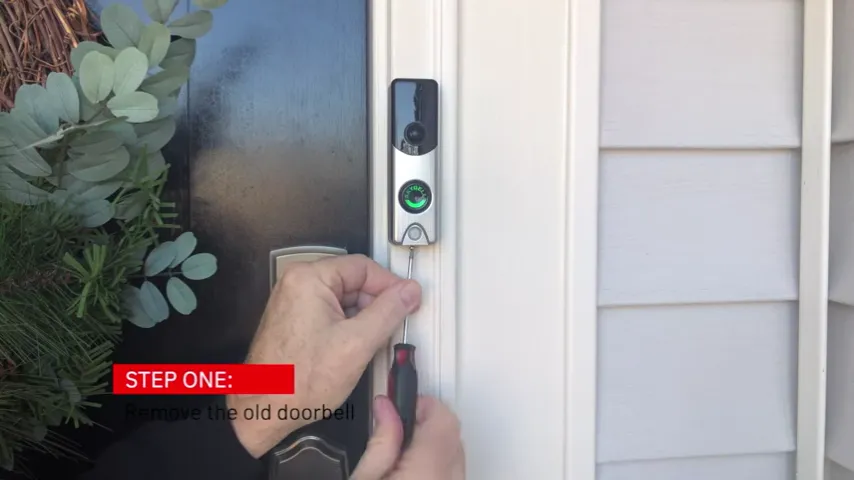
- Start by carefully marking the desired location for the doorbell on your door frame. Make sure it is at a suitable height for easy access.
- Next, using a drill and the appropriate screwdriver bit, drill holes into the door frame at the marked location.
- Align the mounting bracket with the holes, ensuring it is level and straight.
- Secure the bracket to the door frame by inserting screws through the bracket and into the pre-drilled holes.
- Once all the screws are in place, tighten them gently, making sure not to overtighten and damage the door frame.
- Check the stability of the mounting bracket by giving it a light push to ensure it is firmly attached.
By following these steps, you will have successfully attached the mounting bracket of your Blink Doorbell to your door frame.
Connecting the doorbell wiring to the existing doorbell
After securely attaching the mounting bracket, the next step in installing your Blink Doorbell is to connect the doorbell wiring to the existing doorbell system. This ensures that your new doorbell is powered and functions properly. Here’s how you can do it:
Please note: It’s essential to turn off the power supply to your existing doorbell system before proceeding with this step. Safety should always be a top priority when dealing with electrical wiring.
- Start by locating the existing doorbell chime. This is typically located inside your home, near the front door or hallway.
- Once you have located the chime, carefully remove the cover to expose the wiring.
- Identify the wires connected to the existing chime. The most common configurations include two wires, usually one connected to the “Front” or “Trans” terminal and the other to the “Transformer” or “Rear” terminal.
- Loosen the terminal screws on the existing chime and unhook the wires.
- Connect the corresponding wires from your Blink Doorbell to the same terminals on the existing chime.
- Tighten the terminal screws to secure the wires in place.
- Once the wiring is securely connected, ensure the cover of the existing chime is back in place.
Mounting the doorbell onto the bracket securely
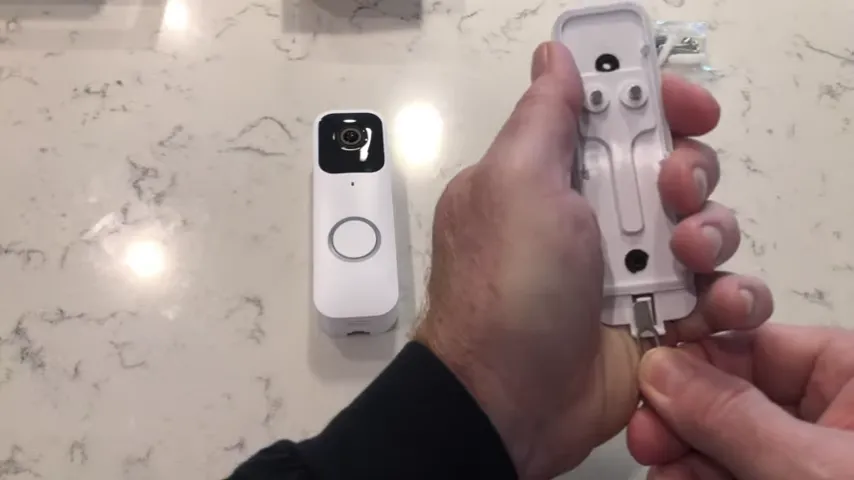
Now that the mounting bracket is attached and the wiring is connected, it’s time to mount your Blink Doorbell onto the bracket securely. Proper installation ensures that your doorbell is stable and able to capture clear video footage. Here’s how to mount the doorbell:
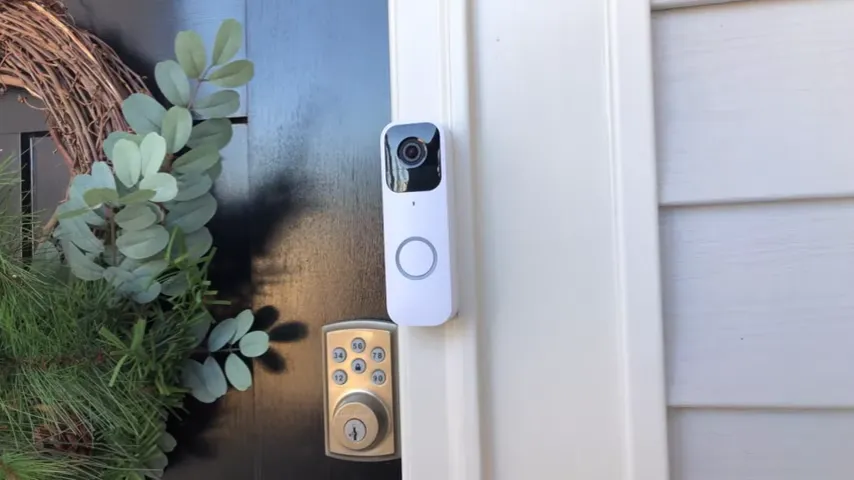
- First, carefully remove the front cover of the Blink Doorbell by sliding it upwards.
- Position the doorbell over the mounting bracket, ensuring the mounting holes on the doorbell align with the screw holes on the bracket.
- Insert screws into the aligned holes and tighten them gently with a suitable screwdriver.
- Ensure that the doorbell is level and straight once it is mounted.
- Gently press the front cover back onto the doorbell until it clicks into place.
- Give the doorbell a light tug to ensure it is securely mounted.
By following these steps, you will have successfully completed the installation of your Blink Doorbell. Now sit back, relax, and enjoy the added security and convenience your new doorbell brings.
Connecting And Setting Up The Doorbell
Connecting the Doorbell to Your Wi-Fi Network
To begin the process of setting up your Blink doorbell, you’ll first need to connect it to your Wi-Fi network. This will allow you to access your doorbell’s live video feed and receive notifications on your smartphone or tablet.
Here’s how you can connect your doorbell to your Wi-Fi network:
- Ensure that your Wi-Fi network is up and running and that you have the network password handy.
- Open the Blink app on your device and tap on the “Add a Device” button.
- Follow the on-screen prompts to put your doorbell into pairing mode. This typically involves pressing and holding the setup button on the back of the doorbell.
- Once in pairing mode, the Blink app will automatically detect your doorbell and prompt you to select your Wi-Fi network.
- Choose your Wi-Fi network from the list and enter your password when prompted.
- Wait for the doorbell to connect to your Wi-Fi network. This process may take a few moments.
- Once connected, you will receive a confirmation message on the app, indicating that your doorbell is successfully connected to your Wi-Fi network.
That’s it! Your Blink doorbell is now connected to your Wi-Fi network, allowing you to access its features and settings through the Blink app.
Downloading and Installing the Blink App
In order to configure and control your Blink doorbell, you’ll need to download and install the Blink app on your smartphone or tablet. The Blink app is available for both iOS and Android devices and can be found on the App Store and Google Play Store, respectively.
Follow these steps to download and install the Blink app:
- Open the App Store or Google Play Store on your device.
- Search for “Blink Home Monitor” app.
- Tap on the app icon to open its page.
- Click on the “Download” or “Install” button to start the installation process.
- Wait for the app to download and install on your device. This may take a few moments depending on your internet connection speed.
- Once the app is installed, tap on the app icon to open it.
Great job! You now have the Blink app installed on your device, ready to pair and configure your Blink doorbell.
Pairing the Doorbell with the App and Configuring Settings
With your Blink doorbell connected to your Wi-Fi network and the Blink app installed on your device, it’s time to pair the doorbell with the app and configure the settings according to your preferences. This will enable you to customize features such as motion detection, video recording, and notifications.
Here’s how you can pair your doorbell with the Blink app and configure settings:
- Open the Blink app on your device.
- Tap on the “Add a Device” button to start the pairing process.
- Follow the on-screen prompts to put your doorbell into pairing mode if it isn’t already.
- The app will automatically detect your doorbell and prompt you to confirm the pairing.
- Once paired, you can access the doorbell settings within the app to customize various features.
- Explore the settings menu to configure options such as motion sensitivity, video recording length, and notification preferences.
- Make adjustments according to your preferences and save the changes.
Fantastic! You have now successfully paired your Blink doorbell with the Blink app and configured the necessary settings. You’re all set to use and enjoy the features that Blink has to offer!
Troubleshooting Installation Issues
Installing your Blink Doorbell is an exciting process that enhances the security and convenience of your home. However, like any modern technology, you might face some installation issues along the way. Don’t worry! In this section, we will address the most common troubleshooting problems related to the installation of your Blink Doorbell and provide step-by-step solutions to get you up and running in no time.
Ensuring proper power supply to the doorbell
One of the primary reasons for installation issues with your Blink Doorbell could be an improper power supply. To ensure that your doorbell is receiving sufficient power, follow these steps:
- Check the wiring connections: Make sure the wires are securely connected to the appropriate terminals on the doorbell and your existing doorbell chime.
- Verify the transformer compatibility: Check if your doorbell transformer is compatible and provides the correct voltage and wattage required to power your Blink Doorbell. Refer to the user manual or contact customer support for assistance.
- Inspect the power source: If your doorbell is battery-powered, make sure the batteries are properly inserted and fully charged. Replace them if necessary.
Addressing connectivity problems
Having trouble connecting your Blink Doorbell to your network? Fret not! Here’s how you can resolve connectivity issues:
- Check your Wi-Fi signal strength: Make sure your doorbell is within a suitable range of your Wi-Fi router. Weak signals can hinder proper connectivity.
- Verify network credentials: Ensure that you have entered the correct Wi-Fi network name (SSID) and password during the setup process. Double-check for typos or special characters that may cause authentication failures.
- Reboot your router and doorbell: Sometimes, a simple reboot can resolve connectivity problems. Restart both your router and doorbell, allowing them to refresh their connections.
- Move interference sources: Appliances like cordless phones, baby monitors, or microwave ovens can disrupt your Wi-Fi signal. Consider relocating these devices away from your doorbell or router.
Troubleshooting any other installation-related issues
If you encounter any other installation-related issues not covered above, we’ve got you covered. Follow these general troubleshooting steps to identify and resolve the problem:
- Check the doorbell placement: Ensure your Blink Doorbell is installed at the right height and angle for optimal performance. Adjust the mounting position if needed.
- Inspect the doorbell and wires: Examine the doorbell and wiring for any damage or loose connections. Ensure all components are securely in place.
- Reset the doorbell: If you’re still encountering issues, try resetting the doorbell to its factory settings and repeating the installation process from scratch.
- Contact customer support: If all else fails, don’t hesitate to reach out to Blink’s customer support. They have a team of experts ready to assist you with any installation challenges you may face.
By adhering to these troubleshooting steps, you can overcome any installation issues and enjoy the seamless functionality and security offered by your Blink Doorbell. Remember, patience and persistence are key to a successful installation process.
Fine-Tuning Doorbell Functionality
Once you have successfully installed your Blink Doorbell, it’s time to fine-tune its functionality to suit your specific needs. In this section, we will explore three key aspects of fine-tuning your doorbell: adjusting motion detection sensitivity, customizing notification settings, and integrating additional smart home devices. Let’s dive in and optimize your doorbell experience.
Adjusting motion detection sensitivity
The motion detection sensitivity of your Blink Doorbell determines how it responds to movement in its field of view. By adjusting this setting, you can ensure that you receive notifications for relevant events, while reducing false alerts caused by insignificant movements.
To adjust motion detection sensitivity, follow these steps:
- Open the Blink app on your smartphone or tablet.
- Select the settings icon in the top right corner of the screen.
- Tap on the doorbell device you want to adjust.
- Scroll down to the “Motion Detection” section and tap on it.
- Use the slider to increase or decrease the sensitivity level according to your preference.
- Test the new sensitivity level and continue fine-tuning if necessary.
Customizing notification settings
Customizing your Blink Doorbell’s notification settings allows you to receive alerts in a way that works best for you. Whether you want to receive a push notification on your smartphone, an email notification, or both, you have full control over how and when you get notified.
Here’s how you can customize your doorbell’s notification settings:
- Open the Blink app on your smartphone or tablet.
- Select the settings icon in the top right corner of the screen.
- Tap on the doorbell device you want to adjust.
- Scroll down to the “Notification Settings” section and tap on it.
- Select your preferred notification methods, such as push notifications and email alerts.
- Configure any additional settings, such as enabling or disabling sound alerts.
- Save your changes and test the notification settings to ensure they work as desired.
Integrating additional smart home devices with the doorbell
One of the advantages of the Blink Doorbell is its compatibility with various smart home devices. You can enhance the functionality and convenience by integrating your doorbell with other compatible devices, such as smart locks, voice assistants, or security systems.
Follow these steps to integrate additional smart home devices with your Blink Doorbell:
- Identify the smart home device you want to integrate with your doorbell.
- Refer to the manufacturer’s instructions to enable the device for integration.
- In the Blink app, tap on the settings icon in the top right corner of the screen.
- Select the doorbell device you want to integrate the smart home device with.
- Navigate to the “Integration” or “Smart Home” section.
- Follow the prompts provided to link your Blink doorbell with the smart home device.
- Test the integration to ensure seamless communication between devices.
By adjusting motion detection sensitivity, customizing notification settings, and integrating additional smart home devices, you can optimize your Blink Doorbell’s functionality according to your preferences and needs. Enjoy peace of mind and convenience with these fine-tuning options!
Maintenance And Care
Proper maintenance and care of your Blink doorbell is essential to ensure its longevity and reliable performance. By following a few simple steps, you can keep your doorbell in top condition and enjoy all its features seamlessly.
Cleaning the Doorbell Regularly
To maintain the optimum functionality and appearance of your Blink doorbell, it is advisable to clean it regularly. Over time, dirt, dust, and grime can accumulate on the surface, affecting its performance and aesthetic appeal. To clean your doorbell effectively, follow these steps:
- First, disconnect the doorbell from its power source. This prevents any accidental triggering or damage while cleaning.
- Gently wipe the surface of the doorbell with a soft, dry cloth to remove any loose debris or dirt.
- If there are stubborn stains or dirt, you can dampen the cloth slightly with mild soap and water. Make sure the cloth is not too wet to prevent any moisture from entering the device.
- Using the damp cloth, gently wipe the surface of the doorbell, paying attention to corners, buttons, and any crevices where dirt might accumulate.
- Once you have cleaned the surface, use a dry cloth to remove any excess moisture.
- Reconnect the doorbell to its power source and ensure it is functioning correctly.
Regular cleaning of your Blink doorbell not only keeps it looking new but also helps maintain image clarity and motion detection capabilities.
Checking for Firmware Updates
Firmware updates are essential for improving the performance, security, and functionality of your Blink doorbell. By regularly checking for and installing firmware updates, you can ensure that your device is up to date with the latest features and enhancements. To check for firmware updates, follow these steps:
- Open the Blink app on your smartphone or tablet.
- Navigate to the doorbell settings.
- Look for the “Firmware” or “Software Updates” option.
- If an update is available, follow the on-screen instructions to download and install it.
- Wait for the update process to complete, ensuring that your device remains connected to a stable Wi-Fi network throughout.
- Once the update is installed, your Blink doorbell will have the latest firmware, providing enhanced performance and new features.
Regularly checking for and installing firmware updates ensures that your Blink doorbell remains secure and operates at its best.
Replacing Batteries if Necessary
The batteries in your Blink doorbell are crucial for its operation, providing power to enable video recording, motion detection, and other features. If you notice a decrease in battery life or your doorbell becomes unresponsive, it may be time to replace the batteries. Follow these steps to replace the batteries:
- Disconnect the doorbell from its power source.
- Locate the battery compartment on the back of the doorbell.
- Remove the battery compartment cover by sliding it or using a screwdriver, depending on the model.
- Take out the old batteries and dispose of them according to local regulations.
- Insert new batteries into the compartment, ensuring the correct polarity.
- Replace the battery compartment cover securely.
- Reconnect the doorbell to its power source and verify that it is functioning correctly.
Regularly checking and replacing the batteries, if necessary, guarantees uninterrupted operation of your Blink doorbell.
Frequently Asked Questions For How To Install Blink Doorbell
Faq 1: How Do I Install Blink Doorbell?
Installing the Blink Doorbell is a breeze. Simply follow the provided instructions, mount the doorbell, and connect it to your home’s WiFi network.
Faq 2: What Tools Do I Need To Install Blink Doorbell?
To install the Blink Doorbell, you’ll need a screwdriver, a drill (if necessary for mounting), and your smartphone or tablet for the setup process.
Faq 3: Can I Install Blink Doorbell By Myself?
Yes, absolutely! The installation process for the Blink Doorbell is designed for easy DIY installation, enabling you to set it up without the need for professional help.
Faq 4: Is The Blink Doorbell Compatible With My Existing Doorbell Wiring?
Yes, the Blink Doorbell is compatible with existing doorbell wiring. However, it also works independently if you don’t have existing wiring.
Faq 5: How Long Does It Take To Install Blink Doorbell?
On average, it takes around 15-30 minutes to install the Blink Doorbell. This includes the time for mounting, connecting to WiFi, and completing the setup process.
Conclusion
Installing the Blink Doorbell is a simple and effective way to enhance your home security. With its easy setup and user-friendly interface, anyone can install this smart doorbell without professional help. By following the step-by-step instructions provided in this blog post, you can have the Blink Doorbell up and running in no time.
Take control of your home security today and enjoy the peace of mind that comes with it.
